Experimental Use Disclaimer (Must Read)
Start your collection of rare 3D printable materials.
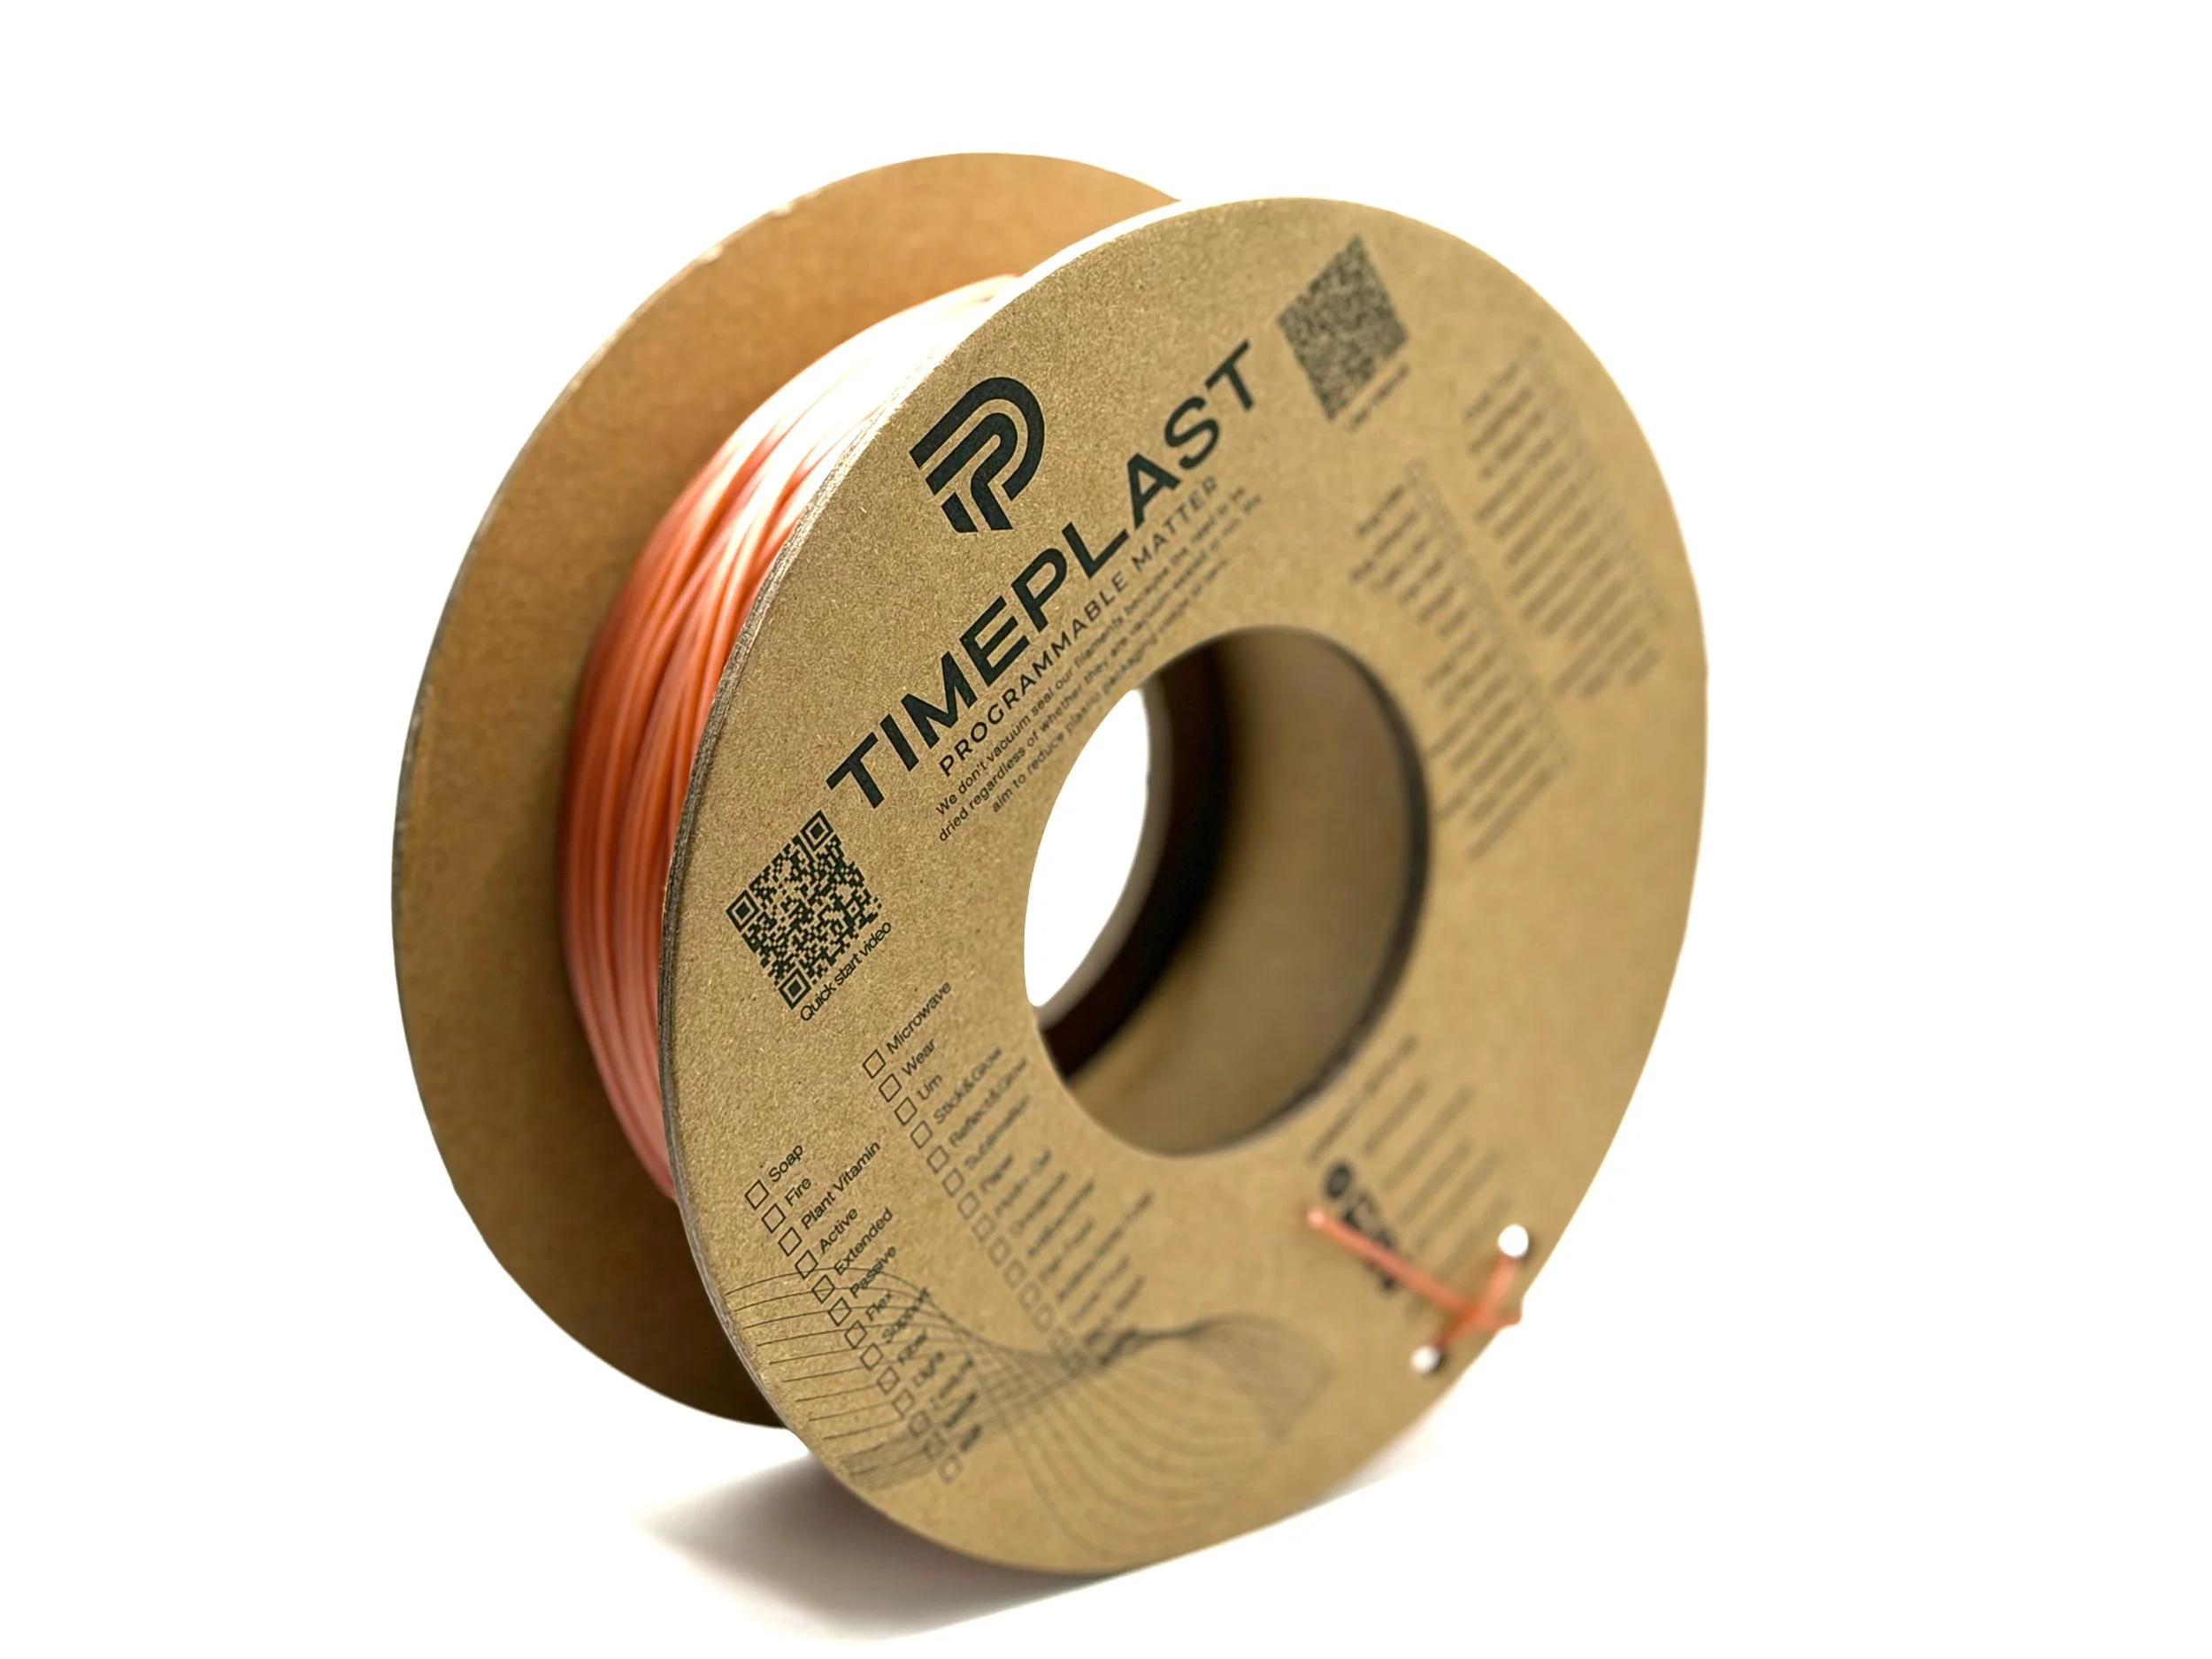
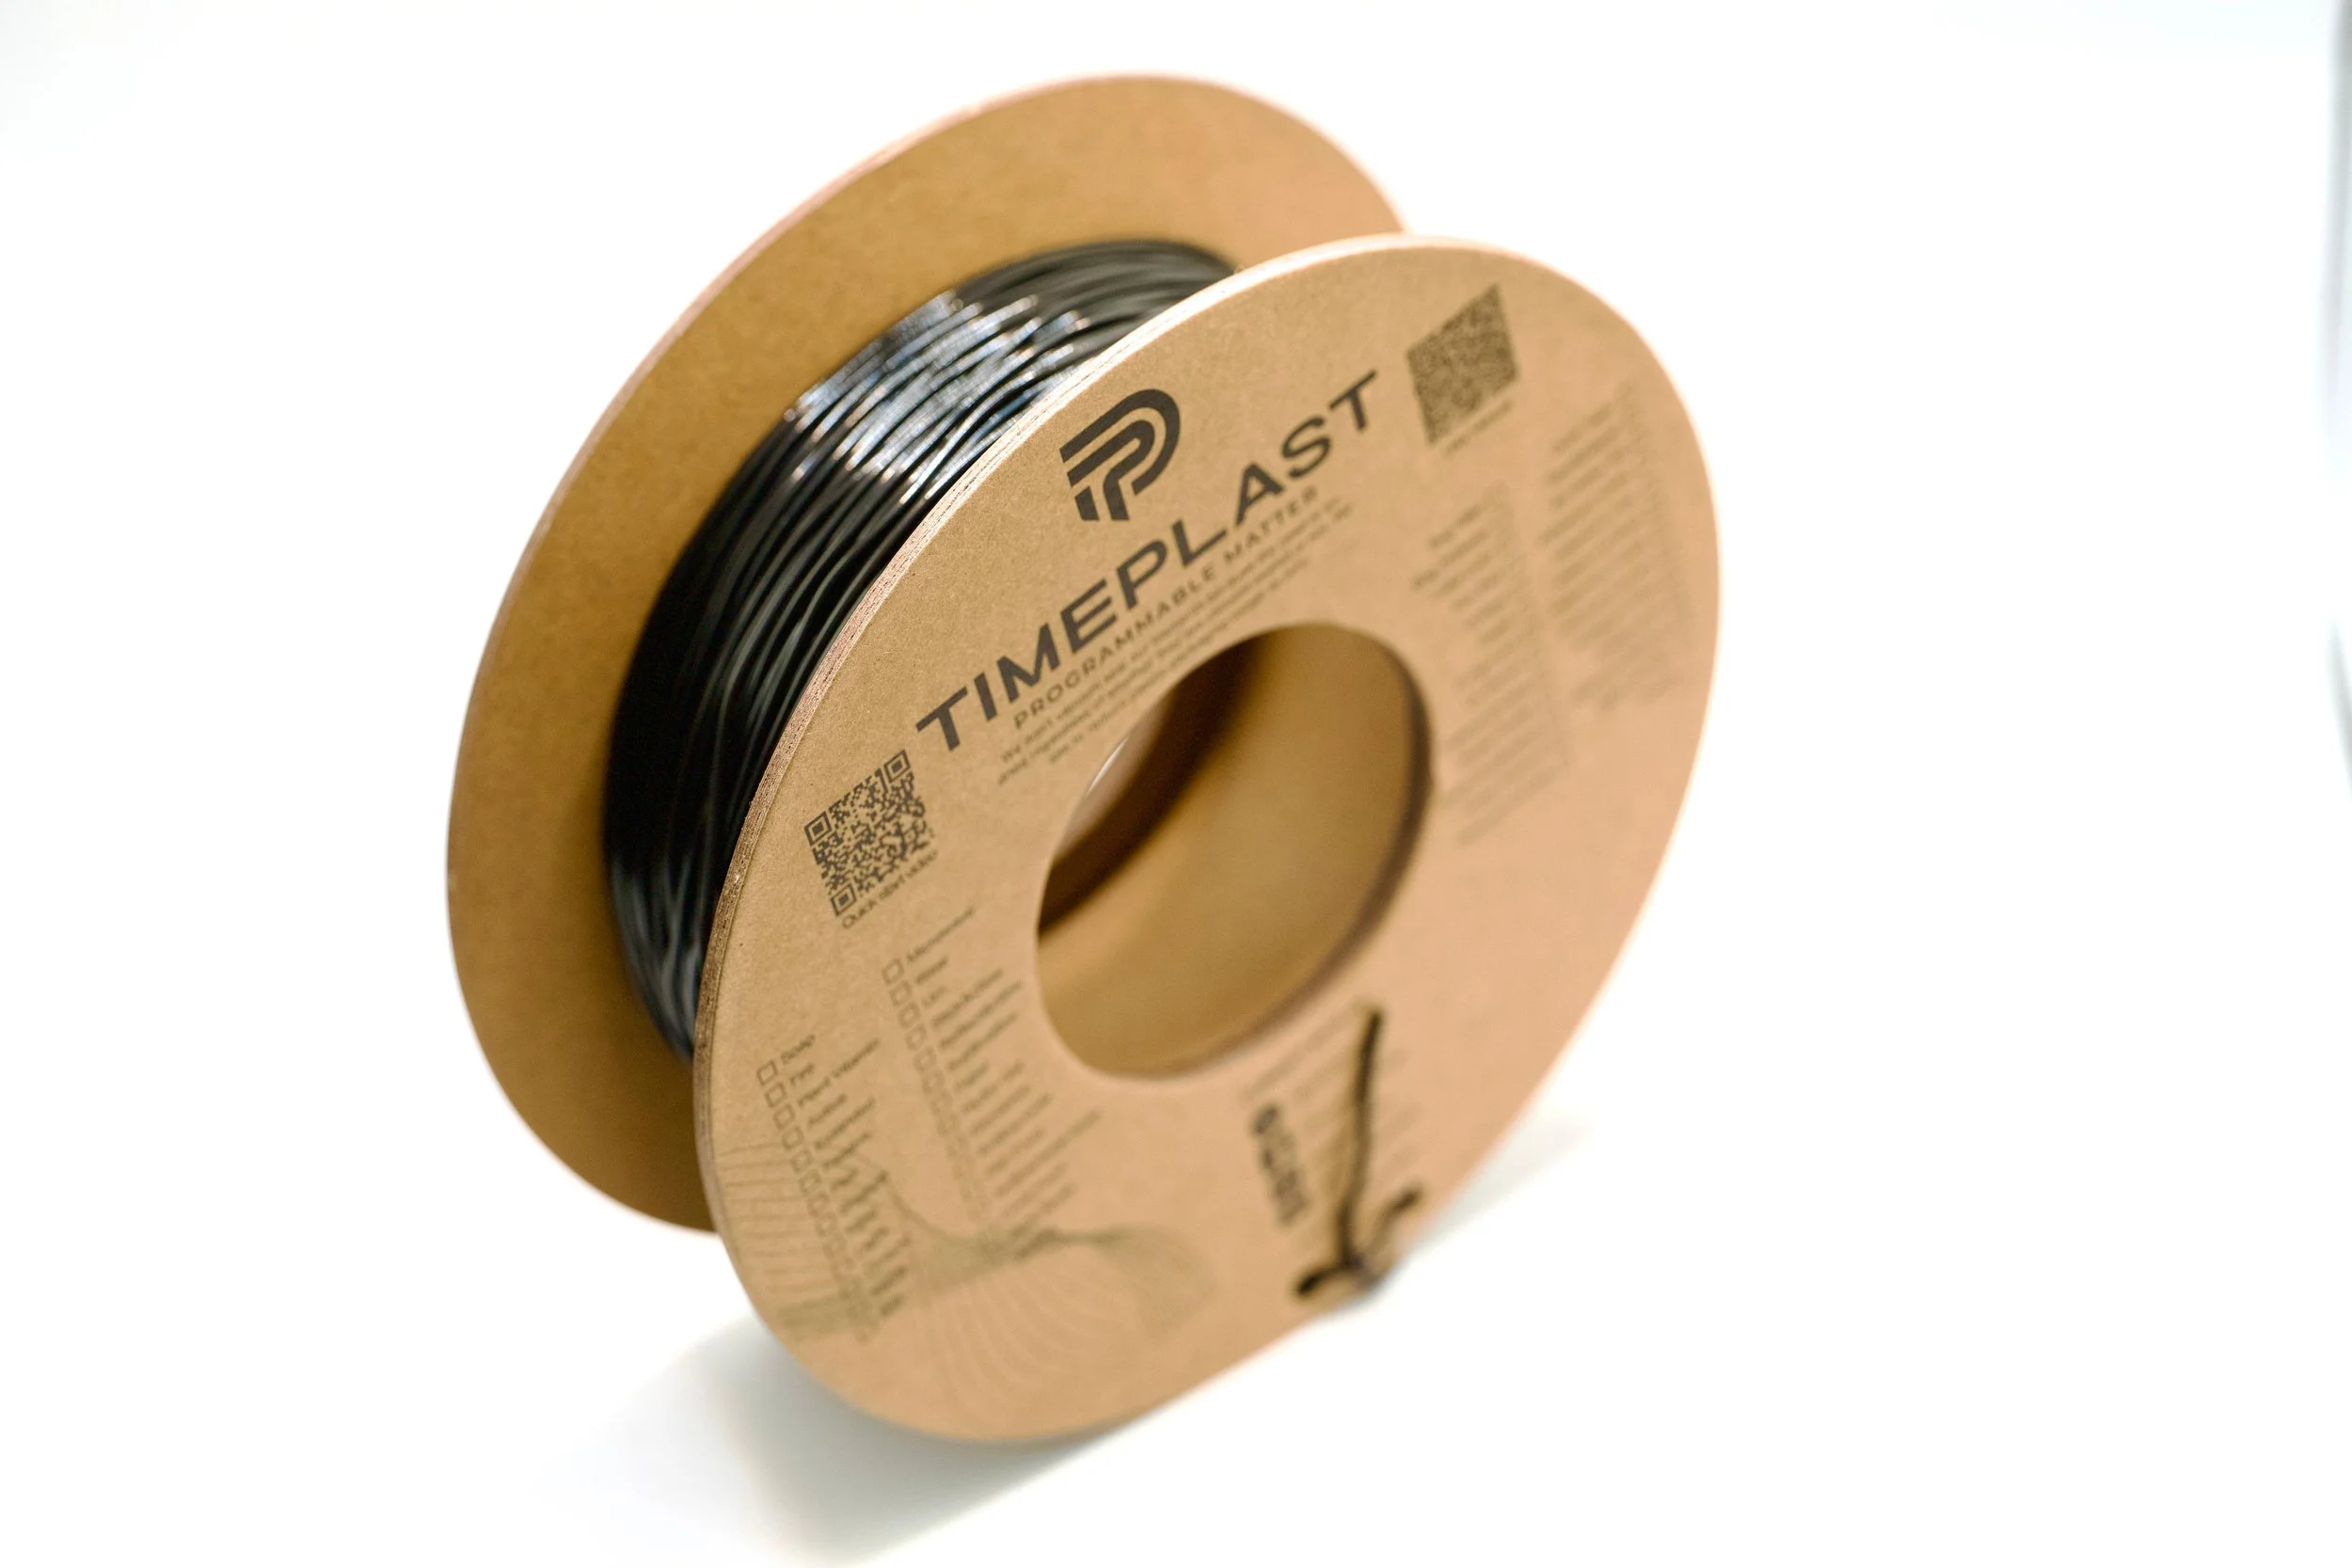
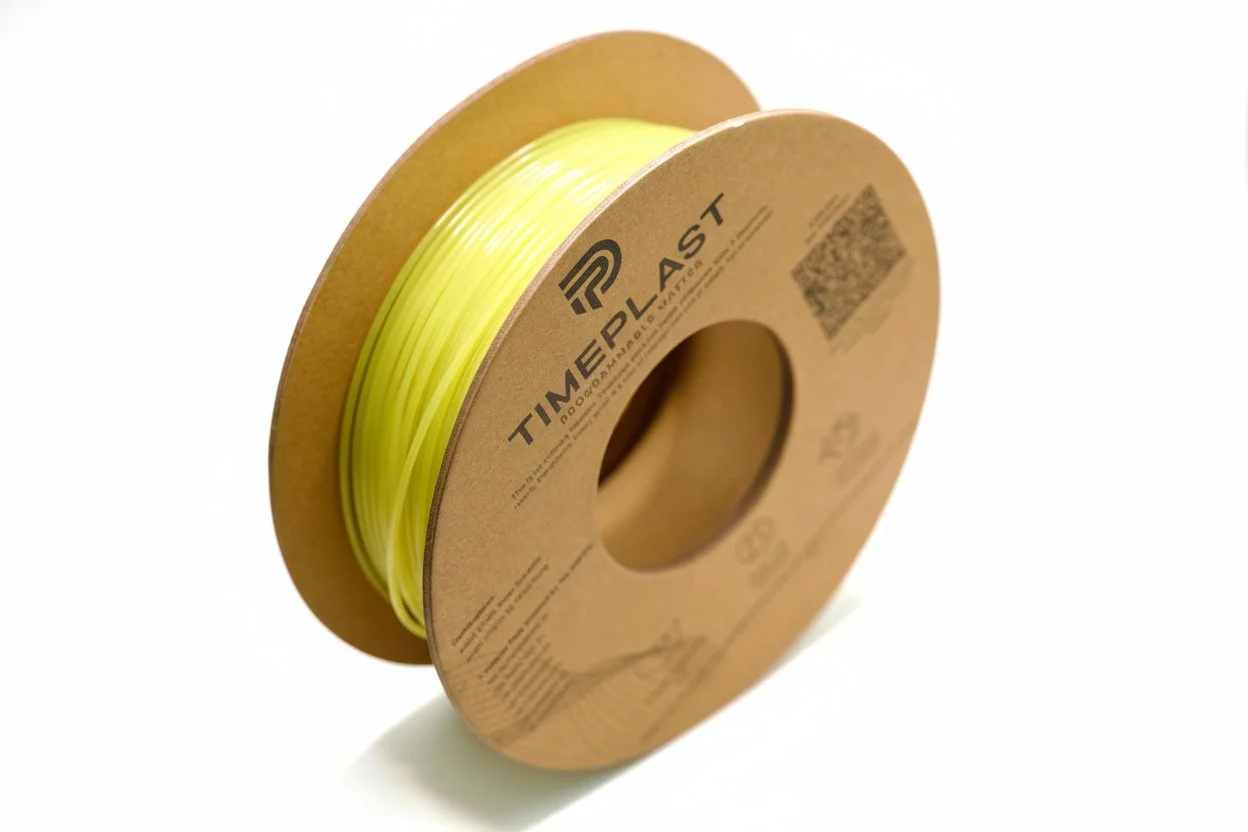
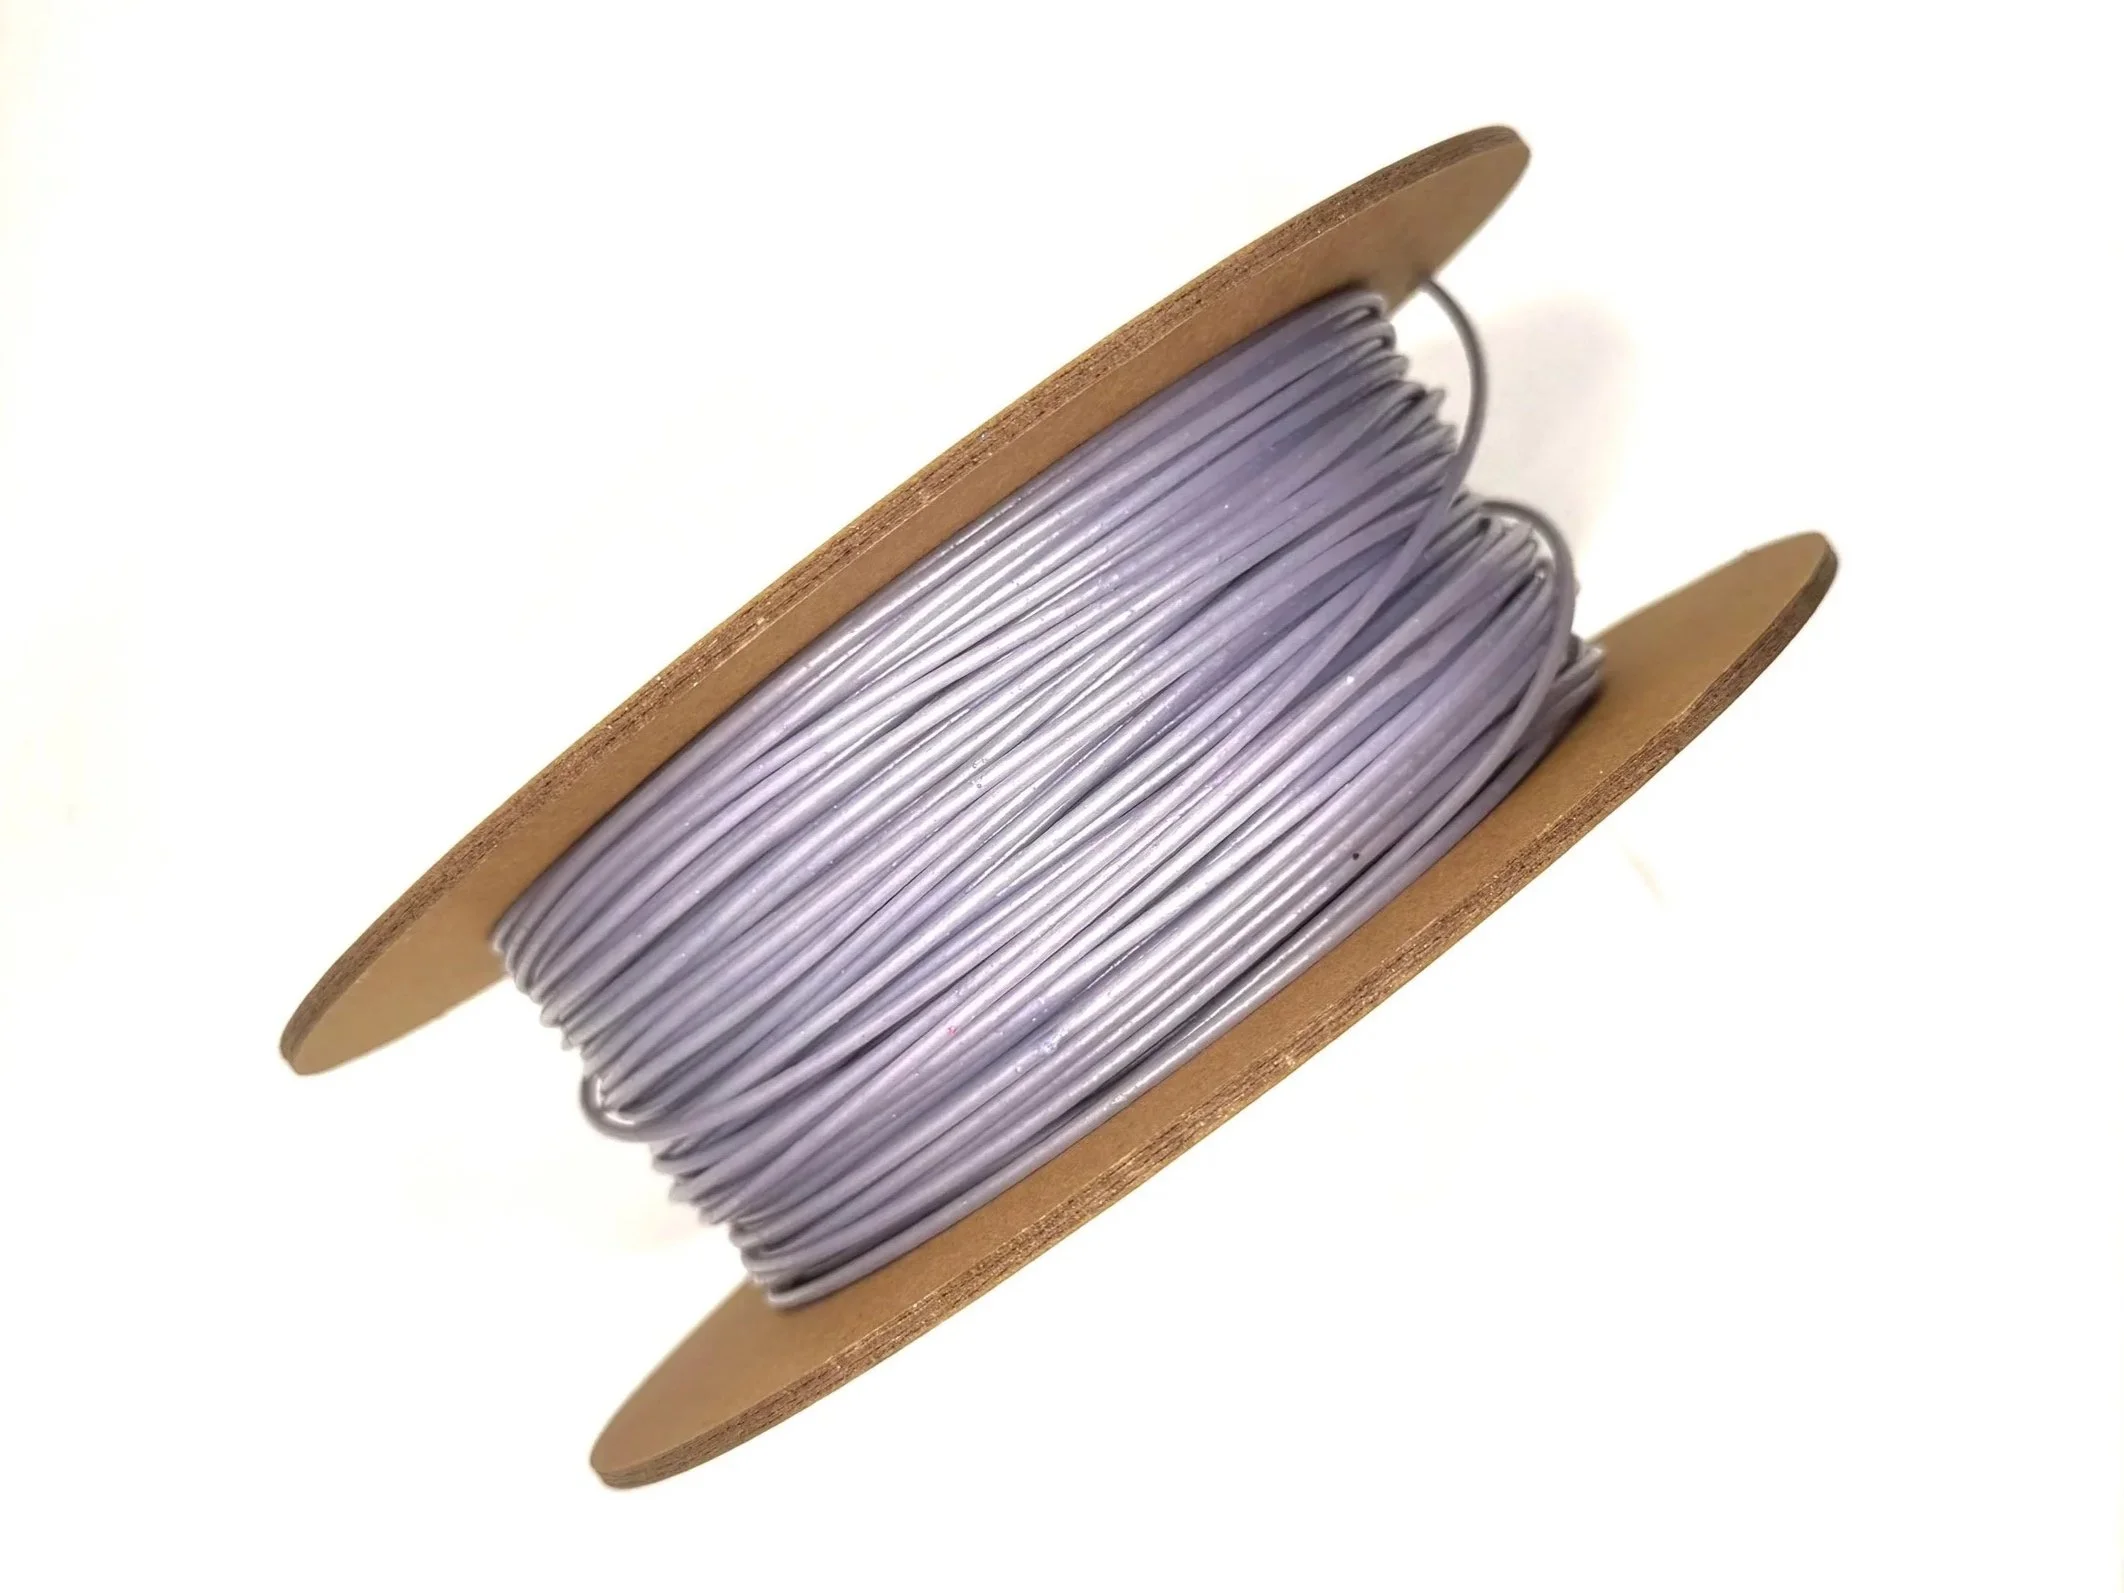
We make our own polymerized alcohols. Our filaments are 70% water, with a diameter of Ø= 1.75 ± 0.15 mm
Timeplast’s story runs deep, our 7 patents, our vision of the future, our crowdfunding campaign or a factory tour, tell only part of the story.
Best Selling Filaments
Developed by Timeplast & String Cubed INC.
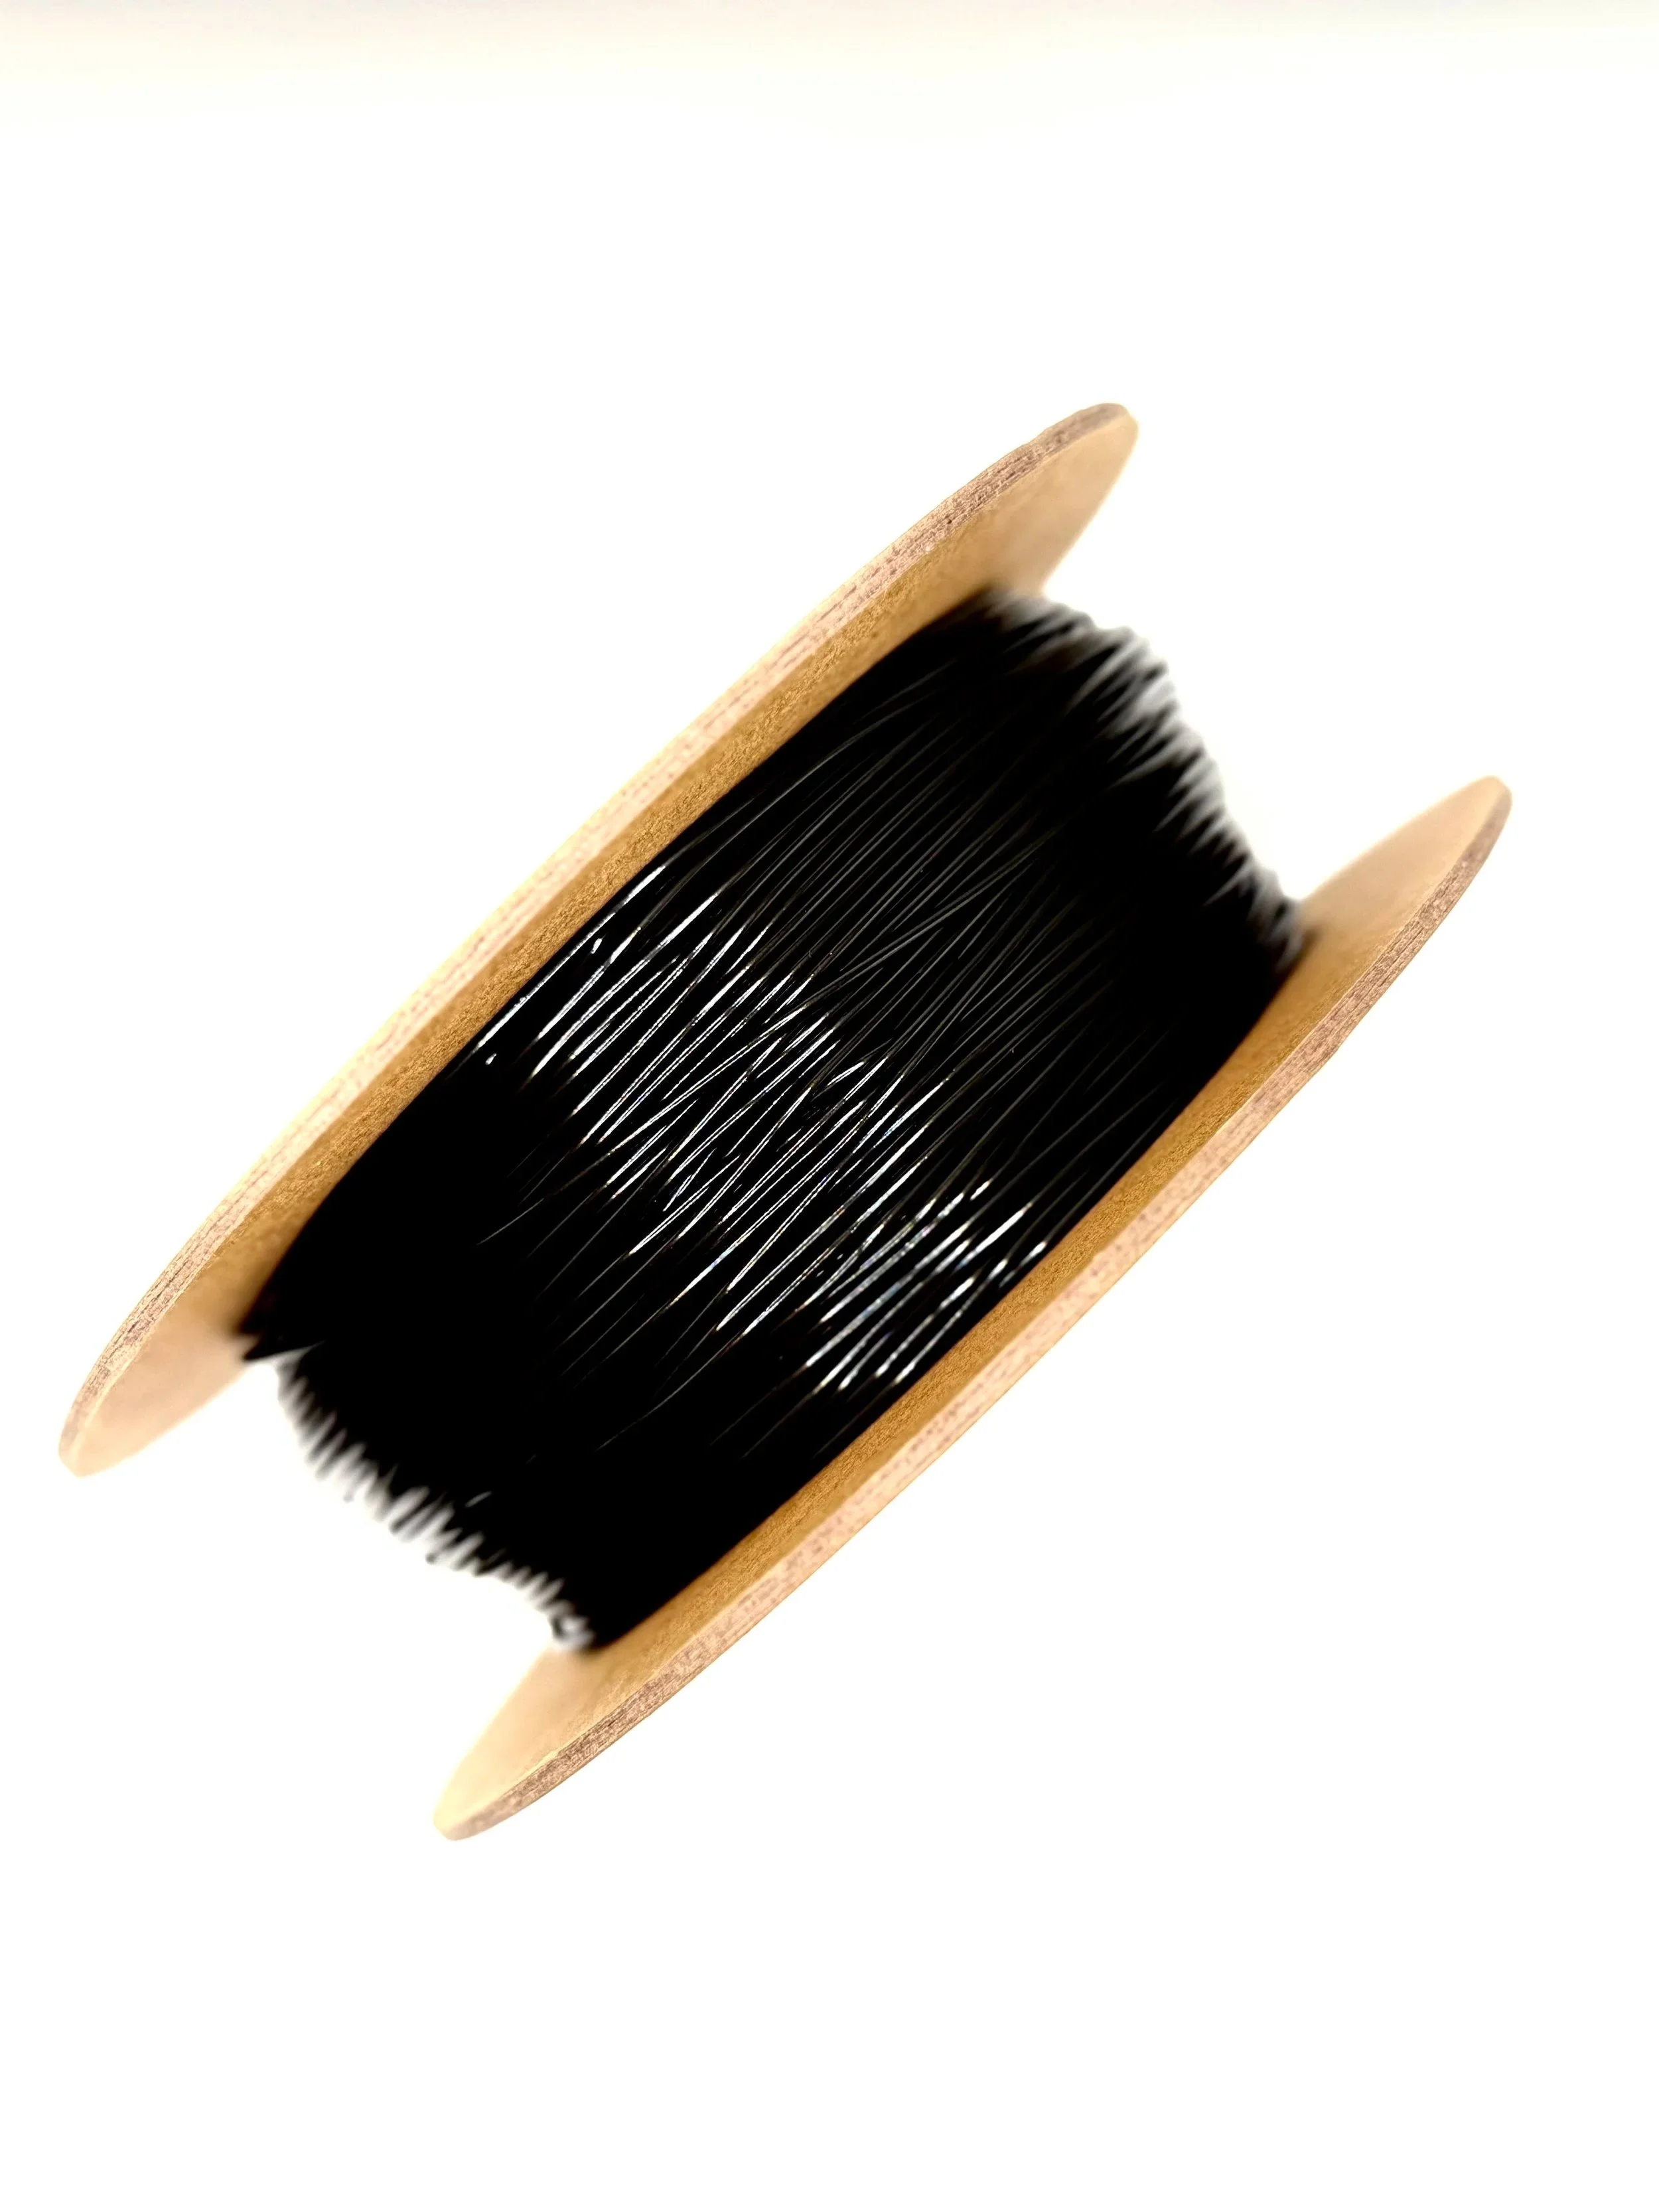
Soap - Gen 5
3D print usable soaps!
-
TimeMass Soap Gen 5 is real soap, delivered as filament.
Print any shape, let it dry, and use it at the sink like any other soap.
Expect agentle, low-foam lather by design. In personal care, foam is a powerful sensory cue, but it’s not a direct indicator of cleansing ability, what matters is the surfactant system doing the work.
Feature highlights version
Print → dry → wash
Gen 5 extrudes smoothly, then hardens as moisture evaporates, forming a functional bar you can actually use.Low foam, real clean
If you’re used to commercial “bubble mountains”, this will feel different. It’s intentionally less foamy, you’re getting cleansing from the formulation, not foam theatre.Customise mid-print
Pause the print to add optional extras: essential oils, moisturisers, exfoliants, or other soap-safe additives and make the bar truly yours.Lasts longer when you let it dry
Between uses, dry time helps the bar regenerate hardness, which extends life compared with a constantly-wet bar.What it’s made from
Gen 5 is a polymer–soap hybrid made from water,calcium carbonate,in-house polymerised alcohols,olive oil, and naturally derived surfactants/emulsifiers (coco-glucoside and glyceryl stearate).
In plain terms: it’s engineered to print cleanly, then behave like a soap bar once it cools and dries.A soap that doesn’t need dramatic bubbles to prove it works.
Printing recommendations: For reliable prints, please always use a 0.8mm nozzle. A cryogrip blue plate so that first layer will adhere. For all of the other parameters, please use our specialized GPT here. And if at any point you have questions, concerns, or difficulty printing, please don’t hesitate to reach out to us at timeplast@timeplast.com. We work with every customer until their filament prints successfully, and we also offer no-questions-asked refunds if the material simply isn’t the right fit for you. Your satisfaction is always our priority.
Safety tip: Don’t go wild with undiluted essential oils. They’re called “concentrated” for a reason. Use responsibly.
For external use only. Avoid sensitive areas.
Made in the USA.
-
Click here to access our new and improved TimeMass GPT Assistant. Just tell it your printer model and the TimeMass filament you're using—it will instantly recommend the exact parameters you need to start printing successfully.
1. Introduction
These parameters are designed to help avoid printing issues; however, temperatures and speed timings can be adjusted based on your specific goals. For example, if you prefer a less rigid result, we recommend using a lower temperature. This section outlines a complete slicing and printing profile for TimeMass Soap, tailored for printers with a 0.8 mm nozzle. If the print is not being successful, please lower the nozzle temperature by 10°C and start over until an optimal print is achieved. Please check the manual for printing parameters.2. Temperature Settings
2.aNozzle Temperature: 230°C — Optimal for flowability while avoiding decomposition (which begins around 250°C).
2.bBed Temperature: 75°C — Ensures strong first-layer adhesion and prevents moisture bubbling.
2.cNozzle Temperature Range: 230–245°C — Timeplast melts around 165°C but prints best at 235°C for precise viscosity control.3. Cooling Settings
3.aNo Cooling for First Layers: 3 layers — Prevents shrinkage due to rapid cooling of moisture-rich filament.
3.bFan Minimum Speed: 0% for the first 100 seconds — Allows heat retention during early layers.
3.cFan Maximum Speed: 15% starting at 8 seconds — Avoids overcooling that can lead to warping.
3.dKeep Fan Always On: OFF — Allows vapor to escape and avoids internal fogging.
3.eSlow Down for Cooling: ON — Improves surface finish with controlled cooling.
3.fForce Cooling for Overhangs: OFF — Overcooling can deform bridges in Timeplast.
3.gFan for Overhangs: 15% — Only for essential cooling in complex areas.
3.hPre-Start Fan Time: 2 seconds — Minimizes pressure differential during the first layer.4. Volumetric Flow
4.aMax Volumetric Speed: 12 mm³/s — Based on a melt flow index of ~15 g/10min, allows high-speed printing.
4.bRamming Speed: 3 mm³/s — Prevents bubbles or popping from pressure spikes.5. Retraction and Flow
5.aRetraction Distance: 0.4 mm — Minimal retraction required for soft filaments to avoid stringing.
5.bRetraction Speed: 15 mm/s — Slow enough to avoid pulling molten plastic.
5.cPressure Advance: 0.05 — Compensates for nozzle lag at high flow rates.
5.dFlow Ratio: 92% — Slight under-extrusion avoids swelling and surface artifacts.6. Precision Settings
6.aGap Closing Radius: 0.1 mm — Tolerant of gaps in thicker walls.
6.bArc Fitting: ON — Reduces G-code size and smooths curve transitions.
6.cElephant Foot Compensation: 0.1 mm — Offsets squishing in the first layer caused by large bead sizes.7. Walls and Shells
7.aWall Loops: 2 — Minimum for strength when using a 0.8 mm nozzle.
7.bDetect Thin Walls: ON — Ensures tight geometries aren’t skipped.
7.cTop/Bottom Shell Layers: 3 — Provides good coverage; increase if watertightness is needed.
7.dTop/Bottom Thickness: 1.2 mm — Equals 1.5x the nozzle size for solid strength.
7.eTop/Bottom Pattern: Monotonic — Distributes tension evenly and improves surface finish.8. Geometry and Movement
8.aWall Order: Inner before Outer — Creates cleaner outer surfaces.
8.bInfill First: OFF — Maintains precise outer dimensions.
8.cSmooth Speed Transition: ON — Prevents ringing caused by abrupt speed changes.
8.dSmooth Coefficient: 80 — Ideal damping for soft materials.
8.eAvoid Crossing Wall: ON — Minimizes stringing across part walls.
8.fMax Detour for Crossing: 10 mm or 5% — Balances time with print cleanliness.9. Layer and Width Settings
9.aLayer Height: 0.3 mm — Optimal for strength and resolution using a 0.8 mm nozzle.
9.bInitial Layer Height: 0.35 mm — Slightly higher to improve adhesion.
9.cLine Widths (all): 0.8 mm — Matches nozzle diameter for consistent extrusion.10. Seam Settings
10.aSeam Position: Aligned or Back — Use aligned for mechanical consistency, back for visual appeal.
10.bSmart Scarf Seam: ON — Automatically adjusts seam location to reduce visual impact.
10.cSeam Angle: 155° — Standard seam angle for clean transitions.
10.dSeam Steps: 10 — Smooths seam path and improves visual finish.11. Infill Settings
11.aWall/Infill Overlap: 10% — Prevents infill from deforming soft exterior walls.
11.bInfill Combination: ON — Consolidates paths for efficiency.
11.cDetect Floating Shells: ON — Ensures unsupported vertical structures are printed reliably.
11.dSparse Infill Density: 20–25% — Balanced rigidity vs. material use.
11.eSparse Pattern: Grid — Stable and efficient for flexible geometries.12. Speed Settings
12.aTravel: 160 mm/s — Fast but safe against backlash.
12.bInitial Layer: 15 mm/s — Prevents nozzle from skimming and ensures bed adhesion.
12.cOuter Wall: 60 mm/s — Controlled speed for surface quality.
12.dInner Wall: 90 mm/s — Slightly faster without compromising control.
12.eSmall Perimeter: 35 mm/s — Reduced speed for detailed geometry.
12.fTop Surface: 40 mm/s — Improves finish on topmost layers.
12.gInfill: 100–120 mm/s — Takes advantage of high flowability.13. Acceleration Settings
13.aNormal Print: 2000 mm/s² — Prevents ringing in soft filaments.
13.bTravel: 4000 mm/s² — Enables fast movement without harsh transitions.
13.cInitial Layer: 300 mm/s² — Gentle movement prevents lifting from the bed.
13.dOuter Wall: 1500 mm/s² — Improves outer surface clarity.
13.eInner Wall: 2000 mm/s² — Balanced for structural components.
13.fTop Surface: 1500 mm/s² — Ensures smooth detailing.14. Adhesion and Brims
14.aSkirt Loops: 2 — Helps prime nozzle and start cleanly.
14.bBrim Width: 6 mm — Helps hold soft materials down.
14.cBrim Gap: 0.15 mm — Allows for easy removal without tearing.15. Prime Tower and Flush Settings
15.aPrime Tower: ON — Purges moisture and early flow inconsistencies.
15.bTower Width: 40 mm — Prevents collapse due to heat.
15.cBrim Width (Tower): 4 mm — Adds stability to the purge base.
15.dFlush Into Support: ON — Discards unwanted early flow safely.16. G-Code Start Script
M900 K0.05 ; Pressure Advance M106 S0 ; Fan off G92 E0 G1 E15 F300 ; purge line G92 E0
17. Additional Notes
17.aDry filament at 155 F for 2 hours before use.
17.bStore with desiccant.
17.cKeep extruder door open to allow vapor to escape.
17.dAvoid long dwell times at high temperatures.If you need any other assistance, feel free to reach out to us anytime at timeplast@timeplast.com — we’ll be happy to help.
Free U.S. standard shipping on orders of 5+ spools!
Fire - Gen 2
Burnable 3D filament
-
TimeMass Fire Gen 2 is a burnable 3D printing filament made of water, wood, calcium carbonate, vinegar, in-house made and patented polymerized alcohol.
It prints fast, melts smooth, burns clean, and yes, it’s designed to ignite on purpose. Unlike traditional filaments that either melt like sad spaghetti or combust like a campfire mistake, this one burns right.
Want to print candles? Fire sculptures? Ritual objects for your post-plastic utopia? Go wild. You can even design your prints to control how they burn fast, slow, flashy, or dramatic.
Pro tip: treat your print like a wick. Too thick? It’ll choke. Too thin? It’ll vanish. Just right? Beautiful combustion.
Need Ideas? Here You Go:
Spiral Towers: fire climbs up like it’s doing performance art.
Geometric Lanterns: pretty shapes + oxygen = dramatic collapse.
Flame Trees: fast-burning branches, slow-burning trunks.
Fire Flowers: petals curl and vanish while the stem holds the line.
Maze Prints: fire snakes through like it’s solving a puzzle.
Starbursts: spikes ignite like a slow-motion explosion.
Wavy Sculptures: dynamic flames that ripple as they burn.
You can even pause the print to drop in oils or other additives. TimeMass Fire holds them, absorbs them, and releases them mid-burn. Yes, your candle can smell like bergamot and existential closure.
Why It Matters:
Burns efficiently with minimal residue.
Prints on standard 3D printers.
Customizable burn rates.
Cleaner alternative to paraffin wax and plastic trash.
Absorbs oils and additives mid-print.
Supports sustainability without sacrificing creativity.
Basically, it’s a burnable, sculptable, programmable piece of environmental art.
Welcome to the future of fire. No paraffin. No guilt. Just combustion, on your terms. -
Click here to access our new and improved TimeMass GPT Assistant. Just tell it your printer model and the TimeMass filament you're using—it will instantly recommend the exact parameters you need to start printing successfully.
1. Introduction
These parameters are designed to help avoid printing issues; however, temperatures and speed timings can be adjusted based on your specific goals. For example, if you prefer a less rigid result, we recommend using a lower temperature. This section outlines a complete slicing and printing profile for TimeMass Fire, tailored for printers with a 0.8 mm nozzle. If the print is not being successful, please lower the nozzle temperature by 10°C and start over until an optimal print is achieved. Please check the manual for printing parameters.2. Temperature Settings
2.aNozzle Temperature: 230°C — Optimal for flowability while avoiding decomposition (which begins around 250°C).
2.bBed Temperature: 75°C — Ensures strong first-layer adhesion and prevents moisture bubbling.
2.cNozzle Temperature Range: 230–245°C — Timeplast melts around 165°C but prints best at 240°C for precise viscosity control.3. Cooling Settings
3.aNo Cooling for First Layers: 3 layers — Prevents shrinkage due to rapid cooling of moisture-rich filament.
3.bFan Minimum Speed: 0% for the first 100 seconds — Allows heat retention during early layers.
3.cFan Maximum Speed: 15% starting at 8 seconds — Avoids overcooling that can lead to warping.
3.dKeep Fan Always On: OFF — Allows vapor to escape and avoids internal fogging.
3.eSlow Down for Cooling: ON — Improves surface finish with controlled cooling.
3.fForce Cooling for Overhangs: OFF — Overcooling can deform bridges in Timeplast.
3.gFan for Overhangs: 15% — Only for essential cooling in complex areas.
3.hPre-Start Fan Time: 2 seconds — Minimizes pressure differential during the first layer.4. Volumetric Flow
4.aMax Volumetric Speed: 12 mm³/s — Based on a melt flow index of ~15 g/10min, allows high-speed printing.
4.bRamming Speed: 3 mm³/s — Prevents bubbles or popping from pressure spikes.5. Retraction and Flow
5.aRetraction Distance: 0.4 mm — Minimal retraction required for soft filaments to avoid stringing.
5.bRetraction Speed: 15 mm/s — Slow enough to avoid pulling molten plastic.
5.cPressure Advance: 0.05 — Compensates for nozzle lag at high flow rates.
5.dFlow Ratio: 92% — Slight under-extrusion avoids swelling and surface artifacts.6. Precision Settings
6.aGap Closing Radius: 0.1 mm — Tolerant of gaps in thicker walls.
6.bArc Fitting: ON — Reduces G-code size and smooths curve transitions.
6.cElephant Foot Compensation: 0.1 mm — Offsets squishing in the first layer caused by large bead sizes.7. Walls and Shells
7.aWall Loops: 2 — Minimum for strength when using a 0.8 mm nozzle.
7.bDetect Thin Walls: ON — Ensures tight geometries aren’t skipped.
7.cTop/Bottom Shell Layers: 3 — Provides good coverage; increase if watertightness is needed.
7.dTop/Bottom Thickness: 1.2 mm — Equals 1.5x the nozzle size for solid strength.
7.eTop/Bottom Pattern: Monotonic — Distributes tension evenly and improves surface finish.8. Geometry and Movement
8.aWall Order: Inner before Outer — Creates cleaner outer surfaces.
8.bInfill First: OFF — Maintains precise outer dimensions.
8.cSmooth Speed Transition: ON — Prevents ringing caused by abrupt speed changes.
8.dSmooth Coefficient: 80 — Ideal damping for soft materials.
8.eAvoid Crossing Wall: ON — Minimizes stringing across part walls.
8.fMax Detour for Crossing: 10 mm or 5% — Balances time with print cleanliness.9. Layer and Width Settings
9.aLayer Height: 0.3 mm — Optimal for strength and resolution using a 0.8 mm nozzle.
9.bInitial Layer Height: 0.35 mm — Slightly higher to improve adhesion.
9.cLine Widths (all): 0.8 mm — Matches nozzle diameter for consistent extrusion.10. Seam Settings
10.aSeam Position: Aligned or Back — Use aligned for mechanical consistency, back for visual appeal.
10.bSmart Scarf Seam: ON — Automatically adjusts seam location to reduce visual impact.
10.cSeam Angle: 155° — Standard seam angle for clean transitions.
10.dSeam Steps: 10 — Smooths seam path and improves visual finish.11. Infill Settings
11.aWall/Infill Overlap: 10% — Prevents infill from deforming soft exterior walls.
11.bInfill Combination: ON — Consolidates paths for efficiency.
11.cDetect Floating Shells: ON — Ensures unsupported vertical structures are printed reliably.
11.dSparse Infill Density: 20–25% — Balanced rigidity vs. material use.
11.eSparse Pattern: Grid — Stable and efficient for flexible geometries.12. Speed Settings
12.aTravel: 160 mm/s — Fast but safe against backlash.
12.bInitial Layer: 15 mm/s — Prevents nozzle from skimming and ensures bed adhesion.
12.cOuter Wall: 60 mm/s — Controlled speed for surface quality.
12.dInner Wall: 90 mm/s — Slightly faster without compromising control.
12.eSmall Perimeter: 35 mm/s — Reduced speed for detailed geometry.
12.fTop Surface: 40 mm/s — Improves finish on topmost layers.
12.gInfill: 100–120 mm/s — Takes advantage of high flowability.13. Acceleration Settings
13.aNormal Print: 2000 mm/s² — Prevents ringing in soft filaments.
13.bTravel: 4000 mm/s² — Enables fast movement without harsh transitions.
13.cInitial Layer: 300 mm/s² — Gentle movement prevents lifting from the bed.
13.dOuter Wall: 1500 mm/s² — Improves outer surface clarity.
13.eInner Wall: 2000 mm/s² — Balanced for structural components.
13.fTop Surface: 1500 mm/s² — Ensures smooth detailing.14. Adhesion and Brims
14.aSkirt Loops: 2 — Helps prime nozzle and start cleanly.
14.bBrim Width: 6 mm — Helps hold soft materials down.
14.cBrim Gap: 0.15 mm — Allows for easy removal without tearing.15. Prime Tower and Flush Settings
15.aPrime Tower: ON — Purges moisture and early flow inconsistencies.
15.bTower Width: 40 mm — Prevents collapse due to heat.
15.cBrim Width (Tower): 4 mm — Adds stability to the purge base.
15.dFlush Into Support: ON — Discards unwanted early flow safely.16. G-Code Start Script
M900 K0.05 ; Pressure Advance M106 S0 ; Fan off G92 E0 G1 E15 F300 ; purge line G92 E0
17. Additional Notes
17.aDry filament at 155F for 2 hours before use.
17.bStore with desiccant.
17.cKeep extruder door open to allow vapor to escape.
17.dAvoid long dwell times at high temperatures.If you need any other assistance, feel free to reach out to us anytime at timeplast@timeplast.com — we’ll be happy to help.
Free U.S. standard shipping on orders of 5+ spools!
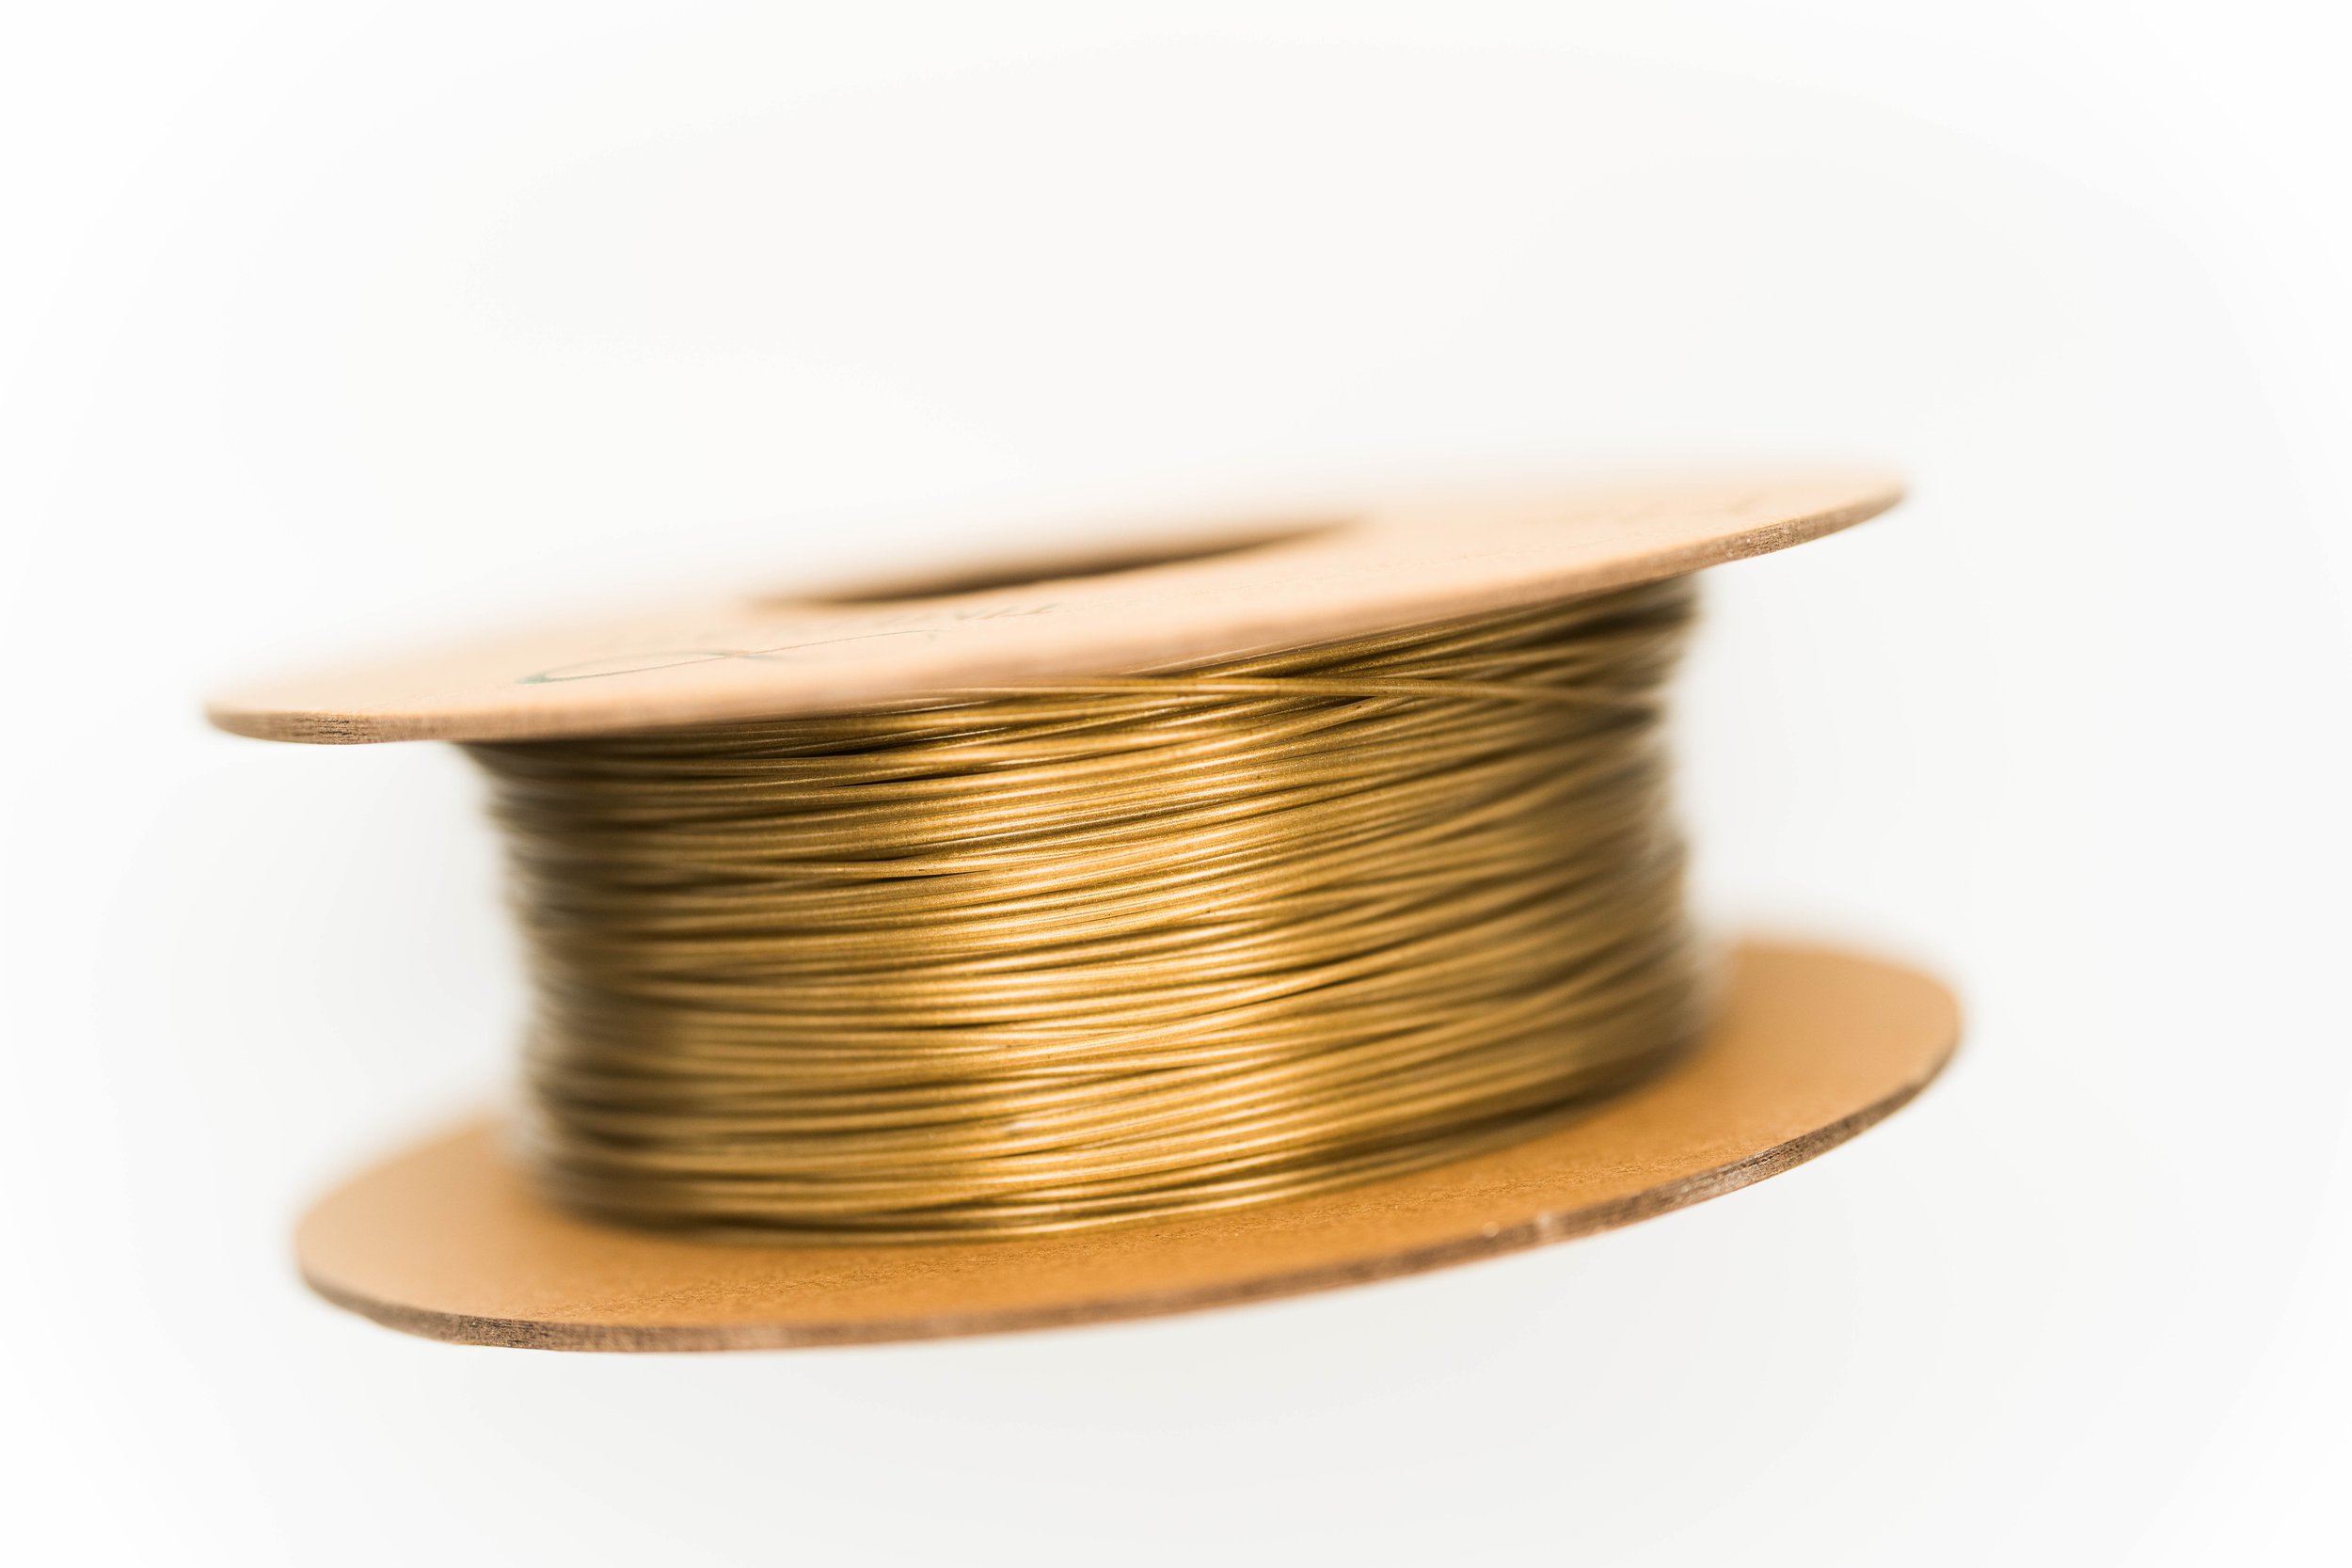
Retroreflective Holographic
Gold by day, Blue by night.
-
Light up your prints, shine like a road sign by day, glow blue like a galaxy by night.
Meet the filament that bends light to your will. TimeMass Retroreflective Holographic fuses three light-active systems in one spool: a high-crystallinity TimeMass Light base that moves light through the body of your print, retroreflective glass beads that throw light straight back at the source, and a rare-earth blue glow phosphor that stores energy and radiates in the dark. The result is a print that looks alive bright, shimmering, and otherworldly, whether you’re under sunlight, LEDs, or lights-off.
Why you’ll love it
Two personalities, 24/7: Flashlight or headlights on it? It “pops” back at you like a safety sign. Lights off? It emits a deep, electric-blue glow no batteries needed.
Built-in light piping: Our high-crystallinity TimeMass Light matrix transports and diffuses light through walls and edges, so pieces feel like they’re lit from within.
Holographic shimmer: Ultra-fine prismatic microspheres scatter light into spectral colors for a subtle, shifting rainbow as you move.
Conversation-starting: Looks premium on a desk; turns into a showpiece at night. Perfect for gifts, commissions, signage, night-lights, jewelry, props, bike reflectors, and “how did you print that?” moments.
How it works?
TimeMass Light base: A clear, structured polymer matrix with tuned crystallinity lets light travel across your part less “hot spot,” more even internal glow.
Retroreflective beads: Microscopic glass lenses send incoming light straight back to its source, creating that road-sign flash when viewed near the light.
Blue phosphor (strontium aluminate, Eu/Dy doped): “Charges” under light and re-emits blue in the dark, fading slowly over time.
What to make?
Cosmic décor & light art (panels, prisms, crystal clusters)
Reflective bike tags & outdoor accents (be seen at night)
Logos & signage with day “flash” + night glow
Jewelry & wearables with holographic shift
Night-lights, ornaments, suncatchers, display bases
Pro tips for best results
Keep it dry: Store in a dry box; if needed, dry at ~155 °F (68 °C) for 2 hours. Moisture = micro-bubbles = reduced clarity/glow.
Polish the light entry: Light loves a smooth window. Lightly sand/polish the flat base to help “inject” light from below.
Charge the glow: UV flashlight or bright lamp for 1–2 minutes. Blue emission is strongest right after charging and remains visible for hours.
Show-time moves: For the retroreflective effect, shine the light from near your eyes (phone LED, headlamp) and watch it beam straight back.
Safety & handling
Non-toxic ingredients; rare-earth dopants are bound in the plastic. Print in a ventilated area like any filament and avoid inhaling fumes. Finished parts are safe to handle.
-
Click here to access our new and improved TimeMass GPT Assistant. Just tell it your printer model and the TimeMass filament you're using—it will instantly recommend the exact parameters you need to start printing successfully.
1. Introduction
These parameters are designed to help avoid printing issues; however, temperatures and speed timings can be adjusted based on your specific goals. For example, if you prefer a less rigid result, we recommend using a lower temperature. This section outlines a complete slicing and printing profile for TimeMass, tailored for printers with a 0.8 mm nozzle. If the print is not being successful, please lower the nozzle temperature by 10°C and start over until an optimal print is achieved. Please check the manual for printing parameters.2. Temperature Settings
2.aNozzle Temperature: 230°C — Optimal for flowability while avoiding decomposition (which begins around 250°C).
2.bBed Temperature: 75°C — Ensures strong first-layer adhesion and prevents moisture bubbling.
2.cNozzle Temperature Range: 230–245°C — Timeplast melts around 165°C but prints best at 240°C for precise viscosity control.3. Cooling Settings
3.aNo Cooling for First Layers: 3 layers — Prevents shrinkage due to rapid cooling of moisture-rich filament.
3.bFan Minimum Speed: 0% for the first 100 seconds — Allows heat retention during early layers.
3.cFan Maximum Speed: 15% starting at 8 seconds — Avoids overcooling that can lead to warping.
3.dKeep Fan Always On: OFF — Allows vapor to escape and avoids internal fogging.
3.eSlow Down for Cooling: ON — Improves surface finish with controlled cooling.
3.fForce Cooling for Overhangs: OFF — Overcooling can deform bridges in Timeplast.
3.gFan for Overhangs: 15% — Only for essential cooling in complex areas.
3.hPre-Start Fan Time: 2 seconds — Minimizes pressure differential during the first layer.4. Volumetric Flow
4.aMax Volumetric Speed: 12 mm³/s — Based on a melt flow index of ~15 g/10min, allows high-speed printing.
4.bRamming Speed: 3 mm³/s — Prevents bubbles or popping from pressure spikes.5. Retraction and Flow
5.aRetraction Distance: 0.4 mm — Minimal retraction required for soft filaments to avoid stringing.
5.bRetraction Speed: 15 mm/s — Slow enough to avoid pulling molten plastic.
5.cPressure Advance: 0.05 — Compensates for nozzle lag at high flow rates.
5.dFlow Ratio: 92% — Slight under-extrusion avoids swelling and surface artifacts.6. Precision Settings
6.aGap Closing Radius: 0.1 mm — Tolerant of gaps in thicker walls.
6.bArc Fitting: ON — Reduces G-code size and smooths curve transitions.
6.cElephant Foot Compensation: 0.1 mm — Offsets squishing in the first layer caused by large bead sizes.7. Walls and Shells
7.aWall Loops: 2 — Minimum for strength when using a 0.8 mm nozzle.
7.bDetect Thin Walls: ON — Ensures tight geometries aren’t skipped.
7.cTop/Bottom Shell Layers: 3 — Provides good coverage; increase if watertightness is needed.
7.dTop/Bottom Thickness: 1.2 mm — Equals 1.5x the nozzle size for solid strength.
7.eTop/Bottom Pattern: Monotonic — Distributes tension evenly and improves surface finish.8. Geometry and Movement
8.aWall Order: Inner before Outer — Creates cleaner outer surfaces.
8.bInfill First: OFF — Maintains precise outer dimensions.
8.cSmooth Speed Transition: ON — Prevents ringing caused by abrupt speed changes.
8.dSmooth Coefficient: 80 — Ideal damping for soft materials.
8.eAvoid Crossing Wall: ON — Minimizes stringing across part walls.
8.fMax Detour for Crossing: 10 mm or 5% — Balances time with print cleanliness.9. Layer and Width Settings
9.aLayer Height: 0.3 mm — Optimal for strength and resolution using a 0.8 mm nozzle.
9.bInitial Layer Height: 0.35 mm — Slightly higher to improve adhesion.
9.cLine Widths (all): 0.8 mm — Matches nozzle diameter for consistent extrusion.10. Seam Settings
10.aSeam Position: Aligned or Back — Use aligned for mechanical consistency, back for visual appeal.
10.bSmart Scarf Seam: ON — Automatically adjusts seam location to reduce visual impact.
10.cSeam Angle: 155° — Standard seam angle for clean transitions.
10.dSeam Steps: 10 — Smooths seam path and improves visual finish.11. Infill Settings
11.aWall/Infill Overlap: 10% — Prevents infill from deforming soft exterior walls.
11.bInfill Combination: ON — Consolidates paths for efficiency.
11.cDetect Floating Shells: ON — Ensures unsupported vertical structures are printed reliably.
11.dSparse Infill Density: 20–25% — Balanced rigidity vs. material use.
11.eSparse Pattern: Grid — Stable and efficient for flexible geometries.12. Speed Settings
12.aTravel: 160 mm/s — Fast but safe against backlash.
12.bInitial Layer: 15 mm/s — Prevents nozzle from skimming and ensures bed adhesion.
12.cOuter Wall: 60 mm/s — Controlled speed for surface quality.
12.dInner Wall: 90 mm/s — Slightly faster without compromising control.
12.eSmall Perimeter: 35 mm/s — Reduced speed for detailed geometry.
12.fTop Surface: 40 mm/s — Improves finish on topmost layers.
12.gInfill: 100–120 mm/s — Takes advantage of high flowability.13. Acceleration Settings
13.aNormal Print: 2000 mm/s² — Prevents ringing in soft filaments.
13.bTravel: 4000 mm/s² — Enables fast movement without harsh transitions.
13.cInitial Layer: 300 mm/s² — Gentle movement prevents lifting from the bed.
13.dOuter Wall: 1500 mm/s² — Improves outer surface clarity.
13.eInner Wall: 2000 mm/s² — Balanced for structural components.
13.fTop Surface: 1500 mm/s² — Ensures smooth detailing.14. Adhesion and Brims
14.aSkirt Loops: 2 — Helps prime nozzle and start cleanly.
14.bBrim Width: 6 mm — Helps hold soft materials down.
14.cBrim Gap: 0.15 mm — Allows for easy removal without tearing.15. Prime Tower and Flush Settings
15.aPrime Tower: ON — Purges moisture and early flow inconsistencies.
15.bTower Width: 40 mm — Prevents collapse due to heat.
15.cBrim Width (Tower): 4 mm — Adds stability to the purge base.
15.dFlush Into Support: ON — Discards unwanted early flow safely.16. G-Code Start Script
M900 K0.05 ; Pressure Advance M106 S0 ; Fan off G92 E0 G1 E15 F300 ; purge line G92 E0
17. Additional Notes
17.aDry filament at 155 F for 2 hours before use.
17.bStore with desiccant.
17.cKeep extruder door open to allow vapor to escape.
17.dAvoid long dwell times at high temperatures.If you need any other assistance, feel free to reach out to us anytime at timeplast@timeplast.com — we’ll be happy to help.
Free U.S. standard shipping on orders of 5+ spools!
Plant Vitamin - Gen 2
Growth, Layer by Layer
-
Timeplast - TimeMass Plant Vitamin is a water-retaining, nutrient-loaded filament engineered for slow-release fertilization right from the print bed. Built with carbon, nitrogen, phosphorus, and sulfu plus structured water and calcium carbonate it lets you 3D print objects that nourish plants over time.
No runoff. No burst-release. Just sustained growth, powered by smart material design.
How it works:
Hydrophilic matrix absorbs moisture and dissolves slowly, releasing nutrients in sync with plant needs.
Water = trigger: Pods can be printed to behave like analog biological computers, using moisture to time and deliver nutrient output.
No batteries. No sensors. Just physics.
Full Nutrient Breakdown (per 350g spool):
Nitrogen (N): 10.8 g: Chlorophyll production & leaf growth
Phosphate (P₂O₅): 8.4 g: Root development & flowering
Potash (K₂O): 6.8 g: Disease resistance & overall health
Calcium (Ca): 2.4 g: Cell wall structure & nutrient absorption
Magnesium (Mg): 0.8 g: Photosynthesis & enzyme function
Core Material:
Structured Water: 70%: Boosts solubility and uptake
Calcium Carbonate: 20%: Strengthens the filament and feeds the soil
Sustained Release Design:
Nutrients are embedded within the Timeplast Plus matrix for gradual delivery
Structured water ensures efficient solubility
No leaching = no waste
Stability & Vitamin Integrity (Because Growers Actually Care):
Microencapsulation: Heat-resistant shells (sol-gel silica, melamine, urea-formaldehyde, etc.) prevent degradation during extrusion.
Vitamin Derivatives: Stable precursors like ascorbyl palmitate reactivate in soil through pH, enzymes, or hydration.
Multi-phase Composite: Core-shell architecture keeps active components cool during print.
Low-shear, thermally controlled extrusion: Custom nozzles and low-friction channels reduce heat spikes.
Water-based integration: Vitamins are solvent-bound into low-temp meltable additives, preserving potency.
Where to use it:
Urban gardening & hydroponics: Print self-feeding seed pods, planters, or nutrient spikes
Precision agriculture: Design root-zone diffusers to boost yield without runoff
Reforestation: Print biodegradable seed capsules with long-term nutrient support
Irrigation aids & smart pots: Combine watering and feeding in one functional print
The result?
Printed structures that actually feed the soil. No over-fertilizing. No chemical waste. Just controlled, water-powered nutrient delivery designed by you.Need Ideas? Here You Go:
Self-fertilizing plant pots and holders, eliminating the need for chemical fertilizers.
Water-dispersible nutrient discs that can be buried in soil for controlled nutrient release.
Eco-friendly seedling trays that break down naturally, enriching the soil.
Hydroponic nutrient carriers, improving plant growth in water-based systems.
Custom garden markers, serving both as labels and soil enhancers.
-
Click here to access our new and improved TimeMass GPT Assistant. Jusst tell it your printer model and the TimeMass filament you're using—it will instantly recommend the exact parameters you need to start printing successfully.
1. Introduction
These parameters are designed to help avoid printing issues; however, temperatures and speed timings can be adjusted based on your specific goals. For example, if you prefer a less rigid result, we recommend using a lower temperature. This section outlines a complete slicing and printing profile for TimeMass Plant Vitamin, tailored for printers with a 0.8 mm nozzle. If the print is not being successful, please lower the nozzle temperature by 10°C and start over until an optimal print is achieved. Please check the manual for printing parameters.2. Temperature Settings
2.aNozzle Temperature: 230°C — Optimal for flowability while avoiding decomposition (which begins around 250°C).
2.bBed Temperature: 75°C — Ensures strong first-layer adhesion and prevents moisture bubbling.
2.cNozzle Temperature Range: 230–245°C — Timeplast melts around 165°C but prints best at 240°C for precise viscosity control.3. Cooling Settings
3.aNo Cooling for First Layers: 3 layers — Prevents shrinkage due to rapid cooling of moisture-rich filament.
3.bFan Minimum Speed: 0% for the first 100 seconds — Allows heat retention during early layers.
3.cFan Maximum Speed: 15% starting at 8 seconds — Avoids overcooling that can lead to warping.
3.dKeep Fan Always On: OFF — Allows vapor to escape and avoids internal fogging.
3.eSlow Down for Cooling: ON — Improves surface finish with controlled cooling.
3.fForce Cooling for Overhangs: OFF — Overcooling can deform bridges in Timeplast.
3.gFan for Overhangs: 15% — Only for essential cooling in complex areas.
3.hPre-Start Fan Time: 2 seconds — Minimizes pressure differential during the first layer.4. Volumetric Flow
4.aMax Volumetric Speed: 12 mm³/s — Based on a melt flow index of ~15 g/10min, allows high-speed printing.
4.bRamming Speed: 3 mm³/s — Prevents bubbles or popping from pressure spikes.5. Retraction and Flow
5.aRetraction Distance: 0.4 mm — Minimal retraction required for soft filaments to avoid stringing.
5.bRetraction Speed: 15 mm/s — Slow enough to avoid pulling molten plastic.
5.cPressure Advance: 0.05 — Compensates for nozzle lag at high flow rates.
5.dFlow Ratio: 92% — Slight under-extrusion avoids swelling and surface artifacts.6. Precision Settings
6.aGap Closing Radius: 0.1 mm — Tolerant of gaps in thicker walls.
6.bArc Fitting: ON — Reduces G-code size and smooths curve transitions.
6.cElephant Foot Compensation: 0.1 mm — Offsets squishing in the first layer caused by large bead sizes.7. Walls and Shells
7.aWall Loops: 2 — Minimum for strength when using a 0.8 mm nozzle.
7.bDetect Thin Walls: ON — Ensures tight geometries aren’t skipped.
7.cTop/Bottom Shell Layers: 3 — Provides good coverage; increase if watertightness is needed.
7.dTop/Bottom Thickness: 1.2 mm — Equals 1.5x the nozzle size for solid strength.
7.eTop/Bottom Pattern: Monotonic — Distributes tension evenly and improves surface finish.8. Geometry and Movement
8.aWall Order: Inner before Outer — Creates cleaner outer surfaces.
8.bInfill First: OFF — Maintains precise outer dimensions.
8.cSmooth Speed Transition: ON — Prevents ringing caused by abrupt speed changes.
8.dSmooth Coefficient: 80 — Ideal damping for soft materials.
8.eAvoid Crossing Wall: ON — Minimizes stringing across part walls.
8.fMax Detour for Crossing: 10 mm or 5% — Balances time with print cleanliness.9. Layer and Width Settings
9.aLayer Height: 0.3 mm — Optimal for strength and resolution using a 0.8 mm nozzle.
9.bInitial Layer Height: 0.35 mm — Slightly higher to improve adhesion.
9.cLine Widths (all): 0.8 mm — Matches nozzle diameter for consistent extrusion.10. Seam Settings
10.aSeam Position: Aligned or Back — Use aligned for mechanical consistency, back for visual appeal.
10.bSmart Scarf Seam: ON — Automatically adjusts seam location to reduce visual impact.
10.cSeam Angle: 155° — Standard seam angle for clean transitions.
10.dSeam Steps: 10 — Smooths seam path and improves visual finish.11. Infill Settings
11.aWall/Infill Overlap: 10% — Prevents infill from deforming soft exterior walls.
11.bInfill Combination: ON — Consolidates paths for efficiency.
11.cDetect Floating Shells: ON — Ensures unsupported vertical structures are printed reliably.
11.dSparse Infill Density: 20–25% — Balanced rigidity vs. material use.
11.eSparse Pattern: Grid — Stable and efficient for flexible geometries.12. Speed Settings
12.aTravel: 160 mm/s — Fast but safe against backlash.
12.bInitial Layer: 15 mm/s — Prevents nozzle from skimming and ensures bed adhesion.
12.cOuter Wall: 60 mm/s — Controlled speed for surface quality.
12.dInner Wall: 90 mm/s — Slightly faster without compromising control.
12.eSmall Perimeter: 35 mm/s — Reduced speed for detailed geometry.
12.fTop Surface: 40 mm/s — Improves finish on topmost layers.
12.gInfill: 100–120 mm/s — Takes advantage of high flowability.13. Acceleration Settings
13.aNormal Print: 2000 mm/s² — Prevents ringing in soft filaments.
13.bTravel: 4000 mm/s² — Enables fast movement without harsh transitions.
13.cInitial Layer: 300 mm/s² — Gentle movement prevents lifting from the bed.
13.dOuter Wall: 1500 mm/s² — Improves outer surface clarity.
13.eInner Wall: 2000 mm/s² — Balanced for structural components.
13.fTop Surface: 1500 mm/s² — Ensures smooth detailing.14. Adhesion and Brims
14.aSkirt Loops: 2 — Helps prime nozzle and start cleanly.
14.bBrim Width: 6 mm — Helps hold soft materials down.
14.cBrim Gap: 0.15 mm — Allows for easy removal without tearing.15. Prime Tower and Flush Settings
15.aPrime Tower: ON — Purges moisture and early flow inconsistencies.
15.bTower Width: 40 mm — Prevents collapse due to heat.
15.cBrim Width (Tower): 4 mm — Adds stability to the purge base.
15.dFlush Into Support: ON — Discards unwanted early flow safely.16. G-Code Start Script
M900 K0.05 ; Pressure Advance M106 S0 ; Fan off G92 E0 G1 E15 F300 ; purge line G92 E0
17. Additional Notes
17.aDry filament at 155 F for 2 hours before use.
17.bStore with desiccant.
17.cKeep extruder door open to allow vapor to escape.
17.dAvoid long dwell times at high temperatures.If you need any other assistance, feel free to reach out to us anytime at timeplast@timeplast.com — we’ll be happy to help.
Free U.S. standard shipping on orders of 5+ spools!
We Accept:


First-Ever Funtional 3D Printed Solar Panel
High-end filaments
Developed by Timeplast & String Cubed INC.
Photovoltaic
-
This cutting-edge 3D printing filament is the result of a collaboration between Timeplast and String Cubed Inc. to create a material that not only can be 3D-printed but also converts light into electricity. Dubbed TimeMass Photovoltaic, it represents a fusion of Timeplast’s expertise in water-soluble polymers and String Cubed’s innovative approach to functional nanomaterials.
Like other TimeMass products, the filament’s base matrix is largely water and a proprietary polymerized alcohol formula (approximately 70% water content), meaning printed objects will dissolve when exposed to water.
What sets this filament apart is the infusion of advanced additives that give it photovoltaic (solar cell-like) properties while maintaining full water solubility of the plastic matrix.
Below we detail the formulation’s key components and the important safety procedures customers should follow when using TimeMass Photovoltaic filament, especially considering its water-dissolvable nature and the potentially toxic additives released upon dissolution.
Next-Generation Photovoltaic Formulation
The TimeMass Photovoltaic filament’s functionality comes from a three-part system embedded in the dissolvable Timeplast polymer matrix. This formulation uses zinc oxide nanoparticles, Nitrogen doped carbon nanotubes, and ultra-fine graphite powder for crucial conductivity.
Each component plays a unique role in enabling a photovoltaic response:
Zinc Oxide Nanoparticles (ZnO): In place of TiO₂, the filament now incorporates high-purity ZnO nanoparticles (semiconductor grade). ZnO is an n-type semiconductor with a wide band gap (~3.37 eV), similar to TiO₂, which means it strongly absorbs ultraviolet light and can generate charge carriers under illumination. ZnO is widely used in electronics and solar cells as a UV-sensitive semiconductor. By dispersing nano-scale ZnO throughout the filament, the material can harness UV light from sunlight or other sources to excite electrons. These excited electrons are the basis of the photovoltaic effect in the filament – ZnO essentially acts as the light-absorbing, electricity-generating medium. The ZnO particles in TimeMass Photovoltaic are uniformly distributed in the polymer, maximizing light exposure and electron generation across the printed object.
Specialized Carbon Nanotubes: A specific formulation of carbon nanotubes (CNTs) These are extremely thin conductive fibers (on the order of tens of nanometers in diameter, with lengths of several microns). For this filament we are using multi-walled carbon nanotubes (MWCNTs) with high purity. Their role is to form conductive pathways and enhance charge separation. Carbon nanotubes have exceptional electrical conductivity and a very high aspect ratio, meaning they can connect the microscopic domains of ZnO within the filament like wiring. In fact, studies show that adding CNTs to ZnO composites greatly increases the electrical conductivity and improves charge transport. In our filament, the specific CNT formulation creates a nano-network that collects the electrons excited by ZnO and shuttles them through the material to produce an electric current. Additionally, the nanotubes broaden the light response of the filament – CNTs are black-colored and absorb a broad spectrum of light (visible and IR), complementing ZnO’s UV absorption. This synergy means a printed object can generate a photocurrent under sunlight more efficiently, as the CNTs help harvest and transport charges that ZnO produces under UV illumination.
Graphite Powder: The third component is ultra-fine graphite powder (3000-mesh, with particle size on the order of ~5–40 microns) Graphite is a conductive form of carbon, and in this formulation it serves multiple purposes. First, it provides a conductive matrix that connects the entire structure electrically – essentially forming a web of microscopic carbon that electrons can flow through easily. The 3000-mesh graphite, being extremely fine, disperses thoroughly and ensures that even if the nanotubes are somewhat sparse, the graphite particles fill any gaps to maintain conductivity. Second, graphite adds bulk electrical conductivity and structural stability to the filament. It helps in collecting charge from the nanotubes and ZnO and funneling it through the printed object to whatever electrodes or contacts are used to tap the power. In summary, graphite works as the “electrode” material distributed within the filament, giving the composite enough conductivity for a measurable photovoltaic response. (Graphite is also chemically stable and not photoactive, so it remains inert while providing electrical pathways.)
Water-Soluble Polymer Matrix: All the above additives are embedded in Timeplast’s proprietary TimeMass polymer matrix, which is a polymerized alcohol-based material that is water-soluble. This matrix holds the ZnO, CNTs, and graphite together in a flexible filament form that can be fed into standard FDM/FFF 3D printers. Once printed and dried, the object is solid and the additives are locked in place. However, when the printed object is later exposed to water, the polymer will dissolve, releasing the embedded ZnO nanoparticles, nanotubes, and graphite powder into the water. The water-soluble binder is designed to dissolve completely without leaving any persistent plastic residue – TimeMass materials dissolve at the molecular level, leaving no microplastic fragments behind. This is a key environmental feature: unlike conventional plastics, the base material won’t linger as pollution. (Only the inorganic additives would remain as a sediment, which we address in the safety section.)
How It Works – Photovoltaic Effect: When you shine a light (especially sunlight or UV-rich light) on a print made with TimeMass Photovoltaic filament, the ZnO nanoparticles absorb UV photons and get excited, generating electron-hole pairs (much like the semiconductor layer of a solar cell). The carbon nanotubes and graphite then immediately do their job by conducting these electrons through the material. If electrodes or wires are connected to the printed object (for example, at different points of a print), a small photocurrent can be measured – essentially the print becomes a tiny solar panel. While the power output is modest (as one would expect given the small particle size and experimental nature of the material), it is enough to demonstrate a photovoltaic response. This breakthrough opens up imaginative possibilities: you could 3D-print devices or surfaces that generate electricity under light, all with a filament that later can dissolve away when its purpose is done. The collaboration between Timeplast and String Cubed Inc. has optimized the ratios of ZnO, CNTs, and graphite to maximize this effect.
Moreover, the filament benefits from ZnO’s comparable band-gap and photoactivity while leveraging possibly different charge dynamics or availability. (ZnO often has a higher electron mobility and similar exciton energy to TiO₂, and it can be produced in nano form easily)
Overall, the tri-component system – ZnO for light absorption, CNT/graphite for conduction – works in concert to yield a functional photovoltaic material in a standard FDM filament format.
-
Click here to access our new and improved TimeMass GPT Assistant. Just tell it your printer model and the TimeMass filament you're using—it will instantly recommend the exact parameters you need to start printing successfully.
1. Introduction
These parameters are designed to help avoid printing issues; however, temperatures and speed timings can be adjusted based on your specific goals. For example, if you prefer a less rigid result, we recommend using a lower temperature. This section outlines a complete slicing and printing profile for TimeMass Photovoltaic, tailored for printers with a 0.8 mm nozzle. If the print is not being successful, please lower the nozzle temperature by 10°C and start over until an optimal print is achieved. Please check the manual for printing parameters.2. Temperature Settings
2.aNozzle Temperature: 230°C — Optimal for flowability while avoiding decomposition (which begins around 250°C).
2.bBed Temperature: 75°C — Ensures strong first-layer adhesion and prevents moisture bubbling.
2.cNozzle Temperature Range: 230–245°C — Timeplast melts around 165°C but prints best at 240°C for precise viscosity control.3. Cooling Settings
3.aNo Cooling for First Layers: 3 layers — Prevents shrinkage due to rapid cooling of moisture-rich filament.
3.bFan Minimum Speed: 0% for the first 100 seconds — Allows heat retention during early layers.
3.cFan Maximum Speed: 15% starting at 8 seconds — Avoids overcooling that can lead to warping.
3.dKeep Fan Always On: OFF — Allows vapor to escape and avoids internal fogging.
3.eSlow Down for Cooling: ON — Improves surface finish with controlled cooling.
3.fForce Cooling for Overhangs: OFF — Overcooling can deform bridges in Timeplast.
3.gFan for Overhangs: 15% — Only for essential cooling in complex areas.
3.hPre-Start Fan Time: 2 seconds — Minimizes pressure differential during the first layer.4. Volumetric Flow
4.aMax Volumetric Speed: 12 mm³/s — Based on a melt flow index of ~15 g/10min, allows high-speed printing.
4.bRamming Speed: 3 mm³/s — Prevents bubbles or popping from pressure spikes.5. Retraction and Flow
5.aRetraction Distance: 0.4 mm — Minimal retraction required for soft filaments to avoid stringing.
5.bRetraction Speed: 15 mm/s — Slow enough to avoid pulling molten plastic.
5.cPressure Advance: 0.05 — Compensates for nozzle lag at high flow rates.
5.dFlow Ratio: 92% — Slight under-extrusion avoids swelling and surface artifacts.6. Precision Settings
6.aGap Closing Radius: 0.1 mm — Tolerant of gaps in thicker walls.
6.bArc Fitting: ON — Reduces G-code size and smooths curve transitions.
6.cElephant Foot Compensation: 0.1 mm — Offsets squishing in the first layer caused by large bead sizes.7. Walls and Shells
7.aWall Loops: 2 — Minimum for strength when using a 0.8 mm nozzle.
7.bDetect Thin Walls: ON — Ensures tight geometries aren’t skipped.
7.cTop/Bottom Shell Layers: 3 — Provides good coverage; increase if watertightness is needed.
7.dTop/Bottom Thickness: 1.2 mm — Equals 1.5x the nozzle size for solid strength.
7.eTop/Bottom Pattern: Monotonic — Distributes tension evenly and improves surface finish.8. Geometry and Movement
8.aWall Order: Inner before Outer — Creates cleaner outer surfaces.
8.bInfill First: OFF — Maintains precise outer dimensions.
8.cSmooth Speed Transition: ON — Prevents ringing caused by abrupt speed changes.
8.dSmooth Coefficient: 80 — Ideal damping for soft materials.
8.eAvoid Crossing Wall: ON — Minimizes stringing across part walls.
8.fMax Detour for Crossing: 10 mm or 5% — Balances time with print cleanliness.9. Layer and Width Settings
9.aLayer Height: 0.3 mm — Optimal for strength and resolution using a 0.8 mm nozzle.
9.bInitial Layer Height: 0.35 mm — Slightly higher to improve adhesion.
9.cLine Widths (all): 0.8 mm — Matches nozzle diameter for consistent extrusion.10. Seam Settings
10.aSeam Position: Aligned or Back — Use aligned for mechanical consistency, back for visual appeal.
10.bSmart Scarf Seam: ON — Automatically adjusts seam location to reduce visual impact.
10.cSeam Angle: 155° — Standard seam angle for clean transitions.
10.dSeam Steps: 10 — Smooths seam path and improves visual finish.11. Infill Settings
11.aWall/Infill Overlap: 10% — Prevents infill from deforming soft exterior walls.
11.bInfill Combination: ON — Consolidates paths for efficiency.
11.cDetect Floating Shells: ON — Ensures unsupported vertical structures are printed reliably.
11.dSparse Infill Density: 20–25% — Balanced rigidity vs. material use.
11.eSparse Pattern: Grid — Stable and efficient for flexible geometries.12. Speed Settings
12.aTravel: 160 mm/s — Fast but safe against backlash.
12.bInitial Layer: 15 mm/s — Prevents nozzle from skimming and ensures bed adhesion.
12.cOuter Wall: 60 mm/s — Controlled speed for surface quality.
12.dInner Wall: 90 mm/s — Slightly faster without compromising control.
12.eSmall Perimeter: 35 mm/s — Reduced speed for detailed geometry.
12.fTop Surface: 40 mm/s — Improves finish on topmost layers.
12.gInfill: 100–120 mm/s — Takes advantage of high flowability.13. Acceleration Settings
13.aNormal Print: 2000 mm/s² — Prevents ringing in soft filaments.
13.bTravel: 4000 mm/s² — Enables fast movement without harsh transitions.
13.cInitial Layer: 300 mm/s² — Gentle movement prevents lifting from the bed.
13.dOuter Wall: 1500 mm/s² — Improves outer surface clarity.
13.eInner Wall: 2000 mm/s² — Balanced for structural components.
13.fTop Surface: 1500 mm/s² — Ensures smooth detailing.14. Adhesion and Brims
14.aSkirt Loops: 2 — Helps prime nozzle and start cleanly.
14.bBrim Width: 6 mm — Helps hold soft materials down.
14.cBrim Gap: 0.15 mm — Allows for easy removal without tearing.15. Prime Tower and Flush Settings
15.aPrime Tower: ON — Purges moisture and early flow inconsistencies.
15.bTower Width: 40 mm — Prevents collapse due to heat.
15.cBrim Width (Tower): 4 mm — Adds stability to the purge base.
15.dFlush Into Support: ON — Discards unwanted early flow safely.16. G-Code Start Script
M900 K0.05 ; Pressure Advance M106 S0 ; Fan off G92 E0 G1 E15 F300 ; purge line G92 E0
17. Additional Notes
17.aDry filament at 155 F for 2 hours before use.
17.bStore with desiccant.
17.cKeep extruder door open to allow vapor to escape.
17.dAvoid long dwell times at high temperatures.If you need any other assistance, feel free to reach out to us anytime at timeplast@timeplast.com — we’ll be happy to help.
Sublimation
-
What if a material could transform, disappear, or reshape itself—on demand? TimeMass - Sublimation is a revolutionary microwave-sensitive filament that bypasses the liquid phase, shifting directly from solid to gas. Engineered with sublimation-prone compounds and a high water content, this material responds aggressively to microwave frequencies, enabling controlled vaporization, collapsible structures, and reactive mechanical components.
A New Dimension of Design & Experimentation
- Microwave-Triggered Disappearance – Watch as structures vanish in seconds when exposed to specific heat conditions, leaving behind no messy residue.
- Precision-Controlled Void Creation – Design temporary supports, chambers, or scaffolds that remove themselves at the perfect moment.
- Reactive, Self-Collapsing Mechanisms – Develop pistons, pressure-release valves, or dissolving seals that respond to thermal input.
- Accelerated Future Simulation – Simulate how objects will deform over centuries under exposure to sunlight, geological radiation, or heat by rapidly accelerating their decay process. Researchers, material scientists, and engineers can now study long-term environmental effects in real time—compressing 1,000 years of exposure into minutes.With TimeMass - Sublimation, traditional design limits evaporate—literally.
Where Science Meets Innovation
- Self-Disassembling Prototypes – Create temporary support structures that remove themselves without manual post-processing.
- Smart Manufacturing & Tooling – Use vaporization to clear out internal cavities in 3D-printed molds, forming complex hollow geometries.
- Special Effects & Theatrical Props – Design disappearing objects for immersive experiences, magic tricks, or experimental art installations.
- Transient Mechanical Components – Build heat-activated pistons or self-erasing message systems, perfect for experimental engineering.
- Environmental Aging Simulation – Speed up centuries of degradation to predict how materials, structures, or artifacts will react to extreme environments over time.
- Zero-Waste Printing – No need for dissolving chemicals or breakaway supports—just heat and gone.Engineered for the Future of Fabrication
By harnessing microwave frequencies as an activation trigger, TimeMass - Sublimation unlocks a new class of transient, responsive, and self-removing designs. Whether you're an innovator, engineer, or artist, this filament disrupts conventional 3D printing, replacing permanence with precision-controlled impermanence.
For those who dream of materials that change, disappear, and evolve—TimeMass - Sublimation brings the future into focus, then lets it fade away.
Evolving sculptures, where sections vanish upon activation.
Microwave-driven actuators for experimental soft robotics.
Disappearing piston chambers that create vacuum-driven motion.
Vaporization-based energy release designs.
-
Click here to access our new and improved TimeMass GPT Assistant. Just tell it your printer model and the TimeMass filament you're using—it will instantly recommend the exact parameters you need to start printing successfully.
1. Introduction
These parameters are designed to help avoid printing issues; however, temperatures and speed timings can be adjusted based on your specific goals. For example, if you prefer a less rigid result, we recommend using a lower temperature. This section outlines a complete slicing and printing profile for TimeMass Sublimation, tailored for printers with a 0.8 mm nozzle. If the print is not being successful, please lower the nozzle temperature by 10°C and start over until an optimal print is achieved. Please check the manual for printing parameters.2. Temperature Settings
2.aNozzle Temperature: 230°C — Optimal for flowability while avoiding decomposition (which begins around 250°C).
2.bBed Temperature: 75°C — Ensures strong first-layer adhesion and prevents moisture bubbling.
2.cNozzle Temperature Range: 230–245°C — Timeplast melts around 165°C but prints best at 240°C for precise viscosity control.3. Cooling Settings
3.aNo Cooling for First Layers: 3 layers — Prevents shrinkage due to rapid cooling of moisture-rich filament.
3.bFan Minimum Speed: 0% for the first 100 seconds — Allows heat retention during early layers.
3.cFan Maximum Speed: 15% starting at 8 seconds — Avoids overcooling that can lead to warping.
3.dKeep Fan Always On: OFF — Allows vapor to escape and avoids internal fogging.
3.eSlow Down for Cooling: ON — Improves surface finish with controlled cooling.
3.fForce Cooling for Overhangs: OFF — Overcooling can deform bridges in Timeplast.
3.gFan for Overhangs: 15% — Only for essential cooling in complex areas.
3.hPre-Start Fan Time: 2 seconds — Minimizes pressure differential during the first layer.4. Volumetric Flow
4.aMax Volumetric Speed: 12 mm³/s — Based on a melt flow index of ~15 g/10min, allows high-speed printing.
4.bRamming Speed: 3 mm³/s — Prevents bubbles or popping from pressure spikes.5. Retraction and Flow
5.aRetraction Distance: 0.4 mm — Minimal retraction required for soft filaments to avoid stringing.
5.bRetraction Speed: 15 mm/s — Slow enough to avoid pulling molten plastic.
5.cPressure Advance: 0.05 — Compensates for nozzle lag at high flow rates.
5.dFlow Ratio: 92% — Slight under-extrusion avoids swelling and surface artifacts.6. Precision Settings
6.aGap Closing Radius: 0.1 mm — Tolerant of gaps in thicker walls.
6.bArc Fitting: ON — Reduces G-code size and smooths curve transitions.
6.cElephant Foot Compensation: 0.1 mm — Offsets squishing in the first layer caused by large bead sizes.7. Walls and Shells
7.aWall Loops: 2 — Minimum for strength when using a 0.8 mm nozzle.
7.bDetect Thin Walls: ON — Ensures tight geometries aren’t skipped.
7.cTop/Bottom Shell Layers: 3 — Provides good coverage; increase if watertightness is needed.
7.dTop/Bottom Thickness: 1.2 mm — Equals 1.5x the nozzle size for solid strength.
7.eTop/Bottom Pattern: Monotonic — Distributes tension evenly and improves surface finish.8. Geometry and Movement
8.aWall Order: Inner before Outer — Creates cleaner outer surfaces.
8.bInfill First: OFF — Maintains precise outer dimensions.
8.cSmooth Speed Transition: ON — Prevents ringing caused by abrupt speed changes.
8.dSmooth Coefficient: 80 — Ideal damping for soft materials.
8.eAvoid Crossing Wall: ON — Minimizes stringing across part walls.
8.fMax Detour for Crossing: 10 mm or 5% — Balances time with print cleanliness.9. Layer and Width Settings
9.aLayer Height: 0.3 mm — Optimal for strength and resolution using a 0.8 mm nozzle.
9.bInitial Layer Height: 0.35 mm — Slightly higher to improve adhesion.
9.cLine Widths (all): 0.8 mm — Matches nozzle diameter for consistent extrusion.10. Seam Settings
10.aSeam Position: Aligned or Back — Use aligned for mechanical consistency, back for visual appeal.
10.bSmart Scarf Seam: ON — Automatically adjusts seam location to reduce visual impact.
10.cSeam Angle: 155° — Standard seam angle for clean transitions.
10.dSeam Steps: 10 — Smooths seam path and improves visual finish.11. Infill Settings
11.aWall/Infill Overlap: 10% — Prevents infill from deforming soft exterior walls.
11.bInfill Combination: ON — Consolidates paths for efficiency.
11.cDetect Floating Shells: ON — Ensures unsupported vertical structures are printed reliably.
11.dSparse Infill Density: 20–25% — Balanced rigidity vs. material use.
11.eSparse Pattern: Grid — Stable and efficient for flexible geometries.12. Speed Settings
12.aTravel: 160 mm/s — Fast but safe against backlash.
12.bInitial Layer: 15 mm/s — Prevents nozzle from skimming and ensures bed adhesion.
12.cOuter Wall: 60 mm/s — Controlled speed for surface quality.
12.dInner Wall: 90 mm/s — Slightly faster without compromising control.
12.eSmall Perimeter: 35 mm/s — Reduced speed for detailed geometry.
12.fTop Surface: 40 mm/s — Improves finish on topmost layers.
12.gInfill: 100–120 mm/s — Takes advantage of high flowability.13. Acceleration Settings
13.aNormal Print: 2000 mm/s² — Prevents ringing in soft filaments.
13.bTravel: 4000 mm/s² — Enables fast movement without harsh transitions.
13.cInitial Layer: 300 mm/s² — Gentle movement prevents lifting from the bed.
13.dOuter Wall: 1500 mm/s² — Improves outer surface clarity.
13.eInner Wall: 2000 mm/s² — Balanced for structural components.
13.fTop Surface: 1500 mm/s² — Ensures smooth detailing.14. Adhesion and Brims
14.aSkirt Loops: 2 — Helps prime nozzle and start cleanly.
14.bBrim Width: 6 mm — Helps hold soft materials down.
14.cBrim Gap: 0.15 mm — Allows for easy removal without tearing.15. Prime Tower and Flush Settings
15.aPrime Tower: ON — Purges moisture and early flow inconsistencies.
15.bTower Width: 40 mm — Prevents collapse due to heat.
15.cBrim Width (Tower): 4 mm — Adds stability to the purge base.
15.dFlush Into Support: ON — Discards unwanted early flow safely.16. G-Code Start Script
M900 K0.05 ; Pressure Advance M106 S0 ; Fan off G92 E0 G1 E15 F300 ; purge line G92 E0
17. Additional Notes
17.aDry filament at 155 F for 2 hours before use.
17.bStore with desiccant.
17.cKeep extruder door open to allow vapor to escape.
17.dAvoid long dwell times at high temperatures.If you need any other assistance, feel free to reach out to us anytime at timeplast@timeplast.com — we’ll be happy to help.
Fiber
-
-
Click here to access our new and improved TimeMass GPT Assistant. Just tell it your printer model and the TimeMass filament you're using—it will instantly recommend the exact parameters you need to start printing successfully.
1. Introduction
These parameters are designed to help avoid printing issues; however, temperatures and speed timings can be adjusted based on your specific goals. For example, if you prefer a less rigid result, we recommend using a lower temperature. This section outlines a complete slicing and printing profile for TimeMass Sublimation, tailored for printers with a 0.8 mm nozzle. If the print is not being successful, please lower the nozzle temperature by 10°C and start over until an optimal print is achieved. Please check the manual for printing parameters.2. Temperature Settings
2.aNozzle Temperature: 230°C — Optimal for flowability while avoiding decomposition (which begins around 250°C).
2.bBed Temperature: 75°C — Ensures strong first-layer adhesion and prevents moisture bubbling.
2.cNozzle Temperature Range: 230–245°C — Timeplast melts around 165°C but prints best at 240°C for precise viscosity control.3. Cooling Settings
3.aNo Cooling for First Layers: 3 layers — Prevents shrinkage due to rapid cooling of moisture-rich filament.
3.bFan Minimum Speed: 0% for the first 100 seconds — Allows heat retention during early layers.
3.cFan Maximum Speed: 15% starting at 8 seconds — Avoids overcooling that can lead to warping.
3.dKeep Fan Always On: OFF — Allows vapor to escape and avoids internal fogging.
3.eSlow Down for Cooling: ON — Improves surface finish with controlled cooling.
3.fForce Cooling for Overhangs: OFF — Overcooling can deform bridges in Timeplast.
3.gFan for Overhangs: 15% — Only for essential cooling in complex areas.
3.hPre-Start Fan Time: 2 seconds — Minimizes pressure differential during the first layer.4. Volumetric Flow
4.aMax Volumetric Speed: 12 mm³/s — Based on a melt flow index of ~15 g/10min, allows high-speed printing.
4.bRamming Speed: 3 mm³/s — Prevents bubbles or popping from pressure spikes.5. Retraction and Flow
5.aRetraction Distance: 0.4 mm — Minimal retraction required for soft filaments to avoid stringing.
5.bRetraction Speed: 15 mm/s — Slow enough to avoid pulling molten plastic.
5.cPressure Advance: 0.05 — Compensates for nozzle lag at high flow rates.
5.dFlow Ratio: 92% — Slight under-extrusion avoids swelling and surface artifacts.6. Precision Settings
6.aGap Closing Radius: 0.1 mm — Tolerant of gaps in thicker walls.
6.bArc Fitting: ON — Reduces G-code size and smooths curve transitions.
6.cElephant Foot Compensation: 0.1 mm — Offsets squishing in the first layer caused by large bead sizes.7. Walls and Shells
7.aWall Loops: 2 — Minimum for strength when using a 0.8 mm nozzle.
7.bDetect Thin Walls: ON — Ensures tight geometries aren’t skipped.
7.cTop/Bottom Shell Layers: 3 — Provides good coverage; increase if watertightness is needed.
7.dTop/Bottom Thickness: 1.2 mm — Equals 1.5x the nozzle size for solid strength.
7.eTop/Bottom Pattern: Monotonic — Distributes tension evenly and improves surface finish.8. Geometry and Movement
8.aWall Order: Inner before Outer — Creates cleaner outer surfaces.
8.bInfill First: OFF — Maintains precise outer dimensions.
8.cSmooth Speed Transition: ON — Prevents ringing caused by abrupt speed changes.
8.dSmooth Coefficient: 80 — Ideal damping for soft materials.
8.eAvoid Crossing Wall: ON — Minimizes stringing across part walls.
8.fMax Detour for Crossing: 10 mm or 5% — Balances time with print cleanliness.9. Layer and Width Settings
9.aLayer Height: 0.3 mm — Optimal for strength and resolution using a 0.8 mm nozzle.
9.bInitial Layer Height: 0.35 mm — Slightly higher to improve adhesion.
9.cLine Widths (all): 0.8 mm — Matches nozzle diameter for consistent extrusion.10. Seam Settings
10.aSeam Position: Aligned or Back — Use aligned for mechanical consistency, back for visual appeal.
10.bSmart Scarf Seam: ON — Automatically adjusts seam location to reduce visual impact.
10.cSeam Angle: 155° — Standard seam angle for clean transitions.
10.dSeam Steps: 10 — Smooths seam path and improves visual finish.11. Infill Settings
11.aWall/Infill Overlap: 10% — Prevents infill from deforming soft exterior walls.
11.bInfill Combination: ON — Consolidates paths for efficiency.
11.cDetect Floating Shells: ON — Ensures unsupported vertical structures are printed reliably.
11.dSparse Infill Density: 20–25% — Balanced rigidity vs. material use.
11.eSparse Pattern: Grid — Stable and efficient for flexible geometries.12. Speed Settings
12.aTravel: 160 mm/s — Fast but safe against backlash.
12.bInitial Layer: 15 mm/s — Prevents nozzle from skimming and ensures bed adhesion.
12.cOuter Wall: 60 mm/s — Controlled speed for surface quality.
12.dInner Wall: 90 mm/s — Slightly faster without compromising control.
12.eSmall Perimeter: 35 mm/s — Reduced speed for detailed geometry.
12.fTop Surface: 40 mm/s — Improves finish on topmost layers.
12.gInfill: 100–120 mm/s — Takes advantage of high flowability.13. Acceleration Settings
13.aNormal Print: 2000 mm/s² — Prevents ringing in soft filaments.
13.bTravel: 4000 mm/s² — Enables fast movement without harsh transitions.
13.cInitial Layer: 300 mm/s² — Gentle movement prevents lifting from the bed.
13.dOuter Wall: 1500 mm/s² — Improves outer surface clarity.
13.eInner Wall: 2000 mm/s² — Balanced for structural components.
13.fTop Surface: 1500 mm/s² — Ensures smooth detailing.14. Adhesion and Brims
14.aSkirt Loops: 2 — Helps prime nozzle and start cleanly.
14.bBrim Width: 6 mm — Helps hold soft materials down.
14.cBrim Gap: 0.15 mm — Allows for easy removal without tearing.15. Prime Tower and Flush Settings
15.aPrime Tower: ON — Purges moisture and early flow inconsistencies.
15.bTower Width: 40 mm — Prevents collapse due to heat.
15.cBrim Width (Tower): 4 mm — Adds stability to the purge base.
15.dFlush Into Support: ON — Discards unwanted early flow safely.16. G-Code Start Script
M900 K0.05 ; Pressure Advance M106 S0 ; Fan off G92 E0 G1 E15 F300 ; purge line G92 E0
17. Additional Notes
17.aDry filament at 155 F for 2 hours before use.
17.bStore with desiccant.
17.cKeep extruder door open to allow vapor to escape.
17.dAvoid long dwell times at high temperatures.If you need any other assistance, feel free to reach out to us anytime at timeplast@timeplast.com — we’ll be happy to help.
Microwave

-
What if your 3D print could change shape—expand, twist, collapse—without motors, wires, or gears? Just pure microwave energy?
TimeMass Microwave is the first-ever filament that transforms under electromagnetic radiation. No mechanics. Just heat, vapor, and smart geometry doing all the work.
Most thermoplastics ignore microwaves. Ours eats them for breakfast.
It’s made with polar molecular groups that absorb microwave frequencies (yeah, like your food does). Once activated, it heats up from the inside, triggering built-in shape changes—from slow bends to sudden inflations.
How it works:
Microwave activation – UHF radiation excites the polar molecules. Boom: internal heat.
Microfluidic expansion – embedded water vaporizes, causing controlled pressure changes.
Programmable geometry – smart design means you can decide how it transforms.
What can you actually do with this?
Morphing sculptures – kinetic art that moves with invisible waves.
Self-expanding structures – think packaging, architecture, deployable tech.
Soft robotics & smart actuators – no motors needed, just energy.
Interactive displays – things that open, bend, or animate on command.
Space tech – lightweight, compact prints that “deploy” mid-orbit.
Need Ideas? Here You Go:
Transforming sculptures and kinetic art piecesthat change under microwave exposure.
Self-expanding objects, such as soft robotic actuators or deployable structures.
Educational experiments in thermodynamics and microwave interaction physics.
Custom food-safe molds that expand slightly when heated to create precise shaping.
Biomimetic designs, inspired by nature’s shape-shifting structures.
-
Click here to access our new and improved TimeMass GPT Assistant. Just tell it your printer model and the TimeMass filament you're using—it will instantly recommend the exact parameters you need to start printing successfully.
1. Introduction
These parameters are designed to help avoid printing issues; however, temperatures and speed timings can be adjusted based on your specific goals. For example, if you prefer a less rigid result, we recommend using a lower temperature. This section outlines a complete slicing and printing profile for TimeMass, tailored for printers with a 0.8 mm nozzle. If the print is not being successful, please lower the nozzle temperature by 10°C and start over until an optimal print is achieved. Please check the manual for printing parameters.2. Temperature Settings
2.aNozzle Temperature: 230°C — Optimal for flowability while avoiding decomposition (which begins around 250°C).
2.bBed Temperature: 75°C — Ensures strong first-layer adhesion and prevents moisture bubbling.
2.cNozzle Temperature Range: 230–245°C — Timeplast melts around 165°C but prints best at 240°C for precise viscosity control.3. Cooling Settings
3.aNo Cooling for First Layers: 3 layers — Prevents shrinkage due to rapid cooling of moisture-rich filament.
3.bFan Minimum Speed: 0% for the first 100 seconds — Allows heat retention during early layers.
3.cFan Maximum Speed: 15% starting at 8 seconds — Avoids overcooling that can lead to warping.
3.dKeep Fan Always On: OFF — Allows vapor to escape and avoids internal fogging.
3.eSlow Down for Cooling: ON — Improves surface finish with controlled cooling.
3.fForce Cooling for Overhangs: OFF — Overcooling can deform bridges in Timeplast.
3.gFan for Overhangs: 15% — Only for essential cooling in complex areas.
3.hPre-Start Fan Time: 2 seconds — Minimizes pressure differential during the first layer.4. Volumetric Flow
4.aMax Volumetric Speed: 12 mm³/s — Based on a melt flow index of ~15 g/10min, allows high-speed printing.
4.bRamming Speed: 3 mm³/s — Prevents bubbles or popping from pressure spikes.5. Retraction and Flow
5.aRetraction Distance: 0.4 mm — Minimal retraction required for soft filaments to avoid stringing.
5.bRetraction Speed: 15 mm/s — Slow enough to avoid pulling molten plastic.
5.cPressure Advance: 0.05 — Compensates for nozzle lag at high flow rates.
5.dFlow Ratio: 92% — Slight under-extrusion avoids swelling and surface artifacts.6. Precision Settings
6.aGap Closing Radius: 0.1 mm — Tolerant of gaps in thicker walls.
6.bArc Fitting: ON — Reduces G-code size and smooths curve transitions.
6.cElephant Foot Compensation: 0.1 mm — Offsets squishing in the first layer caused by large bead sizes.7. Walls and Shells
7.aWall Loops: 2 — Minimum for strength when using a 0.8 mm nozzle.
7.bDetect Thin Walls: ON — Ensures tight geometries aren’t skipped.
7.cTop/Bottom Shell Layers: 3 — Provides good coverage; increase if watertightness is needed.
7.dTop/Bottom Thickness: 1.2 mm — Equals 1.5x the nozzle size for solid strength.
7.eTop/Bottom Pattern: Monotonic — Distributes tension evenly and improves surface finish.8. Geometry and Movement
8.aWall Order: Inner before Outer — Creates cleaner outer surfaces.
8.bInfill First: OFF — Maintains precise outer dimensions.
8.cSmooth Speed Transition: ON — Prevents ringing caused by abrupt speed changes.
8.dSmooth Coefficient: 80 — Ideal damping for soft materials.
8.eAvoid Crossing Wall: ON — Minimizes stringing across part walls.
8.fMax Detour for Crossing: 10 mm or 5% — Balances time with print cleanliness.9. Layer and Width Settings
9.aLayer Height: 0.3 mm — Optimal for strength and resolution using a 0.8 mm nozzle.
9.bInitial Layer Height: 0.35 mm — Slightly higher to improve adhesion.
9.cLine Widths (all): 0.8 mm — Matches nozzle diameter for consistent extrusion.10. Seam Settings
10.aSeam Position: Aligned or Back — Use aligned for mechanical consistency, back for visual appeal.
10.bSmart Scarf Seam: ON — Automatically adjusts seam location to reduce visual impact.
10.cSeam Angle: 155° — Standard seam angle for clean transitions.
10.dSeam Steps: 10 — Smooths seam path and improves visual finish.11. Infill Settings
11.aWall/Infill Overlap: 10% — Prevents infill from deforming soft exterior walls.
11.bInfill Combination: ON — Consolidates paths for efficiency.
11.cDetect Floating Shells: ON — Ensures unsupported vertical structures are printed reliably.
11.dSparse Infill Density: 20–25% — Balanced rigidity vs. material use.
11.eSparse Pattern: Grid — Stable and efficient for flexible geometries.12. Speed Settings
12.aTravel: 160 mm/s — Fast but safe against backlash.
12.bInitial Layer: 15 mm/s — Prevents nozzle from skimming and ensures bed adhesion.
12.cOuter Wall: 60 mm/s — Controlled speed for surface quality.
12.dInner Wall: 90 mm/s — Slightly faster without compromising control.
12.eSmall Perimeter: 35 mm/s — Reduced speed for detailed geometry.
12.fTop Surface: 40 mm/s — Improves finish on topmost layers.
12.gInfill: 100–120 mm/s — Takes advantage of high flowability.13. Acceleration Settings
13.aNormal Print: 2000 mm/s² — Prevents ringing in soft filaments.
13.bTravel: 4000 mm/s² — Enables fast movement without harsh transitions.
13.cInitial Layer: 300 mm/s² — Gentle movement prevents lifting from the bed.
13.dOuter Wall: 1500 mm/s² — Improves outer surface clarity.
13.eInner Wall: 2000 mm/s² — Balanced for structural components.
13.fTop Surface: 1500 mm/s² — Ensures smooth detailing.14. Adhesion and Brims
14.aSkirt Loops: 2 — Helps prime nozzle and start cleanly.
14.bBrim Width: 6 mm — Helps hold soft materials down.
14.cBrim Gap: 0.15 mm — Allows for easy removal without tearing.15. Prime Tower and Flush Settings
15.aPrime Tower: ON — Purges moisture and early flow inconsistencies.
15.bTower Width: 40 mm — Prevents collapse due to heat.
15.cBrim Width (Tower): 4 mm — Adds stability to the purge base.
15.dFlush Into Support: ON — Discards unwanted early flow safely.16. G-Code Start Script
M900 K0.05 ; Pressure Advance M106 S0 ; Fan off G92 E0 G1 E15 F300 ; purge line G92 E0
17. Additional Notes
17.aDry filament at 155 F for 2 hours before use.
17.bStore with desiccant.
17.cKeep extruder door open to allow vapor to escape.
17.dAvoid long dwell times at high temperatures.If you need any other assistance, feel free to reach out to us anytime at timeplast@timeplast.com — we’ll be happy to help.
Carbon Nanotube
-
TimeMass Carbon Nanotube Filament is an innovative 3D printing material that combines Timeplast’s water-soluble polymer matrix with a 1% (by mass) infusion of carbon nanotubes (CNTs). The base polymer is a time-programmable, dissolvable plastic made from environmentally benign ingredients. The addition of multi-walled carbon nanotubes (extremely thin, conductive carbon fibers) endows the filament with enhanced mechanical strength and electrical functionality, while still retaining the full water-solubility of the matrix. The result is a composite FDM filament that not only is compatible with standard fused deposition modeling processes, but also introduces novel 4D-printing behavior (object transformation or degradation over time) and the multifunctional benefits of nanomaterials.
Applications Across Sectors
Because of its unprecedented combination of properties (water-solubility, CNT-enhanced strength/conductivity, and FDM compatibility), the TimeMass Carbon Nanotube filament opens up a vast array of applications. Researchers and innovators in many fields can leverage this filament for novel solutions. Below is an overview of possible applications across various sectors, demonstrating the filament’s versatility:
Electronics & Smart Devices: The CNT-infused filament allows for 3D-printed electronic components that can be either permanent or transient. For example, one can print conductive traces, interconnects, or even simple circuits directly into a 3D object. These printed electronics could function as sensors (e.g. a strain gauge or a touch sensor printed onto a device housing) or as EMI shielding inside enclosures. After use, the circuits could be dissolved to securely destroy them or to recycle the base material. The filament’s water-soluble nature is ideal for making temporary electronics such as short-lifespan IoT sensors or dissolvable RFID tags and security seals . Imagine a smart label on a package that transmits data and then dissolves away with water – leaving no electronic waste. Additionally, embedded sensors in critical structures can be printed (to monitor stress, humidity, etc.) and later washed out when the product is retired, avoiding hazardous e-waste. The percolative network of CNTs in the filament provides the electrical pathways needed for these applications , essentially enabling structural electronics (objects that are both load-bearing and circuitry) and printed sensors in one step. This could spur advances in wearable electronics (e.g. a dissolvable health monitor patch), environmental sensors, or disposable diagnostic devices.
Mechanical & Structural Components: In the realm of engineering and construction, this filament can create parts that are strong yet sacrificial. One application is printing temporary support structures or molds. For instance, complex scaffolds for construction or manufacturing can be printed to support assembly or serve as molds for casting, and later simply washed away with water . The added CNTs mean these scaffolds are stronger and stiffer than typical PVA supports, allowing them to bear greater loads or span larger gaps. They can even be designed to monitor loads: a CNT-doped scaffold could sense stress or deformation in a construction element during curing (by changes in its electrical resistance), then dissolve when the concrete or resin sets, leaving behind no inclusions. The filament can also produce lightweight structural parts (with the benefit of CNT reinforcement) for uses where the part only needs to last a certain time. For example, drones or aerospace components that degrade after deployment are conceivable . A small surveillance drone printed from this material could self-decompose in water or rain to avoid leaving technology behind. The CNT content would improve the drone’s stiffness and could serve as built-in antennas for communication, or as heaters for de-icing the drone’s wings, etc. Similarly, automotive parts like temporary jigs, fixtures, or prototypes can be printed and later dissolved to avoid clutter – the CNT reinforcement ensures these parts can withstand mechanical use during their short life. Even in permanent composites, the filament can be used as a sacrificial core: for instance, print an internal support for a hollow composite part, and once the composite cures, dissolve the core. The nanotubes might remain as a thin lining, possibly providing an antistatic interior or sensor network inside the composite structure.
Biomedical & Healthcare: (Research use of this filament in biomedical fields is particularly exciting, though subject to safety evaluations due to CNT presence.) The water-soluble base makes it akin to a biodegradable polymer, suggesting uses in temporary medical implants or supports that harmlessly dissolve in bodily fluids. For example, one could 3D print a dissolvable tissue scaffold for regenerative medicine – the scaffold could provide initial support for cell growth and also deliver carbon nanotubes which have been shown to promote cell differentiation (e.g., encouraging bone or nerve cell growth) . Studies have demonstrated that adding CNTs to 3D-printed bone scaffolds increases mechanical strength and supports bone tissue regeneration . Thus, a TimeMass CNT scaffold could help heal a bone defect and then dissolve, leaving only a percolated nanotube network that the body might gradually absorb or which remains to provide ongoing stimulus for bone growth. Another application is dissolvable electronics for health monitoring – for instance, a temporary pacemaker or diagnostic sensor that operates for a few weeks and then dissolves inside the body to avoid a second removal surgery. The CNTs would lend the device the needed electrical conductivity for sensing or stimulation, while the polymer would safely dissolve. Additionally, drug delivery devices could be printed: a capsule that slowly breaks down to release medication, where CNTs aid in guiding the capsule via magnetism (since CNTs can be functionalized or heated by electromagnetic fields) or even act as nano-heaters to trigger drug release on command. It’s worth noting that any biomedical use of CNTs must consider biocompatibility and clearance from the body – multi-walled CNTs are being researched for targeted treatments but can be toxic in uncontrolled forms . Therefore, current applications may be limited to external or research use (like lab-on-chip devices or dissolvable supports in surgeries that are washed out). Nonetheless, the filament’s ability to dissolve without residue and its CNT-induced functionality make it a strong candidate for future bioresorbable devices, temporary implants, and tissue engineering scaffolds that benefit from a conductive or mechanically enhanced framework.
Environmental & Water Treatment: Environmental engineering can benefit from this filament in two major ways: reducing pollution via temporary materials and active water treatment via nanomaterials. The dissolvable nature aligns with producing zero-waste products – for instance, single-use packaging or containers that can be thrown into water to dissolve after use . A medicine bottle or detergent pod made from this material could safely melt away in water, leaving only benign minerals, thus eliminating plastic waste. Now, with CNTs in the mix, these dissolvable items could also serve a function while they exist. For example, intelligent packaging could be made that monitors temperature or humidity (using the CNT’s sensing ability) to ensure food or pharmaceuticals remain in safe conditions, then the package dissolves for easy disposal. In water treatment, carbon nanotubes are highly prized for their ability to adsorb contaminants and act as nano-filters . One could print a filter structure with this filament, use it to capture pollutants from water, and then dissolve the structure to release the pollutants for analysis or safe disposal. Alternatively, the structure could dissolve slowly in water, releasing CNTs that scavenge pollutants in situ (though care must be taken since free CNTs might need recapture). Researchers have been developing CNT-based membranes and sponges that remove organic, inorganic, and biological toxins from water . The filament allows easy fabrication of such membranes in any shape – e.g., a 3D printed water filter that, after its life, dissolves so that no plastic frame remains (only the trapped contaminants and CNT sediment to dispose of). In agriculture, a smart water-release system could be envisioned: print a CNT-loaded reservoir that slowly dissolves to irrigate crops; the CNTs could detect soil nutrient levels or even deliver nanoscale nutrients (since this filament concept has parallels with Timeplast’s Plant Vitamin filament which releases minerals) . Summarily, the TimeMass CNT filament offers an eco-friendly platform for environmental devices – from marine uses like dissolvable sensor buoys (that prevent adding junk to oceans) to air and water quality sensors that degrade after their data is collected.
Aerospace & Defense: The aerospace sector often requires materials that are lightweight, strong, and sometimes transient or stealthy. The CNT-reinforced dissolvable filament could address niche needs here. For instance, the military or space explorers might use dissolving drones or reconnaissance devices – devices that perform their mission and then can be commanded to disintegrate (preventing enemy retrieval or avoiding space debris). The CNT content provides the strength for flight-worthy structures and also can serve as built-in circuitry (antennas, communication lines, or heating elements). CNTs’ ability to absorb electromagnetic waves (they are often used in radar-absorbing coatings) means a device printed from this filament could have a low radar signature, useful for stealth operations. Additionally, printed camouflage materials could slowly degrade in the environment to avoid leaving traces . In spacecraft applications, a dissolvable material could be used as a deployment mechanism: for example, a satellite could have printed covers or fasteners that dissolve when exposed to water or another solvent in orbit, freeing a solar panel or antenna – using CNTs to generate heat when a current is passed, to initiate the dissolution at a precise moment. The EMI shielding property from CNTs is valuable in aircraft and spacecraft to protect sensitive electronics; one could print a custom-fit, lightweight shield or housing that can be removed by dissolution after testing or send it up as a non-permanent fixture. The filament might also produce temporary fixtures/tools for aerospace manufacturing that need high strength (from CNTs) but easy removal (dissolve away without residue). This reduces labor in disassembling support structures from complex assemblies. Overall, the multi-functionality (mechanical + electrical) and “programmed mortality” of this material fit the cutting-edge demands of aerospace and defense projects.
Art, Fashion & Design: Artists and designers are constantly looking for new materials to realize creative visions. The TimeMass CNT filament offers a medium for creating art that evolves or vanishes over time, with an added twist of interactivity from the nanotubes. Interactive art installations could be made that respond to touch or heat (thanks to the filament’s conductivity) – for instance, a 3D-printed wall art that lights up or makes sound when you touch it, and perhaps after a month on display, it slowly dissolves as part of the artistic message about ephemerality. The material could be used to print sculptures that dissolve with rain, as a commentary on environmental issues, where CNTs provide structural integrity so the piece holds its form until the first rains come. In fashion, one could imagine avant-garde wearables that change or disintegrate: a dress or accessory that dissolves when sprayed with water, or conductive fibers in textiles for a one-time interactive performance. The CNTs could enable elements like heating (a garment that warms up when powered) or sensing (fabric that reacts to the wearer’s vitals), combined with the temporary nature – after the event, the garment can be washed away. Designers might also exploit the optical properties of CNTs (deep black coloration) to create stark visual contrasts or even incorporate light elements; for example, printing a lattice that guides light (in combination with a TimeMass Light filament) and using CNT sections to absorb light in patterns, producing dynamic visual effects. Additionally, educational design projects can use this filament to demonstrate concepts: students can print a structure and then watch it disappear in water, or create circuits that exist only briefly – blending science and art. The dissolvable, time-based aspect has already inspired artworks and installations , and adding CNTs only broadens the palette by introducing electrical and interactive capabilities.
Research & Development: Lastly, it should be emphasized that this filament is a researcher’s dream material for exploring new ideas. In materials science, having a dissolvable nanocomposite allows for experiments in self-assembling nanostructures (by printing and dissolving, as discussed), or studying the effect of nanotubes in complex print geometries. It can be used to prototype responsive systems – for example, printing a small actuator or muscle that bends with electrical current (CNTs will heat under current, possibly enabling thermal actuation of the polymer) and then dissolves as a failsafe. In microfluidics and lab-on-chip development, one could print sacrificial networks that leave behind microchannels lined with CNTs, which could function as electrodes or filtration elements. The filament also offers a platform for studying degradation behavior: by tweaking infill or print parameters, researchers can observe how water infiltrates and breaks down structures, which is valuable knowledge for designing time-dependent materials. Furthermore, combining this CNT filament with other TimeMass variants (like those containing nutrients, magnetic particles, or photovoltaic additives) can yield multi-functional 4D prints – for instance, a structure that not only dissolves but while intact can conduct electricity, deliver a chemical, and respond to light. The possibilities are expansive, and the filament invites cross-disciplinary R&D (from electronics to biotechnology to architecture) to push the boundaries of what additive manufacturing with smart materials can achieve.
The TimeMass Carbon Nanotube filament represents a convergence of 3D printing, nanotechnology, and sustainable design. By embedding carbon nanotubes into a water-soluble, time-programmable polymer, it unlocks capabilities ranging from printing dissolvable supports and electronics to creating stronger, smarter prototypes in virtually any industry. Carbon nanotubes serve as the versatile enhancer – boosting mechanical strength, imparting electrical and thermal functionality, and enabling new uses like printed sensors and conductive networks . Meanwhile, the dissolvable Timeplast matrix ensures that creations can be temporary by design, dissolving with no lasting plastic waste . This filament could find use in everything from eco-friendly packaging to aerospace missions, medical devices to interactive art, embodying the idea of “planned obsolescence” for good – where objects perform their duty and then gracefully disappear . All told, TimeMass CNT filament is a powerful tool for innovation in the 3D printing space, inviting makers and researchers to imagine applications where today’s print is tomorrow’s solution, and gone the next day – with only the benefits (or a sprinkle of nanotubes) left behind.
-
Click here to access our new and improved TimeMass GPT Assistant. Just tell it your printer model and the TimeMass filament you're using—it will instantly recommend the exact parameters you need to start printing successfully.
1. Introduction
These parameters are designed to help avoid printing issues; however, temperatures and speed timings can be adjusted based on your specific goals. For example, if you prefer a less rigid result, we recommend using a lower temperature. This section outlines a complete slicing and printing profile for TimeMass, tailored for printers with a 0.8 mm nozzle. If the print is not being successful, please lower the nozzle temperature by 10°C and start over until an optimal print is achieved. Please check the manual for printing parameters.2. Temperature Settings
2.aNozzle Temperature: 230°C — Optimal for flowability while avoiding decomposition (which begins around 250°C).
2.bBed Temperature: 75°C — Ensures strong first-layer adhesion and prevents moisture bubbling.
2.cNozzle Temperature Range: 230–245°C — Timeplast melts around 165°C but prints best at 240°C for precise viscosity control.3. Cooling Settings
3.aNo Cooling for First Layers: 3 layers — Prevents shrinkage due to rapid cooling of moisture-rich filament.
3.bFan Minimum Speed: 0% for the first 100 seconds — Allows heat retention during early layers.
3.cFan Maximum Speed: 15% starting at 8 seconds — Avoids overcooling that can lead to warping.
3.dKeep Fan Always On: OFF — Allows vapor to escape and avoids internal fogging.
3.eSlow Down for Cooling: ON — Improves surface finish with controlled cooling.
3.fForce Cooling for Overhangs: OFF — Overcooling can deform bridges in Timeplast.
3.gFan for Overhangs: 15% — Only for essential cooling in complex areas.
3.hPre-Start Fan Time: 2 seconds — Minimizes pressure differential during the first layer.4. Volumetric Flow
4.aMax Volumetric Speed: 12 mm³/s — Based on a melt flow index of ~15 g/10min, allows high-speed printing.
4.bRamming Speed: 3 mm³/s — Prevents bubbles or popping from pressure spikes.5. Retraction and Flow
5.aRetraction Distance: 0.4 mm — Minimal retraction required for soft filaments to avoid stringing.
5.bRetraction Speed: 15 mm/s — Slow enough to avoid pulling molten plastic.
5.cPressure Advance: 0.05 — Compensates for nozzle lag at high flow rates.
5.dFlow Ratio: 92% — Slight under-extrusion avoids swelling and surface artifacts.6. Precision Settings
6.aGap Closing Radius: 0.1 mm — Tolerant of gaps in thicker walls.
6.bArc Fitting: ON — Reduces G-code size and smooths curve transitions.
6.cElephant Foot Compensation: 0.1 mm — Offsets squishing in the first layer caused by large bead sizes.7. Walls and Shells
7.aWall Loops: 2 — Minimum for strength when using a 0.8 mm nozzle.
7.bDetect Thin Walls: ON — Ensures tight geometries aren’t skipped.
7.cTop/Bottom Shell Layers: 3 — Provides good coverage; increase if watertightness is needed.
7.dTop/Bottom Thickness: 1.2 mm — Equals 1.5x the nozzle size for solid strength.
7.eTop/Bottom Pattern: Monotonic — Distributes tension evenly and improves surface finish.8. Geometry and Movement
8.aWall Order: Inner before Outer — Creates cleaner outer surfaces.
8.bInfill First: OFF — Maintains precise outer dimensions.
8.cSmooth Speed Transition: ON — Prevents ringing caused by abrupt speed changes.
8.dSmooth Coefficient: 80 — Ideal damping for soft materials.
8.eAvoid Crossing Wall: ON — Minimizes stringing across part walls.
8.fMax Detour for Crossing: 10 mm or 5% — Balances time with print cleanliness.9. Layer and Width Settings
9.aLayer Height: 0.3 mm — Optimal for strength and resolution using a 0.8 mm nozzle.
9.bInitial Layer Height: 0.35 mm — Slightly higher to improve adhesion.
9.cLine Widths (all): 0.8 mm — Matches nozzle diameter for consistent extrusion.10. Seam Settings
10.aSeam Position: Aligned or Back — Use aligned for mechanical consistency, back for visual appeal.
10.bSmart Scarf Seam: ON — Automatically adjusts seam location to reduce visual impact.
10.cSeam Angle: 155° — Standard seam angle for clean transitions.
10.dSeam Steps: 10 — Smooths seam path and improves visual finish.11. Infill Settings
11.aWall/Infill Overlap: 10% — Prevents infill from deforming soft exterior walls.
11.bInfill Combination: ON — Consolidates paths for efficiency.
11.cDetect Floating Shells: ON — Ensures unsupported vertical structures are printed reliably.
11.dSparse Infill Density: 20–25% — Balanced rigidity vs. material use.
11.eSparse Pattern: Grid — Stable and efficient for flexible geometries.12. Speed Settings
12.aTravel: 160 mm/s — Fast but safe against backlash.
12.bInitial Layer: 15 mm/s — Prevents nozzle from skimming and ensures bed adhesion.
12.cOuter Wall: 60 mm/s — Controlled speed for surface quality.
12.dInner Wall: 90 mm/s — Slightly faster without compromising control.
12.eSmall Perimeter: 35 mm/s — Reduced speed for detailed geometry.
12.fTop Surface: 40 mm/s — Improves finish on topmost layers.
12.gInfill: 100–120 mm/s — Takes advantage of high flowability.13. Acceleration Settings
13.aNormal Print: 2000 mm/s² — Prevents ringing in soft filaments.
13.bTravel: 4000 mm/s² — Enables fast movement without harsh transitions.
13.cInitial Layer: 300 mm/s² — Gentle movement prevents lifting from the bed.
13.dOuter Wall: 1500 mm/s² — Improves outer surface clarity.
13.eInner Wall: 2000 mm/s² — Balanced for structural components.
13.fTop Surface: 1500 mm/s² — Ensures smooth detailing.14. Adhesion and Brims
14.aSkirt Loops: 2 — Helps prime nozzle and start cleanly.
14.bBrim Width: 6 mm — Helps hold soft materials down.
14.cBrim Gap: 0.15 mm — Allows for easy removal without tearing.15. Prime Tower and Flush Settings
15.aPrime Tower: ON — Purges moisture and early flow inconsistencies.
15.bTower Width: 40 mm — Prevents collapse due to heat.
15.cBrim Width (Tower): 4 mm — Adds stability to the purge base.
15.dFlush Into Support: ON — Discards unwanted early flow safely.16. G-Code Start Script
M900 K0.05 ; Pressure Advance M106 S0 ; Fan off G92 E0 G1 E15 F300 ; purge line G92 E0
17. Additional Notes
17.aDry filament at 155 F for 2 hours before use.
17.bStore with desiccant.
17.cKeep extruder door open to allow vapor to escape.
17.dAvoid long dwell times at high temperatures.If you need any other assistance, feel free to reach out to us anytime at timeplast@timeplast.com — we’ll be happy to help.
Urn
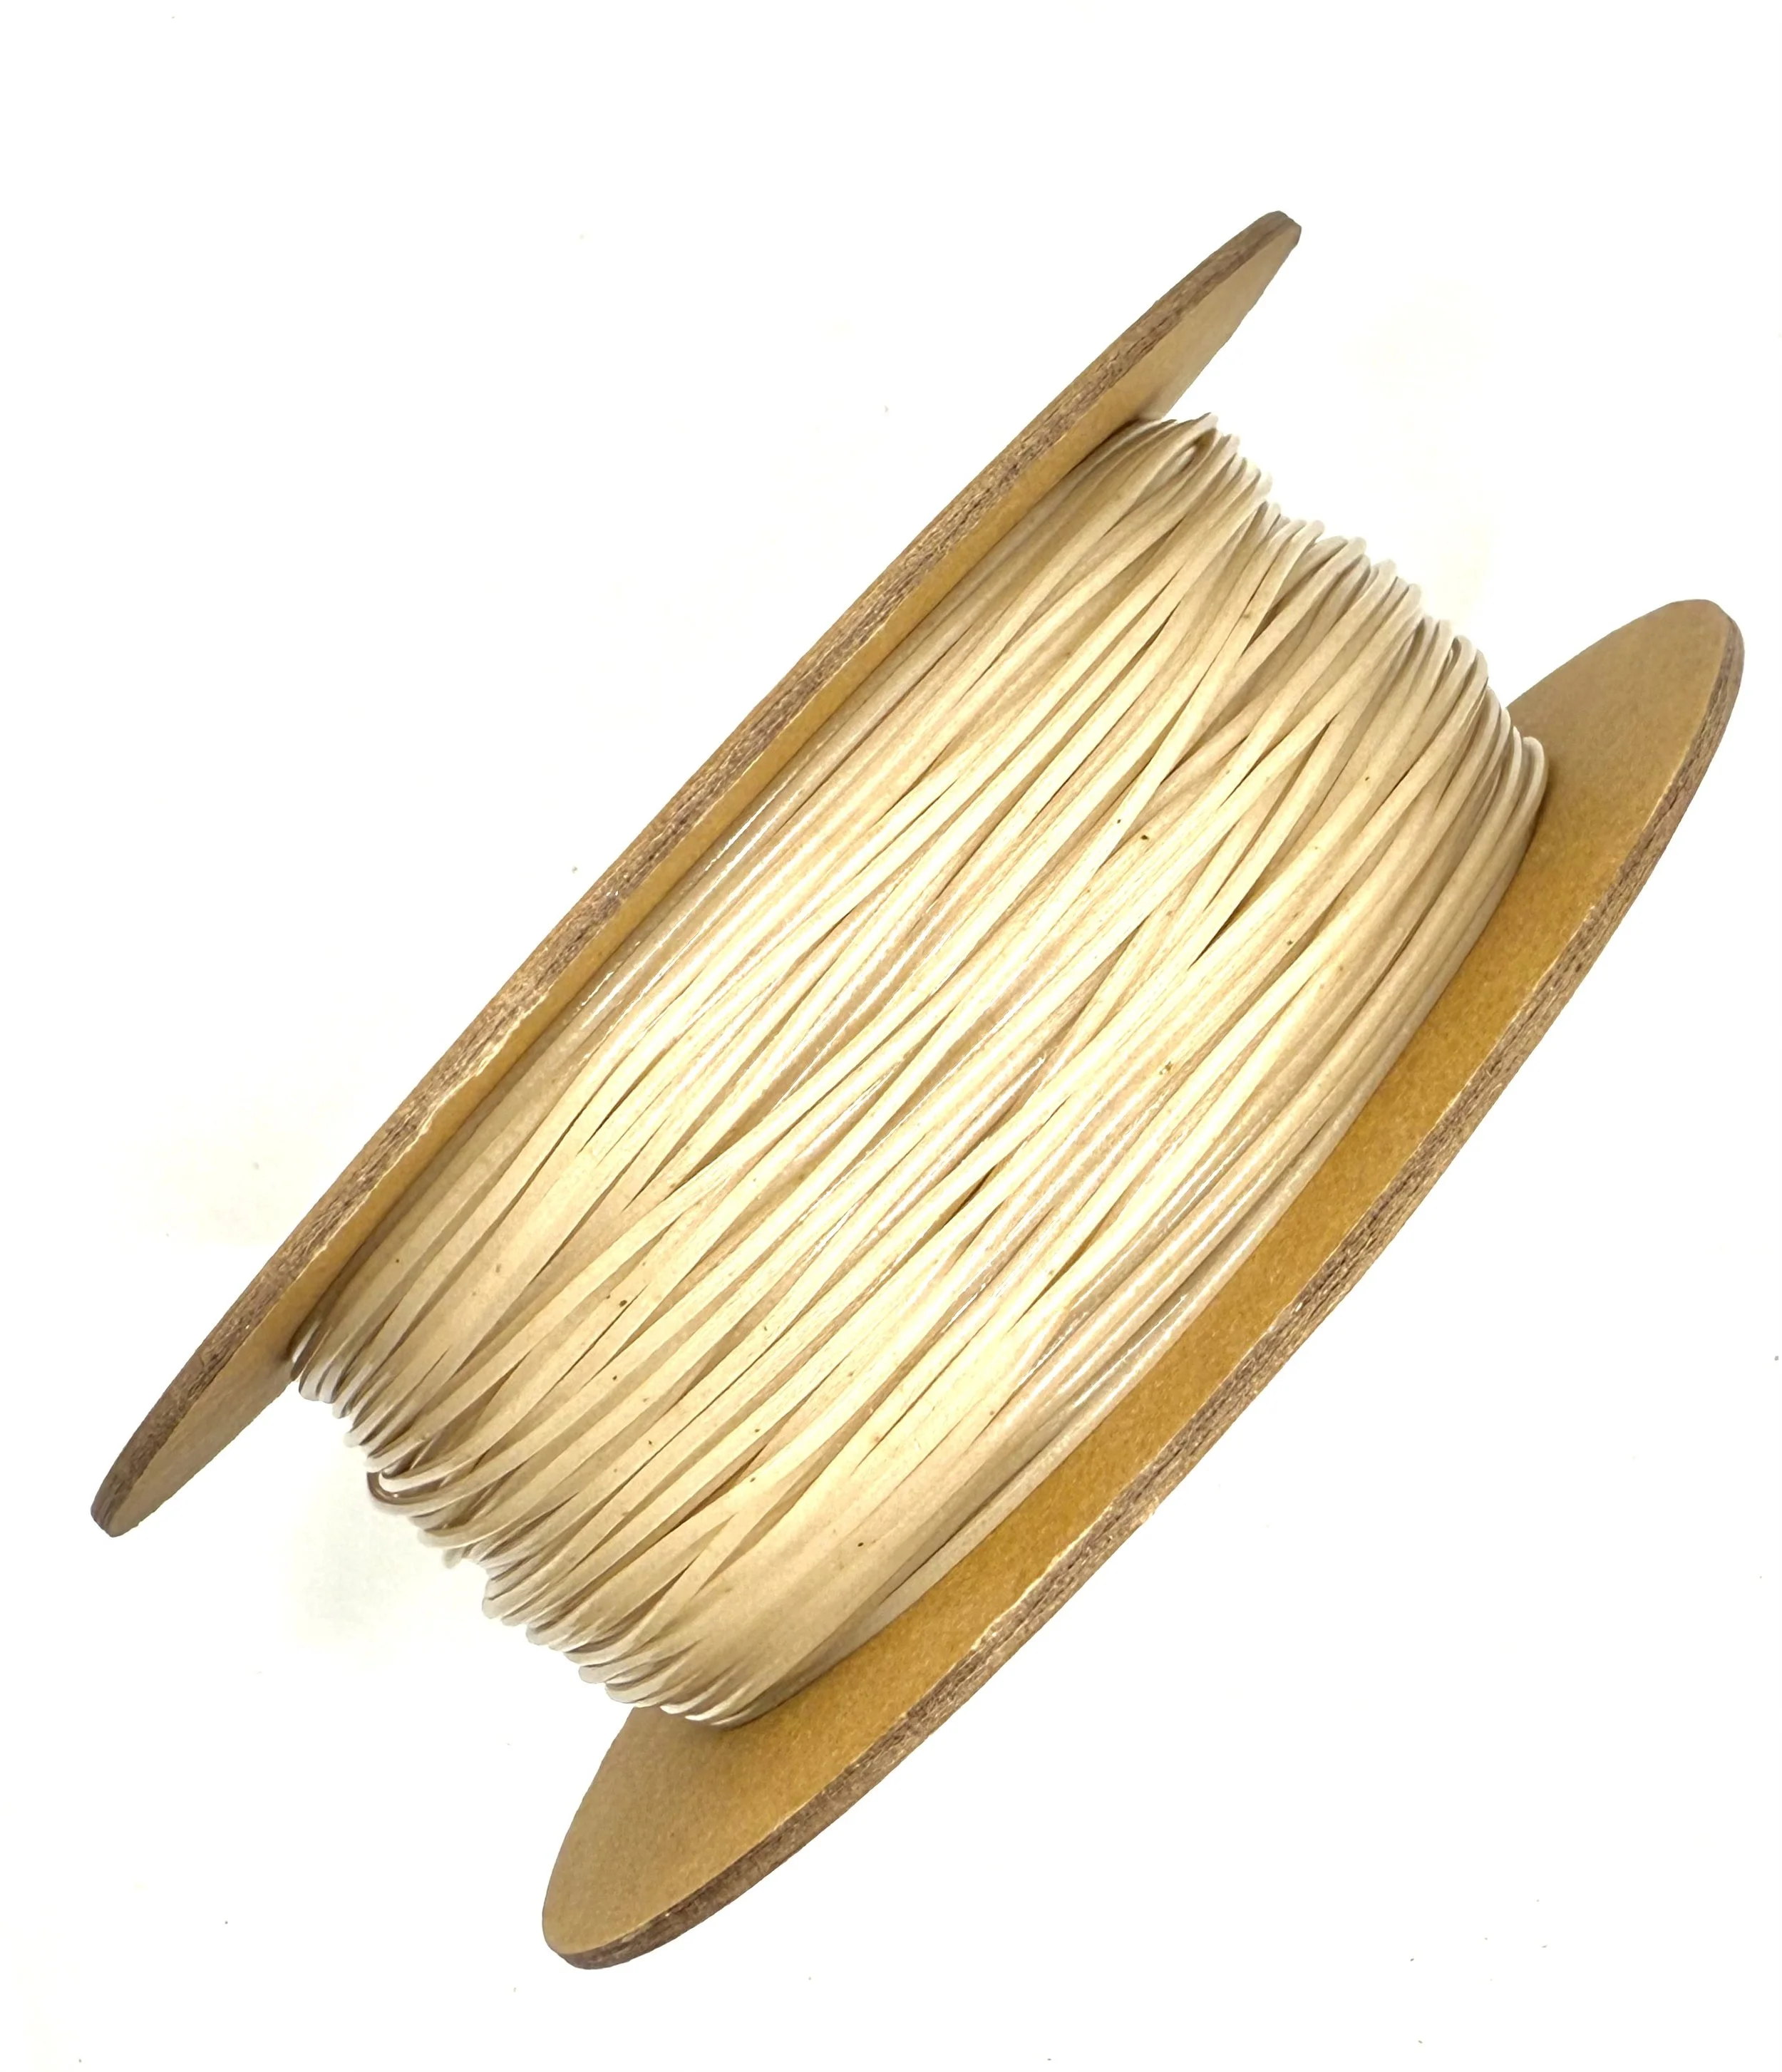
-
The passing of a loved one is a moment of profound loss, but also an opportunity to honor their life in a way that is as unique as they were.
TimeMass - Urn is a thoughtfully crafted 4D-filament, designed to provide a respectful, beautiful, and meaningful way to create a custom urn for someone dear.
Imagine a farewell that merges remembrance with renewal—an urn that floats gently upon the water, carrying the ashes of a loved one under the night sky. As it dissolves, it leaves behind something greater: Lotus seeds, symbolizing rebirth and enlightenment across many cultures, and Kelp spores, fostering new marine life in the waters that embrace them.
Crafted from planet-neutral, water-soluble materials, TimeMass - Urn is infused with:
Lotus Seeds (Nelumbo nucifera) – representing purity, spiritual awakening, and the cycle of life.
Kelp Spores (Macrocystis pyrifera) – nourishing marine environments, sustaining underwater ecosystems.
Crushed Coral (Calcium Carbonate) – aiding reef regeneration and symbolizing eternal connection to the ocean.If combined with TimeMass Fire, Light, or Glow, you can create a one-of-a-kind urn that glows softly in the twilight, offering a final radiant tribute before gracefully dissolving into the water.
As TimeMass - Urn gently breaks down, it disperses its embedded elements to support aquatic ecosystems—a final act of giving, turning loss into renewal, and remembrance into life.
For those seeking a farewell as beautiful as the life it honors, TimeMass - Urn offers a serene, unforgettable goodbye—one that echoes in the waters and hearts forever.
Need Ideas? Here You Go:
Floating urns for ceremonies, allowing ashes to be released into natural waters.
Commemorative sculptures that gradually dissolve over time, leaving no waste.
Aquatic life-support structures, such as artificial reef foundations or eco-art projects.
Eco-conscious time capsules that release elements into the water when needed.
-
Click here to access our new and improved TimeMass GPT Assistant. Just tell it your printer model and the TimeMass filament you're using—it will instantly recommend the exact parameters you need to start printing successfully.
1. Introduction
These parameters are designed to help avoid printing issues; however, temperatures and speed timings can be adjusted based on your specific goals. For example, if you prefer a less rigid result, we recommend using a lower temperature. This section outlines a complete slicing and printing profile for TimeMass, tailored for printers with a 0.8 mm nozzle. If the print is not being successful, please lower the nozzle temperature by 10°C and start over until an optimal print is achieved. Please check the manual for printing parameters.2. Temperature Settings
2.aNozzle Temperature: 230°C — Optimal for flowability while avoiding decomposition (which begins around 250°C).
2.bBed Temperature: 75°C — Ensures strong first-layer adhesion and prevents moisture bubbling.
2.cNozzle Temperature Range: 230–245°C — Timeplast melts around 165°C but prints best at 240°C for precise viscosity control.3. Cooling Settings
3.aNo Cooling for First Layers: 3 layers — Prevents shrinkage due to rapid cooling of moisture-rich filament.
3.bFan Minimum Speed: 0% for the first 100 seconds — Allows heat retention during early layers.
3.cFan Maximum Speed: 15% starting at 8 seconds — Avoids overcooling that can lead to warping.
3.dKeep Fan Always On: OFF — Allows vapor to escape and avoids internal fogging.
3.eSlow Down for Cooling: ON — Improves surface finish with controlled cooling.
3.fForce Cooling for Overhangs: OFF — Overcooling can deform bridges in Timeplast.
3.gFan for Overhangs: 15% — Only for essential cooling in complex areas.
3.hPre-Start Fan Time: 2 seconds — Minimizes pressure differential during the first layer.4. Volumetric Flow
4.aMax Volumetric Speed: 12 mm³/s — Based on a melt flow index of ~15 g/10min, allows high-speed printing.
4.bRamming Speed: 3 mm³/s — Prevents bubbles or popping from pressure spikes.5. Retraction and Flow
5.aRetraction Distance: 0.4 mm — Minimal retraction required for soft filaments to avoid stringing.
5.bRetraction Speed: 15 mm/s — Slow enough to avoid pulling molten plastic.
5.cPressure Advance: 0.05 — Compensates for nozzle lag at high flow rates.
5.dFlow Ratio: 92% — Slight under-extrusion avoids swelling and surface artifacts.6. Precision Settings
6.aGap Closing Radius: 0.1 mm — Tolerant of gaps in thicker walls.
6.bArc Fitting: ON — Reduces G-code size and smooths curve transitions.
6.cElephant Foot Compensation: 0.1 mm — Offsets squishing in the first layer caused by large bead sizes.7. Walls and Shells
7.aWall Loops: 2 — Minimum for strength when using a 0.8 mm nozzle.
7.bDetect Thin Walls: ON — Ensures tight geometries aren’t skipped.
7.cTop/Bottom Shell Layers: 3 — Provides good coverage; increase if watertightness is needed.
7.dTop/Bottom Thickness: 1.2 mm — Equals 1.5x the nozzle size for solid strength.
7.eTop/Bottom Pattern: Monotonic — Distributes tension evenly and improves surface finish.8. Geometry and Movement
8.aWall Order: Inner before Outer — Creates cleaner outer surfaces.
8.bInfill First: OFF — Maintains precise outer dimensions.
8.cSmooth Speed Transition: ON — Prevents ringing caused by abrupt speed changes.
8.dSmooth Coefficient: 80 — Ideal damping for soft materials.
8.eAvoid Crossing Wall: ON — Minimizes stringing across part walls.
8.fMax Detour for Crossing: 10 mm or 5% — Balances time with print cleanliness.9. Layer and Width Settings
9.aLayer Height: 0.3 mm — Optimal for strength and resolution using a 0.8 mm nozzle.
9.bInitial Layer Height: 0.35 mm — Slightly higher to improve adhesion.
9.cLine Widths (all): 0.8 mm — Matches nozzle diameter for consistent extrusion.10. Seam Settings
10.aSeam Position: Aligned or Back — Use aligned for mechanical consistency, back for visual appeal.
10.bSmart Scarf Seam: ON — Automatically adjusts seam location to reduce visual impact.
10.cSeam Angle: 155° — Standard seam angle for clean transitions.
10.dSeam Steps: 10 — Smooths seam path and improves visual finish.11. Infill Settings
11.aWall/Infill Overlap: 10% — Prevents infill from deforming soft exterior walls.
11.bInfill Combination: ON — Consolidates paths for efficiency.
11.cDetect Floating Shells: ON — Ensures unsupported vertical structures are printed reliably.
11.dSparse Infill Density: 20–25% — Balanced rigidity vs. material use.
11.eSparse Pattern: Grid — Stable and efficient for flexible geometries.12. Speed Settings
12.aTravel: 160 mm/s — Fast but safe against backlash.
12.bInitial Layer: 15 mm/s — Prevents nozzle from skimming and ensures bed adhesion.
12.cOuter Wall: 60 mm/s — Controlled speed for surface quality.
12.dInner Wall: 90 mm/s — Slightly faster without compromising control.
12.eSmall Perimeter: 35 mm/s — Reduced speed for detailed geometry.
12.fTop Surface: 40 mm/s — Improves finish on topmost layers.
12.gInfill: 100–120 mm/s — Takes advantage of high flowability.13. Acceleration Settings
13.aNormal Print: 2000 mm/s² — Prevents ringing in soft filaments.
13.bTravel: 4000 mm/s² — Enables fast movement without harsh transitions.
13.cInitial Layer: 300 mm/s² — Gentle movement prevents lifting from the bed.
13.dOuter Wall: 1500 mm/s² — Improves outer surface clarity.
13.eInner Wall: 2000 mm/s² — Balanced for structural components.
13.fTop Surface: 1500 mm/s² — Ensures smooth detailing.14. Adhesion and Brims
14.aSkirt Loops: 2 — Helps prime nozzle and start cleanly.
14.bBrim Width: 6 mm — Helps hold soft materials down.
14.cBrim Gap: 0.15 mm — Allows for easy removal without tearing.15. Prime Tower and Flush Settings
15.aPrime Tower: ON — Purges moisture and early flow inconsistencies.
15.bTower Width: 40 mm — Prevents collapse due to heat.
15.cBrim Width (Tower): 4 mm — Adds stability to the purge base.
15.dFlush Into Support: ON — Discards unwanted early flow safely.16. G-Code Start Script
M900 K0.05 ; Pressure Advance M106 S0 ; Fan off G92 E0 G1 E15 F300 ; purge line G92 E0
17. Additional Notes
17.aDry filament at 155 F for 2 hours before use.
17.bStore with desiccant.
17.cKeep extruder door open to allow vapor to escape.
17.dAvoid long dwell times at high temperatures.If you need any other assistance, feel free to reach out to us anytime at timeplast@timeplast.com — we’ll be happy to help.
Founder’s Factory Tour

Cinnamon Soap Gen 5
Subscribers’ soap.
Built on Gen 5 Soap – Now with Cinnamon
TimeMass Cinnamon Soap is based on our latest Gen 5 formula (the world’s first 3D printable soap that actually foams in water) and lasts 10× longer than a regular store bar. We’ve infused it with real cinnamon oil and spice, so every print is both a cleaning powerhouse and a spicy treat for the senses.
Time-programmed 4D-filaments
Active

Quick timed dissolution
-
TimeMass Active by Timeplast is an advanced 3D printing filament designed to introduce 4D printing capabilities, where objects can transform over time due to their material composition. Unlike traditional filaments, TimeMass Active embeds time-sensitive water dissolution properties, allowing printed objects to change, dissolve, or degrade in a controlled manner when exposed to specific environmental triggers like water.
This revolutionary material aligns with sustainability goals, offering a potential solution for reducing plastic waste by ensuring objects don't persist indefinitely. It's a step beyond conventional biodegradable materials, as it can be precisely engineered for degradation timelines and environmental impact.
Need Ideas? Here You Go:
Active opens the door to a variety of cutting-edge applications, especially in industries that benefit from controlled degradation, temporary functionality, or sustainable disposal. Here are some key applications that can be manufactured with it:
1. Sustainable Packaging & Containers
Single-use packaging that dissolves in water or degrades after a set time.
Medical and pharmaceutical blister packs that disappear after use.
E-commerce mailers or shipping materials that break down naturally.
2. Medical & dissolvable Implants
Dissolvable medical devices (e.g., temporary surgical supports or drug-delivery capsules).
Dissolvable splints and casts for temporary use.
Eco-friendly sutures or wound dressings that dissolve safely in the body.
3. Fishing & Marine Applications
Water-soluble fishing line that reduces ocean waste.
Dissolvable bait holders for sustainable fishing practices.
Temporary aquatic structures that degrade naturally over time.
4. Construction & Temporary Structures
Scaffolding that disappears when exposed to rain or UV light.
Dissolvable moldings and supports for temporary installations.
Formwork for concrete that dissolves after the structure sets.
5. Smart Consumer Goods
Eco-friendly toys or festival products that disappear after use.
Single-use utensils or dishware that self-destruct in water.
Event wristbands and passes that vanish after an event ends.
6. Electronics & Smart Materials
Dissolvable circuits or casings for electronics.
Temporary RFID tags or security seals that disappear after use.
Eco-friendly wearable tech components designed for planned obsolescence.
7. Aerospace & Military
Time-sensitive drones or surveillance devices that degrade after deployment.
Dissolvable camouflage materials for stealth operations.
Temporary shelters that degrade in extreme environments.
8. Art & Design
Interactive sculptures or installations that disappear over time.
Water-soluble fashion pieces that change with rain or humidity.
Degradable 3D-printed decor for temporary displays.
Active has a huge potential for industries looking to reduce waste, enhance sustainability, and introduce functional degradation into 3D printed products.
-
Click here to access our new and improved TimeMass GPT Assistant. Just tell it your printer model and the TimeMass filament you're using—it will instantly recommend the exact parameters you need to start printing successfully.
1. Introduction
These parameters are designed to help avoid printing issues; however, temperatures and speed timings can be adjusted based on your specific goals. For example, if you prefer a less rigid result, we recommend using a lower temperature. This section outlines a complete slicing and printing profile for TimeMass Active, tailored for printers with a 0.8 mm nozzle. If the print is not being successful, please lower the nozzle temperature by 10°C and start over until an optimal print is achieved. Please check the manual for printing parameters.2. Temperature Settings
2.aNozzle Temperature: 230°C — Optimal for flowability while avoiding decomposition (which begins around 250°C).
2.bBed Temperature: 75°C — Ensures strong first-layer adhesion and prevents moisture bubbling.
2.cNozzle Temperature Range: 230–245°C — Timeplast melts around 165°C but prints best at 240°C for precise viscosity control.3. Cooling Settings
3.aNo Cooling for First Layers: 3 layers — Prevents shrinkage due to rapid cooling of moisture-rich filament.
3.bFan Minimum Speed: 0% for the first 100 seconds — Allows heat retention during early layers.
3.cFan Maximum Speed: 15% starting at 8 seconds — Avoids overcooling that can lead to warping.
3.dKeep Fan Always On: OFF — Allows vapor to escape and avoids internal fogging.
3.eSlow Down for Cooling: ON — Improves surface finish with controlled cooling.
3.fForce Cooling for Overhangs: OFF — Overcooling can deform bridges in Timeplast.
3.gFan for Overhangs: 15% — Only for essential cooling in complex areas.
3.hPre-Start Fan Time: 2 seconds — Minimizes pressure differential during the first layer.4. Volumetric Flow
4.aMax Volumetric Speed: 12 mm³/s — Based on a melt flow index of ~15 g/10min, allows high-speed printing.
4.bRamming Speed: 3 mm³/s — Prevents bubbles or popping from pressure spikes.5. Retraction and Flow
5.aRetraction Distance: 0.4 mm — Minimal retraction required for soft filaments to avoid stringing.
5.bRetraction Speed: 15 mm/s — Slow enough to avoid pulling molten plastic.
5.cPressure Advance: 0.05 — Compensates for nozzle lag at high flow rates.
5.dFlow Ratio: 92% — Slight under-extrusion avoids swelling and surface artifacts.6. Precision Settings
6.aGap Closing Radius: 0.1 mm — Tolerant of gaps in thicker walls.
6.bArc Fitting: ON — Reduces G-code size and smooths curve transitions.
6.cElephant Foot Compensation: 0.1 mm — Offsets squishing in the first layer caused by large bead sizes.7. Walls and Shells
7.aWall Loops: 2 — Minimum for strength when using a 0.8 mm nozzle.
7.bDetect Thin Walls: ON — Ensures tight geometries aren’t skipped.
7.cTop/Bottom Shell Layers: 3 — Provides good coverage; increase if watertightness is needed.
7.dTop/Bottom Thickness: 1.2 mm — Equals 1.5x the nozzle size for solid strength.
7.eTop/Bottom Pattern: Monotonic — Distributes tension evenly and improves surface finish.8. Geometry and Movement
8.aWall Order: Inner before Outer — Creates cleaner outer surfaces.
8.bInfill First: OFF — Maintains precise outer dimensions.
8.cSmooth Speed Transition: ON — Prevents ringing caused by abrupt speed changes.
8.dSmooth Coefficient: 80 — Ideal damping for soft materials.
8.eAvoid Crossing Wall: ON — Minimizes stringing across part walls.
8.fMax Detour for Crossing: 10 mm or 5% — Balances time with print cleanliness.9. Layer and Width Settings
9.aLayer Height: 0.3 mm — Optimal for strength and resolution using a 0.8 mm nozzle.
9.bInitial Layer Height: 0.35 mm — Slightly higher to improve adhesion.
9.cLine Widths (all): 0.8 mm — Matches nozzle diameter for consistent extrusion.10. Seam Settings
10.aSeam Position: Aligned or Back — Use aligned for mechanical consistency, back for visual appeal.
10.bSmart Scarf Seam: ON — Automatically adjusts seam location to reduce visual impact.
10.cSeam Angle: 155° — Standard seam angle for clean transitions.
10.dSeam Steps: 10 — Smooths seam path and improves visual finish.11. Infill Settings
11.aWall/Infill Overlap: 10% — Prevents infill from deforming soft exterior walls.
11.bInfill Combination: ON — Consolidates paths for efficiency.
11.cDetect Floating Shells: ON — Ensures unsupported vertical structures are printed reliably.
11.dSparse Infill Density: 20–25% — Balanced rigidity vs. material use.
11.eSparse Pattern: Grid — Stable and efficient for flexible geometries.12. Speed Settings
12.aTravel: 160 mm/s — Fast but safe against backlash.
12.bInitial Layer: 15 mm/s — Prevents nozzle from skimming and ensures bed adhesion.
12.cOuter Wall: 60 mm/s — Controlled speed for surface quality.
12.dInner Wall: 90 mm/s — Slightly faster without compromising control.
12.eSmall Perimeter: 35 mm/s — Reduced speed for detailed geometry.
12.fTop Surface: 40 mm/s — Improves finish on topmost layers.
12.gInfill: 100–120 mm/s — Takes advantage of high flowability.13. Acceleration Settings
13.aNormal Print: 2000 mm/s² — Prevents ringing in soft filaments.
13.bTravel: 4000 mm/s² — Enables fast movement without harsh transitions.
13.cInitial Layer: 300 mm/s² — Gentle movement prevents lifting from the bed.
13.dOuter Wall: 1500 mm/s² — Improves outer surface clarity.
13.eInner Wall: 2000 mm/s² — Balanced for structural components.
13.fTop Surface: 1500 mm/s² — Ensures smooth detailing.14. Adhesion and Brims
14.aSkirt Loops: 2 — Helps prime nozzle and start cleanly.
14.bBrim Width: 6 mm — Helps hold soft materials down.
14.cBrim Gap: 0.15 mm — Allows for easy removal without tearing.15. Prime Tower and Flush Settings
15.aPrime Tower: ON — Purges moisture and early flow inconsistencies.
15.bTower Width: 40 mm — Prevents collapse due to heat.
15.cBrim Width (Tower): 4 mm — Adds stability to the purge base.
15.dFlush Into Support: ON — Discards unwanted early flow safely.16. G-Code Start Script
M900 K0.05 ; Pressure Advance M106 S0 ; Fan off G92 E0 G1 E15 F300 ; purge line G92 E0
17. Additional Notes
17.aDry filament at 155 F for 2 hours before use.
17.bStore with desiccant.
17.cKeep extruder door open to allow vapor to escape.
17.dAvoid long dwell times at high temperatures.If you need any other assistance, feel free to reach out to us anytime at timeplast@timeplast.com — we’ll be happy to help.
Free U.S. standard shipping on orders of 5+ spools!
Custom colors for 5+ same-type spools’ orders
Extended
Medium timed dissolution
-
TimeMass Extended by Timeplast is a versatile 3D printing filament designed to offer a controlled mid-point between short-term dissolution and long-term durability. Positioned between TimeMass Active and TimeMass Passive, it maintains structural integrity for extended periods before gradually dissolving in water. This makes it ideal for applications that require temporary functionality with a longer lifecycle.
Key Features:
- Extended Dissolution Timeline – Designed to last months or years before dissolving.
- Environmentally Responsive – Begins degradation only under specific moisture exposure.
- Sustainable Alternative – Fully dissolves without leaving microplastics behind.
- Functional Durability – Suitable for semi-permanent tools, fixtures, and packaging.Ideal Uses:
Outdoor tools or fixtures that naturally disappear over seasons.
Medical models or trays intended for medium-term use.
Temporary signage, displays, or installations.
Educational kits with limited lifespan needs.
TimeMass Extended offers the perfect balance for users needing a filament that’s neither too fleeting nor permanently persistent—just right for sustainability and functionality.
-
Click here to access our new and improved TimeMass GPT Assistant. Just tell it your printer model and the TimeMass filament you're using—it will instantly recommend the exact parameters you need to start printing successfully.
1. Introduction
These parameters are designed to help avoid printing issues; however, temperatures and speed timings can be adjusted based on your specific goals. For example, if you prefer a less rigid result, we recommend using a lower temperature. This section outlines a complete slicing and printing profile for TimeMass Extended, tailored for printers with a 0.8 mm nozzle. If the print is not being successful, please lower the nozzle temperature by 10°C and start over until an optimal print is achieved. Please check the manual for printing parameters.2. Temperature Settings
2.aNozzle Temperature: 230°C — Optimal for flowability while avoiding decomposition (which begins around 250°C).
2.bBed Temperature: 75°C — Ensures strong first-layer adhesion and prevents moisture bubbling.
2.cNozzle Temperature Range: 230–245°C — Timeplast melts around 165°C but prints best at 240°C for precise viscosity control.3. Cooling Settings
3.aNo Cooling for First Layers: 3 layers — Prevents shrinkage due to rapid cooling of moisture-rich filament.
3.bFan Minimum Speed: 0% for the first 100 seconds — Allows heat retention during early layers.
3.cFan Maximum Speed: 15% starting at 8 seconds — Avoids overcooling that can lead to warping.
3.dKeep Fan Always On: OFF — Allows vapor to escape and avoids internal fogging.
3.eSlow Down for Cooling: ON — Improves surface finish with controlled cooling.
3.fForce Cooling for Overhangs: OFF — Overcooling can deform bridges in Timeplast.
3.gFan for Overhangs: 15% — Only for essential cooling in complex areas.
3.hPre-Start Fan Time: 2 seconds — Minimizes pressure differential during the first layer.4. Volumetric Flow
4.aMax Volumetric Speed: 12 mm³/s — Based on a melt flow index of ~15 g/10min, allows high-speed printing.
4.bRamming Speed: 3 mm³/s — Prevents bubbles or popping from pressure spikes.5. Retraction and Flow
5.aRetraction Distance: 0.4 mm — Minimal retraction required for soft filaments to avoid stringing.
5.bRetraction Speed: 15 mm/s — Slow enough to avoid pulling molten plastic.
5.cPressure Advance: 0.05 — Compensates for nozzle lag at high flow rates.
5.dFlow Ratio: 92% — Slight under-extrusion avoids swelling and surface artifacts.6. Precision Settings
6.aGap Closing Radius: 0.1 mm — Tolerant of gaps in thicker walls.
6.bArc Fitting: ON — Reduces G-code size and smooths curve transitions.
6.cElephant Foot Compensation: 0.1 mm — Offsets squishing in the first layer caused by large bead sizes.7. Walls and Shells
7.aWall Loops: 2 — Minimum for strength when using a 0.8 mm nozzle.
7.bDetect Thin Walls: ON — Ensures tight geometries aren’t skipped.
7.cTop/Bottom Shell Layers: 3 — Provides good coverage; increase if watertightness is needed.
7.dTop/Bottom Thickness: 1.2 mm — Equals 1.5x the nozzle size for solid strength.
7.eTop/Bottom Pattern: Monotonic — Distributes tension evenly and improves surface finish.8. Geometry and Movement
8.aWall Order: Inner before Outer — Creates cleaner outer surfaces.
8.bInfill First: OFF — Maintains precise outer dimensions.
8.cSmooth Speed Transition: ON — Prevents ringing caused by abrupt speed changes.
8.dSmooth Coefficient: 80 — Ideal damping for soft materials.
8.eAvoid Crossing Wall: ON — Minimizes stringing across part walls.
8.fMax Detour for Crossing: 10 mm or 5% — Balances time with print cleanliness.9. Layer and Width Settings
9.aLayer Height: 0.3 mm — Optimal for strength and resolution using a 0.8 mm nozzle.
9.bInitial Layer Height: 0.35 mm — Slightly higher to improve adhesion.
9.cLine Widths (all): 0.8 mm — Matches nozzle diameter for consistent extrusion.10. Seam Settings
10.aSeam Position: Aligned or Back — Use aligned for mechanical consistency, back for visual appeal.
10.bSmart Scarf Seam: ON — Automatically adjusts seam location to reduce visual impact.
10.cSeam Angle: 155° — Standard seam angle for clean transitions.
10.dSeam Steps: 10 — Smooths seam path and improves visual finish.11. Infill Settings
11.aWall/Infill Overlap: 10% — Prevents infill from deforming soft exterior walls.
11.bInfill Combination: ON — Consolidates paths for efficiency.
11.cDetect Floating Shells: ON — Ensures unsupported vertical structures are printed reliably.
11.dSparse Infill Density: 20–25% — Balanced rigidity vs. material use.
11.eSparse Pattern: Grid — Stable and efficient for flexible geometries.12. Speed Settings
12.aTravel: 160 mm/s — Fast but safe against backlash.
12.bInitial Layer: 15 mm/s — Prevents nozzle from skimming and ensures bed adhesion.
12.cOuter Wall: 60 mm/s — Controlled speed for surface quality.
12.dInner Wall: 90 mm/s — Slightly faster without compromising control.
12.eSmall Perimeter: 35 mm/s — Reduced speed for detailed geometry.
12.fTop Surface: 40 mm/s — Improves finish on topmost layers.
12.gInfill: 100–120 mm/s — Takes advantage of high flowability.13. Acceleration Settings
13.aNormal Print: 2000 mm/s² — Prevents ringing in soft filaments.
13.bTravel: 4000 mm/s² — Enables fast movement without harsh transitions.
13.cInitial Layer: 300 mm/s² — Gentle movement prevents lifting from the bed.
13.dOuter Wall: 1500 mm/s² — Improves outer surface clarity.
13.eInner Wall: 2000 mm/s² — Balanced for structural components.
13.fTop Surface: 1500 mm/s² — Ensures smooth detailing.14. Adhesion and Brims
14.aSkirt Loops: 2 — Helps prime nozzle and start cleanly.
14.bBrim Width: 6 mm — Helps hold soft materials down.
14.cBrim Gap: 0.15 mm — Allows for easy removal without tearing.15. Prime Tower and Flush Settings
15.aPrime Tower: ON — Purges moisture and early flow inconsistencies.
15.bTower Width: 40 mm — Prevents collapse due to heat.
15.cBrim Width (Tower): 4 mm — Adds stability to the purge base.
15.dFlush Into Support: ON — Discards unwanted early flow safely.16. G-Code Start Script
M900 K0.05 ; Pressure Advance M106 S0 ; Fan off G92 E0 G1 E15 F300 ; purge line G92 E0
17. Additional Notes
17.aDry filament at 155 F for 2 hours before use.
17.bStore with desiccant.
17.cKeep extruder door open to allow vapor to escape.
17.dAvoid long dwell times at high temperatures.If you need any other assistance, feel free to reach out to us anytime at timeplast@timeplast.com — we’ll be happy to help.
Free U.S. standard shipping on orders of 5+ spools!
Custom colors for 5+ same-type spools’ orders
Passive

Slow timed dissolution
-
TimeMass Passive by Timeplast is a specialized 3D printing filament designed to be highly durable, stable, and resistant to external environmental factors. Unlike Time-Mass Active (which degrades over time) or TimeMass Fire (which is designed to burn), TimeMass Passive is engineered for long-term structural integrity, making it ideal for applications that require strength, longevity, and resistance to wear.
Key Features of TimeMass Passive:
Highly Durable – Designed to last for extended periods without significant degradation.
Resistant to Environmental Factors – Protects against moisture, UV exposure, and oxidation.
Structurally Strong – Can be used in applications requiring mechanical stability.
Sustainable & Non-Toxic – Developed with eco-friendly material science principles.
Dimensional Stability – Maintains its form and function over time without warping or breaking down.
Why TimeMass Passive?
Timeplast designed TimeMass Passive as a material solution for industries and consumers needing durability without excessive waste. While many materials either degrade too quickly or persist indefinitely as pollutants, TimeMass Passive offers a balance—lasting as long as needed while remaining eco-conscious.
Need Ideas? Here You Go:
1. Long-Lasting Consumer Goods
Durable home decor and furniture components.
Weather-resistant outdoor accessories.
Sustainable, long-term-use kitchenware.
2. Industrial & Engineering Applications
Structural parts for 3D-printed machinery or tools.
Corrosion-resistant components for marine or aerospace applications.
Long-lasting prototypes for product development.
3. Infrastructure & Construction
3D-printed building materials that withstand the elements.
Durable interlocking tiles or modular structures.
Architectural elements requiring longevity.
4. Medical & Safety Equipment
Hygienic and long-lasting prosthetic components.
Non-degradable medical tools or diagnostic equipment.
Protective casings for sensitive instruments.
5. Automotive & Aerospace Applications
Heat and pressure-resistant vehicle components.
Protective covers for electronic and mechanical systems.
Long-term-use parts for sustainable transport solutions.
-
Click here to access our new and improved TimeMass GPT Assistant. Just tell it your printer model and the TimeMass filament you're using—it will instantly recommend the exact parameters you need to start printing successfully.
1. Introduction
This is the printing guide for TimeMass Passive filament as tested on the Bambu Labs A1. This filament features extremely low moisture exchange, high structural stiffness, and requires higher thermal energy for optimal melt and flow.Because TimeMass Passive releases minimal vapor but has high melt resistance and moderate elasticity, these profiles focus on thermal force management, mechanical flow stability, and precise extrusion tuning.
If the print is not being successful, please lower the nozzle temperature by 10°C and start over until an optimal print is achieved.2. Temperature Settings (All Nozzles)
2.a 0.2 mm Nozzle — Nozzle Temp: 235°C | Bed Temp: 70°C — High energy needed to soften the matrix
2.b 0.4 mm Nozzle — Nozzle Temp: 245°C | Bed Temp: 70°C — Better melt performance through standard nozzle size
2.c 0.6 mm Nozzle — Nozzle Temp: 250°C | Bed Temp: 70°C — Elevated flow demand for thick lines
2.d 0.8 mm Nozzle — Nozzle Temp: 255°C | Bed Temp: 70°C — Necessary thermal energy to prevent partial fusion at large diameterNote: Heatsink fans must remain consistent. Bed adhesion improves with light glue stick.
3. Cooling Settings (All Nozzles)
3.a No Cooling for First Layers: 2 — Less needed due to stiffer filament body
3.b Fan Minimum Speed: 20% at 50 seconds — Starts cooling sooner to shape rigid geometry
3.c Fan Maximum Speed: 25% — Supports layer definition without cracking
3.d Keep Fan Always On: ON — Essential for shaping passive structure
3.e Force Cooling Overhangs: ON — Encourages clean bridges for long spans
3.f Fan for Overhangs: 25–35% — Passive holds angles well, supports sharper fan controlNote: Timeplast Passive benefits from continuous airflow and structured cooling logic.
4. Max Volumetric Flow
4.a 0.2 mm Nozzle — Max Flow: 2 mm³/s — High-viscosity structure needs conservative flow
4.b 0.4 mm Nozzle — Max Flow: 5 mm³/s — Standard flow, safe and precise for rigid plastic
4.c 0.6 mm Nozzle — Max Flow: 9 mm³/s — Accommodates increased demand for high-mass lines
4.d 0.8 mm Nozzle — Max Flow: 13 mm³/s — Delivers clean, full-fused thick walls5. Retraction & Pressure Advance
5.a 0.2 mm Nozzle — Retraction: 1.0 mm @ 25 mm/s | Pressure Advance: 0.03
5.b 0.4 mm Nozzle — Retraction: 0.8 mm @ 20 mm/s | Pressure Advance: 0.04
5.c 0.6 mm Nozzle — Retraction: 0.6 mm @ 18 mm/s | Pressure Advance: 0.045
5.d 0.8 mm Nozzle — Retraction: 0.5 mm @ 15 mm/s | Pressure Advance: 0.05Note: Low moisture = less stringing, but retraction is still key for clean transitions.
6. Layer Height and Line Width
6.a 0.2 mm — Layer Height: 0.12 mm | Initial: 0.18 mm | Line Width: 0.25 mm
6.b 0.4 mm — Layer Height: 0.2 mm | Initial: 0.22 mm | Line Width: 0.42 mm
6.c 0.6 mm — Layer Height: 0.3 mm | Initial: 0.32 mm | Line Width: 0.6 mm
6.d 0.8 mm — Layer Height: 0.3 mm | Initial: 0.35 mm | Line Width: 0.8 mmNote: Clean lines support Timeplast Passive’s structural stiffness.
7. Wall, Shell & Infill Settings
7.a Wall Loops — 0.2 mm: 3 | 0.4 mm: 2–3 | 0.6 mm: 2 | 0.8 mm: 2
7.b Top/Bottom Shells — 0.2 mm & 0.4 mm: 4 | 0.6 mm & 0.8 mm: 3
7.c Top/Bottom Thickness — All: 1.2 mm (except 0.2 mm at 1 mm)
7.d Sparse Infill Density — 0.2 mm: 25% | 0.4 mm: 20–25% | 0.6 & 0.8 mm: 15–20%Note: Strong shells help support high stiffness and dimensional precision.
8. Speed & Acceleration
8.a Travel Speed — 0.2 mm: 120 mm/s | 0.4 mm: 140 mm/s | 0.6 mm: 150 mm/s | 0.8 mm: 160 mm/s
8.b Outer Wall Speed — 35 / 45 / 55 / 65 mm/s (increasing by nozzle size)
8.c Infill Speed — 70 / 100 / 120 / 130 mm/s
8.d Acceleration (Print) — 1200 / 1800 / 2200 / 2400 mm/s²
8.e Acceleration (Travel) — 3000 / 3500 / 4000 / 4500 mm/s²Note: Passive resists flex — high-speed print motion is safe and reliable.
9. Adhesion & Brims
9.a Skirt Loops: 1–2 — Clears dense first-line flow
9.b Brim Width: 5 mm — Secures stiffer corners to plate
9.c Brim Gap: 0.15 mm — Moderate release force to match rigidity10. Flush, Prime & G-code
10.a Prime Tower: Optional — Low moisture means less need for purging10.b Start G-code:
M900 K[PA] ; Pressure Advance M106 S0 ; Fan off G92 E0 G1 E15 F300 ; purge line G92 E0
Replace [PA] with the appropriate pressure advance value for your nozzle size.
11. Parameters That Stay Consistent Across All Nozzles
11.a Bed temperature: 70°C
11.b Seam logic and arc fitting: ON
11.c Retraction smoothing: Enabled
11.d Cooling delay: 2–3 layers
11.e Compatible with all standard Bambu Lab slicer toolsIf you need any other assistance, feel free to reach out to us anytime at timeplast@timeplast.com — we’ll be happy to help.
Free U.S. standard shipping on orders of 5+ spools!
Custom colors for 5+ same-type spools’ orders
Fishing Kit
Fish Food
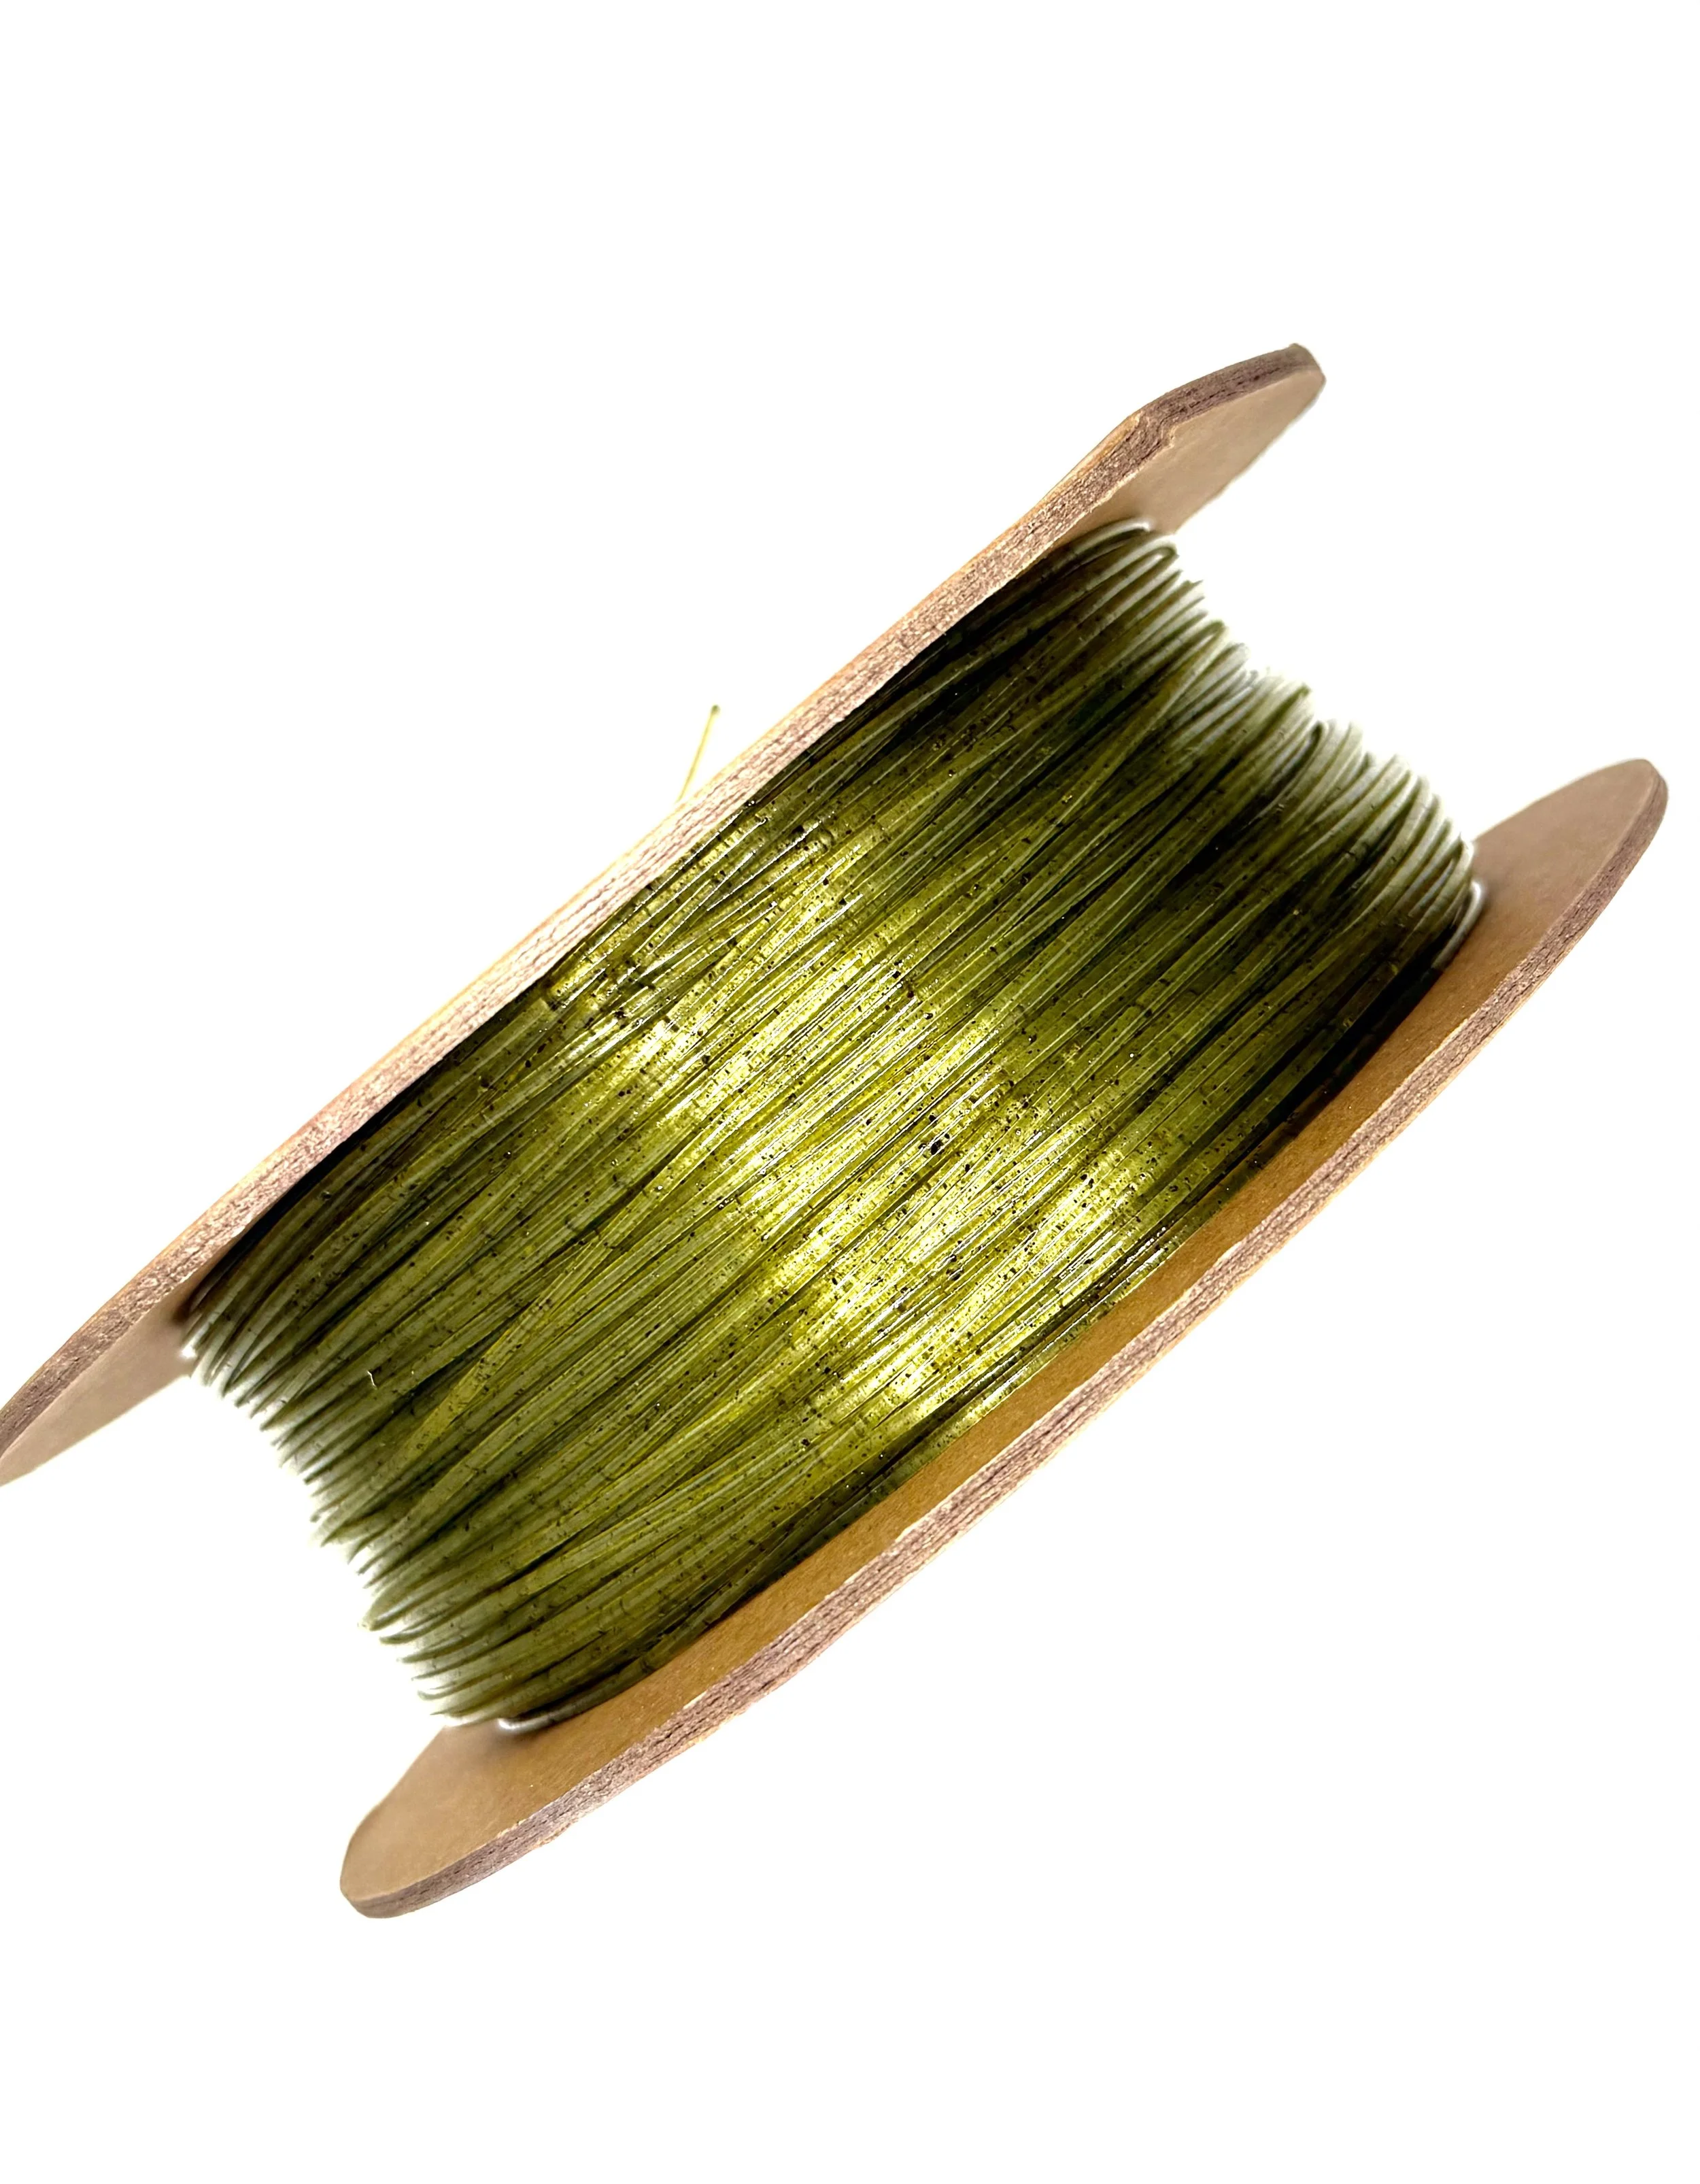
-
A protein-rich, interactive filament made from shrimp meal, fish meal, earthworm powder, and spirulina. This is more than food—it's enrichment. Print mini prey-like structures your fish will explore and nibble on over time.
Feed. Play. Repeat.
How it works:
Bioavailable proteins and marine vitamins are embedded within a low-leach matrix that softens underwater, triggering interest and gradual release.
It’s enrichment disguised as nutrition.
Nutrient Composition (per 350g spool):
Fish & Shrimp Meal: 20 g – Rich in omega-3s
Spirulina & Earthworms: 15 g – For immunity and digestion
Vitamin Mix: 5 g – A, D3, B-complex
Where to use it:
Aquarium toys – Print fish- or squid-shaped items for slow feeding
Breeder tanks – Enrichment for bettas, cichlids, and other active fish
Decorative feeders – Combine style and sustenance
Education kits – Demonstrate animal behavior and nutrition in action.
-
Click here to access our new and improved TimeMass GPT Assistant. Just tell it your printer model and the TimeMass filament you're using—it will instantly recommend the exact parameters you need to start printing successfully.
1. Introduction
These parameters are designed to help avoid printing issues; however, temperatures and speed timings can be adjusted based on your specific goals. For example, if you prefer a less rigid result, we recommend using a lower temperature. This section outlines a complete slicing and printing profile for TimeMass Fish Food, tailored for printers with a 0.8 mm nozzle. If the print is not being successful, please lower the nozzle temperature by 10°C and start over until an optimal print is achieved. Please check the manual for printing parameters.2. Temperature Settings
2.aNozzle Temperature: 230°C — Optimal for flowability while avoiding decomposition (which begins around 250°C).
2.bBed Temperature: 75°C — Ensures strong first-layer adhesion and prevents moisture bubbling.
2.cNozzle Temperature Range: 230–245°C — Timeplast melts around 165°C but prints best at 240°C for precise viscosity control.3. Cooling Settings
3.aNo Cooling for First Layers: 3 layers — Prevents shrinkage due to rapid cooling of moisture-rich filament.
3.bFan Minimum Speed: 0% for the first 100 seconds — Allows heat retention during early layers.
3.cFan Maximum Speed: 15% starting at 8 seconds — Avoids overcooling that can lead to warping.
3.dKeep Fan Always On: OFF — Allows vapor to escape and avoids internal fogging.
3.eSlow Down for Cooling: ON — Improves surface finish with controlled cooling.
3.fForce Cooling for Overhangs: OFF — Overcooling can deform bridges in Timeplast.
3.gFan for Overhangs: 15% — Only for essential cooling in complex areas.
3.hPre-Start Fan Time: 2 seconds — Minimizes pressure differential during the first layer.4. Volumetric Flow
4.aMax Volumetric Speed: 12 mm³/s — Based on a melt flow index of ~15 g/10min, allows high-speed printing.
4.bRamming Speed: 3 mm³/s — Prevents bubbles or popping from pressure spikes.5. Retraction and Flow
5.aRetraction Distance: 0.4 mm — Minimal retraction required for soft filaments to avoid stringing.
5.bRetraction Speed: 15 mm/s — Slow enough to avoid pulling molten plastic.
5.cPressure Advance: 0.05 — Compensates for nozzle lag at high flow rates.
5.dFlow Ratio: 92% — Slight under-extrusion avoids swelling and surface artifacts.6. Precision Settings
6.aGap Closing Radius: 0.1 mm — Tolerant of gaps in thicker walls.
6.bArc Fitting: ON — Reduces G-code size and smooths curve transitions.
6.cElephant Foot Compensation: 0.1 mm — Offsets squishing in the first layer caused by large bead sizes.7. Walls and Shells
7.aWall Loops: 2 — Minimum for strength when using a 0.8 mm nozzle.
7.bDetect Thin Walls: ON — Ensures tight geometries aren’t skipped.
7.cTop/Bottom Shell Layers: 3 — Provides good coverage; increase if watertightness is needed.
7.dTop/Bottom Thickness: 1.2 mm — Equals 1.5x the nozzle size for solid strength.
7.eTop/Bottom Pattern: Monotonic — Distributes tension evenly and improves surface finish.8. Geometry and Movement
8.aWall Order: Inner before Outer — Creates cleaner outer surfaces.
8.bInfill First: OFF — Maintains precise outer dimensions.
8.cSmooth Speed Transition: ON — Prevents ringing caused by abrupt speed changes.
8.dSmooth Coefficient: 80 — Ideal damping for soft materials.
8.eAvoid Crossing Wall: ON — Minimizes stringing across part walls.
8.fMax Detour for Crossing: 10 mm or 5% — Balances time with print cleanliness.9. Layer and Width Settings
9.aLayer Height: 0.3 mm — Optimal for strength and resolution using a 0.8 mm nozzle.
9.bInitial Layer Height: 0.35 mm — Slightly higher to improve adhesion.
9.cLine Widths (all): 0.8 mm — Matches nozzle diameter for consistent extrusion.10. Seam Settings
10.aSeam Position: Aligned or Back — Use aligned for mechanical consistency, back for visual appeal.
10.bSmart Scarf Seam: ON — Automatically adjusts seam location to reduce visual impact.
10.cSeam Angle: 155° — Standard seam angle for clean transitions.
10.dSeam Steps: 10 — Smooths seam path and improves visual finish.11. Infill Settings
11.aWall/Infill Overlap: 10% — Prevents infill from deforming soft exterior walls.
11.bInfill Combination: ON — Consolidates paths for efficiency.
11.cDetect Floating Shells: ON — Ensures unsupported vertical structures are printed reliably.
11.dSparse Infill Density: 20–25% — Balanced rigidity vs. material use.
11.eSparse Pattern: Grid — Stable and efficient for flexible geometries.12. Speed Settings
12.aTravel: 160 mm/s — Fast but safe against backlash.
12.bInitial Layer: 15 mm/s — Prevents nozzle from skimming and ensures bed adhesion.
12.cOuter Wall: 60 mm/s — Controlled speed for surface quality.
12.dInner Wall: 90 mm/s — Slightly faster without compromising control.
12.eSmall Perimeter: 35 mm/s — Reduced speed for detailed geometry.
12.fTop Surface: 40 mm/s — Improves finish on topmost layers.
12.gInfill: 100–120 mm/s — Takes advantage of high flowability.13. Acceleration Settings
13.aNormal Print: 2000 mm/s² — Prevents ringing in soft filaments.
13.bTravel: 4000 mm/s² — Enables fast movement without harsh transitions.
13.cInitial Layer: 300 mm/s² — Gentle movement prevents lifting from the bed.
13.dOuter Wall: 1500 mm/s² — Improves outer surface clarity.
13.eInner Wall: 2000 mm/s² — Balanced for structural components.
13.fTop Surface: 1500 mm/s² — Ensures smooth detailing.14. Adhesion and Brims
14.aSkirt Loops: 2 — Helps prime nozzle and start cleanly.
14.bBrim Width: 6 mm — Helps hold soft materials down.
14.cBrim Gap: 0.15 mm — Allows for easy removal without tearing.15. Prime Tower and Flush Settings
15.aPrime Tower: ON — Purges moisture and early flow inconsistencies.
15.bTower Width: 40 mm — Prevents collapse due to heat.
15.cBrim Width (Tower): 4 mm — Adds stability to the purge base.
15.dFlush Into Support: ON — Discards unwanted early flow safely.16. G-Code Start Script
M900 K0.05 ; Pressure Advance M106 S0 ; Fan off G92 E0 G1 E15 F300 ; purge line G92 E0
17. Additional Notes
17.aDry filament at 155 F for 2 hours before use.
17.bStore with desiccant.
17.cKeep extruder door open to allow vapor to escape.
17.dAvoid long dwell times at high temperatures.If you need any other assistance, feel free to reach out to us anytime at timeplast@timeplast.com — we’ll be happy to help.
Free U.S. standard shipping on orders of 5+ spools!
Coral Food
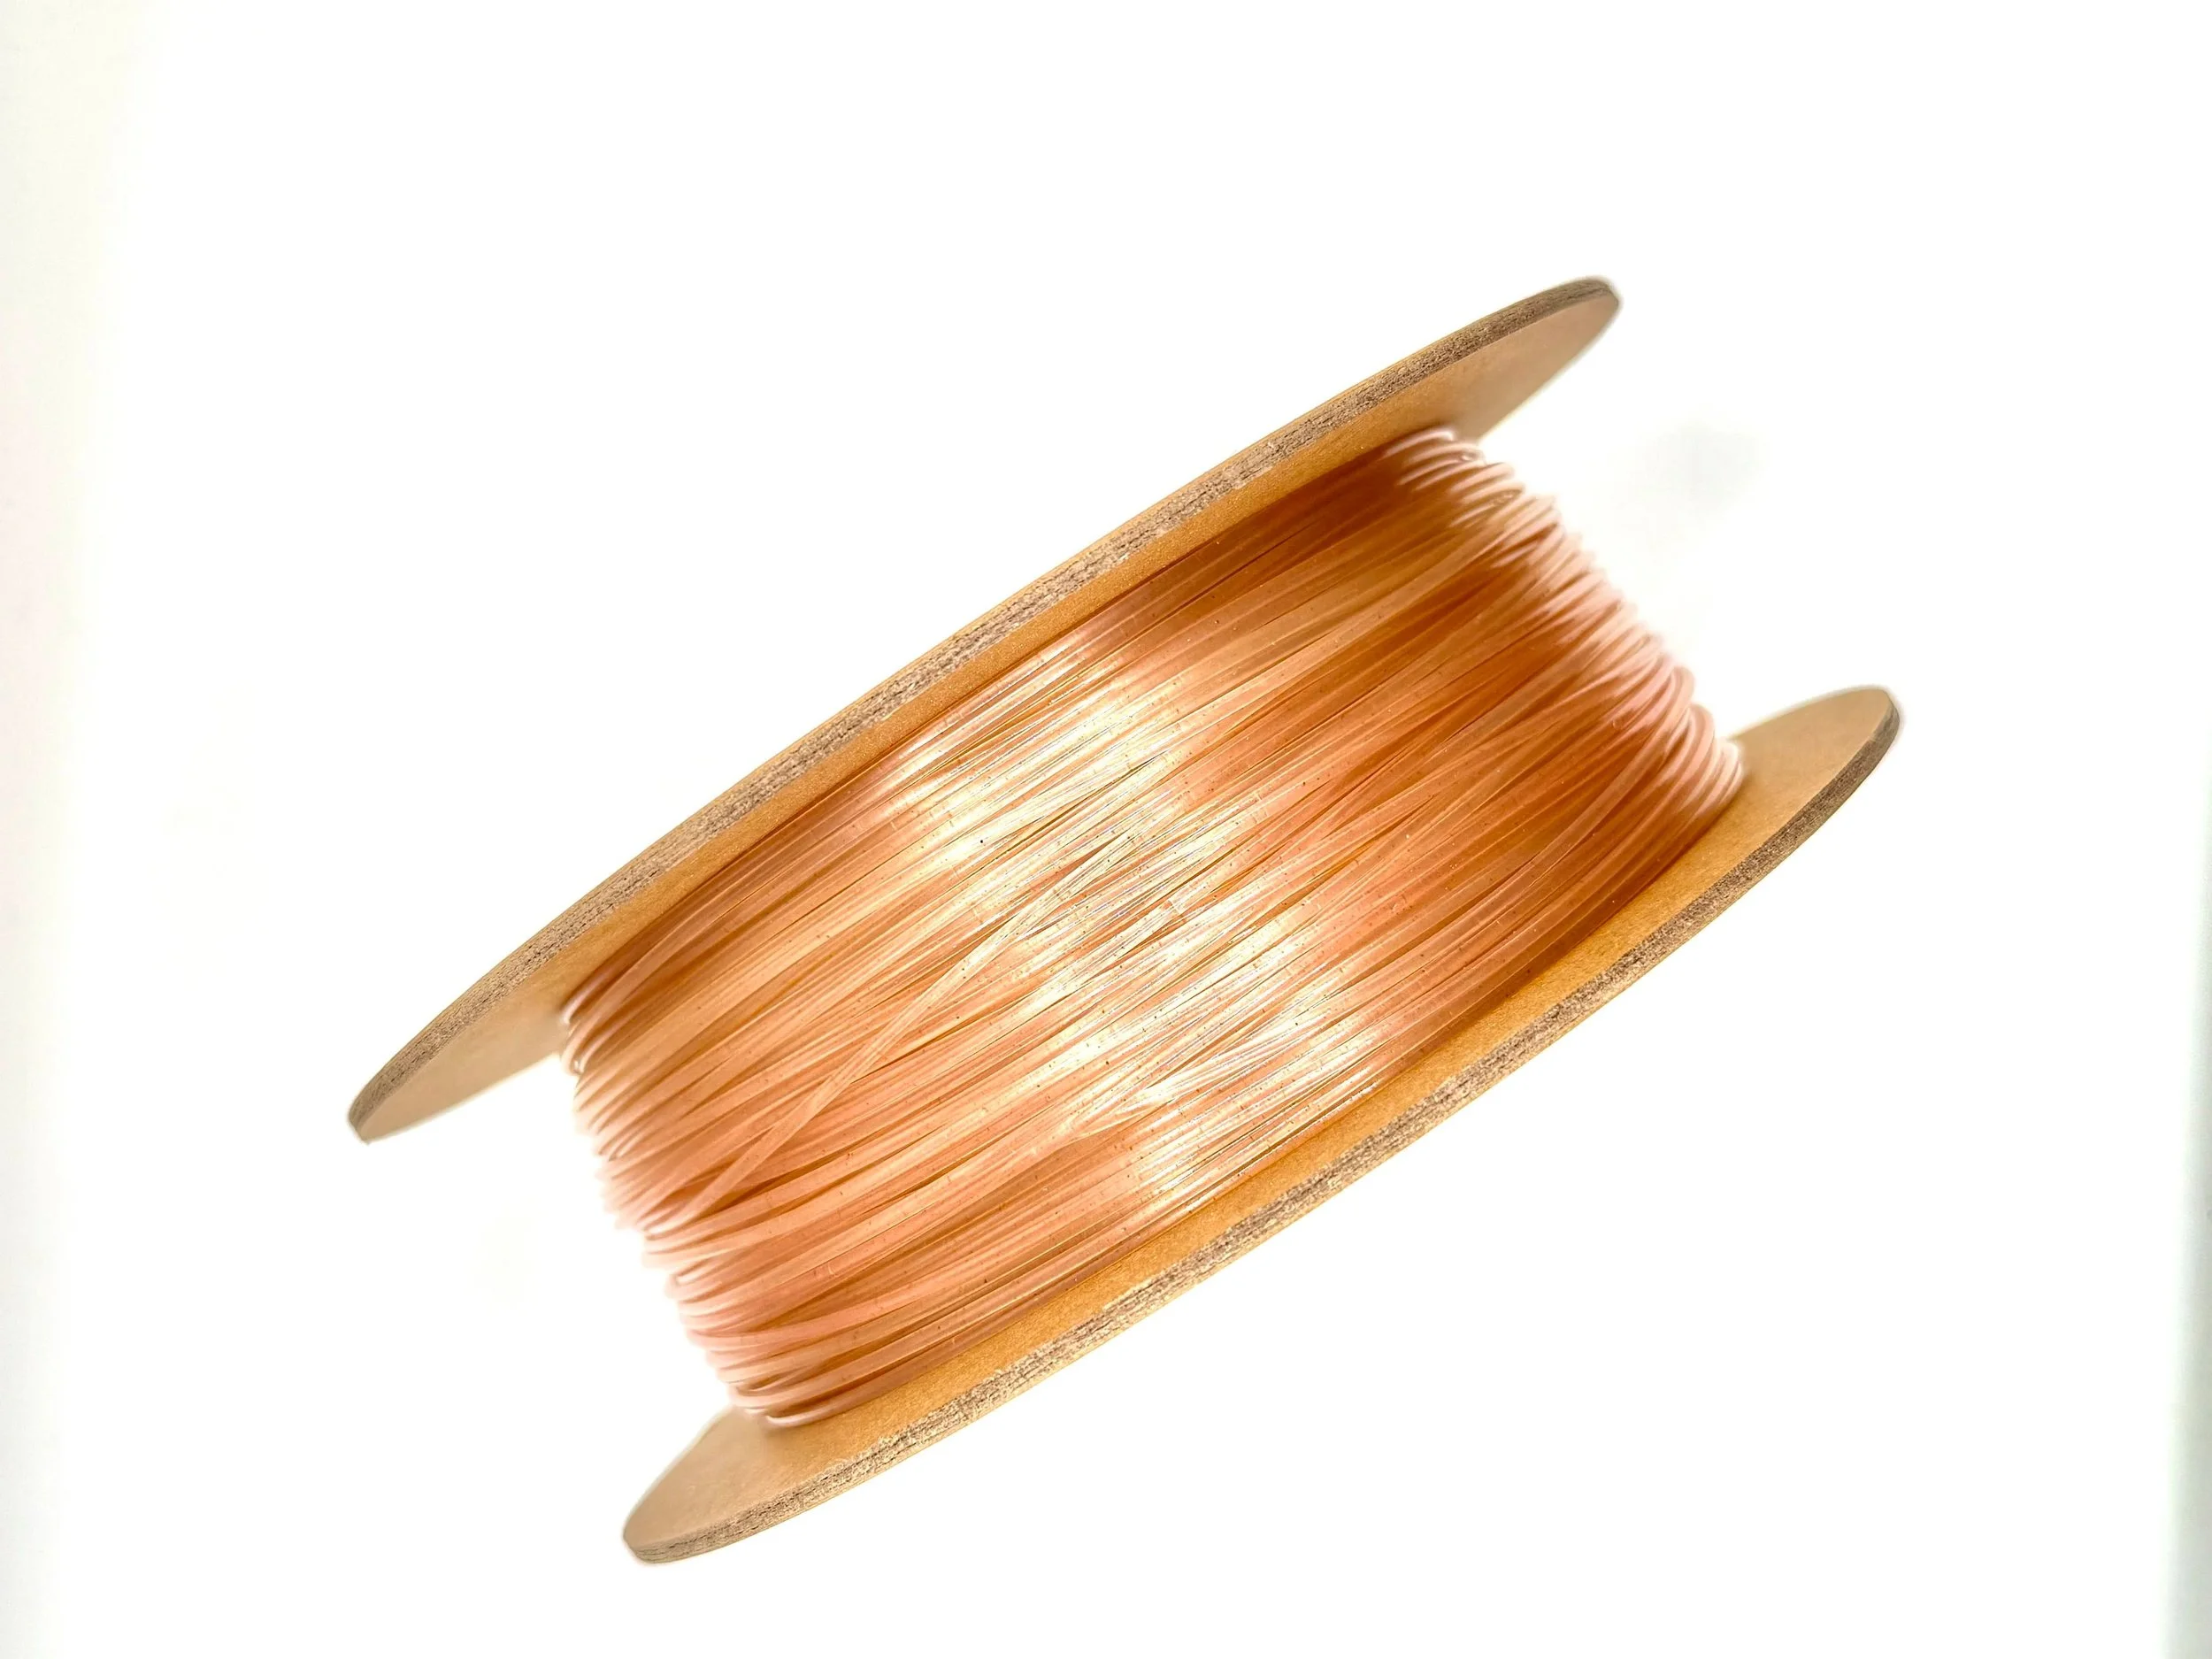
-
Crafted for reef-building organisms, this filament contains a precise blend of phytoplankton, zooplankton, and organic matter—formulated to release slowly in marine systems without overwhelming your tank chemistry.
3D-printed nourishment for vibrant corals.
How it works:
Timeplast’s gentle encapsulation process protects thermally sensitive ingredients, ensuring coral-friendly nutrients survive extrusion and dissolve on cue.
Stable. Targeted. Coral-safe.
Food Matrix Includes:
Phytoplankton: 22 g – Stimulates soft coral growth
Zooplankton: 16 g – Provides protein for hard corals
Organic marine matter: 8 g – Feeds filter feeders and boosts biodiversity
Where to use it:
Reef aquariums – Print food-releasing rocks or domes
Coral nurseries – Support growth with minimal water impact
Research labs – Controlled delivery of coral diets
DIY enthusiasts – Make coral feeders with specific profiles
-
Click here to access our new and improved TimeMass GPT Assistant. Just tell it your printer model and the TimeMass filament you're using—it will instantly recommend the exact parameters you need to start printing successfully.
1. Introduction
These parameters are designed to help avoid printing issues; however, temperatures and speed timings can be adjusted based on your specific goals. For example, if you prefer a less rigid result, we recommend using a lower temperature. This section outlines a complete slicing and printing profile for TimeMass Coral Food, tailored for printers with a 0.8 mm nozzle. If the print is not being successful, please lower the nozzle temperature by 10°C and start over until an optimal print is achieved. Please check the manual for printing parameters.2. Temperature Settings
2.aNozzle Temperature: 230°C — Optimal for flowability while avoiding decomposition (which begins around 250°C).
2.bBed Temperature: 75°C — Ensures strong first-layer adhesion and prevents moisture bubbling.
2.cNozzle Temperature Range: 230–245°C — Timeplast melts around 165°C but prints best at 240°C for precise viscosity control.3. Cooling Settings
3.aNo Cooling for First Layers: 3 layers — Prevents shrinkage due to rapid cooling of moisture-rich filament.
3.bFan Minimum Speed: 0% for the first 100 seconds — Allows heat retention during early layers.
3.cFan Maximum Speed: 15% starting at 8 seconds — Avoids overcooling that can lead to warping.
3.dKeep Fan Always On: OFF — Allows vapor to escape and avoids internal fogging.
3.eSlow Down for Cooling: ON — Improves surface finish with controlled cooling.
3.fForce Cooling for Overhangs: OFF — Overcooling can deform bridges in Timeplast.
3.gFan for Overhangs: 15% — Only for essential cooling in complex areas.
3.hPre-Start Fan Time: 2 seconds — Minimizes pressure differential during the first layer.4. Volumetric Flow
4.aMax Volumetric Speed: 12 mm³/s — Based on a melt flow index of ~15 g/10min, allows high-speed printing.
4.bRamming Speed: 3 mm³/s — Prevents bubbles or popping from pressure spikes.5. Retraction and Flow
5.aRetraction Distance: 0.4 mm — Minimal retraction required for soft filaments to avoid stringing.
5.bRetraction Speed: 15 mm/s — Slow enough to avoid pulling molten plastic.
5.cPressure Advance: 0.05 — Compensates for nozzle lag at high flow rates.
5.dFlow Ratio: 92% — Slight under-extrusion avoids swelling and surface artifacts.6. Precision Settings
6.aGap Closing Radius: 0.1 mm — Tolerant of gaps in thicker walls.
6.bArc Fitting: ON — Reduces G-code size and smooths curve transitions.
6.cElephant Foot Compensation: 0.1 mm — Offsets squishing in the first layer caused by large bead sizes.7. Walls and Shells
7.aWall Loops: 2 — Minimum for strength when using a 0.8 mm nozzle.
7.bDetect Thin Walls: ON — Ensures tight geometries aren’t skipped.
7.cTop/Bottom Shell Layers: 3 — Provides good coverage; increase if watertightness is needed.
7.dTop/Bottom Thickness: 1.2 mm — Equals 1.5x the nozzle size for solid strength.
7.eTop/Bottom Pattern: Monotonic — Distributes tension evenly and improves surface finish.8. Geometry and Movement
8.aWall Order: Inner before Outer — Creates cleaner outer surfaces.
8.bInfill First: OFF — Maintains precise outer dimensions.
8.cSmooth Speed Transition: ON — Prevents ringing caused by abrupt speed changes.
8.dSmooth Coefficient: 80 — Ideal damping for soft materials.
8.eAvoid Crossing Wall: ON — Minimizes stringing across part walls.
8.fMax Detour for Crossing: 10 mm or 5% — Balances time with print cleanliness.9. Layer and Width Settings
9.aLayer Height: 0.3 mm — Optimal for strength and resolution using a 0.8 mm nozzle.
9.bInitial Layer Height: 0.35 mm — Slightly higher to improve adhesion.
9.cLine Widths (all): 0.8 mm — Matches nozzle diameter for consistent extrusion.10. Seam Settings
10.aSeam Position: Aligned or Back — Use aligned for mechanical consistency, back for visual appeal.
10.bSmart Scarf Seam: ON — Automatically adjusts seam location to reduce visual impact.
10.cSeam Angle: 155° — Standard seam angle for clean transitions.
10.dSeam Steps: 10 — Smooths seam path and improves visual finish.11. Infill Settings
11.aWall/Infill Overlap: 10% — Prevents infill from deforming soft exterior walls.
11.bInfill Combination: ON — Consolidates paths for efficiency.
11.cDetect Floating Shells: ON — Ensures unsupported vertical structures are printed reliably.
11.dSparse Infill Density: 20–25% — Balanced rigidity vs. material use.
11.eSparse Pattern: Grid — Stable and efficient for flexible geometries.12. Speed Settings
12.aTravel: 160 mm/s — Fast but safe against backlash.
12.bInitial Layer: 15 mm/s — Prevents nozzle from skimming and ensures bed adhesion.
12.cOuter Wall: 60 mm/s — Controlled speed for surface quality.
12.dInner Wall: 90 mm/s — Slightly faster without compromising control.
12.eSmall Perimeter: 35 mm/s — Reduced speed for detailed geometry.
12.fTop Surface: 40 mm/s — Improves finish on topmost layers.
12.gInfill: 100–120 mm/s — Takes advantage of high flowability.13. Acceleration Settings
13.aNormal Print: 2000 mm/s² — Prevents ringing in soft filaments.
13.bTravel: 4000 mm/s² — Enables fast movement without harsh transitions.
13.cInitial Layer: 300 mm/s² — Gentle movement prevents lifting from the bed.
13.dOuter Wall: 1500 mm/s² — Improves outer surface clarity.
13.eInner Wall: 2000 mm/s² — Balanced for structural components.
13.fTop Surface: 1500 mm/s² — Ensures smooth detailing.14. Adhesion and Brims
14.aSkirt Loops: 2 — Helps prime nozzle and start cleanly.
14.bBrim Width: 6 mm — Helps hold soft materials down.
14.cBrim Gap: 0.15 mm — Allows for easy removal without tearing.15. Prime Tower and Flush Settings
15.aPrime Tower: ON — Purges moisture and early flow inconsistencies.
15.bTower Width: 40 mm — Prevents collapse due to heat.
15.cBrim Width (Tower): 4 mm — Adds stability to the purge base.
15.dFlush Into Support: ON — Discards unwanted early flow safely.16. G-Code Start Script
M900 K0.05 ; Pressure Advance M106 S0 ; Fan off G92 E0 G1 E15 F300 ; purge line G92 E0
17. Additional Notes
17.aDry filament at 155 F for 2 hours before use.
17.bStore with desiccant.
17.cKeep extruder door open to allow vapor to escape.
17.dAvoid long dwell times at high temperatures.If you need any other assistance, feel free to reach out to us anytime at timeplast@timeplast.com — we’ll be happy to help.
Free U.S. standard shipping on orders of 5+ spools!
Fish Bait
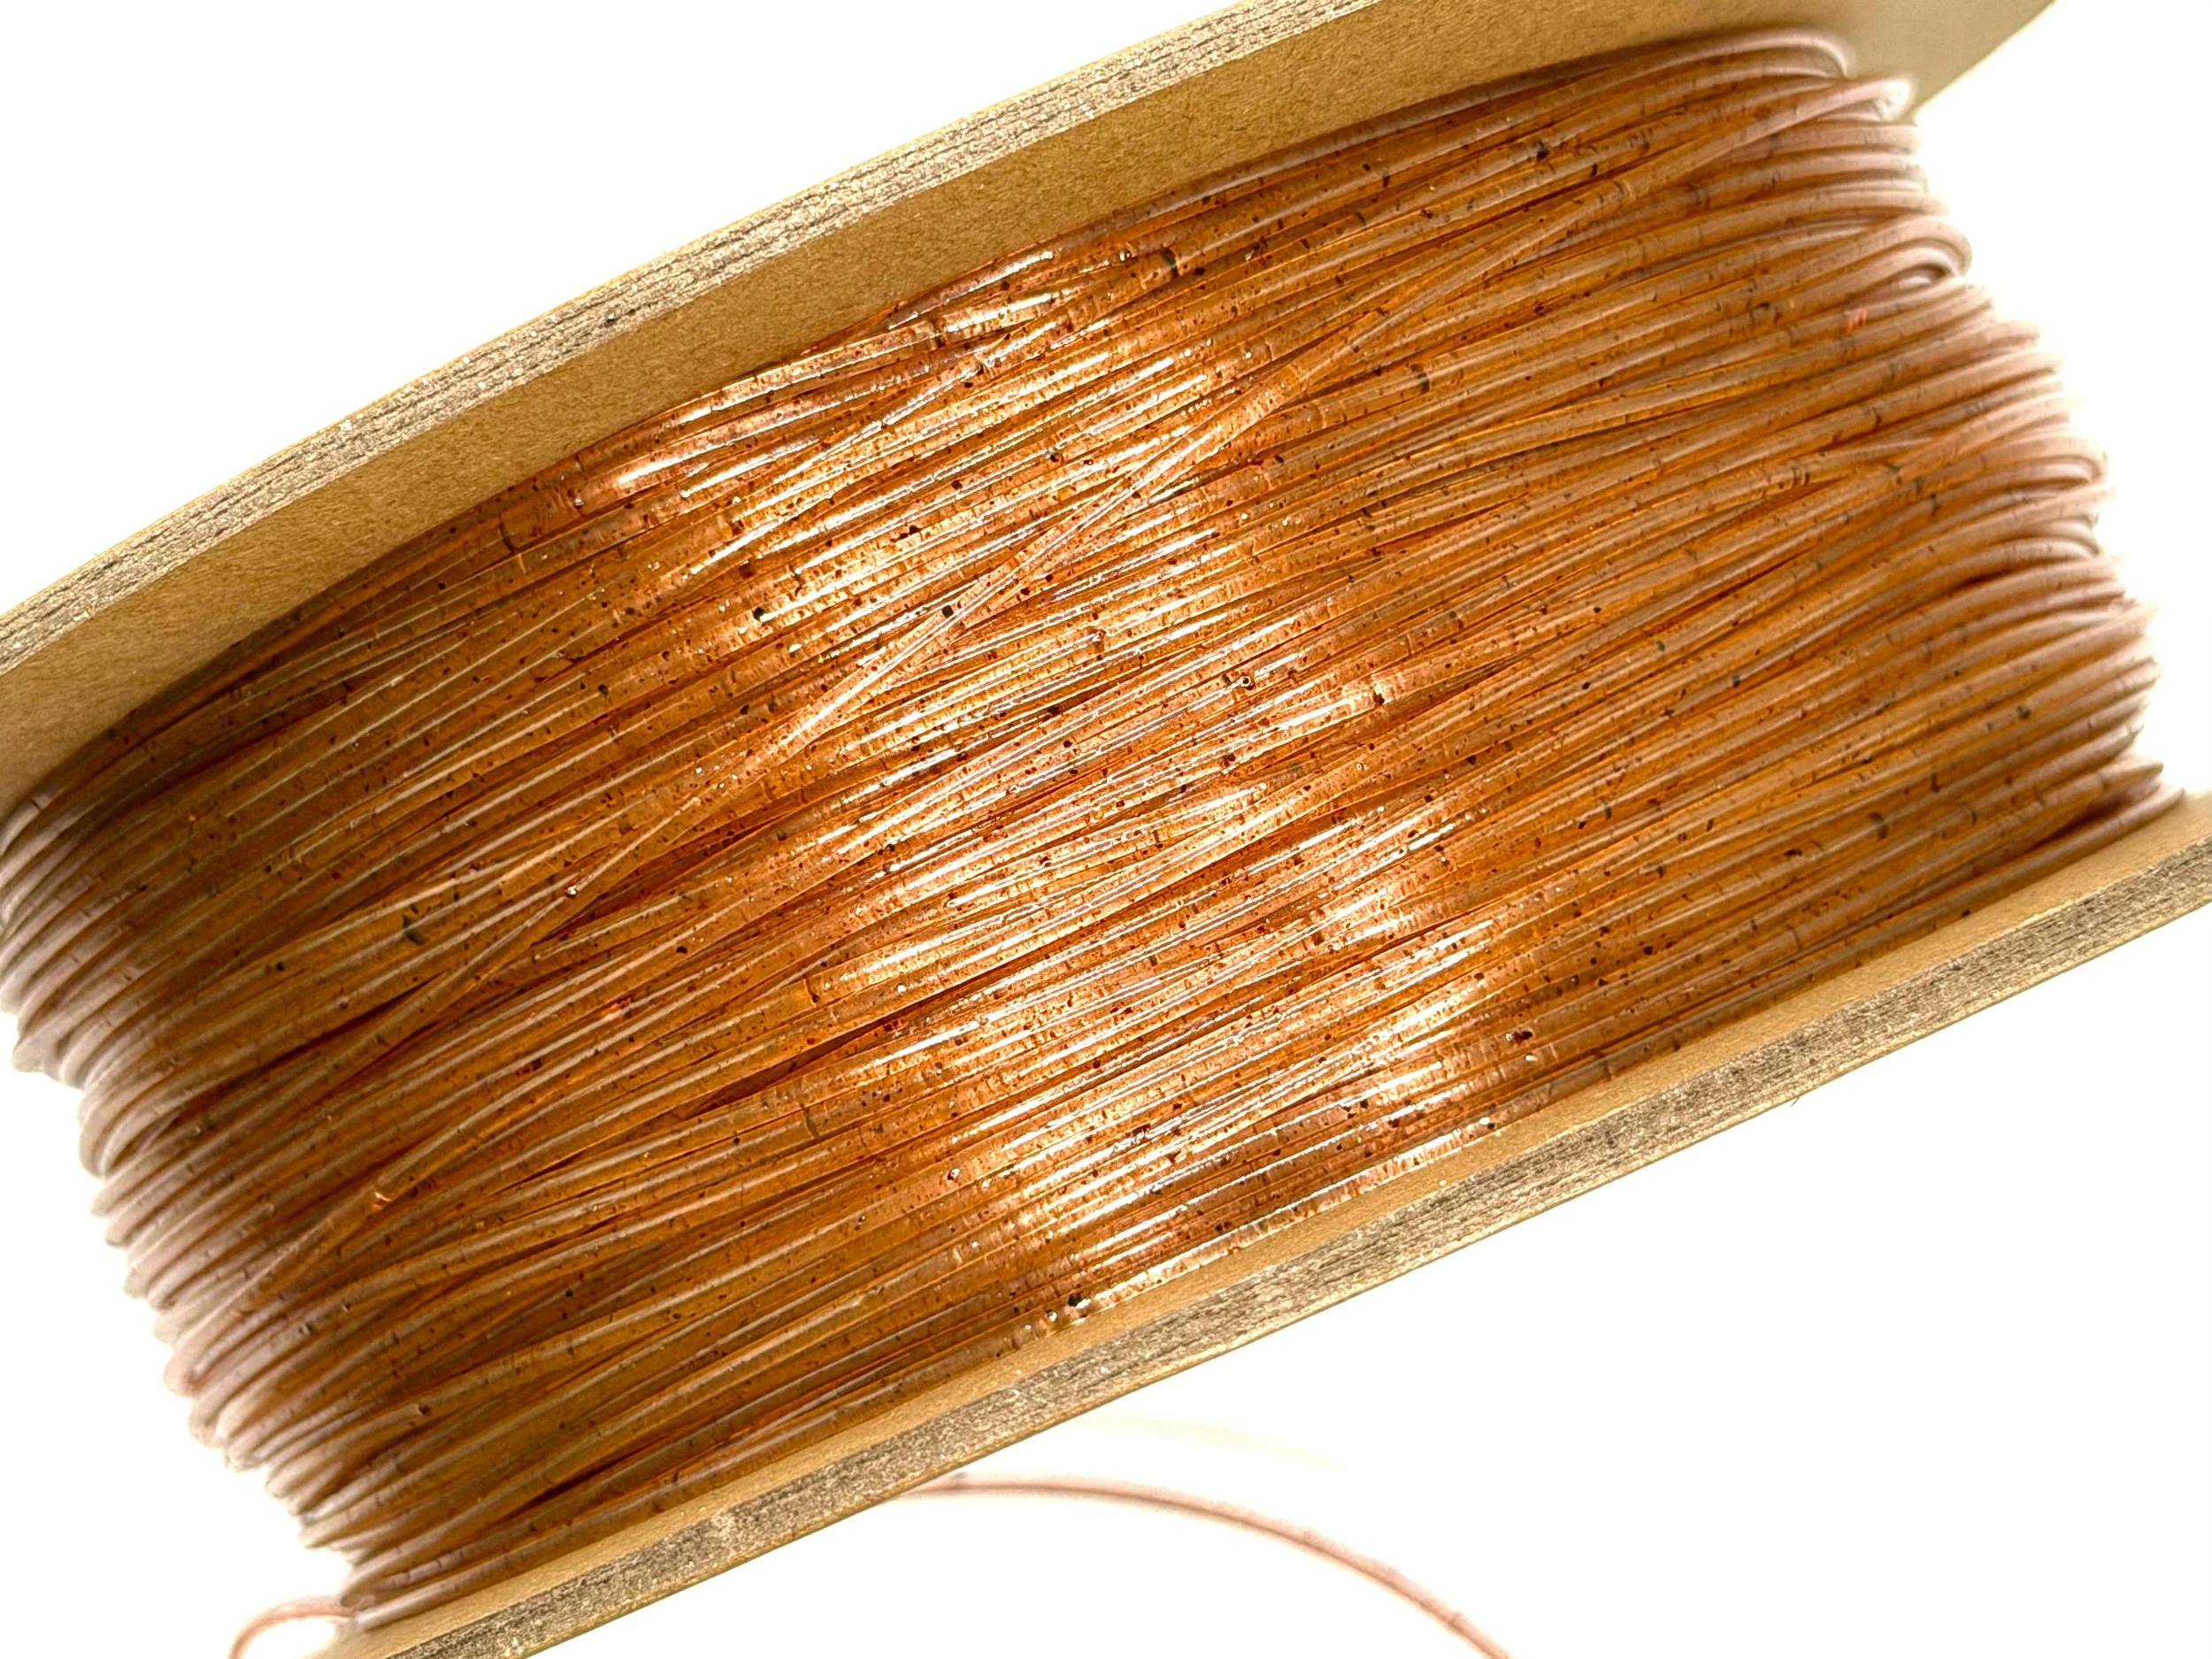
-
Water soluble, fish-attracting filament built to dissolve after one hour in water. Packed with worm, shrimp, squid, and fish meal, it tempts fish while reducing waste in the water. Ideal for recreational fishing or custom bait design.
Print. Cast. Catch. No mess left behind.
How it works:
Water exposure activates flavor molecules and starts softening the bait. Time-controlled dissolution ensures no environmental-impact disposal.
Bait it your way.
Core Ingredients:
Fish + Shrimp Meal: 15 g
Squid Powder + Worm Extract: 3 g
Marine-safe Binder: 25 g
Where to use it:
Fishing bait prototypes – Shape-specific lures
Retail baits – Sell your own 3D-printed bait line
Sustainable fishing – No plastic trash in rivers or lakes
Environmental Use Disclaimer
Intended Use Notice:
This product is designed for use exclusively in large natural or managed bodies of water, such as ponds, lakes, rivers, or ocean environments with significant water volume and natural circulation.
Do not use this product in confined or closed aquatic systems such as home aquariums, fish tanks, ornamental ponds, or small water containers, where pigment or nutrient concentrations cannot dilute naturally.
All colorants and additives used in this filament are food-grade or aquaculture-safe, formulated to biodegrade or disperse harmlessly under normal environmental conditions.
Proper use of this product supports eco-responsible fishing and aquatic applications while maintaining environmental safety standards.
-
Click here to access our new and improved TimeMass GPT Assistant. Just tell it your printer model and the TimeMass filament you're using—it will instantly recommend the exact parameters you need to start printing successfully.
1. Introduction
These parameters are designed to help avoid printing issues; however, temperatures and speed timings can be adjusted based on your specific goals. For example, if you prefer a less rigid result, we recommend using a lower temperature. This section outlines a complete slicing and printing profile for TimeMass Fish Bait, tailored for printers with a 0.8 mm nozzle. If the print is not being successful, please lower the nozzle temperature by 10°C and start over until an optimal print is achieved. Please check the manual for printing parameters.2. Temperature Settings
2.aNozzle Temperature: 230°C — Optimal for flowability while avoiding decomposition (which begins around 250°C).
2.bBed Temperature: 75°C — Ensures strong first-layer adhesion and prevents moisture bubbling.
2.cNozzle Temperature Range: 230–245°C — Timeplast melts around 165°C but prints best at 240°C for precise viscosity control.3. Cooling Settings
3.aNo Cooling for First Layers: 3 layers — Prevents shrinkage due to rapid cooling of moisture-rich filament.
3.bFan Minimum Speed: 0% for the first 100 seconds — Allows heat retention during early layers.
3.cFan Maximum Speed: 15% starting at 8 seconds — Avoids overcooling that can lead to warping.
3.dKeep Fan Always On: OFF — Allows vapor to escape and avoids internal fogging.
3.eSlow Down for Cooling: ON — Improves surface finish with controlled cooling.
3.fForce Cooling for Overhangs: OFF — Overcooling can deform bridges in Timeplast.
3.gFan for Overhangs: 15% — Only for essential cooling in complex areas.
3.hPre-Start Fan Time: 2 seconds — Minimizes pressure differential during the first layer.4. Volumetric Flow
4.aMax Volumetric Speed: 12 mm³/s — Based on a melt flow index of ~15 g/10min, allows high-speed printing.
4.bRamming Speed: 3 mm³/s — Prevents bubbles or popping from pressure spikes.5. Retraction and Flow
5.aRetraction Distance: 0.4 mm — Minimal retraction required for soft filaments to avoid stringing.
5.bRetraction Speed: 15 mm/s — Slow enough to avoid pulling molten plastic.
5.cPressure Advance: 0.05 — Compensates for nozzle lag at high flow rates.
5.dFlow Ratio: 92% — Slight under-extrusion avoids swelling and surface artifacts.6. Precision Settings
6.aGap Closing Radius: 0.1 mm — Tolerant of gaps in thicker walls.
6.bArc Fitting: ON — Reduces G-code size and smooths curve transitions.
6.cElephant Foot Compensation: 0.1 mm — Offsets squishing in the first layer caused by large bead sizes.7. Walls and Shells
7.aWall Loops: 2 — Minimum for strength when using a 0.8 mm nozzle.
7.bDetect Thin Walls: ON — Ensures tight geometries aren’t skipped.
7.cTop/Bottom Shell Layers: 3 — Provides good coverage; increase if watertightness is needed.
7.dTop/Bottom Thickness: 1.2 mm — Equals 1.5x the nozzle size for solid strength.
7.eTop/Bottom Pattern: Monotonic — Distributes tension evenly and improves surface finish.8. Geometry and Movement
8.aWall Order: Inner before Outer — Creates cleaner outer surfaces.
8.bInfill First: OFF — Maintains precise outer dimensions.
8.cSmooth Speed Transition: ON — Prevents ringing caused by abrupt speed changes.
8.dSmooth Coefficient: 80 — Ideal damping for soft materials.
8.eAvoid Crossing Wall: ON — Minimizes stringing across part walls.
8.fMax Detour for Crossing: 10 mm or 5% — Balances time with print cleanliness.9. Layer and Width Settings
9.aLayer Height: 0.3 mm — Optimal for strength and resolution using a 0.8 mm nozzle.
9.bInitial Layer Height: 0.35 mm — Slightly higher to improve adhesion.
9.cLine Widths (all): 0.8 mm — Matches nozzle diameter for consistent extrusion.10. Seam Settings
10.aSeam Position: Aligned or Back — Use aligned for mechanical consistency, back for visual appeal.
10.bSmart Scarf Seam: ON — Automatically adjusts seam location to reduce visual impact.
10.cSeam Angle: 155° — Standard seam angle for clean transitions.
10.dSeam Steps: 10 — Smooths seam path and improves visual finish.11. Infill Settings
11.aWall/Infill Overlap: 10% — Prevents infill from deforming soft exterior walls.
11.bInfill Combination: ON — Consolidates paths for efficiency.
11.cDetect Floating Shells: ON — Ensures unsupported vertical structures are printed reliably.
11.dSparse Infill Density: 20–25% — Balanced rigidity vs. material use.
11.eSparse Pattern: Grid — Stable and efficient for flexible geometries.12. Speed Settings
12.aTravel: 160 mm/s — Fast but safe against backlash.
12.bInitial Layer: 15 mm/s — Prevents nozzle from skimming and ensures bed adhesion.
12.cOuter Wall: 60 mm/s — Controlled speed for surface quality.
12.dInner Wall: 90 mm/s — Slightly faster without compromising control.
12.eSmall Perimeter: 35 mm/s — Reduced speed for detailed geometry.
12.fTop Surface: 40 mm/s — Improves finish on topmost layers.
12.gInfill: 100–120 mm/s — Takes advantage of high flowability.13. Acceleration Settings
13.aNormal Print: 2000 mm/s² — Prevents ringing in soft filaments.
13.bTravel: 4000 mm/s² — Enables fast movement without harsh transitions.
13.cInitial Layer: 300 mm/s² — Gentle movement prevents lifting from the bed.
13.dOuter Wall: 1500 mm/s² — Improves outer surface clarity.
13.eInner Wall: 2000 mm/s² — Balanced for structural components.
13.fTop Surface: 1500 mm/s² — Ensures smooth detailing.14. Adhesion and Brims
14.aSkirt Loops: 2 — Helps prime nozzle and start cleanly.
14.bBrim Width: 6 mm — Helps hold soft materials down.
14.cBrim Gap: 0.15 mm — Allows for easy removal without tearing.15. Prime Tower and Flush Settings
15.aPrime Tower: ON — Purges moisture and early flow inconsistencies.
15.bTower Width: 40 mm — Prevents collapse due to heat.
15.cBrim Width (Tower): 4 mm — Adds stability to the purge base.
15.dFlush Into Support: ON — Discards unwanted early flow safely.16. G-Code Start Script
M900 K0.05 ; Pressure Advance M106 S0 ; Fan off G92 E0 G1 E15 F300 ; purge line G92 E0
17. Additional Notes
17.aDry filament at 155 F for 2 hours before use.
17.bStore with desiccant.
17.cKeep extruder door open to allow vapor to escape.
17.dAvoid long dwell times at high temperatures.If you need any other assistance, feel free to reach out to us anytime at timeplast@timeplast.com — we’ll be happy to help.
Free U.S. standard shipping on orders of 5+ spools!
The Manifester Explained.
Outdoor
Flex
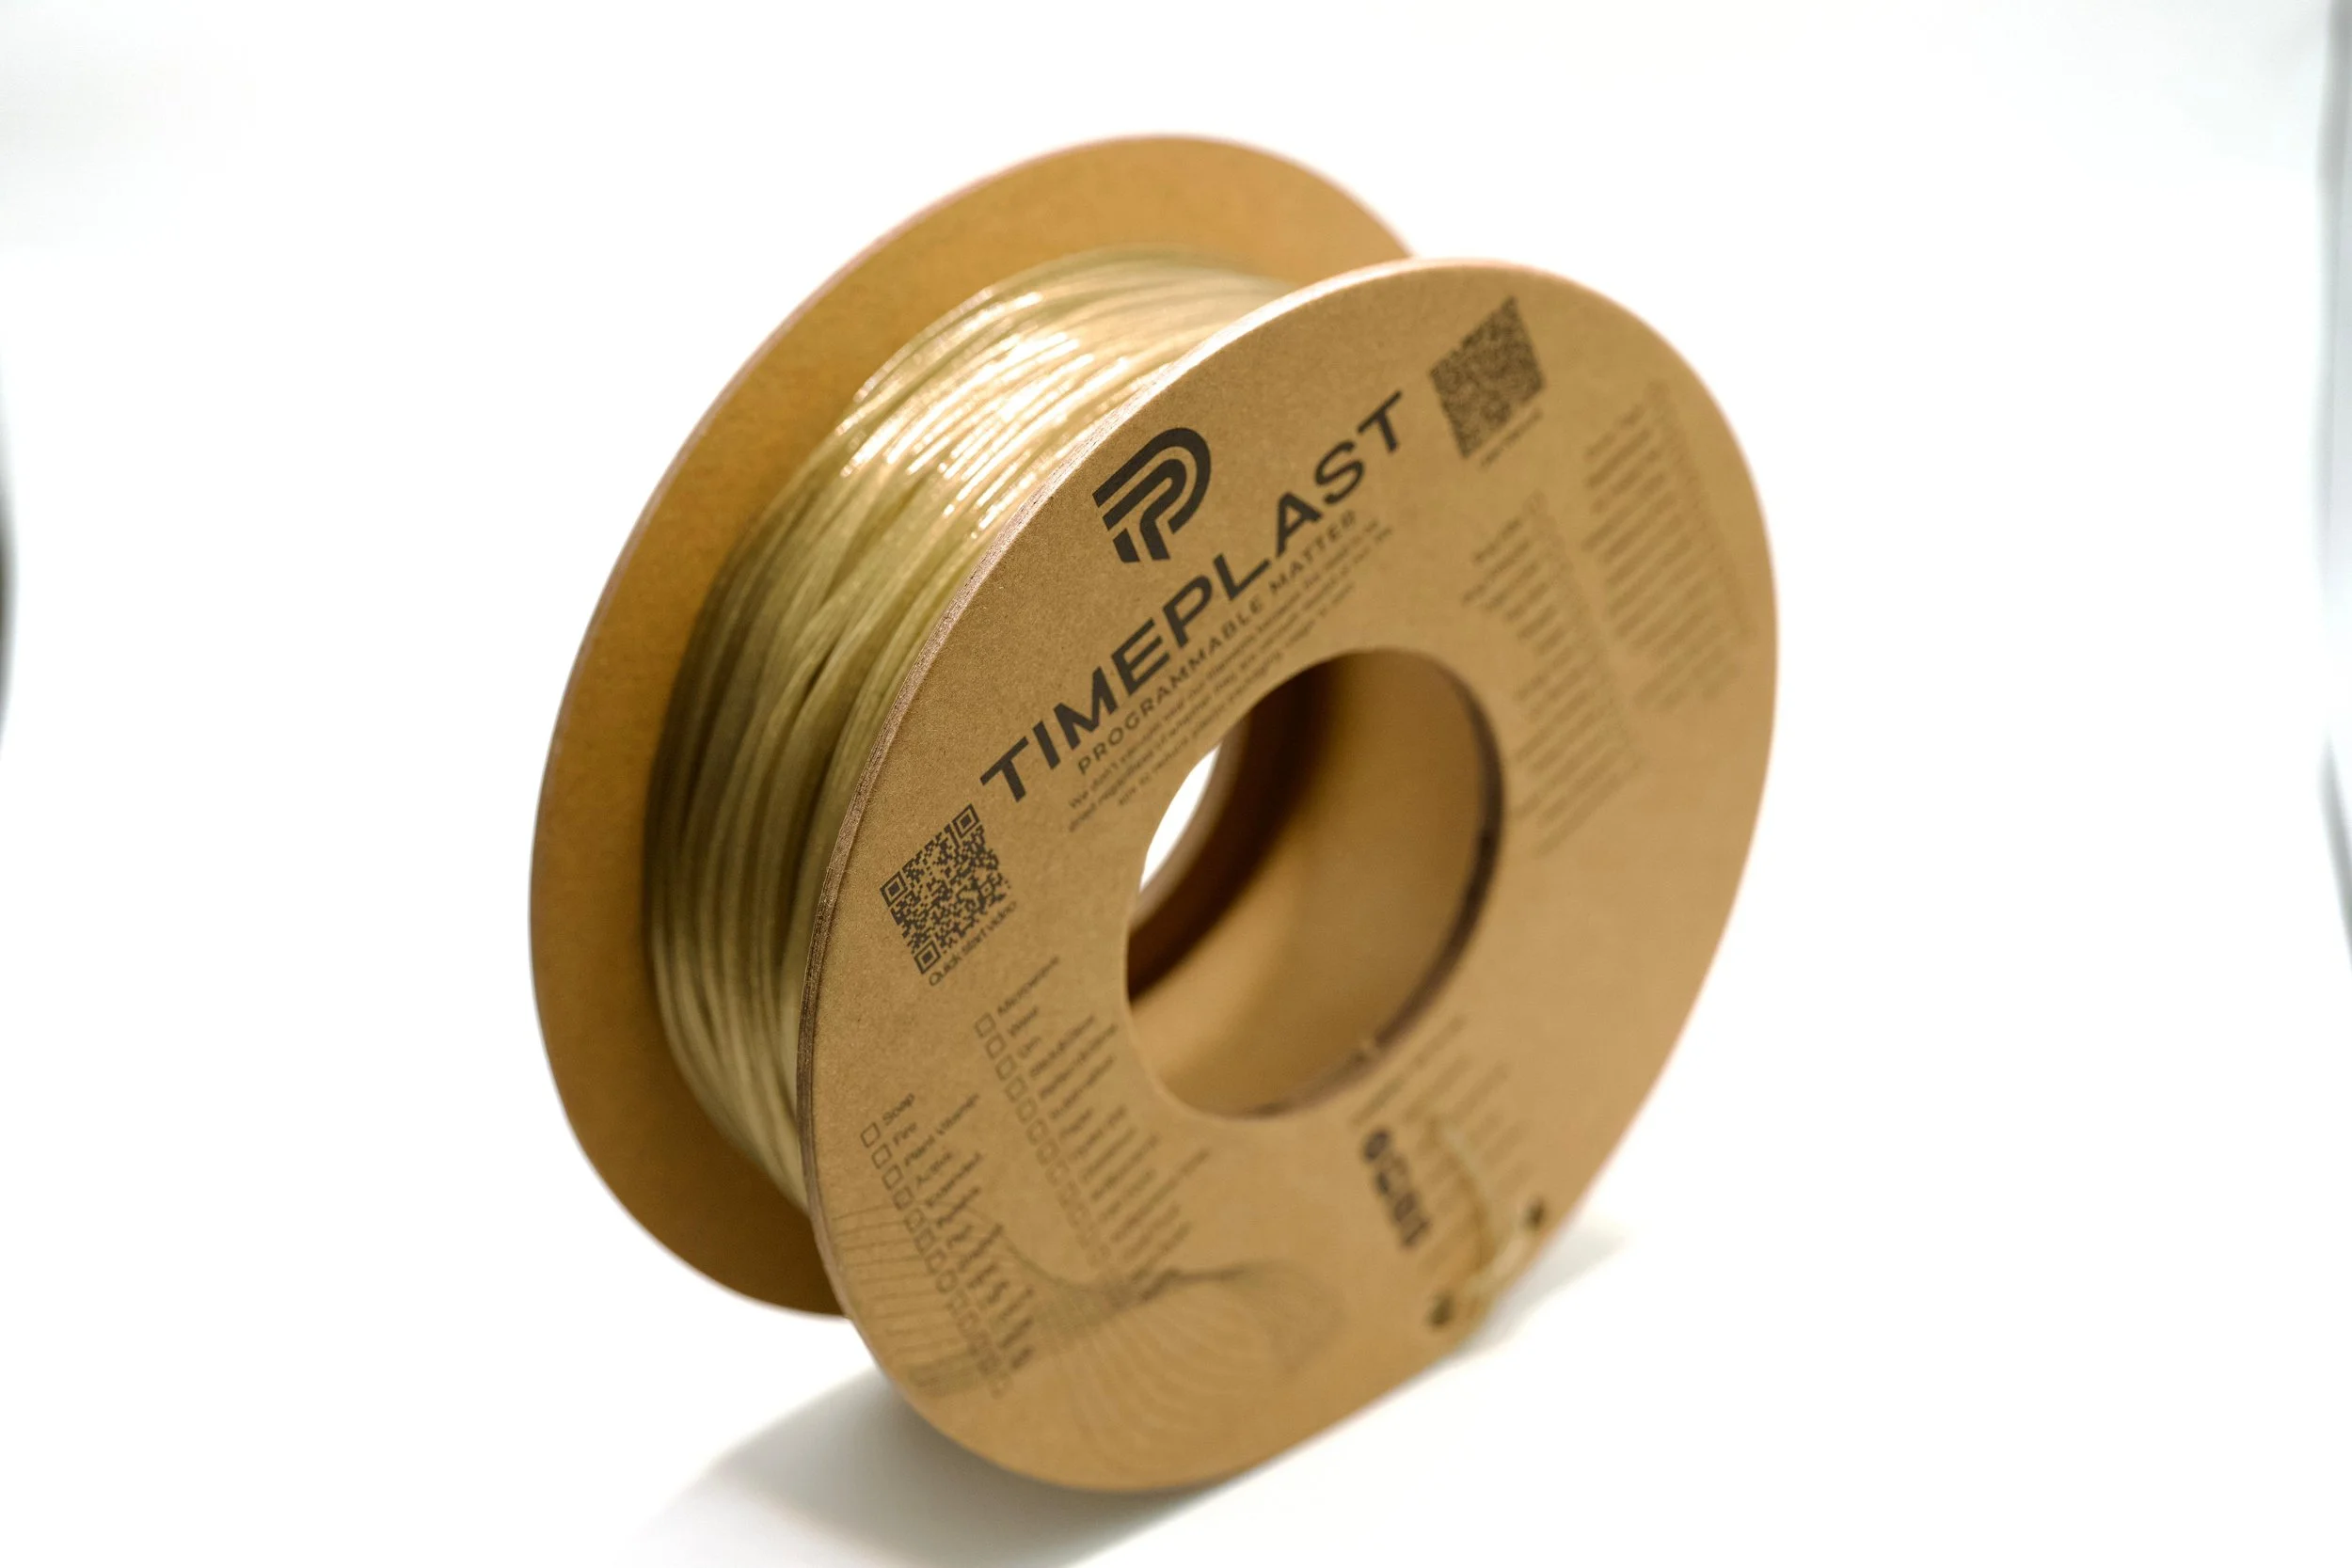
-
TimeMass Flex is a TPU-like flexible filament developed by Timeplast that is also water-soluble. This unique combination allows for applications where maximum flexibility is needed, followed by controlled dissolution in water.
-
Click here to access our new and improved TimeMass GPT Assistant. Just tell it your printer model and the TimeMass filament you're using—it will instantly recommend the exact parameters you need to start printing successfully.
1. Introduction
These parameters are designed to help avoid printing issues; however, temperatures and speed timings can be adjusted based on your specific goals. For example, if you prefer a less rigid result, we recommend using a lower temperature. This section outlines a complete slicing and printing profile for TimeMass Flex, tailored for printers with a 0.8 mm nozzle. If the print is not being successful, please lower the nozzle temperature by 10°C and start over until an optimal print is achieved. Please check the manual for printing parameters.2. Temperature Settings
2.aNozzle Temperature: 230°C — Optimal for flowability while avoiding decomposition (which begins around 250°C).
2.bBed Temperature: 75°C — Ensures strong first-layer adhesion and prevents moisture bubbling.
2.cNozzle Temperature Range: 230–245°C — Timeplast melts around 165°C but prints best at 240°C for precise viscosity control.3. Cooling Settings
3.aNo Cooling for First Layers: 3 layers — Prevents shrinkage due to rapid cooling of moisture-rich filament.
3.bFan Minimum Speed: 0% for the first 100 seconds — Allows heat retention during early layers.
3.cFan Maximum Speed: 15% starting at 8 seconds — Avoids overcooling that can lead to warping.
3.dKeep Fan Always On: OFF — Allows vapor to escape and avoids internal fogging.
3.eSlow Down for Cooling: ON — Improves surface finish with controlled cooling.
3.fForce Cooling for Overhangs: OFF — Overcooling can deform bridges in Timeplast.
3.gFan for Overhangs: 15% — Only for essential cooling in complex areas.
3.hPre-Start Fan Time: 2 seconds — Minimizes pressure differential during the first layer.4. Volumetric Flow
4.aMax Volumetric Speed: 12 mm³/s — Based on a melt flow index of ~15 g/10min, allows high-speed printing.
4.bRamming Speed: 3 mm³/s — Prevents bubbles or popping from pressure spikes.5. Retraction and Flow
5.aRetraction Distance: 0.4 mm — Minimal retraction required for soft filaments to avoid stringing.
5.bRetraction Speed: 15 mm/s — Slow enough to avoid pulling molten plastic.
5.cPressure Advance: 0.05 — Compensates for nozzle lag at high flow rates.
5.dFlow Ratio: 92% — Slight under-extrusion avoids swelling and surface artifacts.6. Precision Settings
6.aGap Closing Radius: 0.1 mm — Tolerant of gaps in thicker walls.
6.bArc Fitting: ON — Reduces G-code size and smooths curve transitions.
6.cElephant Foot Compensation: 0.1 mm — Offsets squishing in the first layer caused by large bead sizes.7. Walls and Shells
7.aWall Loops: 2 — Minimum for strength when using a 0.8 mm nozzle.
7.bDetect Thin Walls: ON — Ensures tight geometries aren’t skipped.
7.cTop/Bottom Shell Layers: 3 — Provides good coverage; increase if watertightness is needed.
7.dTop/Bottom Thickness: 1.2 mm — Equals 1.5x the nozzle size for solid strength.
7.eTop/Bottom Pattern: Monotonic — Distributes tension evenly and improves surface finish.8. Geometry and Movement
8.aWall Order: Inner before Outer — Creates cleaner outer surfaces.
8.bInfill First: OFF — Maintains precise outer dimensions.
8.cSmooth Speed Transition: ON — Prevents ringing caused by abrupt speed changes.
8.dSmooth Coefficient: 80 — Ideal damping for soft materials.
8.eAvoid Crossing Wall: ON — Minimizes stringing across part walls.
8.fMax Detour for Crossing: 10 mm or 5% — Balances time with print cleanliness.9. Layer and Width Settings
9.aLayer Height: 0.3 mm — Optimal for strength and resolution using a 0.8 mm nozzle.
9.bInitial Layer Height: 0.35 mm — Slightly higher to improve adhesion.
9.cLine Widths (all): 0.8 mm — Matches nozzle diameter for consistent extrusion.10. Seam Settings
10.aSeam Position: Aligned or Back — Use aligned for mechanical consistency, back for visual appeal.
10.bSmart Scarf Seam: ON — Automatically adjusts seam location to reduce visual impact.
10.cSeam Angle: 155° — Standard seam angle for clean transitions.
10.dSeam Steps: 10 — Smooths seam path and improves visual finish.11. Infill Settings
11.aWall/Infill Overlap: 10% — Prevents infill from deforming soft exterior walls.
11.bInfill Combination: ON — Consolidates paths for efficiency.
11.cDetect Floating Shells: ON — Ensures unsupported vertical structures are printed reliably.
11.dSparse Infill Density: 20–25% — Balanced rigidity vs. material use.
11.eSparse Pattern: Grid — Stable and efficient for flexible geometries.12. Speed Settings
12.aTravel: 160 mm/s — Fast but safe against backlash.
12.bInitial Layer: 15 mm/s — Prevents nozzle from skimming and ensures bed adhesion.
12.cOuter Wall: 60 mm/s — Controlled speed for surface quality.
12.dInner Wall: 90 mm/s — Slightly faster without compromising control.
12.eSmall Perimeter: 35 mm/s — Reduced speed for detailed geometry.
12.fTop Surface: 40 mm/s — Improves finish on topmost layers.
12.gInfill: 100–120 mm/s — Takes advantage of high flowability.13. Acceleration Settings
13.aNormal Print: 2000 mm/s² — Prevents ringing in soft filaments.
13.bTravel: 4000 mm/s² — Enables fast movement without harsh transitions.
13.cInitial Layer: 300 mm/s² — Gentle movement prevents lifting from the bed.
13.dOuter Wall: 1500 mm/s² — Improves outer surface clarity.
13.eInner Wall: 2000 mm/s² — Balanced for structural components.
13.fTop Surface: 1500 mm/s² — Ensures smooth detailing.14. Adhesion and Brims
14.aSkirt Loops: 2 — Helps prime nozzle and start cleanly.
14.bBrim Width: 6 mm — Helps hold soft materials down.
14.cBrim Gap: 0.15 mm — Allows for easy removal without tearing.15. Prime Tower and Flush Settings
15.aPrime Tower: ON — Purges moisture and early flow inconsistencies.
15.bTower Width: 40 mm — Prevents collapse due to heat.
15.cBrim Width (Tower): 4 mm — Adds stability to the purge base.
15.dFlush Into Support: ON — Discards unwanted early flow safely.16. G-Code Start Script
M900 K0.05 ; Pressure Advance M106 S0 ; Fan off G92 E0 G1 E15 F300 ; purge line G92 E0
17. Additional Notes
17.aDry filament at 155 F for 2 hours before use.
17.bStore with desiccant.
17.cKeep extruder door open to allow vapor to escape.
17.dAvoid long dwell times at high temperatures.If you need any other assistance, feel free to reach out to us anytime at timeplast@timeplast.com — we’ll be happy to help.
Free U.S. standard shipping on orders of 5+ spools!
Custom colors for 5+ same-type spools’ orders
Ball
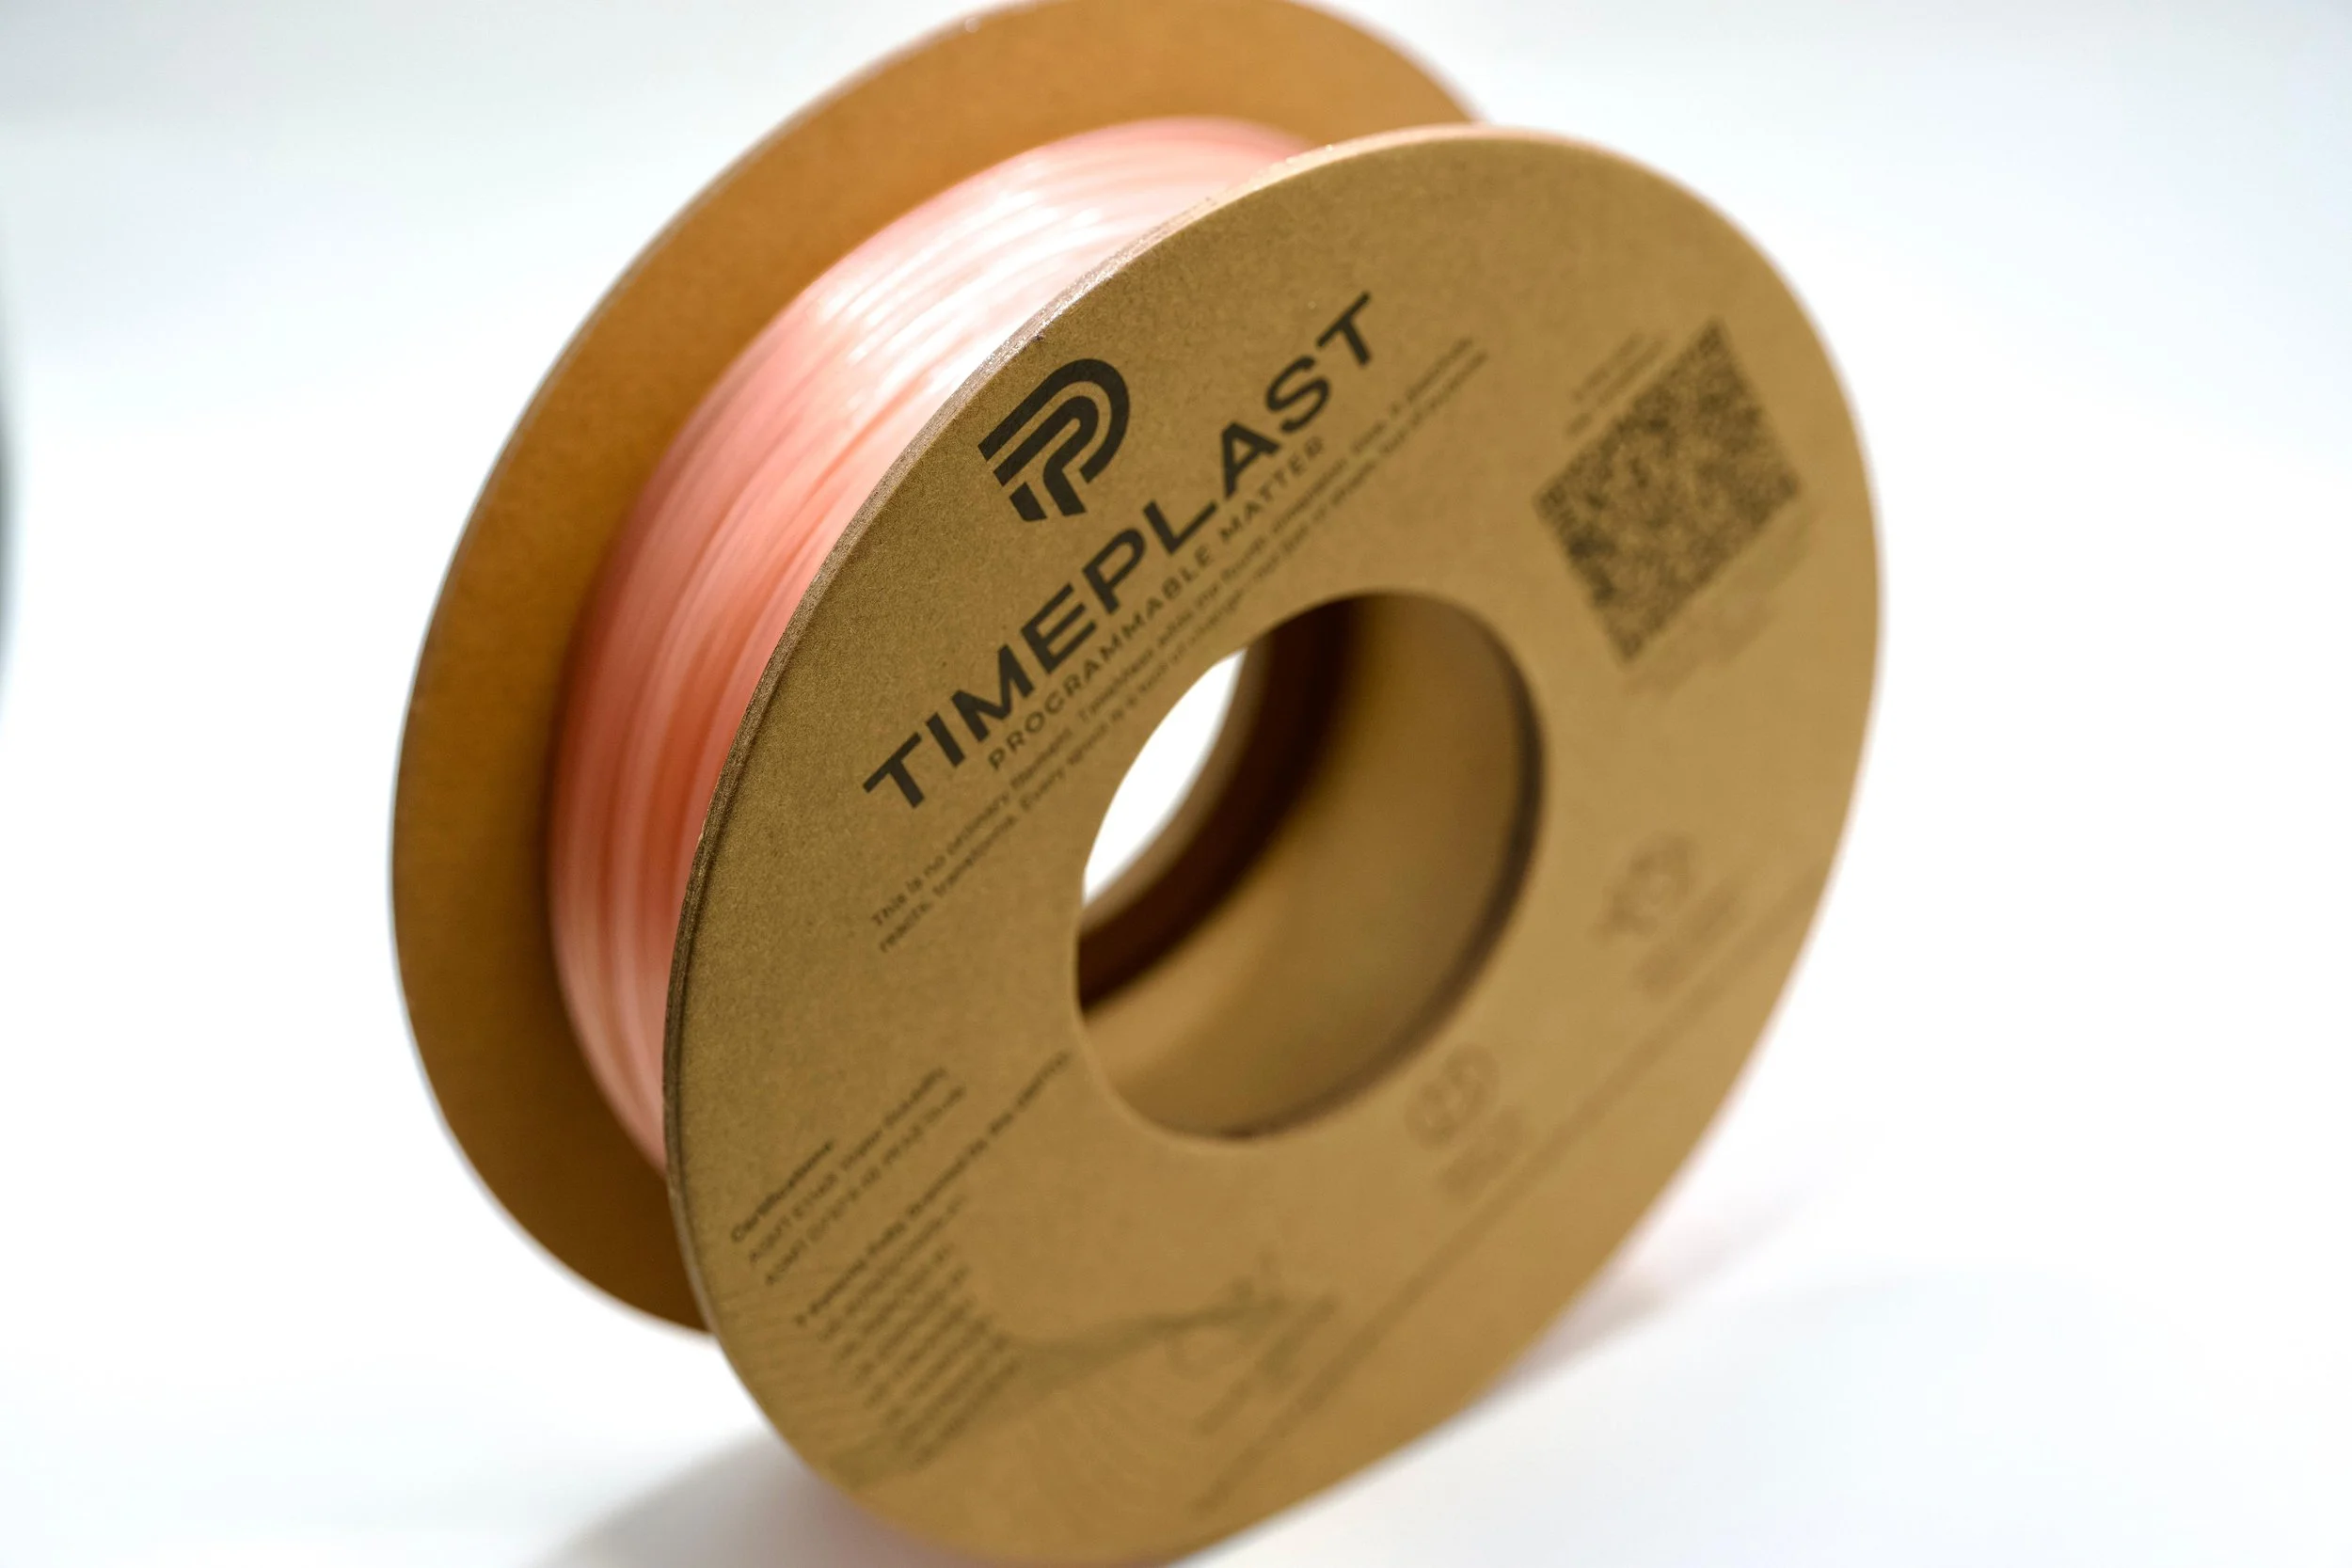
-
What if 3D-printed objects could bounce, stretch, and absorb impact like real rubber—without the weaknesses of traditional elastomers? TimeMass - Ball is a next-generation ultra-flexible, high-molecular-weight polymer filament, engineered to replicate the mechanical properties of rubber with superior resilience, printability, and long-term durability.
Unlike conventional rubber-like 3D printing filaments, which often suffer from poor elasticity recovery and weak layer adhesion, TimeMass - Ball leverages a specialized polymer structure with long-chain entanglements and high molecular cohesion. This unique formulation ensures exceptional bounce, impact absorption, and mechanical endurance—delivering true rubber-like performance with the reliability of advanced polymers.
Designed for Maximum Elasticity & Energy Efficiency
- Unrivaled Strain Recovery – Maintains high elasticity and rebounds efficiently, ensuring minimal permanent deformation even after repeated compression.
- Energy-Efficient Bounce – Engineered for dynamic response, allowing objects to store and release energy efficiently, mimicking the behavior of real rubber.
- Superior Layer Adhesion & Tear Resistance – Unlike other flexible filaments that delaminate or tear easily, TimeMass - Ball retains strong interlayer bonding, making it perfect for high-impact applications.Where Performance Meets Practicality
- Sporting Goods & High-Impact Prototypes – Print high-rebound balls, protective padding, and shock-absorbing components with unparalleled flexibility.
- Automotive & Robotics Applications – Develop durable vibration dampeners, soft grippers, or suspension elements that can withstand repeated stress.
- Toys, Games & Interactive Designs – Create durable, bouncy objects such as stress balls, fidget toys, or play equipment that can endure constant use.
- Wearable & Medical Innovations – Design pressure-distributing insoles, orthopedic supports, or flexible exoskeletons that adapt to movement without breaking down.
- Soft Robotics & Experimental Engineering – Use TimeMass - Ball to build responsive actuators, inflatable chambers, or shock-resistant casings for cutting-edge research.Revolutionizing Rubber-Like 3D Printing
By eliminating the weaknesses of standard elastomers, TimeMass - Ball enables new possibilities in sports, engineering, robotics, and beyond. Its ability to stretch, compress, and rebound dynamically makes it a game-changer for high-performance, flexible applications.
For those who demand precision, durability, and true rubber-like performance, TimeMass - Ball is the next evolution in flexible 3D printing.
Need Ideas? Here You Go:
Fully functional, airless sports balls, like basketballs and soccer balls, without the need for inflation.
Impact-resistant pads and bumpers for robotics, industrial machinery, or automotive components.
Vibration-dampening parts for mechanical or soundproofing applications.
Stress-relief and therapeutic squeeze balls for medical and wellness use.
Flexible grips, handles, and soft-touch surfacesfor ergonomic tools.
Advanced robotic actuators that require soft material interactions.
-
Click here to access our new and improved TimeMass GPT Assistant. Just tell it your printer model and the TimeMass filament you're using—it will instantly recommend the exact parameters you need to start printing successfully.
1. Introduction
These parameters are designed to help avoid printing issues; however, temperatures and speed timings can be adjusted based on your specific goals. For example, if you prefer a less rigid result, we recommend using a lower temperature. This section outlines a complete slicing and printing profile for TimeMass Ball, tailored for printers with a 0.8 mm nozzle. If the print is not being successful, please lower the nozzle temperature by 10°C and start over until an optimal print is achieved. Please check the manual for printing parameters.2. Temperature Settings
2.aNozzle Temperature: 230°C — Optimal for flowability while avoiding decomposition (which begins around 250°C).
2.bBed Temperature: 75°C — Ensures strong first-layer adhesion and prevents moisture bubbling.
2.cNozzle Temperature Range: 230–245°C — Timeplast melts around 165°C but prints best at 240°C for precise viscosity control.3. Cooling Settings
3.aNo Cooling for First Layers: 3 layers — Prevents shrinkage due to rapid cooling of moisture-rich filament.
3.bFan Minimum Speed: 0% for the first 100 seconds — Allows heat retention during early layers.
3.cFan Maximum Speed: 15% starting at 8 seconds — Avoids overcooling that can lead to warping.
3.dKeep Fan Always On: OFF — Allows vapor to escape and avoids internal fogging.
3.eSlow Down for Cooling: ON — Improves surface finish with controlled cooling.
3.fForce Cooling for Overhangs: OFF — Overcooling can deform bridges in Timeplast.
3.gFan for Overhangs: 15% — Only for essential cooling in complex areas.
3.hPre-Start Fan Time: 2 seconds — Minimizes pressure differential during the first layer.4. Volumetric Flow
4.aMax Volumetric Speed: 12 mm³/s — Based on a melt flow index of ~15 g/10min, allows high-speed printing.
4.bRamming Speed: 3 mm³/s — Prevents bubbles or popping from pressure spikes.5. Retraction and Flow
5.aRetraction Distance: 0.4 mm — Minimal retraction required for soft filaments to avoid stringing.
5.bRetraction Speed: 15 mm/s — Slow enough to avoid pulling molten plastic.
5.cPressure Advance: 0.05 — Compensates for nozzle lag at high flow rates.
5.dFlow Ratio: 92% — Slight under-extrusion avoids swelling and surface artifacts.6. Precision Settings
6.aGap Closing Radius: 0.1 mm — Tolerant of gaps in thicker walls.
6.bArc Fitting: ON — Reduces G-code size and smooths curve transitions.
6.cElephant Foot Compensation: 0.1 mm — Offsets squishing in the first layer caused by large bead sizes.7. Walls and Shells
7.aWall Loops: 2 — Minimum for strength when using a 0.8 mm nozzle.
7.bDetect Thin Walls: ON — Ensures tight geometries aren’t skipped.
7.cTop/Bottom Shell Layers: 3 — Provides good coverage; increase if watertightness is needed.
7.dTop/Bottom Thickness: 1.2 mm — Equals 1.5x the nozzle size for solid strength.
7.eTop/Bottom Pattern: Monotonic — Distributes tension evenly and improves surface finish.8. Geometry and Movement
8.aWall Order: Inner before Outer — Creates cleaner outer surfaces.
8.bInfill First: OFF — Maintains precise outer dimensions.
8.cSmooth Speed Transition: ON — Prevents ringing caused by abrupt speed changes.
8.dSmooth Coefficient: 80 — Ideal damping for soft materials.
8.eAvoid Crossing Wall: ON — Minimizes stringing across part walls.
8.fMax Detour for Crossing: 10 mm or 5% — Balances time with print cleanliness.9. Layer and Width Settings
9.aLayer Height: 0.3 mm — Optimal for strength and resolution using a 0.8 mm nozzle.
9.bInitial Layer Height: 0.35 mm — Slightly higher to improve adhesion.
9.cLine Widths (all): 0.8 mm — Matches nozzle diameter for consistent extrusion.10. Seam Settings
10.aSeam Position: Aligned or Back — Use aligned for mechanical consistency, back for visual appeal.
10.bSmart Scarf Seam: ON — Automatically adjusts seam location to reduce visual impact.
10.cSeam Angle: 155° — Standard seam angle for clean transitions.
10.dSeam Steps: 10 — Smooths seam path and improves visual finish.11. Infill Settings
11.aWall/Infill Overlap: 10% — Prevents infill from deforming soft exterior walls.
11.bInfill Combination: ON — Consolidates paths for efficiency.
11.cDetect Floating Shells: ON — Ensures unsupported vertical structures are printed reliably.
11.dSparse Infill Density: 20–25% — Balanced rigidity vs. material use.
11.eSparse Pattern: Grid — Stable and efficient for flexible geometries.12. Speed Settings
12.aTravel: 160 mm/s — Fast but safe against backlash.
12.bInitial Layer: 15 mm/s — Prevents nozzle from skimming and ensures bed adhesion.
12.cOuter Wall: 60 mm/s — Controlled speed for surface quality.
12.dInner Wall: 90 mm/s — Slightly faster without compromising control.
12.eSmall Perimeter: 35 mm/s — Reduced speed for detailed geometry.
12.fTop Surface: 40 mm/s — Improves finish on topmost layers.
12.gInfill: 100–120 mm/s — Takes advantage of high flowability.13. Acceleration Settings
13.aNormal Print: 2000 mm/s² — Prevents ringing in soft filaments.
13.bTravel: 4000 mm/s² — Enables fast movement without harsh transitions.
13.cInitial Layer: 300 mm/s² — Gentle movement prevents lifting from the bed.
13.dOuter Wall: 1500 mm/s² — Improves outer surface clarity.
13.eInner Wall: 2000 mm/s² — Balanced for structural components.
13.fTop Surface: 1500 mm/s² — Ensures smooth detailing.14. Adhesion and Brims
14.aSkirt Loops: 2 — Helps prime nozzle and start cleanly.
14.bBrim Width: 6 mm — Helps hold soft materials down.
14.cBrim Gap: 0.15 mm — Allows for easy removal without tearing.15. Prime Tower and Flush Settings
15.aPrime Tower: ON — Purges moisture and early flow inconsistencies.
15.bTower Width: 40 mm — Prevents collapse due to heat.
15.cBrim Width (Tower): 4 mm — Adds stability to the purge base.
15.dFlush Into Support: ON — Discards unwanted early flow safely.16. G-Code Start Script
M900 K0.05 ; Pressure Advance M106 S0 ; Fan off G92 E0 G1 E15 F300 ; purge line G92 E0
17. Additional Notes
17.aDry filament at 155 F for 2 hours before use.
17.bStore with desiccant.
17.cKeep extruder door open to allow vapor to escape.
17.dAvoid long dwell times at high temperatures.If you need any other assistance, feel free to reach out to us anytime at timeplast@timeplast.com — we’ll be happy to help.
Free U.S. standard shipping on orders of 5+ spools!
Custom colors for 5+ same-type spools’ orders
Wear

-
What if clothing could be printed to fit perfectly, adapt dynamically, and enhance functionality beyond anything traditional fabrics allow? TimeMass - Wear is a next-generation 4D printing filament, engineered for customized, high-performance wearables that move, flex, and breathe—all while maintaining exceptional durability and comfort.
Unlike traditional flexible filaments, TimeMass - Wear is designed with highly ordered molecular alignments, ensuring it remains strong, stretchable, and breathable under repeated stress. Whether used for clothing, accessories, or specialized gear, this filament represents the future of 3D-printed fashion and function.
Revolutionizing Wearables: Fashion Beyond Limits
Unprecedented Dress Designs – When combined with TimeMass Fiber, TimeMass - Wear unlocks revolutionary soft fabric-like structures, making it possible to print dresses the likes of which no one has ever seen before. Intricate patterns, seamless organic curves, and one-piece garments can now be created without the limitations of traditional sewing and stitching. Imagine flowing gowns with interwoven lattices, geometric sculptural forms, or self-supporting textile structures that could never be achieved with conventional materials.
Next-Level Suits for Any Purpose – Fashion is no longer just about aesthetics—TimeMass - Wear enables fully functional suits tailored for specific jobs, survival, and extreme conditions:
- Survivalist Suits – Glow in the dark, provide thermal insulation, float on water, and even integrate insect-repellent properties. Industrial & Job-Specific Gear – Design heat-resistant, impact-absorbing, or weatherproof suits tailored for construction, firefighting, or space exploration.
- Adaptive Uniforms – Military, first responders, and outdoor enthusiasts can wear multi-layered, intelligent fabrics that react dynamically to temperature, moisture, and movement.A Fusion of Fashion, Science & Utility
Hybrid Fabric-Texture Printing – When paired with TimeMass Fiber, TimeMass - Wear can mimic woven textiles, layered fabrics, and organic fiber patterns—merging the best qualities of traditional materials and futuristic design.
Breathable, Soft, Yet Ultra-Durable – Unlike rigid 3D-printed plastics, this filament is designed for comfort in motion, ensuring clothing is lightweight, flexible, and skin-friendly.
Sustainable, Waste-Free Manufacturing – Print on-demand apparel, accessories, and functional gear, eliminating fabric waste and pioneering a more circular, eco-friendly fashion industry.
Combining 4D Printing for Maximum Impact – When paired with other TimeMass filaments, wearable designs become even more multifunctional:
- TimeMass Glow & Reflect – Create self-illuminating safety wear for nighttime visibility.
- TimeMass Sublimation – Print temporary dissolvable designs that disappear on command.
- TimeMass Plant Vitamin – Integrate biodegradable, self-sustaining materials into garments that support nature and growth.A New Era of Wearable Design Begins
With TimeMass - Wear, fashion becomes more than fabric—it becomes an extension of the body, a tool for survival, and a limitless canvas for innovation.
For designers, engineers, and visionaries shaping the future, this filament unlocks possibilities never before imagined—from gravity-defying dresses to intelligent, multifunctional suits that adapt to their environment.
The future of wearables isn’t just smart—it’s printed.
Need Ideas? Here You Go:
Watch bands, wristbands, and wearable smart device accessories.
Adjustable, ergonomic footwear components, such as insoles or custom-fit straps.
Breathable, flexible clothing elements for cosplay, sportswear, or fashion.
High-impact protective gear, such as soft armor layers or reinforced gloves.
Integrated textile-print hybrid designs, mixing with TimeMass Fiber for fabric-like finishes.
Smart textiles with embedded sensors, leveraging conductivity-enhancing post-processing techniques.
-
Click here to access our new and improved TimeMass GPT Assistant. Just tell it your printer model and the TimeMass filament you're using—it will instantly recommend the exact parameters you need to start printing successfully.
1. Introduction
These parameters are designed to help avoid printing issues; however, temperatures and speed timings can be adjusted based on your specific goals. For example, if you prefer a less rigid result, we recommend using a lower temperature. This section outlines a complete slicing and printing profile for TimeMass Wear, tailored for printers with a 0.8 mm nozzle. If the print is not being successful, please lower the nozzle temperature by 10°C and start over until an optimal print is achieved. Please check the manual for printing parameters.2. Temperature Settings
2.aNozzle Temperature: 230°C — Optimal for flowability while avoiding decomposition (which begins around 250°C).
2.bBed Temperature: 75°C — Ensures strong first-layer adhesion and prevents moisture bubbling.
2.cNozzle Temperature Range: 230–245°C — Timeplast melts around 165°C but prints best at 240°C for precise viscosity control.3. Cooling Settings
3.aNo Cooling for First Layers: 3 layers — Prevents shrinkage due to rapid cooling of moisture-rich filament.
3.bFan Minimum Speed: 0% for the first 100 seconds — Allows heat retention during early layers.
3.cFan Maximum Speed: 15% starting at 8 seconds — Avoids overcooling that can lead to warping.
3.dKeep Fan Always On: OFF — Allows vapor to escape and avoids internal fogging.
3.eSlow Down for Cooling: ON — Improves surface finish with controlled cooling.
3.fForce Cooling for Overhangs: OFF — Overcooling can deform bridges in Timeplast.
3.gFan for Overhangs: 15% — Only for essential cooling in complex areas.
3.hPre-Start Fan Time: 2 seconds — Minimizes pressure differential during the first layer.4. Volumetric Flow
4.aMax Volumetric Speed: 12 mm³/s — Based on a melt flow index of ~15 g/10min, allows high-speed printing.
4.bRamming Speed: 3 mm³/s — Prevents bubbles or popping from pressure spikes.5. Retraction and Flow
5.aRetraction Distance: 0.4 mm — Minimal retraction required for soft filaments to avoid stringing.
5.bRetraction Speed: 15 mm/s — Slow enough to avoid pulling molten plastic.
5.cPressure Advance: 0.05 — Compensates for nozzle lag at high flow rates.
5.dFlow Ratio: 92% — Slight under-extrusion avoids swelling and surface artifacts.6. Precision Settings
6.aGap Closing Radius: 0.1 mm — Tolerant of gaps in thicker walls.
6.bArc Fitting: ON — Reduces G-code size and smooths curve transitions.
6.cElephant Foot Compensation: 0.1 mm — Offsets squishing in the first layer caused by large bead sizes.7. Walls and Shells
7.aWall Loops: 2 — Minimum for strength when using a 0.8 mm nozzle.
7.bDetect Thin Walls: ON — Ensures tight geometries aren’t skipped.
7.cTop/Bottom Shell Layers: 3 — Provides good coverage; increase if watertightness is needed.
7.dTop/Bottom Thickness: 1.2 mm — Equals 1.5x the nozzle size for solid strength.
7.eTop/Bottom Pattern: Monotonic — Distributes tension evenly and improves surface finish.8. Geometry and Movement
8.aWall Order: Inner before Outer — Creates cleaner outer surfaces.
8.bInfill First: OFF — Maintains precise outer dimensions.
8.cSmooth Speed Transition: ON — Prevents ringing caused by abrupt speed changes.
8.dSmooth Coefficient: 80 — Ideal damping for soft materials.
8.eAvoid Crossing Wall: ON — Minimizes stringing across part walls.
8.fMax Detour for Crossing: 10 mm or 5% — Balances time with print cleanliness.9. Layer and Width Settings
9.aLayer Height: 0.3 mm — Optimal for strength and resolution using a 0.8 mm nozzle.
9.bInitial Layer Height: 0.35 mm — Slightly higher to improve adhesion.
9.cLine Widths (all): 0.8 mm — Matches nozzle diameter for consistent extrusion.10. Seam Settings
10.aSeam Position: Aligned or Back — Use aligned for mechanical consistency, back for visual appeal.
10.bSmart Scarf Seam: ON — Automatically adjusts seam location to reduce visual impact.
10.cSeam Angle: 155° — Standard seam angle for clean transitions.
10.dSeam Steps: 10 — Smooths seam path and improves visual finish.11. Infill Settings
11.aWall/Infill Overlap: 10% — Prevents infill from deforming soft exterior walls.
11.bInfill Combination: ON — Consolidates paths for efficiency.
11.cDetect Floating Shells: ON — Ensures unsupported vertical structures are printed reliably.
11.dSparse Infill Density: 20–25% — Balanced rigidity vs. material use.
11.eSparse Pattern: Grid — Stable and efficient for flexible geometries.12. Speed Settings
12.aTravel: 160 mm/s — Fast but safe against backlash.
12.bInitial Layer: 15 mm/s — Prevents nozzle from skimming and ensures bed adhesion.
12.cOuter Wall: 60 mm/s — Controlled speed for surface quality.
12.dInner Wall: 90 mm/s — Slightly faster without compromising control.
12.eSmall Perimeter: 35 mm/s — Reduced speed for detailed geometry.
12.fTop Surface: 40 mm/s — Improves finish on topmost layers.
12.gInfill: 100–120 mm/s — Takes advantage of high flowability.13. Acceleration Settings
13.aNormal Print: 2000 mm/s² — Prevents ringing in soft filaments.
13.bTravel: 4000 mm/s² — Enables fast movement without harsh transitions.
13.cInitial Layer: 300 mm/s² — Gentle movement prevents lifting from the bed.
13.dOuter Wall: 1500 mm/s² — Improves outer surface clarity.
13.eInner Wall: 2000 mm/s² — Balanced for structural components.
13.fTop Surface: 1500 mm/s² — Ensures smooth detailing.14. Adhesion and Brims
14.aSkirt Loops: 2 — Helps prime nozzle and start cleanly.
14.bBrim Width: 6 mm — Helps hold soft materials down.
14.cBrim Gap: 0.15 mm — Allows for easy removal without tearing.15. Prime Tower and Flush Settings
15.aPrime Tower: ON — Purges moisture and early flow inconsistencies.
15.bTower Width: 40 mm — Prevents collapse due to heat.
15.cBrim Width (Tower): 4 mm — Adds stability to the purge base.
15.dFlush Into Support: ON — Discards unwanted early flow safely.16. G-Code Start Script
M900 K0.05 ; Pressure Advance M106 S0 ; Fan off G92 E0 G1 E15 F300 ; purge line G92 E0
17. Additional Notes
17.aDry filament at 155 F for 2 hours before use.
17.bStore with desiccant.
17.cKeep extruder door open to allow vapor to escape.
17.dAvoid long dwell times at high temperatures.If you need any other assistance, feel free to reach out to us anytime at timeplast@timeplast.com — we’ll be happy to help.
Free U.S. standard shipping on orders of 5+ spools!
Custom colors for 5+ same-type spools’ orders
Reflect & Glow
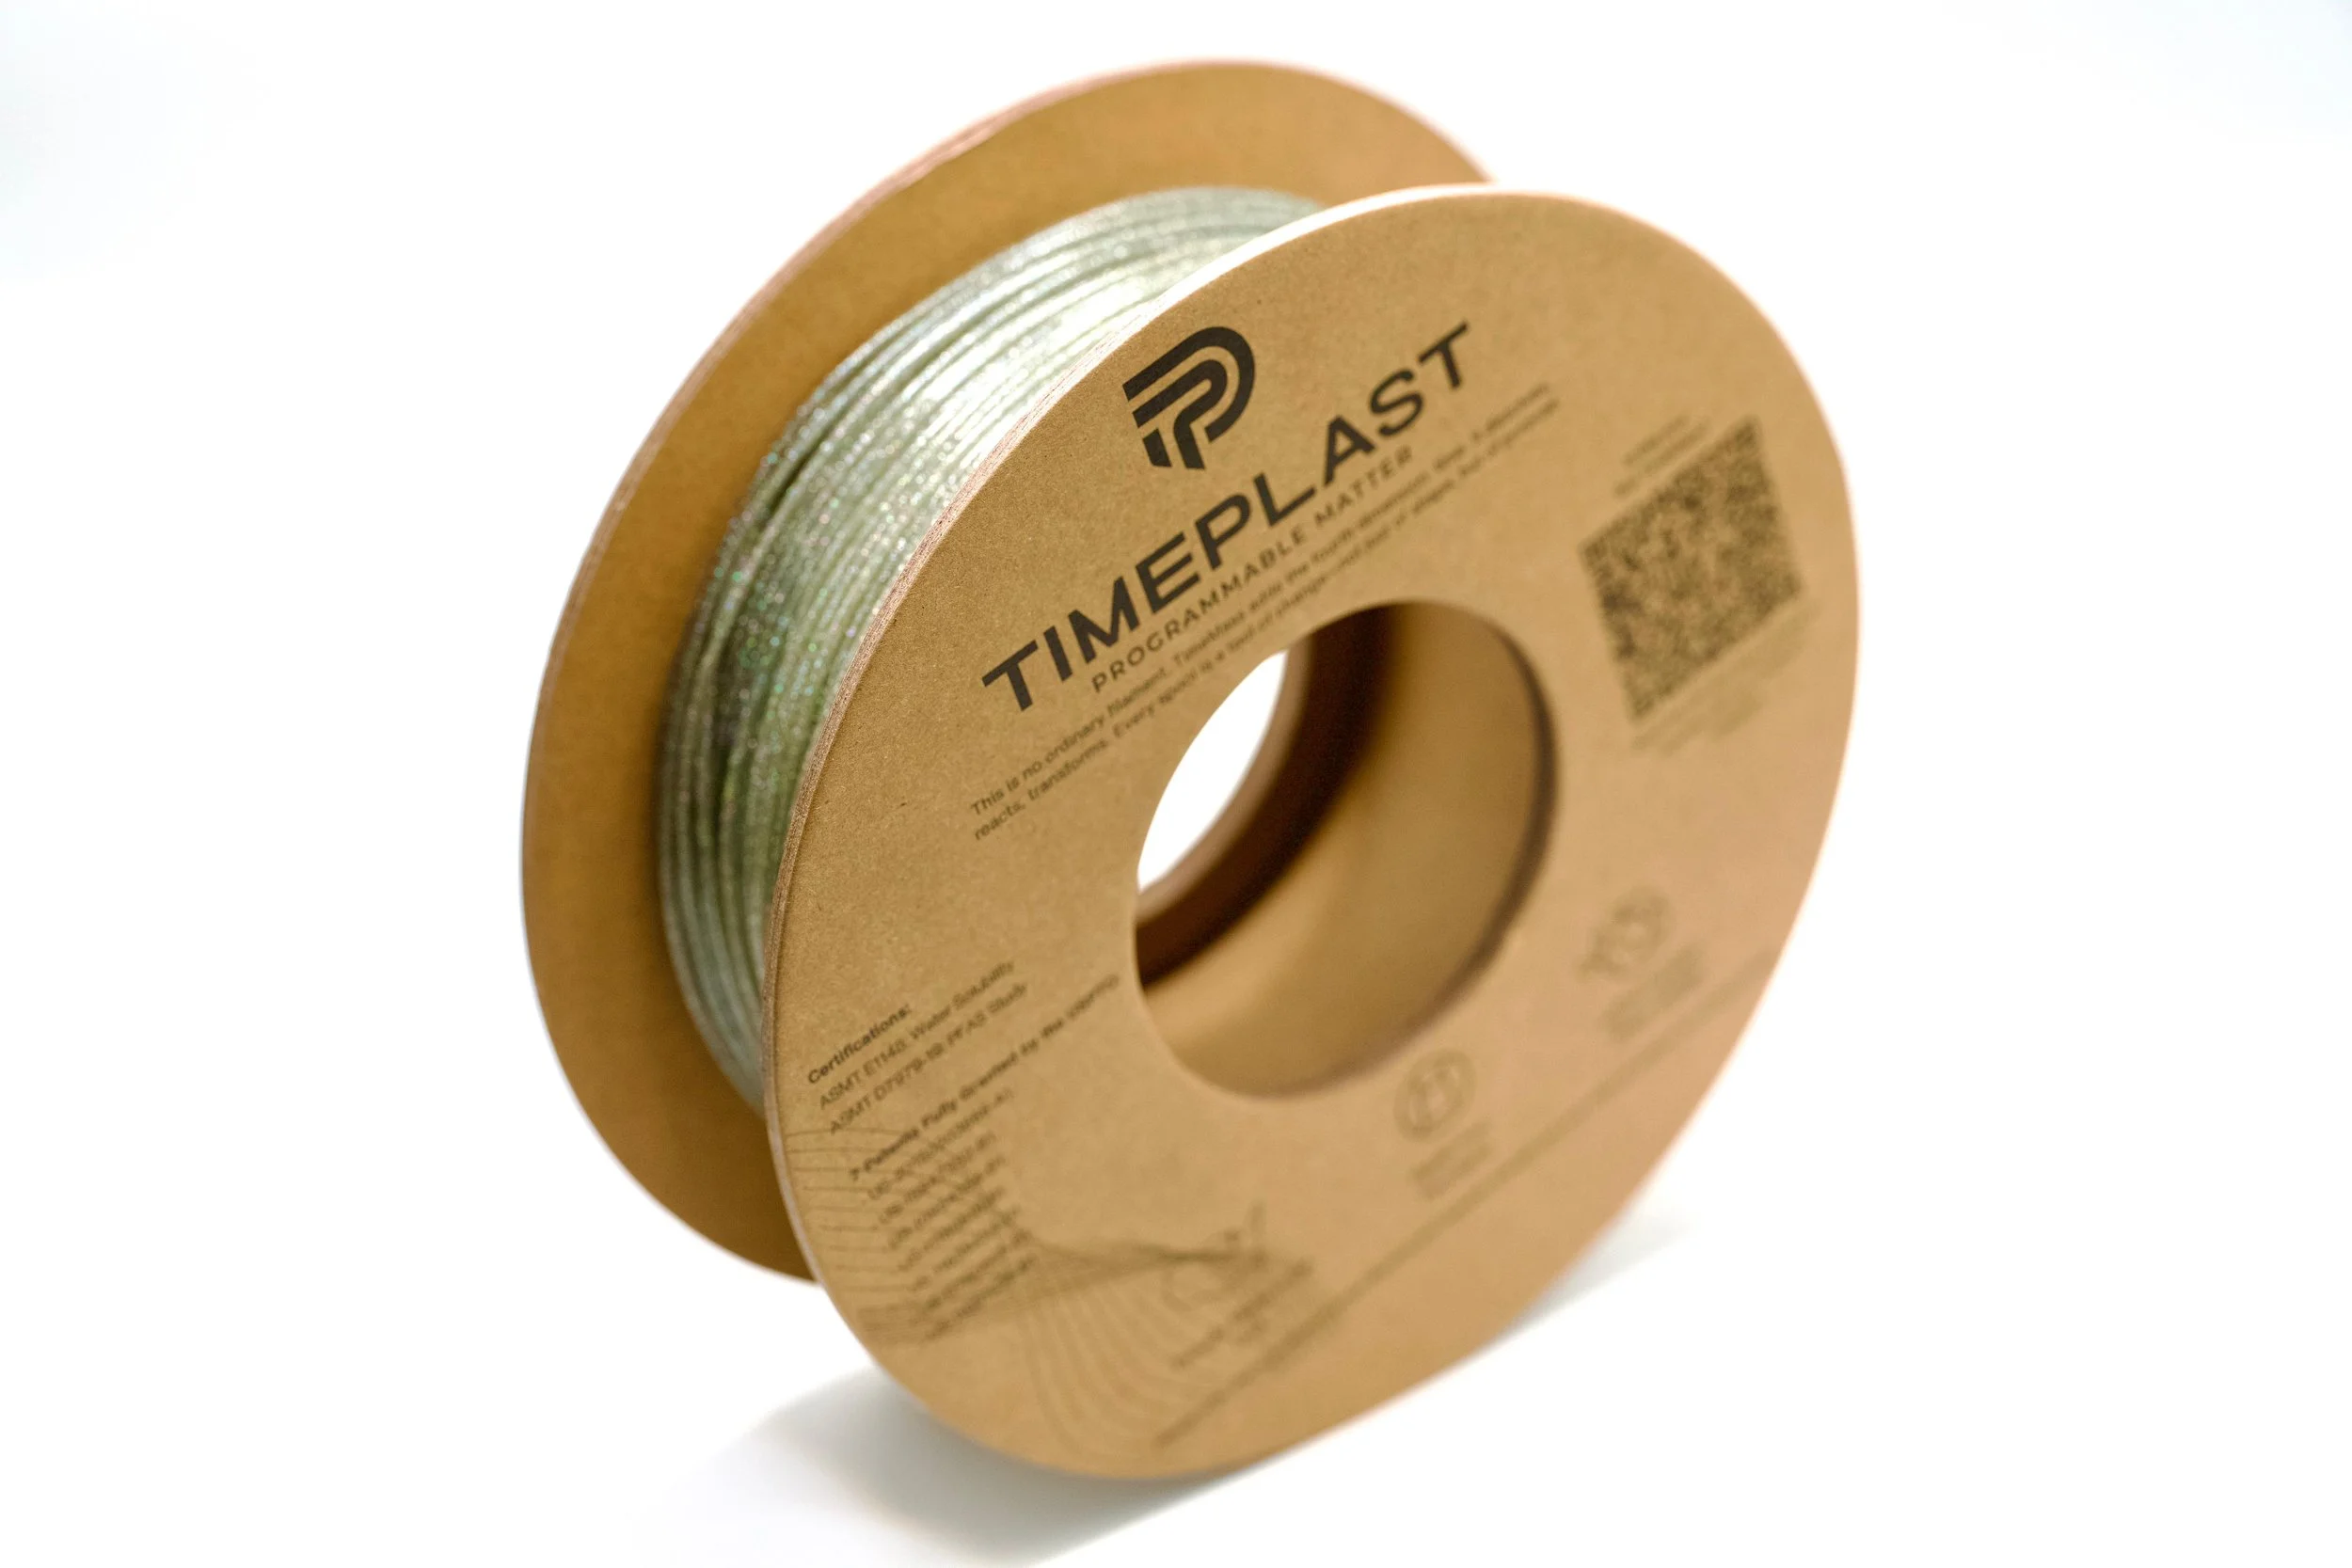
-
When it’s dark, you’ve got two options: disappear or glow like a legend.
TimeMass Reflect & Glow does both—glows in total darkness and reflects light straight back to the source when hit with headlights, flashlights, or whatever else is bouncing around out there.No batteries. No wires. Just light in, visibility out.
How it works:
Phosphorescent glow – Charges in ambient light and glows when the lights go out.
Microprism retroreflection – Reflects light directly back, so you stay visible from every angle. Like a cat’s eye, but printable.
If the glow fades? No problem. The reflection kicks in. You’re still seen. You’re still safe.
Where to use it:
Wearables – Jackets, helmets, bags—anything you want to keep visible on a night ride or rave.
Vehicles & roads – Print your own reflectors, emergency tags, or bumper warnings.
Camping gear – Tag your tent, tools, or that one zipper you always lose.
Home safety – Mark stairs, doors, or exit paths so they light up when you need them.
Creative chaos – Glowing art, hidden messages, nighttime signage... whatever weird glowing object you need in your life.
No charging cables. No nonsense.
Just a print that remembers the light and knows how to throw it back when it counts.Whether you're staying safe or just showing off, Reflect & Glow makes sure you're never left in the dark.
Need Ideas? Here You Go:
Wearable safety gear, such as jogging armbands and biking accessories.
Reflective road signs and trail markers for enhanced nighttime navigation.
Emergency equipment labels visible in low light and under direct illumination.
Glow-reactive sculptures and interactive designs.
-
Click here to access our new and improved TimeMass GPT Assistant. Just tell it your printer model and the TimeMass filament you're using—it will instantly recommend the exact parameters you need to start printing successfully.
1. Introduction
These parameters are designed to help avoid printing issues; however, temperatures and speed timings can be adjusted based on your specific goals. For example, if you prefer a less rigid result, we recommend using a lower temperature. This section outlines a complete slicing and printing profile for TimeMass Reflect & Glow, tailored for printers with a 0.8 mm nozzle. If the print is not being successful, please lower the nozzle temperature by 10°C and start over until an optimal print is achieved. Please check the manual for printing parameters.2. Temperature Settings
2.aNozzle Temperature: 230°C — Optimal for flowability while avoiding decomposition (which begins around 250°C).
2.bBed Temperature: 75°C — Ensures strong first-layer adhesion and prevents moisture bubbling.
2.cNozzle Temperature Range: 230–245°C — Timeplast melts around 165°C but prints best at 240°C for precise viscosity control.3. Cooling Settings
3.aNo Cooling for First Layers: 3 layers — Prevents shrinkage due to rapid cooling of moisture-rich filament.
3.bFan Minimum Speed: 0% for the first 100 seconds — Allows heat retention during early layers.
3.cFan Maximum Speed: 15% starting at 8 seconds — Avoids overcooling that can lead to warping.
3.dKeep Fan Always On: OFF — Allows vapor to escape and avoids internal fogging.
3.eSlow Down for Cooling: ON — Improves surface finish with controlled cooling.
3.fForce Cooling for Overhangs: OFF — Overcooling can deform bridges in Timeplast.
3.gFan for Overhangs: 15% — Only for essential cooling in complex areas.
3.hPre-Start Fan Time: 2 seconds — Minimizes pressure differential during the first layer.4. Volumetric Flow
4.aMax Volumetric Speed: 12 mm³/s — Based on a melt flow index of ~15 g/10min, allows high-speed printing.
4.bRamming Speed: 3 mm³/s — Prevents bubbles or popping from pressure spikes.5. Retraction and Flow
5.aRetraction Distance: 0.4 mm — Minimal retraction required for soft filaments to avoid stringing.
5.bRetraction Speed: 15 mm/s — Slow enough to avoid pulling molten plastic.
5.cPressure Advance: 0.05 — Compensates for nozzle lag at high flow rates.
5.dFlow Ratio: 92% — Slight under-extrusion avoids swelling and surface artifacts.6. Precision Settings
6.aGap Closing Radius: 0.1 mm — Tolerant of gaps in thicker walls.
6.bArc Fitting: ON — Reduces G-code size and smooths curve transitions.
6.cElephant Foot Compensation: 0.1 mm — Offsets squishing in the first layer caused by large bead sizes.7. Walls and Shells
7.aWall Loops: 2 — Minimum for strength when using a 0.8 mm nozzle.
7.bDetect Thin Walls: ON — Ensures tight geometries aren’t skipped.
7.cTop/Bottom Shell Layers: 3 — Provides good coverage; increase if watertightness is needed.
7.dTop/Bottom Thickness: 1.2 mm — Equals 1.5x the nozzle size for solid strength.
7.eTop/Bottom Pattern: Monotonic — Distributes tension evenly and improves surface finish.8. Geometry and Movement
8.aWall Order: Inner before Outer — Creates cleaner outer surfaces.
8.bInfill First: OFF — Maintains precise outer dimensions.
8.cSmooth Speed Transition: ON — Prevents ringing caused by abrupt speed changes.
8.dSmooth Coefficient: 80 — Ideal damping for soft materials.
8.eAvoid Crossing Wall: ON — Minimizes stringing across part walls.
8.fMax Detour for Crossing: 10 mm or 5% — Balances time with print cleanliness.9. Layer and Width Settings
9.aLayer Height: 0.3 mm — Optimal for strength and resolution using a 0.8 mm nozzle.
9.bInitial Layer Height: 0.35 mm — Slightly higher to improve adhesion.
9.cLine Widths (all): 0.8 mm — Matches nozzle diameter for consistent extrusion.10. Seam Settings
10.aSeam Position: Aligned or Back — Use aligned for mechanical consistency, back for visual appeal.
10.bSmart Scarf Seam: ON — Automatically adjusts seam location to reduce visual impact.
10.cSeam Angle: 155° — Standard seam angle for clean transitions.
10.dSeam Steps: 10 — Smooths seam path and improves visual finish.11. Infill Settings
11.aWall/Infill Overlap: 10% — Prevents infill from deforming soft exterior walls.
11.bInfill Combination: ON — Consolidates paths for efficiency.
11.cDetect Floating Shells: ON — Ensures unsupported vertical structures are printed reliably.
11.dSparse Infill Density: 20–25% — Balanced rigidity vs. material use.
11.eSparse Pattern: Grid — Stable and efficient for flexible geometries.12. Speed Settings
12.aTravel: 160 mm/s — Fast but safe against backlash.
12.bInitial Layer: 15 mm/s — Prevents nozzle from skimming and ensures bed adhesion.
12.cOuter Wall: 60 mm/s — Controlled speed for surface quality.
12.dInner Wall: 90 mm/s — Slightly faster without compromising control.
12.eSmall Perimeter: 35 mm/s — Reduced speed for detailed geometry.
12.fTop Surface: 40 mm/s — Improves finish on topmost layers.
12.gInfill: 100–120 mm/s — Takes advantage of high flowability.13. Acceleration Settings
13.aNormal Print: 2000 mm/s² — Prevents ringing in soft filaments.
13.bTravel: 4000 mm/s² — Enables fast movement without harsh transitions.
13.cInitial Layer: 300 mm/s² — Gentle movement prevents lifting from the bed.
13.dOuter Wall: 1500 mm/s² — Improves outer surface clarity.
13.eInner Wall: 2000 mm/s² — Balanced for structural components.
13.fTop Surface: 1500 mm/s² — Ensures smooth detailing.14. Adhesion and Brims
14.aSkirt Loops: 2 — Helps prime nozzle and start cleanly.
14.bBrim Width: 6 mm — Helps hold soft materials down.
14.cBrim Gap: 0.15 mm — Allows for easy removal without tearing.15. Prime Tower and Flush Settings
15.aPrime Tower: ON — Purges moisture and early flow inconsistencies.
15.bTower Width: 40 mm — Prevents collapse due to heat.
15.cBrim Width (Tower): 4 mm — Adds stability to the purge base.
15.dFlush Into Support: ON — Discards unwanted early flow safely.16. G-Code Start Script
M900 K0.05 ; Pressure Advance M106 S0 ; Fan off G92 E0 G1 E15 F300 ; purge line G92 E0
17. Additional Notes
17.aDry filament at 155 F for 2 hours before use.
17.bStore with desiccant.
17.cKeep extruder door open to allow vapor to escape.
17.dAvoid long dwell times at high temperatures.If you need any other assistance, feel free to reach out to us anytime at timeplast@timeplast.com — we’ll be happy to help.
Free U.S. standard shipping on orders of 5+ spools!
Custom colors for 5+ same-type spools’ orders
Smart Nutrition
Plant Vitamin - Gen 2
-
TimeMass Plant Vitamin is a water-retaining, nutrient-loaded filament engineered for slow-release fertilization right from the print bed. Built with carbon, nitrogen, phosphorus, and sulfur—plus structured water and calcium carbonate—it lets you 3D print objects that nourish plants over time.
No runoff. No burst-release. Just sustained growth, powered by smart material design.
How it works:
Hydrophilic matrix absorbs moisture and dissolves slowly, releasing nutrients in sync with plant needs.
Water = trigger – Pods can be printed to behave like analog biological computers, using moisture to time and deliver nutrient output.
No batteries. No sensors. Just physics.
Full Nutrient Breakdown (per 350g spool):
Nitrogen (N): 10.8 g – Chlorophyll production & leaf growth
Phosphate (P₂O₅): 8.4 g – Root development & flowering
Potash (K₂O): 6.8 g – Disease resistance & overall health
Calcium (Ca): 2.4 g – Cell wall structure & nutrient absorption
Magnesium (Mg): 0.8 g – Photosynthesis & enzyme function
Core Material:
Structured Water: 70% – Boosts solubility and uptake
Calcium Carbonate: 20% – Strengthens the filament and feeds the soil
Sustained Release Design:
Nutrients are embedded within the Timeplast Plus matrix for gradual delivery
Structured water ensures efficient solubility
No leaching = no waste
Stability & Vitamin Integrity (Because Growers Actually Care):
Microencapsulation – Heat-resistant shells (sol-gel silica, melamine, urea-formaldehyde, etc.) prevent degradation during extrusion.
Vitamin Derivatives – Stable precursors like ascorbyl palmitate reactivate in soil through pH, enzymes, or hydration.
Multi-phase Composite – Core-shell architecture keeps active components cool during print.
Low-shear, thermally controlled extrusion – Custom nozzles and low-friction channels reduce heat spikes.
Water-based integration – Vitamins are solvent-bound into low-temp meltable additives, preserving potency.
Where to use it:
Urban gardening & hydroponics – Print self-feeding seed pods, planters, or nutrient spikes
Precision agriculture – Design root-zone diffusers to boost yield without runoff
Reforestation – Print biodegradable seed capsules with long-term nutrient support
Irrigation aids & smart pots – Combine watering and feeding in one functional print
The result?
Printed structures that actually feed the soil. No over-fertilizing. No chemical waste. Just controlled, water-powered nutrient delivery—designed by you.Need Ideas? Here You Go:
Self-fertilizing plant pots and holders, eliminating the need for chemical fertilizers.
Water-dispersible nutrient discs that can be buried in soil for controlled nutrient release.
Eco-friendly seedling trays that break down naturally, enriching the soil.
Hydroponic nutrient carriers, improving plant growth in water-based systems.
Custom garden markers, serving both as labels and soil enhancers.
-
Click here to access our new and improved TimeMass GPT Assistant. Just tell it your printer model and the TimeMass filament you're using—it will instantly recommend the exact parameters you need to start printing successfully.
1. Introduction
These parameters are designed to help avoid printing issues; however, temperatures and speed timings can be adjusted based on your specific goals. For example, if you prefer a less rigid result, we recommend using a lower temperature. This section outlines a complete slicing and printing profile for TimeMass Plant Vitamin, tailored for printers with a 0.8 mm nozzle. If the print is not being successful, please lower the nozzle temperature by 10°C and start over until an optimal print is achieved. Please check the manual for printing parameters.2. Temperature Settings
2.aNozzle Temperature: 230°C — Optimal for flowability while avoiding decomposition (which begins around 250°C).
2.bBed Temperature: 75°C — Ensures strong first-layer adhesion and prevents moisture bubbling.
2.cNozzle Temperature Range: 230–245°C — Timeplast melts around 165°C but prints best at 240°C for precise viscosity control.3. Cooling Settings
3.aNo Cooling for First Layers: 3 layers — Prevents shrinkage due to rapid cooling of moisture-rich filament.
3.bFan Minimum Speed: 0% for the first 100 seconds — Allows heat retention during early layers.
3.cFan Maximum Speed: 15% starting at 8 seconds — Avoids overcooling that can lead to warping.
3.dKeep Fan Always On: OFF — Allows vapor to escape and avoids internal fogging.
3.eSlow Down for Cooling: ON — Improves surface finish with controlled cooling.
3.fForce Cooling for Overhangs: OFF — Overcooling can deform bridges in Timeplast.
3.gFan for Overhangs: 15% — Only for essential cooling in complex areas.
3.hPre-Start Fan Time: 2 seconds — Minimizes pressure differential during the first layer.4. Volumetric Flow
4.aMax Volumetric Speed: 12 mm³/s — Based on a melt flow index of ~15 g/10min, allows high-speed printing.
4.bRamming Speed: 3 mm³/s — Prevents bubbles or popping from pressure spikes.5. Retraction and Flow
5.aRetraction Distance: 0.4 mm — Minimal retraction required for soft filaments to avoid stringing.
5.bRetraction Speed: 15 mm/s — Slow enough to avoid pulling molten plastic.
5.cPressure Advance: 0.05 — Compensates for nozzle lag at high flow rates.
5.dFlow Ratio: 92% — Slight under-extrusion avoids swelling and surface artifacts.6. Precision Settings
6.aGap Closing Radius: 0.1 mm — Tolerant of gaps in thicker walls.
6.bArc Fitting: ON — Reduces G-code size and smooths curve transitions.
6.cElephant Foot Compensation: 0.1 mm — Offsets squishing in the first layer caused by large bead sizes.7. Walls and Shells
7.aWall Loops: 2 — Minimum for strength when using a 0.8 mm nozzle.
7.bDetect Thin Walls: ON — Ensures tight geometries aren’t skipped.
7.cTop/Bottom Shell Layers: 3 — Provides good coverage; increase if watertightness is needed.
7.dTop/Bottom Thickness: 1.2 mm — Equals 1.5x the nozzle size for solid strength.
7.eTop/Bottom Pattern: Monotonic — Distributes tension evenly and improves surface finish.8. Geometry and Movement
8.aWall Order: Inner before Outer — Creates cleaner outer surfaces.
8.bInfill First: OFF — Maintains precise outer dimensions.
8.cSmooth Speed Transition: ON — Prevents ringing caused by abrupt speed changes.
8.dSmooth Coefficient: 80 — Ideal damping for soft materials.
8.eAvoid Crossing Wall: ON — Minimizes stringing across part walls.
8.fMax Detour for Crossing: 10 mm or 5% — Balances time with print cleanliness.9. Layer and Width Settings
9.aLayer Height: 0.3 mm — Optimal for strength and resolution using a 0.8 mm nozzle.
9.bInitial Layer Height: 0.35 mm — Slightly higher to improve adhesion.
9.cLine Widths (all): 0.8 mm — Matches nozzle diameter for consistent extrusion.10. Seam Settings
10.aSeam Position: Aligned or Back — Use aligned for mechanical consistency, back for visual appeal.
10.bSmart Scarf Seam: ON — Automatically adjusts seam location to reduce visual impact.
10.cSeam Angle: 155° — Standard seam angle for clean transitions.
10.dSeam Steps: 10 — Smooths seam path and improves visual finish.11. Infill Settings
11.aWall/Infill Overlap: 10% — Prevents infill from deforming soft exterior walls.
11.bInfill Combination: ON — Consolidates paths for efficiency.
11.cDetect Floating Shells: ON — Ensures unsupported vertical structures are printed reliably.
11.dSparse Infill Density: 20–25% — Balanced rigidity vs. material use.
11.eSparse Pattern: Grid — Stable and efficient for flexible geometries.12. Speed Settings
12.aTravel: 160 mm/s — Fast but safe against backlash.
12.bInitial Layer: 15 mm/s — Prevents nozzle from skimming and ensures bed adhesion.
12.cOuter Wall: 60 mm/s — Controlled speed for surface quality.
12.dInner Wall: 90 mm/s — Slightly faster without compromising control.
12.eSmall Perimeter: 35 mm/s — Reduced speed for detailed geometry.
12.fTop Surface: 40 mm/s — Improves finish on topmost layers.
12.gInfill: 100–120 mm/s — Takes advantage of high flowability.13. Acceleration Settings
13.aNormal Print: 2000 mm/s² — Prevents ringing in soft filaments.
13.bTravel: 4000 mm/s² — Enables fast movement without harsh transitions.
13.cInitial Layer: 300 mm/s² — Gentle movement prevents lifting from the bed.
13.dOuter Wall: 1500 mm/s² — Improves outer surface clarity.
13.eInner Wall: 2000 mm/s² — Balanced for structural components.
13.fTop Surface: 1500 mm/s² — Ensures smooth detailing.14. Adhesion and Brims
14.aSkirt Loops: 2 — Helps prime nozzle and start cleanly.
14.bBrim Width: 6 mm — Helps hold soft materials down.
14.cBrim Gap: 0.15 mm — Allows for easy removal without tearing.15. Prime Tower and Flush Settings
15.aPrime Tower: ON — Purges moisture and early flow inconsistencies.
15.bTower Width: 40 mm — Prevents collapse due to heat.
15.cBrim Width (Tower): 4 mm — Adds stability to the purge base.
15.dFlush Into Support: ON — Discards unwanted early flow safely.16. G-Code Start Script
M900 K0.05 ; Pressure Advance M106 S0 ; Fan off G92 E0 G1 E15 F300 ; purge line G92 E0
17. Additional Notes
17.aDry filament at 155 F for 2 hours before use.
17.bStore with desiccant.
17.cKeep extruder door open to allow vapor to escape.
17.dAvoid long dwell times at high temperatures.If you need any other assistance, feel free to reach out to us anytime at timeplast@timeplast.com — we’ll be happy to help.
Free U.S. standard shipping on orders of 5+ spools!
Sugar
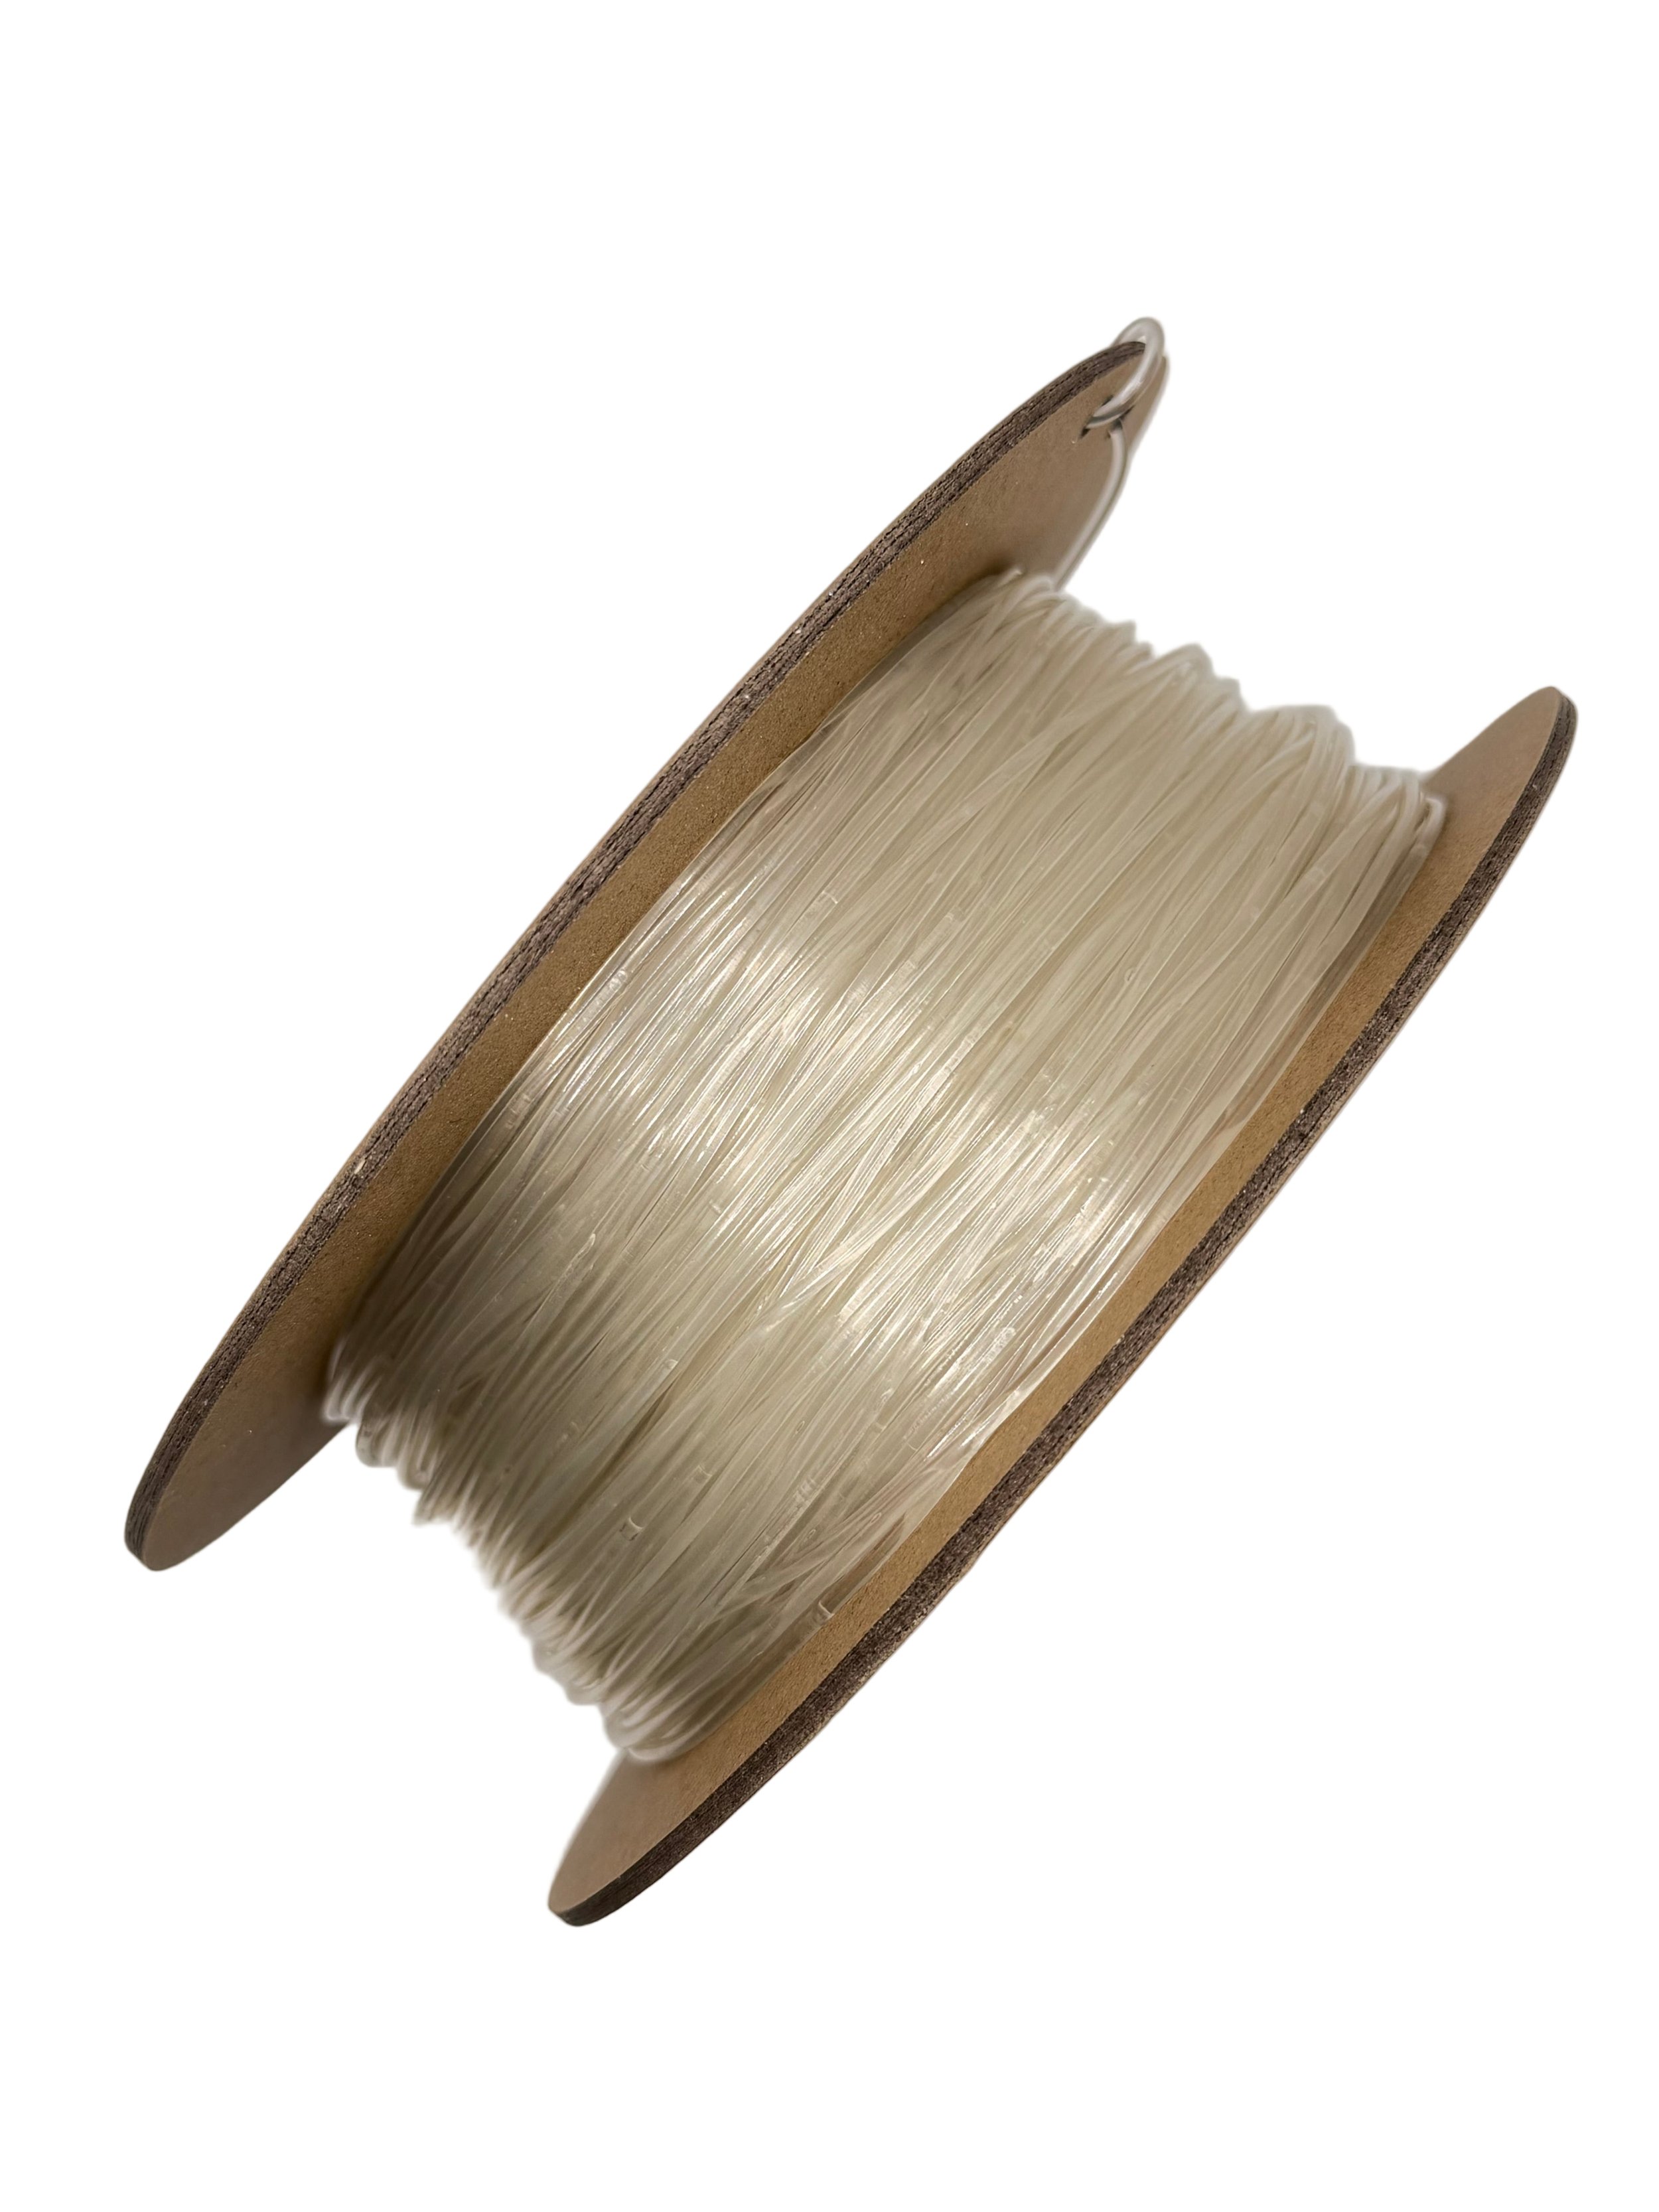
-
A water-activated, sweet-loaded filament ideal for biochemical triggers, insect farming, or experimental food-based prints. Releases glucose and sucrose in trace amounts over time.
Sweet science.
Where to use it:
Insect traps and feeders
Microbial growth experiments
Edutainment or biochemical test kits
-
Click here to access our new and improved TimeMass GPT Assistant. Just tell it your printer model and the TimeMass filament you're using—it will instantly recommend the exact parameters you need to start printing successfully.
1. Introduction
These parameters are designed to help avoid printing issues; however, temperatures and speed timings can be adjusted based on your specific goals. For example, if you prefer a less rigid result, we recommend using a lower temperature. This section outlines a complete slicing and printing profile for TimeMass Sugar, tailored for printers with a 0.8 mm nozzle. If the print is not being successful, please lower the nozzle temperature by 10°C and start over until an optimal print is achieved. Please check the manual for printing parameters.2. Temperature Settings
2.aNozzle Temperature: 230°C — Optimal for flowability while avoiding decomposition (which begins around 250°C).
2.bBed Temperature: 75°C — Ensures strong first-layer adhesion and prevents moisture bubbling.
2.cNozzle Temperature Range: 230–245°C — Timeplast melts around 165°C but prints best at 240°C for precise viscosity control.3. Cooling Settings
3.aNo Cooling for First Layers: 3 layers — Prevents shrinkage due to rapid cooling of moisture-rich filament.
3.bFan Minimum Speed: 0% for the first 100 seconds — Allows heat retention during early layers.
3.cFan Maximum Speed: 15% starting at 8 seconds — Avoids overcooling that can lead to warping.
3.dKeep Fan Always On: OFF — Allows vapor to escape and avoids internal fogging.
3.eSlow Down for Cooling: ON — Improves surface finish with controlled cooling.
3.fForce Cooling for Overhangs: OFF — Overcooling can deform bridges in Timeplast.
3.gFan for Overhangs: 15% — Only for essential cooling in complex areas.
3.hPre-Start Fan Time: 2 seconds — Minimizes pressure differential during the first layer.4. Volumetric Flow
4.aMax Volumetric Speed: 12 mm³/s — Based on a melt flow index of ~15 g/10min, allows high-speed printing.
4.bRamming Speed: 3 mm³/s — Prevents bubbles or popping from pressure spikes.5. Retraction and Flow
5.aRetraction Distance: 0.4 mm — Minimal retraction required for soft filaments to avoid stringing.
5.bRetraction Speed: 15 mm/s — Slow enough to avoid pulling molten plastic.
5.cPressure Advance: 0.05 — Compensates for nozzle lag at high flow rates.
5.dFlow Ratio: 92% — Slight under-extrusion avoids swelling and surface artifacts.6. Precision Settings
6.aGap Closing Radius: 0.1 mm — Tolerant of gaps in thicker walls.
6.bArc Fitting: ON — Reduces G-code size and smooths curve transitions.
6.cElephant Foot Compensation: 0.1 mm — Offsets squishing in the first layer caused by large bead sizes.7. Walls and Shells
7.aWall Loops: 2 — Minimum for strength when using a 0.8 mm nozzle.
7.bDetect Thin Walls: ON — Ensures tight geometries aren’t skipped.
7.cTop/Bottom Shell Layers: 3 — Provides good coverage; increase if watertightness is needed.
7.dTop/Bottom Thickness: 1.2 mm — Equals 1.5x the nozzle size for solid strength.
7.eTop/Bottom Pattern: Monotonic — Distributes tension evenly and improves surface finish.8. Geometry and Movement
8.aWall Order: Inner before Outer — Creates cleaner outer surfaces.
8.bInfill First: OFF — Maintains precise outer dimensions.
8.cSmooth Speed Transition: ON — Prevents ringing caused by abrupt speed changes.
8.dSmooth Coefficient: 80 — Ideal damping for soft materials.
8.eAvoid Crossing Wall: ON — Minimizes stringing across part walls.
8.fMax Detour for Crossing: 10 mm or 5% — Balances time with print cleanliness.9. Layer and Width Settings
9.aLayer Height: 0.3 mm — Optimal for strength and resolution using a 0.8 mm nozzle.
9.bInitial Layer Height: 0.35 mm — Slightly higher to improve adhesion.
9.cLine Widths (all): 0.8 mm — Matches nozzle diameter for consistent extrusion.10. Seam Settings
10.aSeam Position: Aligned or Back — Use aligned for mechanical consistency, back for visual appeal.
10.bSmart Scarf Seam: ON — Automatically adjusts seam location to reduce visual impact.
10.cSeam Angle: 155° — Standard seam angle for clean transitions.
10.dSeam Steps: 10 — Smooths seam path and improves visual finish.11. Infill Settings
11.aWall/Infill Overlap: 10% — Prevents infill from deforming soft exterior walls.
11.bInfill Combination: ON — Consolidates paths for efficiency.
11.cDetect Floating Shells: ON — Ensures unsupported vertical structures are printed reliably.
11.dSparse Infill Density: 20–25% — Balanced rigidity vs. material use.
11.eSparse Pattern: Grid — Stable and efficient for flexible geometries.12. Speed Settings
12.aTravel: 160 mm/s — Fast but safe against backlash.
12.bInitial Layer: 15 mm/s — Prevents nozzle from skimming and ensures bed adhesion.
12.cOuter Wall: 60 mm/s — Controlled speed for surface quality.
12.dInner Wall: 90 mm/s — Slightly faster without compromising control.
12.eSmall Perimeter: 35 mm/s — Reduced speed for detailed geometry.
12.fTop Surface: 40 mm/s — Improves finish on topmost layers.
12.gInfill: 100–120 mm/s — Takes advantage of high flowability.13. Acceleration Settings
13.aNormal Print: 2000 mm/s² — Prevents ringing in soft filaments.
13.bTravel: 4000 mm/s² — Enables fast movement without harsh transitions.
13.cInitial Layer: 300 mm/s² — Gentle movement prevents lifting from the bed.
13.dOuter Wall: 1500 mm/s² — Improves outer surface clarity.
13.eInner Wall: 2000 mm/s² — Balanced for structural components.
13.fTop Surface: 1500 mm/s² — Ensures smooth detailing.14. Adhesion and Brims
14.aSkirt Loops: 2 — Helps prime nozzle and start cleanly.
14.bBrim Width: 6 mm — Helps hold soft materials down.
14.cBrim Gap: 0.15 mm — Allows for easy removal without tearing.15. Prime Tower and Flush Settings
15.aPrime Tower: ON — Purges moisture and early flow inconsistencies.
15.bTower Width: 40 mm — Prevents collapse due to heat.
15.cBrim Width (Tower): 4 mm — Adds stability to the purge base.
15.dFlush Into Support: ON — Discards unwanted early flow safely.16. G-Code Start Script
M900 K0.05 ; Pressure Advance M106 S0 ; Fan off G92 E0 G1 E15 F300 ; purge line G92 E0
17. Additional Notes
17.aDry filament at 155 F for 2 hours before use.
17.bStore with desiccant.
17.cKeep extruder door open to allow vapor to escape.
17.dAvoid long dwell times at high temperatures.If you need any other assistance, feel free to reach out to us anytime at timeplast@timeplast.com — we’ll be happy to help.
Free U.S. standard shipping on orders of 5+ spools!
Cinnamon
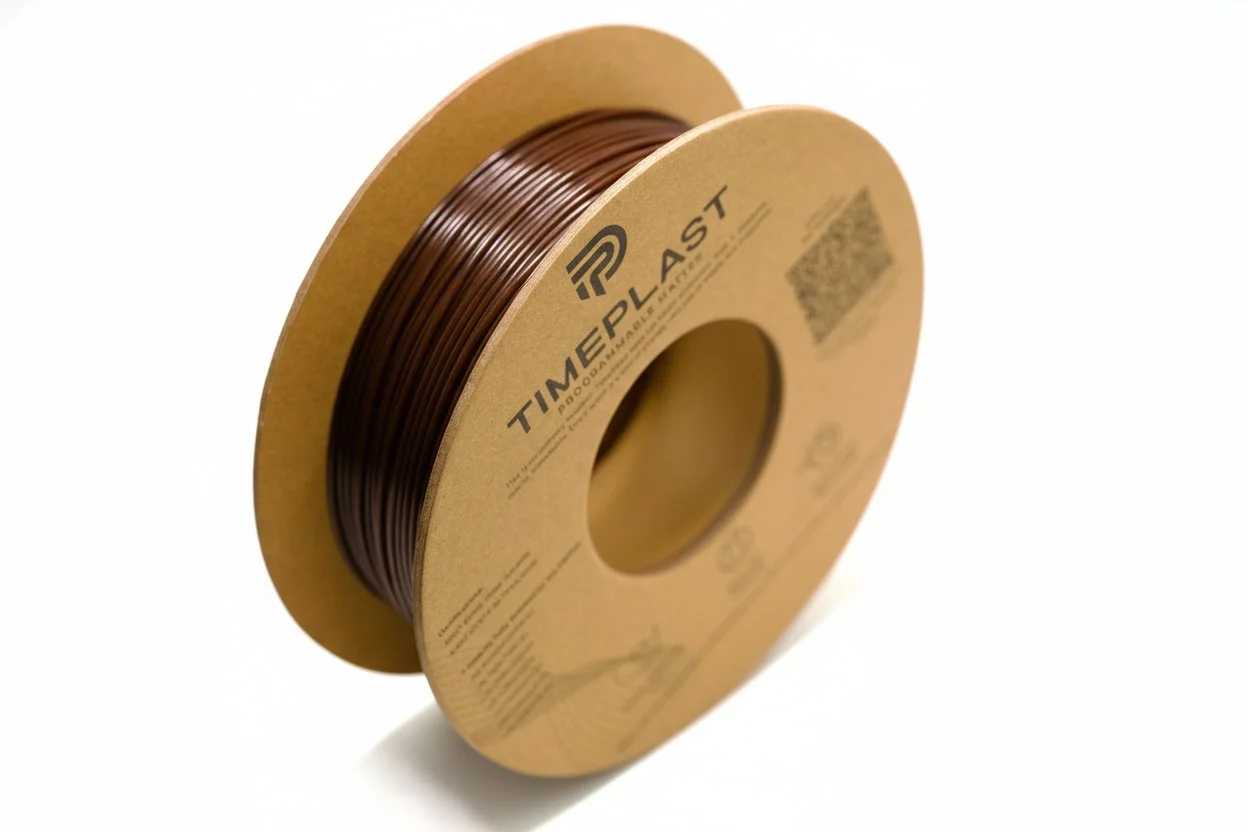
-
This aromatic filament slowly releases real cinnamon—thanks to our water-encapsulation technology that protects and diffuses versatile compounds. Create interactive, scent-forward designs with a warm, spiced identity.
Scent meets function. And it’s all natural.
How it works:
Microencapsulated cinnamon oil and powder are protected during extrusion and slowly released as ambient moisture activates the surface.
Always fresh.
Core Material:
Encapsulated Cinnamon: 18% – Ground and oil blend stabilized via silica-gel shells
Structured water polymer: 82% – Enables consistent print quality and scent diffusion
Scent Design:
Gradual release for up to 6 months depending on exposure
Can be triggered faster in high humidity or warm air flow
Where to use it:
Home fragrance objects – Scented wall tiles, drawer inserts, or ornaments
Edutainment – Teach kids about aromatic molecules with interactive models
Event décor – Custom cinnamon-scented printables for holidays
Bug repellents – Print cinnamon-scented outdoor items (mosquitoes hate it!)
-
Click here to access our new and improved TimeMass GPT Assistant. Just tell it your printer model and the TimeMass filament you're using—it will instantly recommend the exact parameters you need to start printing successfully.
1. Introduction
These parameters are designed to help avoid printing issues; however, temperatures and speed timings can be adjusted based on your specific goals. For example, if you prefer a less rigid result, we recommend using a lower temperature. This section outlines a complete slicing and printing profile for TimeMass Cinnamon, tailored for printers with a 0.8 mm nozzle. If the print is not being successful, please lower the nozzle temperature by 10°C and start over until an optimal print is achieved. Please check the manual for printing parameters.2. Temperature Settings
2.aNozzle Temperature: 230°C — Optimal for flowability while avoiding decomposition (which begins around 250°C).
2.bBed Temperature: 75°C — Ensures strong first-layer adhesion and prevents moisture bubbling.
2.cNozzle Temperature Range: 230–245°C — Timeplast melts around 165°C but prints best at 240°C for precise viscosity control.3. Cooling Settings
3.aNo Cooling for First Layers: 3 layers — Prevents shrinkage due to rapid cooling of moisture-rich filament.
3.bFan Minimum Speed: 0% for the first 100 seconds — Allows heat retention during early layers.
3.cFan Maximum Speed: 15% starting at 8 seconds — Avoids overcooling that can lead to warping.
3.dKeep Fan Always On: OFF — Allows vapor to escape and avoids internal fogging.
3.eSlow Down for Cooling: ON — Improves surface finish with controlled cooling.
3.fForce Cooling for Overhangs: OFF — Overcooling can deform bridges in Timeplast.
3.gFan for Overhangs: 15% — Only for essential cooling in complex areas.
3.hPre-Start Fan Time: 2 seconds — Minimizes pressure differential during the first layer.4. Volumetric Flow
4.aMax Volumetric Speed: 12 mm³/s — Based on a melt flow index of ~15 g/10min, allows high-speed printing.
4.bRamming Speed: 3 mm³/s — Prevents bubbles or popping from pressure spikes.5. Retraction and Flow
5.aRetraction Distance: 0.4 mm — Minimal retraction required for soft filaments to avoid stringing.
5.bRetraction Speed: 15 mm/s — Slow enough to avoid pulling molten plastic.
5.cPressure Advance: 0.05 — Compensates for nozzle lag at high flow rates.
5.dFlow Ratio: 92% — Slight under-extrusion avoids swelling and surface artifacts.6. Precision Settings
6.aGap Closing Radius: 0.1 mm — Tolerant of gaps in thicker walls.
6.bArc Fitting: ON — Reduces G-code size and smooths curve transitions.
6.cElephant Foot Compensation: 0.1 mm — Offsets squishing in the first layer caused by large bead sizes.7. Walls and Shells
7.aWall Loops: 2 — Minimum for strength when using a 0.8 mm nozzle.
7.bDetect Thin Walls: ON — Ensures tight geometries aren’t skipped.
7.cTop/Bottom Shell Layers: 3 — Provides good coverage; increase if watertightness is needed.
7.dTop/Bottom Thickness: 1.2 mm — Equals 1.5x the nozzle size for solid strength.
7.eTop/Bottom Pattern: Monotonic — Distributes tension evenly and improves surface finish.8. Geometry and Movement
8.aWall Order: Inner before Outer — Creates cleaner outer surfaces.
8.bInfill First: OFF — Maintains precise outer dimensions.
8.cSmooth Speed Transition: ON — Prevents ringing caused by abrupt speed changes.
8.dSmooth Coefficient: 80 — Ideal damping for soft materials.
8.eAvoid Crossing Wall: ON — Minimizes stringing across part walls.
8.fMax Detour for Crossing: 10 mm or 5% — Balances time with print cleanliness.9. Layer and Width Settings
9.aLayer Height: 0.3 mm — Optimal for strength and resolution using a 0.8 mm nozzle.
9.bInitial Layer Height: 0.35 mm — Slightly higher to improve adhesion.
9.cLine Widths (all): 0.8 mm — Matches nozzle diameter for consistent extrusion.10. Seam Settings
10.aSeam Position: Aligned or Back — Use aligned for mechanical consistency, back for visual appeal.
10.bSmart Scarf Seam: ON — Automatically adjusts seam location to reduce visual impact.
10.cSeam Angle: 155° — Standard seam angle for clean transitions.
10.dSeam Steps: 10 — Smooths seam path and improves visual finish.11. Infill Settings
11.aWall/Infill Overlap: 10% — Prevents infill from deforming soft exterior walls.
11.bInfill Combination: ON — Consolidates paths for efficiency.
11.cDetect Floating Shells: ON — Ensures unsupported vertical structures are printed reliably.
11.dSparse Infill Density: 20–25% — Balanced rigidity vs. material use.
11.eSparse Pattern: Grid — Stable and efficient for flexible geometries.12. Speed Settings
12.aTravel: 160 mm/s — Fast but safe against backlash.
12.bInitial Layer: 15 mm/s — Prevents nozzle from skimming and ensures bed adhesion.
12.cOuter Wall: 60 mm/s — Controlled speed for surface quality.
12.dInner Wall: 90 mm/s — Slightly faster without compromising control.
12.eSmall Perimeter: 35 mm/s — Reduced speed for detailed geometry.
12.fTop Surface: 40 mm/s — Improves finish on topmost layers.
12.gInfill: 100–120 mm/s — Takes advantage of high flowability.13. Acceleration Settings
13.aNormal Print: 2000 mm/s² — Prevents ringing in soft filaments.
13.bTravel: 4000 mm/s² — Enables fast movement without harsh transitions.
13.cInitial Layer: 300 mm/s² — Gentle movement prevents lifting from the bed.
13.dOuter Wall: 1500 mm/s² — Improves outer surface clarity.
13.eInner Wall: 2000 mm/s² — Balanced for structural components.
13.fTop Surface: 1500 mm/s² — Ensures smooth detailing.14. Adhesion and Brims
14.aSkirt Loops: 2 — Helps prime nozzle and start cleanly.
14.bBrim Width: 6 mm — Helps hold soft materials down.
14.cBrim Gap: 0.15 mm — Allows for easy removal without tearing.15. Prime Tower and Flush Settings
15.aPrime Tower: ON — Purges moisture and early flow inconsistencies.
15.bTower Width: 40 mm — Prevents collapse due to heat.
15.cBrim Width (Tower): 4 mm — Adds stability to the purge base.
15.dFlush Into Support: ON — Discards unwanted early flow safely.16. G-Code Start Script
M900 K0.05 ; Pressure Advance M106 S0 ; Fan off G92 E0 G1 E15 F300 ; purge line G92 E0
17. Additional Notes
17.aDry filament at 155 F for 2 hours before use.
17.bStore with desiccant.
17.cKeep extruder door open to allow vapor to escape.
17.dAvoid long dwell times at high temperatures.If you need any other assistance, feel free to reach out to us anytime at timeplast@timeplast.com — we’ll be happy to help.
Free U.S. standard shipping on orders of 5+ spools!
Fungi Food
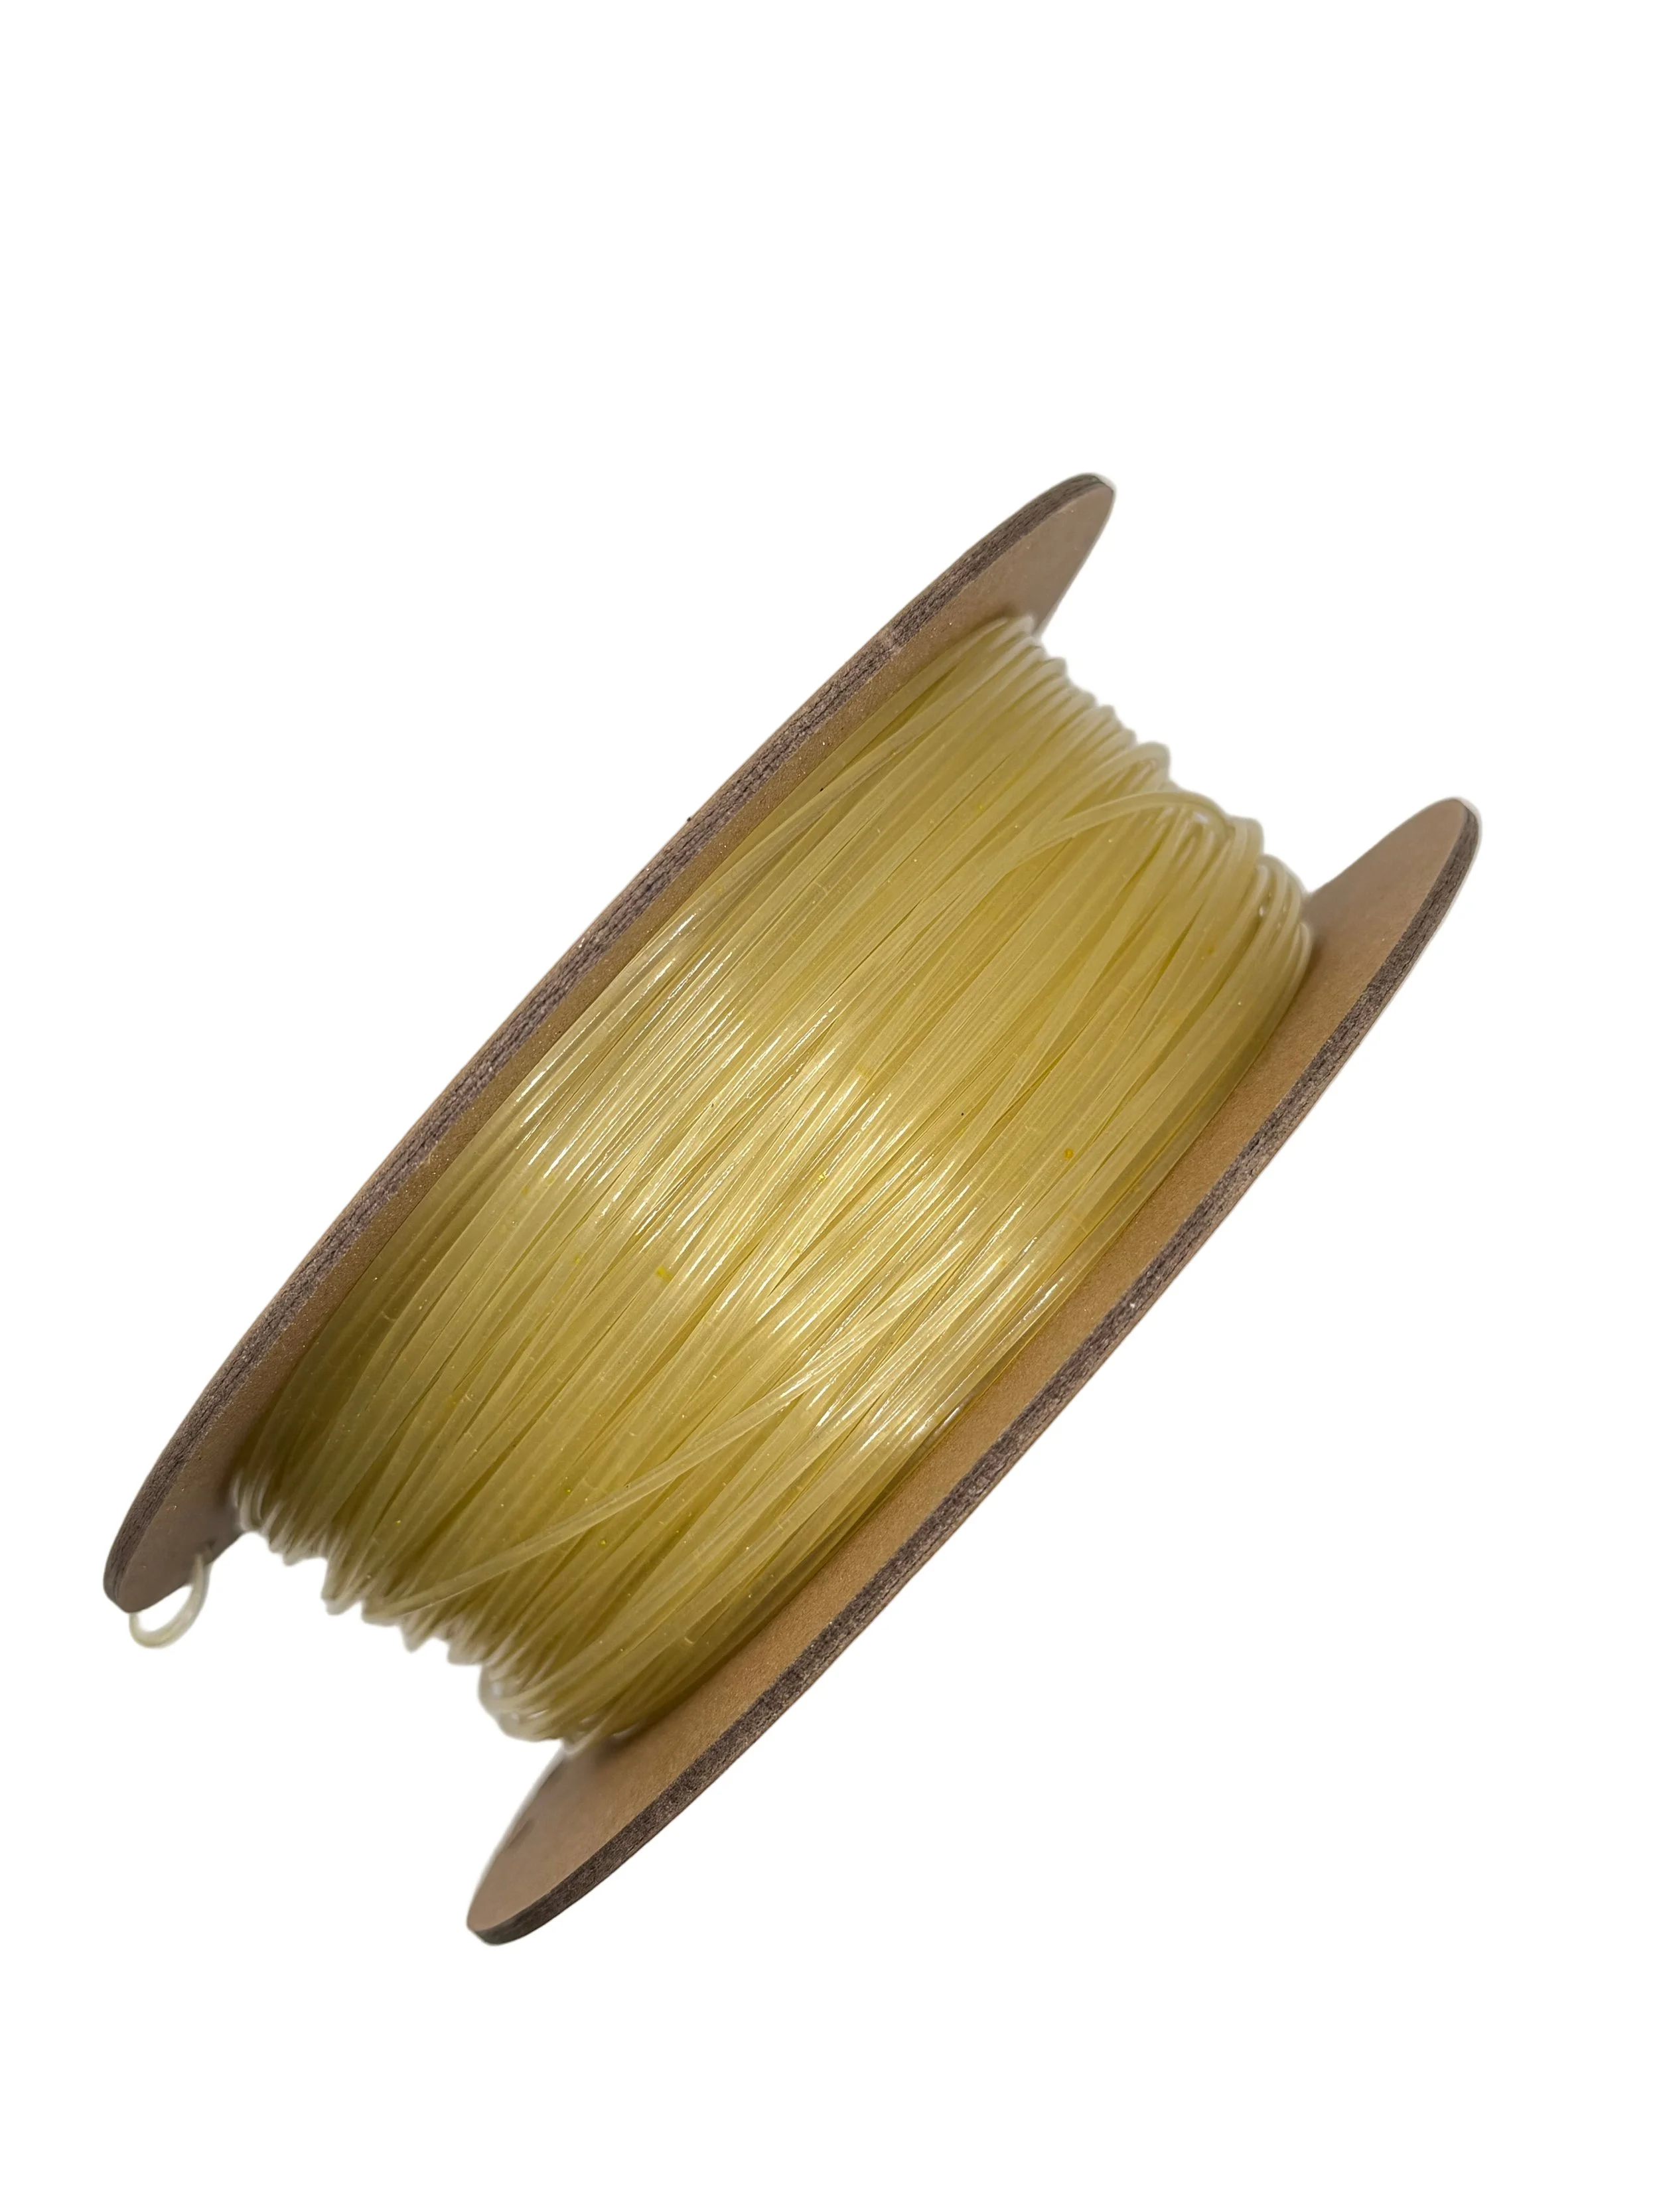
-
Optimized for mushroom growing, this filament contains gypsum (calcium sulfate) to provide vital minerals while managing pH. Includes slow-release hydration tech for sustained mycelium support.
Grow your mycelial empire—one layer at a time.
Where to use it:
DIY mushroom blocks
Humidity-retaining plugs
Spore carriers for inoculation kits.
-
Click here to access our new and improved TimeMass GPT Assistant. Just tell it your printer model and the TimeMass filament you're using—it will instantly recommend the exact parameters you need to start printing successfully.
1. Introduction
These parameters are designed to help avoid printing issues; however, temperatures and speed timings can be adjusted based on your specific goals. For example, if you prefer a less rigid result, we recommend using a lower temperature. This section outlines a complete slicing and printing profile for TimeMass Fungi Food, tailored for printers with a 0.8 mm nozzle. If the print is not being successful, please lower the nozzle temperature by 10°C and start over until an optimal print is achieved. Please check the manual for printing parameters.2. Temperature Settings
2.aNozzle Temperature: 230°C — Optimal for flowability while avoiding decomposition (which begins around 250°C).
2.bBed Temperature: 75°C — Ensures strong first-layer adhesion and prevents moisture bubbling.
2.cNozzle Temperature Range: 230–245°C — Timeplast melts around 165°C but prints best at 240°C for precise viscosity control.3. Cooling Settings
3.aNo Cooling for First Layers: 3 layers — Prevents shrinkage due to rapid cooling of moisture-rich filament.
3.bFan Minimum Speed: 0% for the first 100 seconds — Allows heat retention during early layers.
3.cFan Maximum Speed: 15% starting at 8 seconds — Avoids overcooling that can lead to warping.
3.dKeep Fan Always On: OFF — Allows vapor to escape and avoids internal fogging.
3.eSlow Down for Cooling: ON — Improves surface finish with controlled cooling.
3.fForce Cooling for Overhangs: OFF — Overcooling can deform bridges in Timeplast.
3.gFan for Overhangs: 15% — Only for essential cooling in complex areas.
3.hPre-Start Fan Time: 2 seconds — Minimizes pressure differential during the first layer.4. Volumetric Flow
4.aMax Volumetric Speed: 12 mm³/s — Based on a melt flow index of ~15 g/10min, allows high-speed printing.
4.bRamming Speed: 3 mm³/s — Prevents bubbles or popping from pressure spikes.5. Retraction and Flow
5.aRetraction Distance: 0.4 mm — Minimal retraction required for soft filaments to avoid stringing.
5.bRetraction Speed: 15 mm/s — Slow enough to avoid pulling molten plastic.
5.cPressure Advance: 0.05 — Compensates for nozzle lag at high flow rates.
5.dFlow Ratio: 92% — Slight under-extrusion avoids swelling and surface artifacts.6. Precision Settings
6.aGap Closing Radius: 0.1 mm — Tolerant of gaps in thicker walls.
6.bArc Fitting: ON — Reduces G-code size and smooths curve transitions.
6.cElephant Foot Compensation: 0.1 mm — Offsets squishing in the first layer caused by large bead sizes.7. Walls and Shells
7.aWall Loops: 2 — Minimum for strength when using a 0.8 mm nozzle.
7.bDetect Thin Walls: ON — Ensures tight geometries aren’t skipped.
7.cTop/Bottom Shell Layers: 3 — Provides good coverage; increase if watertightness is needed.
7.dTop/Bottom Thickness: 1.2 mm — Equals 1.5x the nozzle size for solid strength.
7.eTop/Bottom Pattern: Monotonic — Distributes tension evenly and improves surface finish.8. Geometry and Movement
8.aWall Order: Inner before Outer — Creates cleaner outer surfaces.
8.bInfill First: OFF — Maintains precise outer dimensions.
8.cSmooth Speed Transition: ON — Prevents ringing caused by abrupt speed changes.
8.dSmooth Coefficient: 80 — Ideal damping for soft materials.
8.eAvoid Crossing Wall: ON — Minimizes stringing across part walls.
8.fMax Detour for Crossing: 10 mm or 5% — Balances time with print cleanliness.9. Layer and Width Settings
9.aLayer Height: 0.3 mm — Optimal for strength and resolution using a 0.8 mm nozzle.
9.bInitial Layer Height: 0.35 mm — Slightly higher to improve adhesion.
9.cLine Widths (all): 0.8 mm — Matches nozzle diameter for consistent extrusion.10. Seam Settings
10.aSeam Position: Aligned or Back — Use aligned for mechanical consistency, back for visual appeal.
10.bSmart Scarf Seam: ON — Automatically adjusts seam location to reduce visual impact.
10.cSeam Angle: 155° — Standard seam angle for clean transitions.
10.dSeam Steps: 10 — Smooths seam path and improves visual finish.11. Infill Settings
11.aWall/Infill Overlap: 10% — Prevents infill from deforming soft exterior walls.
11.bInfill Combination: ON — Consolidates paths for efficiency.
11.cDetect Floating Shells: ON — Ensures unsupported vertical structures are printed reliably.
11.dSparse Infill Density: 20–25% — Balanced rigidity vs. material use.
11.eSparse Pattern: Grid — Stable and efficient for flexible geometries.12. Speed Settings
12.aTravel: 160 mm/s — Fast but safe against backlash.
12.bInitial Layer: 15 mm/s — Prevents nozzle from skimming and ensures bed adhesion.
12.cOuter Wall: 60 mm/s — Controlled speed for surface quality.
12.dInner Wall: 90 mm/s — Slightly faster without compromising control.
12.eSmall Perimeter: 35 mm/s — Reduced speed for detailed geometry.
12.fTop Surface: 40 mm/s — Improves finish on topmost layers.
12.gInfill: 100–120 mm/s — Takes advantage of high flowability.13. Acceleration Settings
13.aNormal Print: 2000 mm/s² — Prevents ringing in soft filaments.
13.bTravel: 4000 mm/s² — Enables fast movement without harsh transitions.
13.cInitial Layer: 300 mm/s² — Gentle movement prevents lifting from the bed.
13.dOuter Wall: 1500 mm/s² — Improves outer surface clarity.
13.eInner Wall: 2000 mm/s² — Balanced for structural components.
13.fTop Surface: 1500 mm/s² — Ensures smooth detailing.14. Adhesion and Brims
14.aSkirt Loops: 2 — Helps prime nozzle and start cleanly.
14.bBrim Width: 6 mm — Helps hold soft materials down.
14.cBrim Gap: 0.15 mm — Allows for easy removal without tearing.15. Prime Tower and Flush Settings
15.aPrime Tower: ON — Purges moisture and early flow inconsistencies.
15.bTower Width: 40 mm — Prevents collapse due to heat.
15.cBrim Width (Tower): 4 mm — Adds stability to the purge base.
15.dFlush Into Support: ON — Discards unwanted early flow safely.16. G-Code Start Script
M900 K0.05 ; Pressure Advance M106 S0 ; Fan off G92 E0 G1 E15 F300 ; purge line G92 E0
17. Additional Notes
17.aDry filament at 155 F for 2 hours before use.
17.bStore with desiccant.
17.cKeep extruder door open to allow vapor to escape.
17.dAvoid long dwell times at high temperatures.If you need any other assistance, feel free to reach out to us anytime at timeplast@timeplast.com — we’ll be happy to help.
Free U.S. standard shipping on orders of 5+ spools!
Survival & Emergency
Fire - Gen 2
-
TimeMass Fire Gen 2 is a burnable 3D printing filament made of water, wood, calcium carbonate, vinegar, in-house made and patented polymerized alcohol.
It prints fast, melts smooth, burns clean, and yes—it’s designed to ignite on purpose. Unlike traditional filaments that either melt like sad spaghetti or combust like a campfire mistake, this one burns right.
Want to print candles? Fire sculptures? Ritual objects for your post-plastic utopia? Go wild. You can even design your prints to control how they burn—fast, slow, flashy, or dramatic.
Pro tip: treat your print like a wick. Too thick? It’ll choke. Too thin? It’ll vanish. Just right? Beautiful combustion.
-
Click here to access our new and improved TimeMass GPT Assistant. Just tell it your printer model and the TimeMass filament you're using—it will instantly recommend the exact parameters you need to start printing successfully.
1. Introduction
These parameters are designed to help avoid printing issues; however, temperatures and speed timings can be adjusted based on your specific goals. For example, if you prefer a less rigid result, we recommend using a lower temperature. This section outlines a complete slicing and printing profile for TimeMass Fire, tailored for printers with a 0.8 mm nozzle. If the print is not being successful, please lower the nozzle temperature by 10°C and start over until an optimal print is achieved. Please check the manual for printing parameters.2. Temperature Settings
2.aNozzle Temperature: 230°C — Optimal for flowability while avoiding decomposition (which begins around 250°C).
2.bBed Temperature: 75°C — Ensures strong first-layer adhesion and prevents moisture bubbling.
2.cNozzle Temperature Range: 230–245°C — Timeplast melts around 165°C but prints best at 240°C for precise viscosity control.3. Cooling Settings
3.aNo Cooling for First Layers: 3 layers — Prevents shrinkage due to rapid cooling of moisture-rich filament.
3.bFan Minimum Speed: 0% for the first 100 seconds — Allows heat retention during early layers.
3.cFan Maximum Speed: 15% starting at 8 seconds — Avoids overcooling that can lead to warping.
3.dKeep Fan Always On: OFF — Allows vapor to escape and avoids internal fogging.
3.eSlow Down for Cooling: ON — Improves surface finish with controlled cooling.
3.fForce Cooling for Overhangs: OFF — Overcooling can deform bridges in Timeplast.
3.gFan for Overhangs: 15% — Only for essential cooling in complex areas.
3.hPre-Start Fan Time: 2 seconds — Minimizes pressure differential during the first layer.4. Volumetric Flow
4.aMax Volumetric Speed: 12 mm³/s — Based on a melt flow index of ~15 g/10min, allows high-speed printing.
4.bRamming Speed: 3 mm³/s — Prevents bubbles or popping from pressure spikes.5. Retraction and Flow
5.aRetraction Distance: 0.4 mm — Minimal retraction required for soft filaments to avoid stringing.
5.bRetraction Speed: 15 mm/s — Slow enough to avoid pulling molten plastic.
5.cPressure Advance: 0.05 — Compensates for nozzle lag at high flow rates.
5.dFlow Ratio: 92% — Slight under-extrusion avoids swelling and surface artifacts.6. Precision Settings
6.aGap Closing Radius: 0.1 mm — Tolerant of gaps in thicker walls.
6.bArc Fitting: ON — Reduces G-code size and smooths curve transitions.
6.cElephant Foot Compensation: 0.1 mm — Offsets squishing in the first layer caused by large bead sizes.7. Walls and Shells
7.aWall Loops: 2 — Minimum for strength when using a 0.8 mm nozzle.
7.bDetect Thin Walls: ON — Ensures tight geometries aren’t skipped.
7.cTop/Bottom Shell Layers: 3 — Provides good coverage; increase if watertightness is needed.
7.dTop/Bottom Thickness: 1.2 mm — Equals 1.5x the nozzle size for solid strength.
7.eTop/Bottom Pattern: Monotonic — Distributes tension evenly and improves surface finish.8. Geometry and Movement
8.aWall Order: Inner before Outer — Creates cleaner outer surfaces.
8.bInfill First: OFF — Maintains precise outer dimensions.
8.cSmooth Speed Transition: ON — Prevents ringing caused by abrupt speed changes.
8.dSmooth Coefficient: 80 — Ideal damping for soft materials.
8.eAvoid Crossing Wall: ON — Minimizes stringing across part walls.
8.fMax Detour for Crossing: 10 mm or 5% — Balances time with print cleanliness.9. Layer and Width Settings
9.aLayer Height: 0.3 mm — Optimal for strength and resolution using a 0.8 mm nozzle.
9.bInitial Layer Height: 0.35 mm — Slightly higher to improve adhesion.
9.cLine Widths (all): 0.8 mm — Matches nozzle diameter for consistent extrusion.10. Seam Settings
10.aSeam Position: Aligned or Back — Use aligned for mechanical consistency, back for visual appeal.
10.bSmart Scarf Seam: ON — Automatically adjusts seam location to reduce visual impact.
10.cSeam Angle: 155° — Standard seam angle for clean transitions.
10.dSeam Steps: 10 — Smooths seam path and improves visual finish.11. Infill Settings
11.aWall/Infill Overlap: 10% — Prevents infill from deforming soft exterior walls.
11.bInfill Combination: ON — Consolidates paths for efficiency.
11.cDetect Floating Shells: ON — Ensures unsupported vertical structures are printed reliably.
11.dSparse Infill Density: 20–25% — Balanced rigidity vs. material use.
11.eSparse Pattern: Grid — Stable and efficient for flexible geometries.12. Speed Settings
12.aTravel: 160 mm/s — Fast but safe against backlash.
12.bInitial Layer: 15 mm/s — Prevents nozzle from skimming and ensures bed adhesion.
12.cOuter Wall: 60 mm/s — Controlled speed for surface quality.
12.dInner Wall: 90 mm/s — Slightly faster without compromising control.
12.eSmall Perimeter: 35 mm/s — Reduced speed for detailed geometry.
12.fTop Surface: 40 mm/s — Improves finish on topmost layers.
12.gInfill: 100–120 mm/s — Takes advantage of high flowability.13. Acceleration Settings
13.aNormal Print: 2000 mm/s² — Prevents ringing in soft filaments.
13.bTravel: 4000 mm/s² — Enables fast movement without harsh transitions.
13.cInitial Layer: 300 mm/s² — Gentle movement prevents lifting from the bed.
13.dOuter Wall: 1500 mm/s² — Improves outer surface clarity.
13.eInner Wall: 2000 mm/s² — Balanced for structural components.
13.fTop Surface: 1500 mm/s² — Ensures smooth detailing.14. Adhesion and Brims
14.aSkirt Loops: 2 — Helps prime nozzle and start cleanly.
14.bBrim Width: 6 mm — Helps hold soft materials down.
14.cBrim Gap: 0.15 mm — Allows for easy removal without tearing.15. Prime Tower and Flush Settings
15.aPrime Tower: ON — Purges moisture and early flow inconsistencies.
15.bTower Width: 40 mm — Prevents collapse due to heat.
15.cBrim Width (Tower): 4 mm — Adds stability to the purge base.
15.dFlush Into Support: ON — Discards unwanted early flow safely.16. G-Code Start Script
M900 K0.05 ; Pressure Advance M106 S0 ; Fan off G92 E0 G1 E15 F300 ; purge line G92 E0
17. Additional Notes
17.aDry filament at 155 F for 2 hours before use.
17.bStore with desiccant.
17.cKeep extruder door open to allow vapor to escape.
17.dAvoid long dwell times at high temperatures.If you need any other assistance, feel free to reach out to us anytime at timeplast@timeplast.com — we’ll be happy to help.
Free U.S. standard shipping on orders of 5+ spools!
Soap - Gen 5
-
TimeMass Soap Gen 5 - The World’s First Truly 3D-Printable Soap
Timeplast’s TimeMass Soap Gen 5 is a breakthrough polymer-soap hybrid designed for FDM 3D printing. Made from water, calcium carbonate, in-house polymerized alcohols, olive oil, and naturally derived surfactants and emulsifiers (Coco-Glucoside and Glyceryl Stearate), this filament prints reliably and performs as a functional soap.
Gen 5 produces more lather than our previous versions, but it is still far less foamy than a commercial bar of soap—and that’s intentional.
Chemically speaking, foam does not clean.
Cleaning power comes from surfactants and emulsifiers that lift oils and dirt from the skin, not from bubbles.
Foam is mostly visual “show,” and commercial soaps add unnecessary foam boosters purely for aesthetics.
Gen 5 keeps things natural, efficient, and effective, even if the bubbles are modest.What’s Inside
Water + Alcohol Matrix: Allows smooth extrusion and hardens as moisture evaporates.
Calcium Carbonate: Gentle micro-exfoliation and added structure.
Coco-Glucoside & Glyceryl Stearate: Mild, skin-friendly surfactants responsible for real cleaning performance.
Olive Oil: Moisturizing and naturally soothing.
Essential Oils: Light, hypoallergenic fragrance (or user-added custom scents).
What You Can Do With It
Print fully functional soap bars that harden as they dry.
Pause prints to add essential oils, moisturizers, exfoliants, etc.
Create personalized designs, engravings, molds, or gift soaps.
Experiment with structure and shape soap becomes an artistic medium.
Why It Works So Well
Cleans effectively with naturally derived surfactants.
Prints smoothly with a 0.8 mm nozzle on standard FDM printers.
Long-lasting: dry phases regenerate hardness.
Fully customizable: scents, additives are all fair game.
Who It’s For
Makers, soap lovers, experimenters, educators, and anyone excited about a material that blends chemistry, craft, and 3D printing into something completely new.
TimeMass Soap Gen 5:
Smart. Functional. Printable.A soap that doesn’t need dramatic bubbles to prove it works.
Printing recommendations: For reliable prints, please always use a 0.8mm nozzle. A cryogrip blue plate so that first layer will adhere. For all of the other parameters, please use our specialized GPT here. And if at any point you have questions, concerns, or difficulty printing, please don’t hesitate to reach out to us at timeplast@timeplast.com. We work with every customer until their filament prints successfully, and we also offer no-questions-asked refunds if the material simply isn’t the right fit for you. Your satisfaction is always our priority.
Safety tip: Don’t go wild with undiluted essential oils. They’re called “concentrated” for a reason. Use responsibly.
For external use only. Avoid sensitive areas.
-
Click here to access our new and improved TimeMass GPT Assistant. Just tell it your printer model and the TimeMass filament you're using—it will instantly recommend the exact parameters you need to start printing successfully.
1. Introduction
These parameters are designed to help avoid printing issues; however, temperatures and speed timings can be adjusted based on your specific goals. For example, if you prefer a less rigid result, we recommend using a lower temperature. This section outlines a complete slicing and printing profile for TimeMass Soap, tailored for printers with a 0.8 mm nozzle. If the print is not being successful, please lower the nozzle temperature by 10°C and start over until an optimal print is achieved. Please check the manual for printing parameters.2. Temperature Settings
2.aNozzle Temperature: 230°C — Optimal for flowability while avoiding decomposition (which begins around 250°C).
2.bBed Temperature: 75°C — Ensures strong first-layer adhesion and prevents moisture bubbling.
2.cNozzle Temperature Range: 230–245°C — Timeplast melts around 165°C but prints best at 240°C for precise viscosity control.3. Cooling Settings
3.aNo Cooling for First Layers: 3 layers — Prevents shrinkage due to rapid cooling of moisture-rich filament.
3.bFan Minimum Speed: 0% for the first 100 seconds — Allows heat retention during early layers.
3.cFan Maximum Speed: 15% starting at 8 seconds — Avoids overcooling that can lead to warping.
3.dKeep Fan Always On: OFF — Allows vapor to escape and avoids internal fogging.
3.eSlow Down for Cooling: ON — Improves surface finish with controlled cooling.
3.fForce Cooling for Overhangs: OFF — Overcooling can deform bridges in Timeplast.
3.gFan for Overhangs: 15% — Only for essential cooling in complex areas.
3.hPre-Start Fan Time: 2 seconds — Minimizes pressure differential during the first layer.4. Volumetric Flow
4.aMax Volumetric Speed: 12 mm³/s — Based on a melt flow index of ~15 g/10min, allows high-speed printing.
4.bRamming Speed: 3 mm³/s — Prevents bubbles or popping from pressure spikes.5. Retraction and Flow
5.aRetraction Distance: 0.4 mm — Minimal retraction required for soft filaments to avoid stringing.
5.bRetraction Speed: 15 mm/s — Slow enough to avoid pulling molten plastic.
5.cPressure Advance: 0.05 — Compensates for nozzle lag at high flow rates.
5.dFlow Ratio: 92% — Slight under-extrusion avoids swelling and surface artifacts.6. Precision Settings
6.aGap Closing Radius: 0.1 mm — Tolerant of gaps in thicker walls.
6.bArc Fitting: ON — Reduces G-code size and smooths curve transitions.
6.cElephant Foot Compensation: 0.1 mm — Offsets squishing in the first layer caused by large bead sizes.7. Walls and Shells
7.aWall Loops: 2 — Minimum for strength when using a 0.8 mm nozzle.
7.bDetect Thin Walls: ON — Ensures tight geometries aren’t skipped.
7.cTop/Bottom Shell Layers: 3 — Provides good coverage; increase if watertightness is needed.
7.dTop/Bottom Thickness: 1.2 mm — Equals 1.5x the nozzle size for solid strength.
7.eTop/Bottom Pattern: Monotonic — Distributes tension evenly and improves surface finish.8. Geometry and Movement
8.aWall Order: Inner before Outer — Creates cleaner outer surfaces.
8.bInfill First: OFF — Maintains precise outer dimensions.
8.cSmooth Speed Transition: ON — Prevents ringing caused by abrupt speed changes.
8.dSmooth Coefficient: 80 — Ideal damping for soft materials.
8.eAvoid Crossing Wall: ON — Minimizes stringing across part walls.
8.fMax Detour for Crossing: 10 mm or 5% — Balances time with print cleanliness.9. Layer and Width Settings
9.aLayer Height: 0.3 mm — Optimal for strength and resolution using a 0.8 mm nozzle.
9.bInitial Layer Height: 0.35 mm — Slightly higher to improve adhesion.
9.cLine Widths (all): 0.8 mm — Matches nozzle diameter for consistent extrusion.10. Seam Settings
10.aSeam Position: Aligned or Back — Use aligned for mechanical consistency, back for visual appeal.
10.bSmart Scarf Seam: ON — Automatically adjusts seam location to reduce visual impact.
10.cSeam Angle: 155° — Standard seam angle for clean transitions.
10.dSeam Steps: 10 — Smooths seam path and improves visual finish.11. Infill Settings
11.aWall/Infill Overlap: 10% — Prevents infill from deforming soft exterior walls.
11.bInfill Combination: ON — Consolidates paths for efficiency.
11.cDetect Floating Shells: ON — Ensures unsupported vertical structures are printed reliably.
11.dSparse Infill Density: 20–25% — Balanced rigidity vs. material use.
11.eSparse Pattern: Grid — Stable and efficient for flexible geometries.12. Speed Settings
12.aTravel: 160 mm/s — Fast but safe against backlash.
12.bInitial Layer: 15 mm/s — Prevents nozzle from skimming and ensures bed adhesion.
12.cOuter Wall: 60 mm/s — Controlled speed for surface quality.
12.dInner Wall: 90 mm/s — Slightly faster without compromising control.
12.eSmall Perimeter: 35 mm/s — Reduced speed for detailed geometry.
12.fTop Surface: 40 mm/s — Improves finish on topmost layers.
12.gInfill: 100–120 mm/s — Takes advantage of high flowability.13. Acceleration Settings
13.aNormal Print: 2000 mm/s² — Prevents ringing in soft filaments.
13.bTravel: 4000 mm/s² — Enables fast movement without harsh transitions.
13.cInitial Layer: 300 mm/s² — Gentle movement prevents lifting from the bed.
13.dOuter Wall: 1500 mm/s² — Improves outer surface clarity.
13.eInner Wall: 2000 mm/s² — Balanced for structural components.
13.fTop Surface: 1500 mm/s² — Ensures smooth detailing.14. Adhesion and Brims
14.aSkirt Loops: 2 — Helps prime nozzle and start cleanly.
14.bBrim Width: 6 mm — Helps hold soft materials down.
14.cBrim Gap: 0.15 mm — Allows for easy removal without tearing.15. Prime Tower and Flush Settings
15.aPrime Tower: ON — Purges moisture and early flow inconsistencies.
15.bTower Width: 40 mm — Prevents collapse due to heat.
15.cBrim Width (Tower): 4 mm — Adds stability to the purge base.
15.dFlush Into Support: ON — Discards unwanted early flow safely.16. G-Code Start Script
M900 K0.05 ; Pressure Advance M106 S0 ; Fan off G92 E0 G1 E15 F300 ; purge line G92 E0
17. Additional Notes
17.aDry filament at 155 F for 2 hours before use.
17.bStore with desiccant.
17.cKeep extruder door open to allow vapor to escape.
17.dAvoid long dwell times at high temperatures.If you need any other assistance, feel free to reach out to us anytime at timeplast@timeplast.com — we’ll be happy to help.
Free U.S. standard shipping on orders of 5+ spools!
Antibacterial Soap - Gen 4

-
A self-cleaning filament that combines natural antibacterial and antifungal power into one. Made with vinegar, borax, zinc oxide, and miconazole nitrate (2%), this filament is designed for functional hygiene while remaining fully 3D-printable.
While it produces only minimal foam compared to commercial soaps, this is by design—cleaning comes from the natural surfactants and emulsifiers in the formula, not from bubbles. Foam is mostly visual “show”; the real cleansing happens at the molecular level.Clean hands. Clean surfaces. Clean tech.
How it works:
Moisture triggers a slow, controlled release of antimicrobial actives while the structure remains intact for long-lasting use. No slime. No waste. Just embedded hygiene that performs without relying on lather.
Active Components:
Vinegar – Natural disinfectant
Zinc Oxide – Skin-safe microbial barrier
Miconazole Nitrate – Fungus-fighting powerhouse
Borax – Boosts antibacterial and preservative performance
Where to use it:
Reusable soap bars – durable, antibacterial cleansing blocks
Public-use objects – reduce bacteria on high-touch surfaces
Gym or school items – added protection on shared equipment
Anti-fungal trays or dispensers – perfect for humid environmentsFor external use only. Avoid sensitive areas.
-
Click here to access our new and improved TimeMass GPT Assistant. Just tell it your printer model and the TimeMass filament you're using—it will instantly recommend the exact parameters you need to start printing successfully.
1. Introduction
These parameters are designed to help avoid printing issues; however, temperatures and speed timings can be adjusted based on your specific goals. For example, if you prefer a less rigid result, we recommend using a lower temperature. This section outlines a complete slicing and printing profile for TimeMass Antibacterial Soap, tailored for printers with a 0.8 mm nozzle. If the print is not being successful, please lower the nozzle temperature by 10°C and start over until an optimal print is achieved. Please check the manual for printing parameters.2. Temperature Settings
2.aNozzle Temperature: 230°C — Optimal for flowability while avoiding decomposition (which begins around 250°C).
2.bBed Temperature: 75°C — Ensures strong first-layer adhesion and prevents moisture bubbling.
2.cNozzle Temperature Range: 230–245°C — Timeplast melts around 165°C but prints best at 240°C for precise viscosity control.3. Cooling Settings
3.aNo Cooling for First Layers: 3 layers — Prevents shrinkage due to rapid cooling of moisture-rich filament.
3.bFan Minimum Speed: 0% for the first 100 seconds — Allows heat retention during early layers.
3.cFan Maximum Speed: 15% starting at 8 seconds — Avoids overcooling that can lead to warping.
3.dKeep Fan Always On: OFF — Allows vapor to escape and avoids internal fogging.
3.eSlow Down for Cooling: ON — Improves surface finish with controlled cooling.
3.fForce Cooling for Overhangs: OFF — Overcooling can deform bridges in Timeplast.
3.gFan for Overhangs: 15% — Only for essential cooling in complex areas.
3.hPre-Start Fan Time: 2 seconds — Minimizes pressure differential during the first layer.4. Volumetric Flow
4.aMax Volumetric Speed: 12 mm³/s — Based on a melt flow index of ~15 g/10min, allows high-speed printing.
4.bRamming Speed: 3 mm³/s — Prevents bubbles or popping from pressure spikes.5. Retraction and Flow
5.aRetraction Distance: 0.4 mm — Minimal retraction required for soft filaments to avoid stringing.
5.bRetraction Speed: 15 mm/s — Slow enough to avoid pulling molten plastic.
5.cPressure Advance: 0.05 — Compensates for nozzle lag at high flow rates.
5.dFlow Ratio: 92% — Slight under-extrusion avoids swelling and surface artifacts.6. Precision Settings
6.aGap Closing Radius: 0.1 mm — Tolerant of gaps in thicker walls.
6.bArc Fitting: ON — Reduces G-code size and smooths curve transitions.
6.cElephant Foot Compensation: 0.1 mm — Offsets squishing in the first layer caused by large bead sizes.7. Walls and Shells
7.aWall Loops: 2 — Minimum for strength when using a 0.8 mm nozzle.
7.bDetect Thin Walls: ON — Ensures tight geometries aren’t skipped.
7.cTop/Bottom Shell Layers: 3 — Provides good coverage; increase if watertightness is needed.
7.dTop/Bottom Thickness: 1.2 mm — Equals 1.5x the nozzle size for solid strength.
7.eTop/Bottom Pattern: Monotonic — Distributes tension evenly and improves surface finish.8. Geometry and Movement
8.aWall Order: Inner before Outer — Creates cleaner outer surfaces.
8.bInfill First: OFF — Maintains precise outer dimensions.
8.cSmooth Speed Transition: ON — Prevents ringing caused by abrupt speed changes.
8.dSmooth Coefficient: 80 — Ideal damping for soft materials.
8.eAvoid Crossing Wall: ON — Minimizes stringing across part walls.
8.fMax Detour for Crossing: 10 mm or 5% — Balances time with print cleanliness.9. Layer and Width Settings
9.aLayer Height: 0.3 mm — Optimal for strength and resolution using a 0.8 mm nozzle.
9.bInitial Layer Height: 0.35 mm — Slightly higher to improve adhesion.
9.cLine Widths (all): 0.8 mm — Matches nozzle diameter for consistent extrusion.10. Seam Settings
10.aSeam Position: Aligned or Back — Use aligned for mechanical consistency, back for visual appeal.
10.bSmart Scarf Seam: ON — Automatically adjusts seam location to reduce visual impact.
10.cSeam Angle: 155° — Standard seam angle for clean transitions.
10.dSeam Steps: 10 — Smooths seam path and improves visual finish.11. Infill Settings
11.aWall/Infill Overlap: 10% — Prevents infill from deforming soft exterior walls.
11.bInfill Combination: ON — Consolidates paths for efficiency.
11.cDetect Floating Shells: ON — Ensures unsupported vertical structures are printed reliably.
11.dSparse Infill Density: 20–25% — Balanced rigidity vs. material use.
11.eSparse Pattern: Grid — Stable and efficient for flexible geometries.12. Speed Settings
12.aTravel: 160 mm/s — Fast but safe against backlash.
12.bInitial Layer: 15 mm/s — Prevents nozzle from skimming and ensures bed adhesion.
12.cOuter Wall: 60 mm/s — Controlled speed for surface quality.
12.dInner Wall: 90 mm/s — Slightly faster without compromising control.
12.eSmall Perimeter: 35 mm/s — Reduced speed for detailed geometry.
12.fTop Surface: 40 mm/s — Improves finish on topmost layers.
12.gInfill: 100–120 mm/s — Takes advantage of high flowability.13. Acceleration Settings
13.aNormal Print: 2000 mm/s² — Prevents ringing in soft filaments.
13.bTravel: 4000 mm/s² — Enables fast movement without harsh transitions.
13.cInitial Layer: 300 mm/s² — Gentle movement prevents lifting from the bed.
13.dOuter Wall: 1500 mm/s² — Improves outer surface clarity.
13.eInner Wall: 2000 mm/s² — Balanced for structural components.
13.fTop Surface: 1500 mm/s² — Ensures smooth detailing.14. Adhesion and Brims
14.aSkirt Loops: 2 — Helps prime nozzle and start cleanly.
14.bBrim Width: 6 mm — Helps hold soft materials down.
14.cBrim Gap: 0.15 mm — Allows for easy removal without tearing.15. Prime Tower and Flush Settings
15.aPrime Tower: ON — Purges moisture and early flow inconsistencies.
15.bTower Width: 40 mm — Prevents collapse due to heat.
15.cBrim Width (Tower): 4 mm — Adds stability to the purge base.
15.dFlush Into Support: ON — Discards unwanted early flow safely.16. G-Code Start Script
M900 K0.05 ; Pressure Advance M106 S0 ; Fan off G92 E0 G1 E15 F300 ; purge line G92 E0
17. Additional Notes
17.aDry filament at 155 F for 2 hours before use.
17.bStore with desiccant.
17.cKeep extruder door open to allow vapor to escape.
17.dAvoid long dwell times at high temperatures.If you need any other assistance, feel free to reach out to us anytime at timeplast@timeplast.com — we’ll be happy to help.
Free U.S. standard shipping on orders of 5+ spools!
Antibacterial
-
Engineered with embedded slow-release antibacterial agents like Vinegar, borax and chloride compounds, this filament forms a protective and immunity aura around your printed part. Designed to maintain hygiene and reduce microbial growth on high-contact surfaces.
Built-in immunity, powered by science.
How it works:
Encapsulated antimicrobials are slowly released upon contact with ambient moisture, delivering long-term protection without leaching or surface degradation.
No coatings. No sprays. Just baked-in sanitation.
Antibacterial Agents:
Vinegar and Borax: Inhibits bacterial metabolism
Calcium hypochlorite, powerful oxidant and cell killer.
Zinc Oxide (trace): Reinforces microbe resistance
Where to use it:
Public touchpoints – Door handles, elevator buttons, light switches
Healthcare prototypes – Lab tools, dispensers, trays
Pet products – Clean bowls, toys, or water-dispensing structures
Educational tools – Safe-to-touch classroom models
-
Click here to access our new and improved TimeMass GPT Assistant. Just tell it your printer model and the TimeMass filament you're using—it will instantly recommend the exact parameters you need to start printing successfully.
1. Introduction
These parameters are designed to help avoid printing issues; however, temperatures and speed timings can be adjusted based on your specific goals. For example, if you prefer a less rigid result, we recommend using a lower temperature. This section outlines a complete slicing and printing profile for TimeMass Antibacterial, tailored for printers with a 0.8 mm nozzle. If the print is not being successful, please lower the nozzle temperature by 10°C and start over until an optimal print is achieved. Please check the manual for printing parameters.2. Temperature Settings
2.aNozzle Temperature: 230°C — Optimal for flowability while avoiding decomposition (which begins around 250°C).
2.bBed Temperature: 95°C — Ensures strong first-layer adhesion and prevents moisture bubbling.
2.cNozzle Temperature Range: 230–245°C — Timeplast melts around 165°C but prints best at 240°C for precise viscosity control.3. Cooling Settings
3.aNo Cooling for First Layers: 3 layers — Prevents shrinkage due to rapid cooling of moisture-rich filament.
3.bFan Minimum Speed: 0% for the first 100 seconds — Allows heat retention during early layers.
3.cFan Maximum Speed: 15% starting at 8 seconds — Avoids overcooling that can lead to warping.
3.dKeep Fan Always On: OFF — Allows vapor to escape and avoids internal fogging.
3.eSlow Down for Cooling: ON — Improves surface finish with controlled cooling.
3.fForce Cooling for Overhangs: OFF — Overcooling can deform bridges in Timeplast.
3.gFan for Overhangs: 15% — Only for essential cooling in complex areas.
3.hPre-Start Fan Time: 2 seconds — Minimizes pressure differential during the first layer.4. Volumetric Flow
4.aMax Volumetric Speed: 12 mm³/s — Based on a melt flow index of ~15 g/10min, allows high-speed printing.
4.bRamming Speed: 3 mm³/s — Prevents bubbles or popping from pressure spikes.5. Retraction and Flow
5.aRetraction Distance: 0.4 mm — Minimal retraction required for soft filaments to avoid stringing.
5.bRetraction Speed: 15 mm/s — Slow enough to avoid pulling molten plastic.
5.cPressure Advance: 0.05 — Compensates for nozzle lag at high flow rates.
5.dFlow Ratio: 92% — Slight under-extrusion avoids swelling and surface artifacts.6. Precision Settings
6.aGap Closing Radius: 0.1 mm — Tolerant of gaps in thicker walls.
6.bArc Fitting: ON — Reduces G-code size and smooths curve transitions.
6.cElephant Foot Compensation: 0.1 mm — Offsets squishing in the first layer caused by large bead sizes.7. Walls and Shells
7.aWall Loops: 2 — Minimum for strength when using a 0.8 mm nozzle.
7.bDetect Thin Walls: ON — Ensures tight geometries aren’t skipped.
7.cTop/Bottom Shell Layers: 3 — Provides good coverage; increase if watertightness is needed.
7.dTop/Bottom Thickness: 1.2 mm — Equals 1.5x the nozzle size for solid strength.
7.eTop/Bottom Pattern: Monotonic — Distributes tension evenly and improves surface finish.8. Geometry and Movement
8.aWall Order: Inner before Outer — Creates cleaner outer surfaces.
8.bInfill First: OFF — Maintains precise outer dimensions.
8.cSmooth Speed Transition: ON — Prevents ringing caused by abrupt speed changes.
8.dSmooth Coefficient: 80 — Ideal damping for soft materials.
8.eAvoid Crossing Wall: ON — Minimizes stringing across part walls.
8.fMax Detour for Crossing: 10 mm or 5% — Balances time with print cleanliness.9. Layer and Width Settings
9.aLayer Height: 0.3 mm — Optimal for strength and resolution using a 0.8 mm nozzle.
9.bInitial Layer Height: 0.35 mm — Slightly higher to improve adhesion.
9.cLine Widths (all): 0.8 mm — Matches nozzle diameter for consistent extrusion.10. Seam Settings
10.aSeam Position: Aligned or Back — Use aligned for mechanical consistency, back for visual appeal.
10.bSmart Scarf Seam: ON — Automatically adjusts seam location to reduce visual impact.
10.cSeam Angle: 155° — Standard seam angle for clean transitions.
10.dSeam Steps: 10 — Smooths seam path and improves visual finish.11. Infill Settings
11.aWall/Infill Overlap: 10% — Prevents infill from deforming soft exterior walls.
11.bInfill Combination: ON — Consolidates paths for efficiency.
11.cDetect Floating Shells: ON — Ensures unsupported vertical structures are printed reliably.
11.dSparse Infill Density: 20–25% — Balanced rigidity vs. material use.
11.eSparse Pattern: Grid — Stable and efficient for flexible geometries.12. Speed Settings
12.aTravel: 160 mm/s — Fast but safe against backlash.
12.bInitial Layer: 15 mm/s — Prevents nozzle from skimming and ensures bed adhesion.
12.cOuter Wall: 60 mm/s — Controlled speed for surface quality.
12.dInner Wall: 90 mm/s — Slightly faster without compromising control.
12.eSmall Perimeter: 35 mm/s — Reduced speed for detailed geometry.
12.fTop Surface: 40 mm/s — Improves finish on topmost layers.
12.gInfill: 100–120 mm/s — Takes advantage of high flowability.13. Acceleration Settings
13.aNormal Print: 2000 mm/s² — Prevents ringing in soft filaments.
13.bTravel: 4000 mm/s² — Enables fast movement without harsh transitions.
13.cInitial Layer: 300 mm/s² — Gentle movement prevents lifting from the bed.
13.dOuter Wall: 1500 mm/s² — Improves outer surface clarity.
13.eInner Wall: 2000 mm/s² — Balanced for structural components.
13.fTop Surface: 1500 mm/s² — Ensures smooth detailing.14. Adhesion and Brims
14.aSkirt Loops: 2 — Helps prime nozzle and start cleanly.
14.bBrim Width: 6 mm — Helps hold soft materials down.
14.cBrim Gap: 0.15 mm — Allows for easy removal without tearing.15. Prime Tower and Flush Settings
15.aPrime Tower: ON — Purges moisture and early flow inconsistencies.
15.bTower Width: 40 mm — Prevents collapse due to heat.
15.cBrim Width (Tower): 4 mm — Adds stability to the purge base.
15.dFlush Into Support: ON — Discards unwanted early flow safely.16. G-Code Start Script
M900 K0.05 ; Pressure Advance M106 S0 ; Fan off G92 E0 G1 E15 F300 ; purge line G92 E0
17. Additional Notes
17.aDry filament at 155 F for 2 hours before use.
17.bStore with desiccant.
17.cKeep extruder door open to allow vapor to escape.
17.dAvoid long dwell times at high temperatures.If you need print settings for other nozzle sizes, feel free to reach out to us at timeplast@timeplast.com — we’ll be happy to help.
Free U.S. standard shipping on orders of 5+ spools!
Biohackers
Bug Attractor
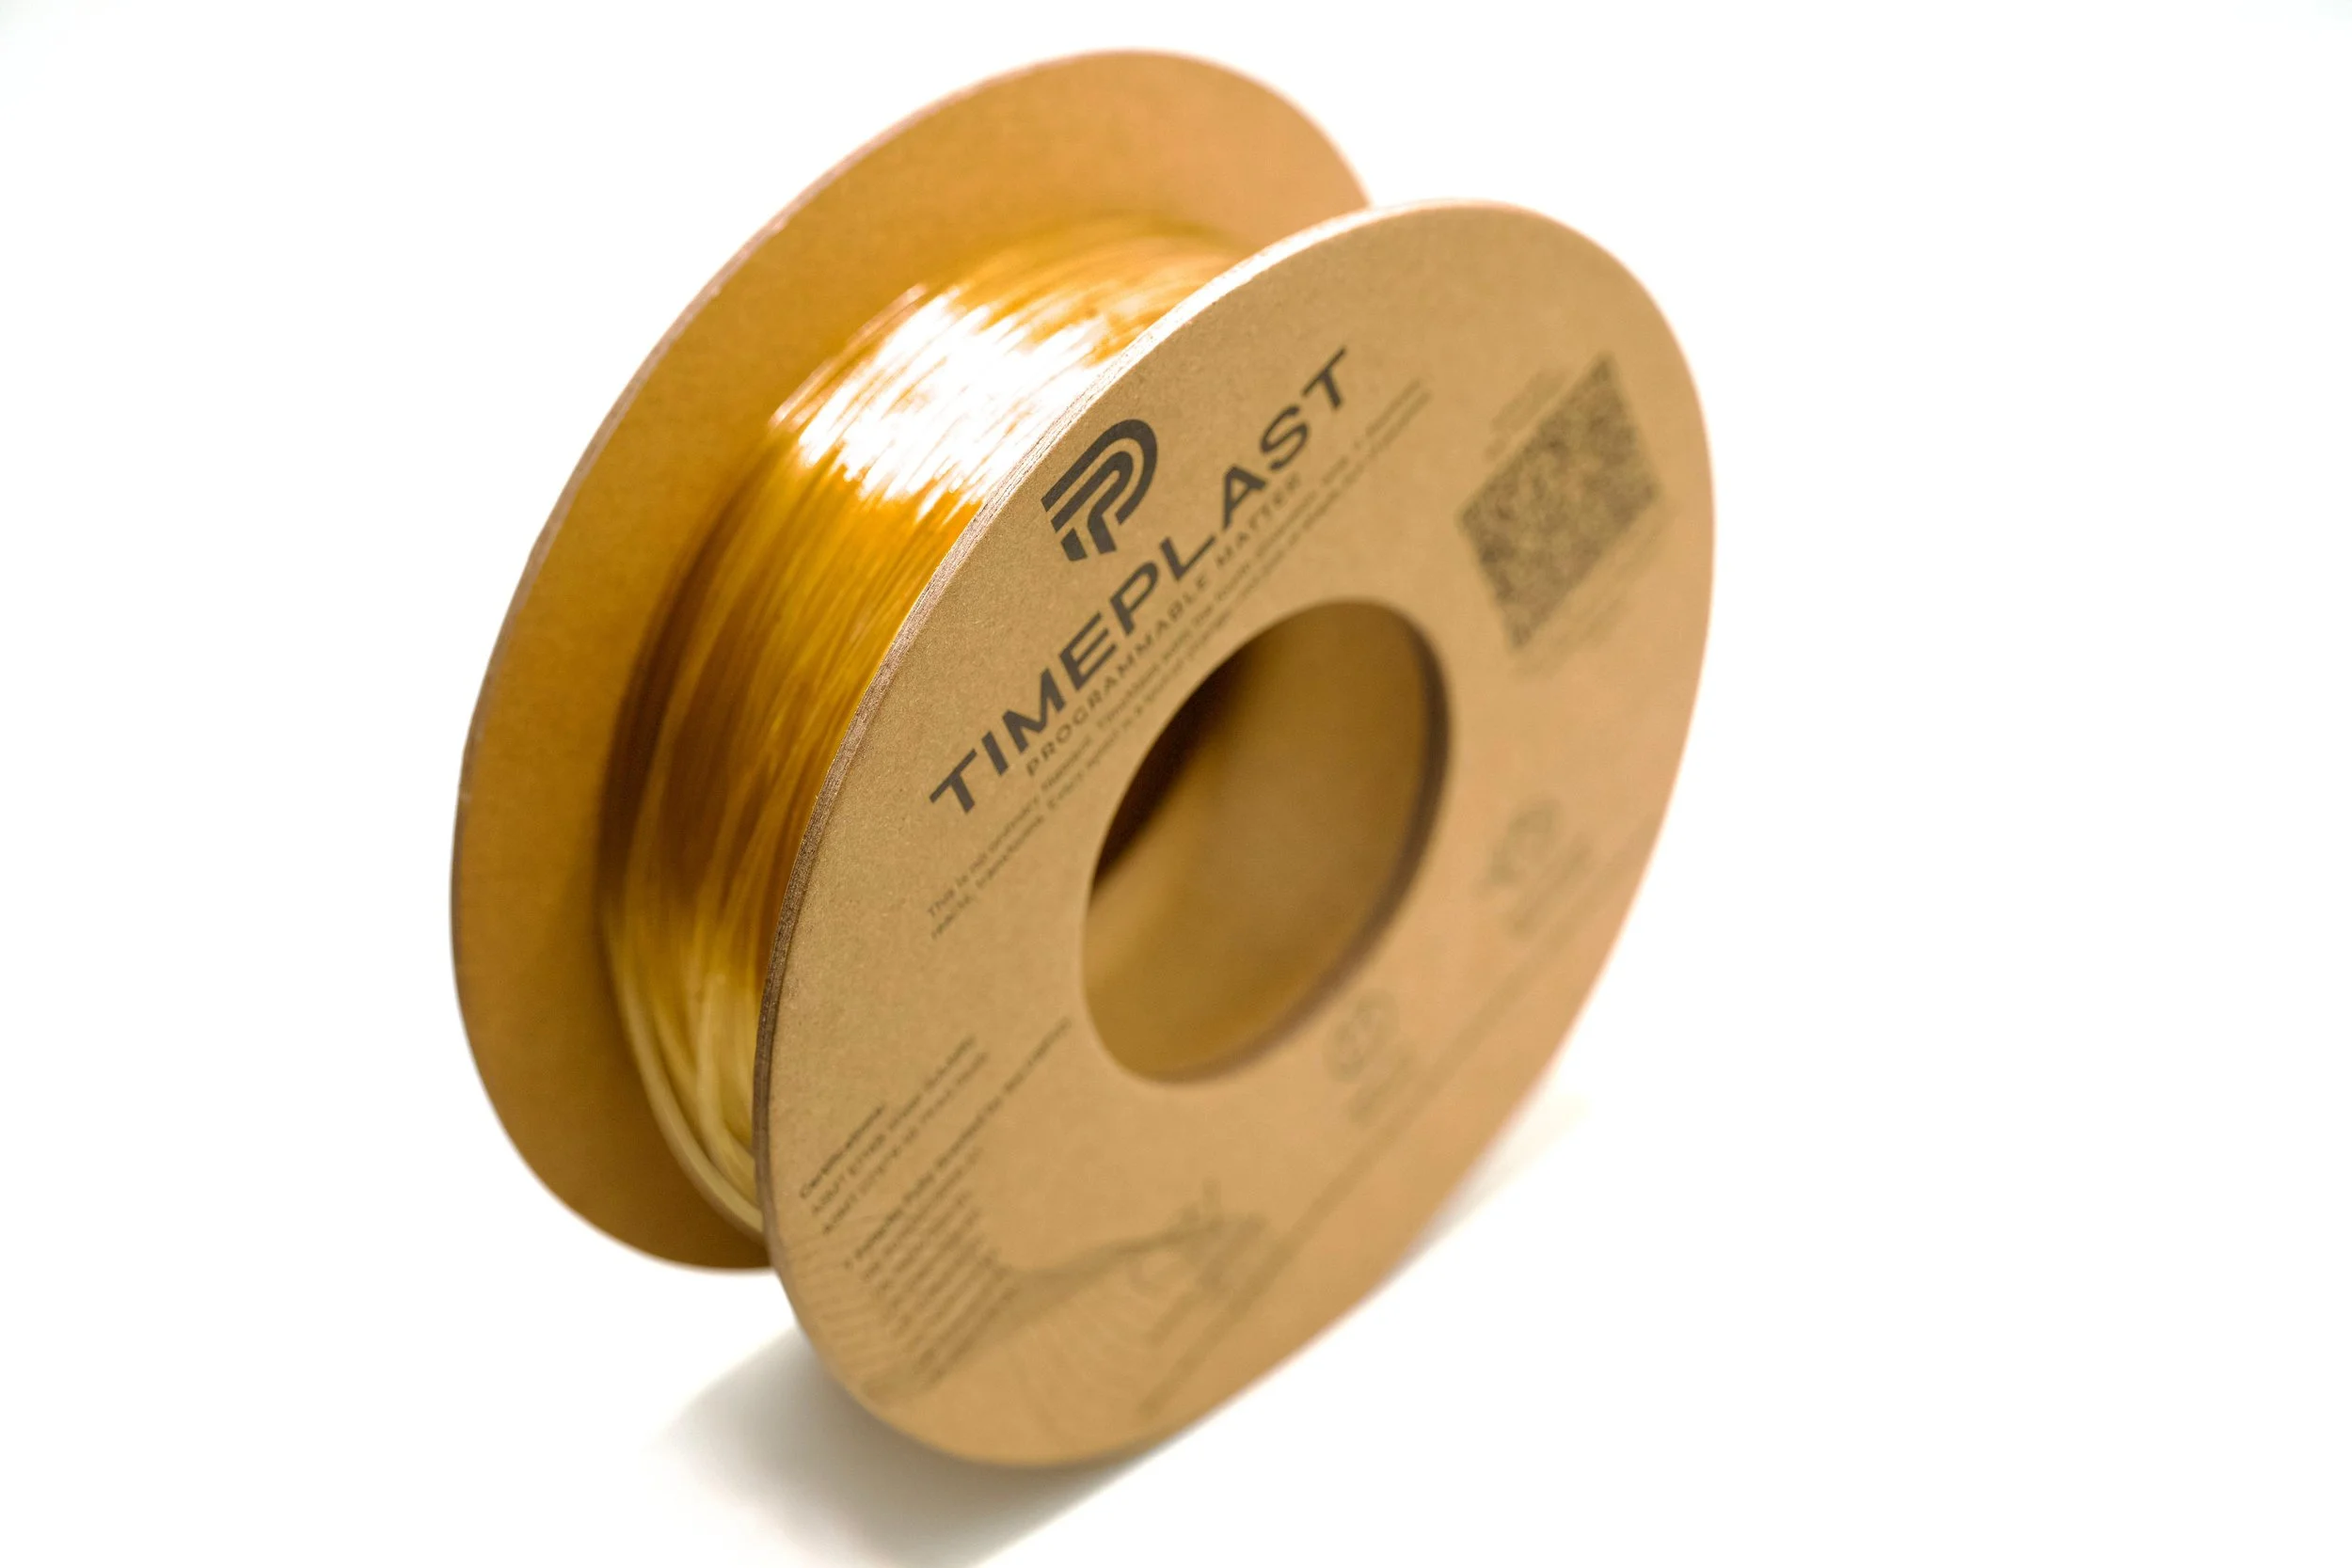
-
Designed for controlled bug attraction, this filament is infused with maltodextrin, sugars, milk proteins, and yeast extract. Ideal for DIY insect farms, traps, or study tools—it draws in scavengers, flyers, and larvae-feeders.
From ant trails to fly swarms, this filament brings the bugs to you.
How it works:
Water-activated compounds release food-scent molecules gradually, maintaining consistent attraction without spoilage.
Insects love it. You control the design.
Core Attractants:
Glucose + Fructose + Maltodextrin – Sweet lures for cockroaches, ants, and flies
Milk Proteins + Yeast Extract – Attract egg-laying insects and larval feeders
Where to use it:
Insect farming – Feed black soldier flies, ants, beetles
Bug behavior studies – Controlled environments for research
Custom traps – Build your own lure stations
Garden insect monitoring
-
Click here to access our new and improved TimeMass GPT Assistant. Just tell it your printer model and the TimeMass filament you're using—it will instantly recommend the exact parameters you need to start printing successfully.
1. Introduction
These parameters are designed to help avoid printing issues; however, temperatures and speed timings can be adjusted based on your specific goals. For example, if you prefer a less rigid result, we recommend using a lower temperature. This section outlines a complete slicing and printing profile for TimeMass Bug Attractor, tailored for printers with a 0.8 mm nozzle. If the print is not being successful, please lower the nozzle temperature by 10°C and start over until an optimal print is achieved. Please check the manual for printing parameters.2. Temperature Settings
2.aNozzle Temperature: 230°C — Optimal for flowability while avoiding decomposition (which begins around 250°C).
2.bBed Temperature: 75°C — Ensures strong first-layer adhesion and prevents moisture bubbling.
2.cNozzle Temperature Range: 230–245°C — Timeplast melts around 165°C but prints best at 240°C for precise viscosity control.3. Cooling Settings
3.aNo Cooling for First Layers: 3 layers — Prevents shrinkage due to rapid cooling of moisture-rich filament.
3.bFan Minimum Speed: 0% for the first 100 seconds — Allows heat retention during early layers.
3.cFan Maximum Speed: 15% starting at 8 seconds — Avoids overcooling that can lead to warping.
3.dKeep Fan Always On: OFF — Allows vapor to escape and avoids internal fogging.
3.eSlow Down for Cooling: ON — Improves surface finish with controlled cooling.
3.fForce Cooling for Overhangs: OFF — Overcooling can deform bridges in Timeplast.
3.gFan for Overhangs: 15% — Only for essential cooling in complex areas.
3.hPre-Start Fan Time: 2 seconds — Minimizes pressure differential during the first layer.4. Volumetric Flow
4.aMax Volumetric Speed: 12 mm³/s — Based on a melt flow index of ~15 g/10min, allows high-speed printing.
4.bRamming Speed: 3 mm³/s — Prevents bubbles or popping from pressure spikes.5. Retraction and Flow
5.aRetraction Distance: 0.4 mm — Minimal retraction required for soft filaments to avoid stringing.
5.bRetraction Speed: 15 mm/s — Slow enough to avoid pulling molten plastic.
5.cPressure Advance: 0.05 — Compensates for nozzle lag at high flow rates.
5.dFlow Ratio: 92% — Slight under-extrusion avoids swelling and surface artifacts.6. Precision Settings
6.aGap Closing Radius: 0.1 mm — Tolerant of gaps in thicker walls.
6.bArc Fitting: ON — Reduces G-code size and smooths curve transitions.
6.cElephant Foot Compensation: 0.1 mm — Offsets squishing in the first layer caused by large bead sizes.7. Walls and Shells
7.aWall Loops: 2 — Minimum for strength when using a 0.8 mm nozzle.
7.bDetect Thin Walls: ON — Ensures tight geometries aren’t skipped.
7.cTop/Bottom Shell Layers: 3 — Provides good coverage; increase if watertightness is needed.
7.dTop/Bottom Thickness: 1.2 mm — Equals 1.5x the nozzle size for solid strength.
7.eTop/Bottom Pattern: Monotonic — Distributes tension evenly and improves surface finish.8. Geometry and Movement
8.aWall Order: Inner before Outer — Creates cleaner outer surfaces.
8.bInfill First: OFF — Maintains precise outer dimensions.
8.cSmooth Speed Transition: ON — Prevents ringing caused by abrupt speed changes.
8.dSmooth Coefficient: 80 — Ideal damping for soft materials.
8.eAvoid Crossing Wall: ON — Minimizes stringing across part walls.
8.fMax Detour for Crossing: 10 mm or 5% — Balances time with print cleanliness.9. Layer and Width Settings
9.aLayer Height: 0.3 mm — Optimal for strength and resolution using a 0.8 mm nozzle.
9.bInitial Layer Height: 0.35 mm — Slightly higher to improve adhesion.
9.cLine Widths (all): 0.8 mm — Matches nozzle diameter for consistent extrusion.10. Seam Settings
10.aSeam Position: Aligned or Back — Use aligned for mechanical consistency, back for visual appeal.
10.bSmart Scarf Seam: ON — Automatically adjusts seam location to reduce visual impact.
10.cSeam Angle: 155° — Standard seam angle for clean transitions.
10.dSeam Steps: 10 — Smooths seam path and improves visual finish.11. Infill Settings
11.aWall/Infill Overlap: 10% — Prevents infill from deforming soft exterior walls.
11.bInfill Combination: ON — Consolidates paths for efficiency.
11.cDetect Floating Shells: ON — Ensures unsupported vertical structures are printed reliably.
11.dSparse Infill Density: 20–25% — Balanced rigidity vs. material use.
11.eSparse Pattern: Grid — Stable and efficient for flexible geometries.12. Speed Settings
12.aTravel: 160 mm/s — Fast but safe against backlash.
12.bInitial Layer: 15 mm/s — Prevents nozzle from skimming and ensures bed adhesion.
12.cOuter Wall: 60 mm/s — Controlled speed for surface quality.
12.dInner Wall: 90 mm/s — Slightly faster without compromising control.
12.eSmall Perimeter: 35 mm/s — Reduced speed for detailed geometry.
12.fTop Surface: 40 mm/s — Improves finish on topmost layers.
12.gInfill: 100–120 mm/s — Takes advantage of high flowability.13. Acceleration Settings
13.aNormal Print: 2000 mm/s² — Prevents ringing in soft filaments.
13.bTravel: 4000 mm/s² — Enables fast movement without harsh transitions.
13.cInitial Layer: 300 mm/s² — Gentle movement prevents lifting from the bed.
13.dOuter Wall: 1500 mm/s² — Improves outer surface clarity.
13.eInner Wall: 2000 mm/s² — Balanced for structural components.
13.fTop Surface: 1500 mm/s² — Ensures smooth detailing.14. Adhesion and Brims
14.aSkirt Loops: 2 — Helps prime nozzle and start cleanly.
14.bBrim Width: 6 mm — Helps hold soft materials down.
14.cBrim Gap: 0.15 mm — Allows for easy removal without tearing.15. Prime Tower and Flush Settings
15.aPrime Tower: ON — Purges moisture and early flow inconsistencies.
15.bTower Width: 40 mm — Prevents collapse due to heat.
15.cBrim Width (Tower): 4 mm — Adds stability to the purge base.
15.dFlush Into Support: ON — Discards unwanted early flow safely.16. G-Code Start Script
M900 K0.05 ; Pressure Advance M106 S0 ; Fan off G92 E0 G1 E15 F300 ; purge line G92 E0
17. Additional Notes
17.aDry filament at 155 F for 2 hours before use.
17.bStore with desiccant.
17.cKeep extruder door open to allow vapor to escape.
17.dAvoid long dwell times at high temperatures.If you need any other assistance, feel free to reach out to us anytime at timeplast@timeplast.com — we’ll be happy to help.
Free U.S. standard shipping on orders of 5+ spools!
Bug Killer
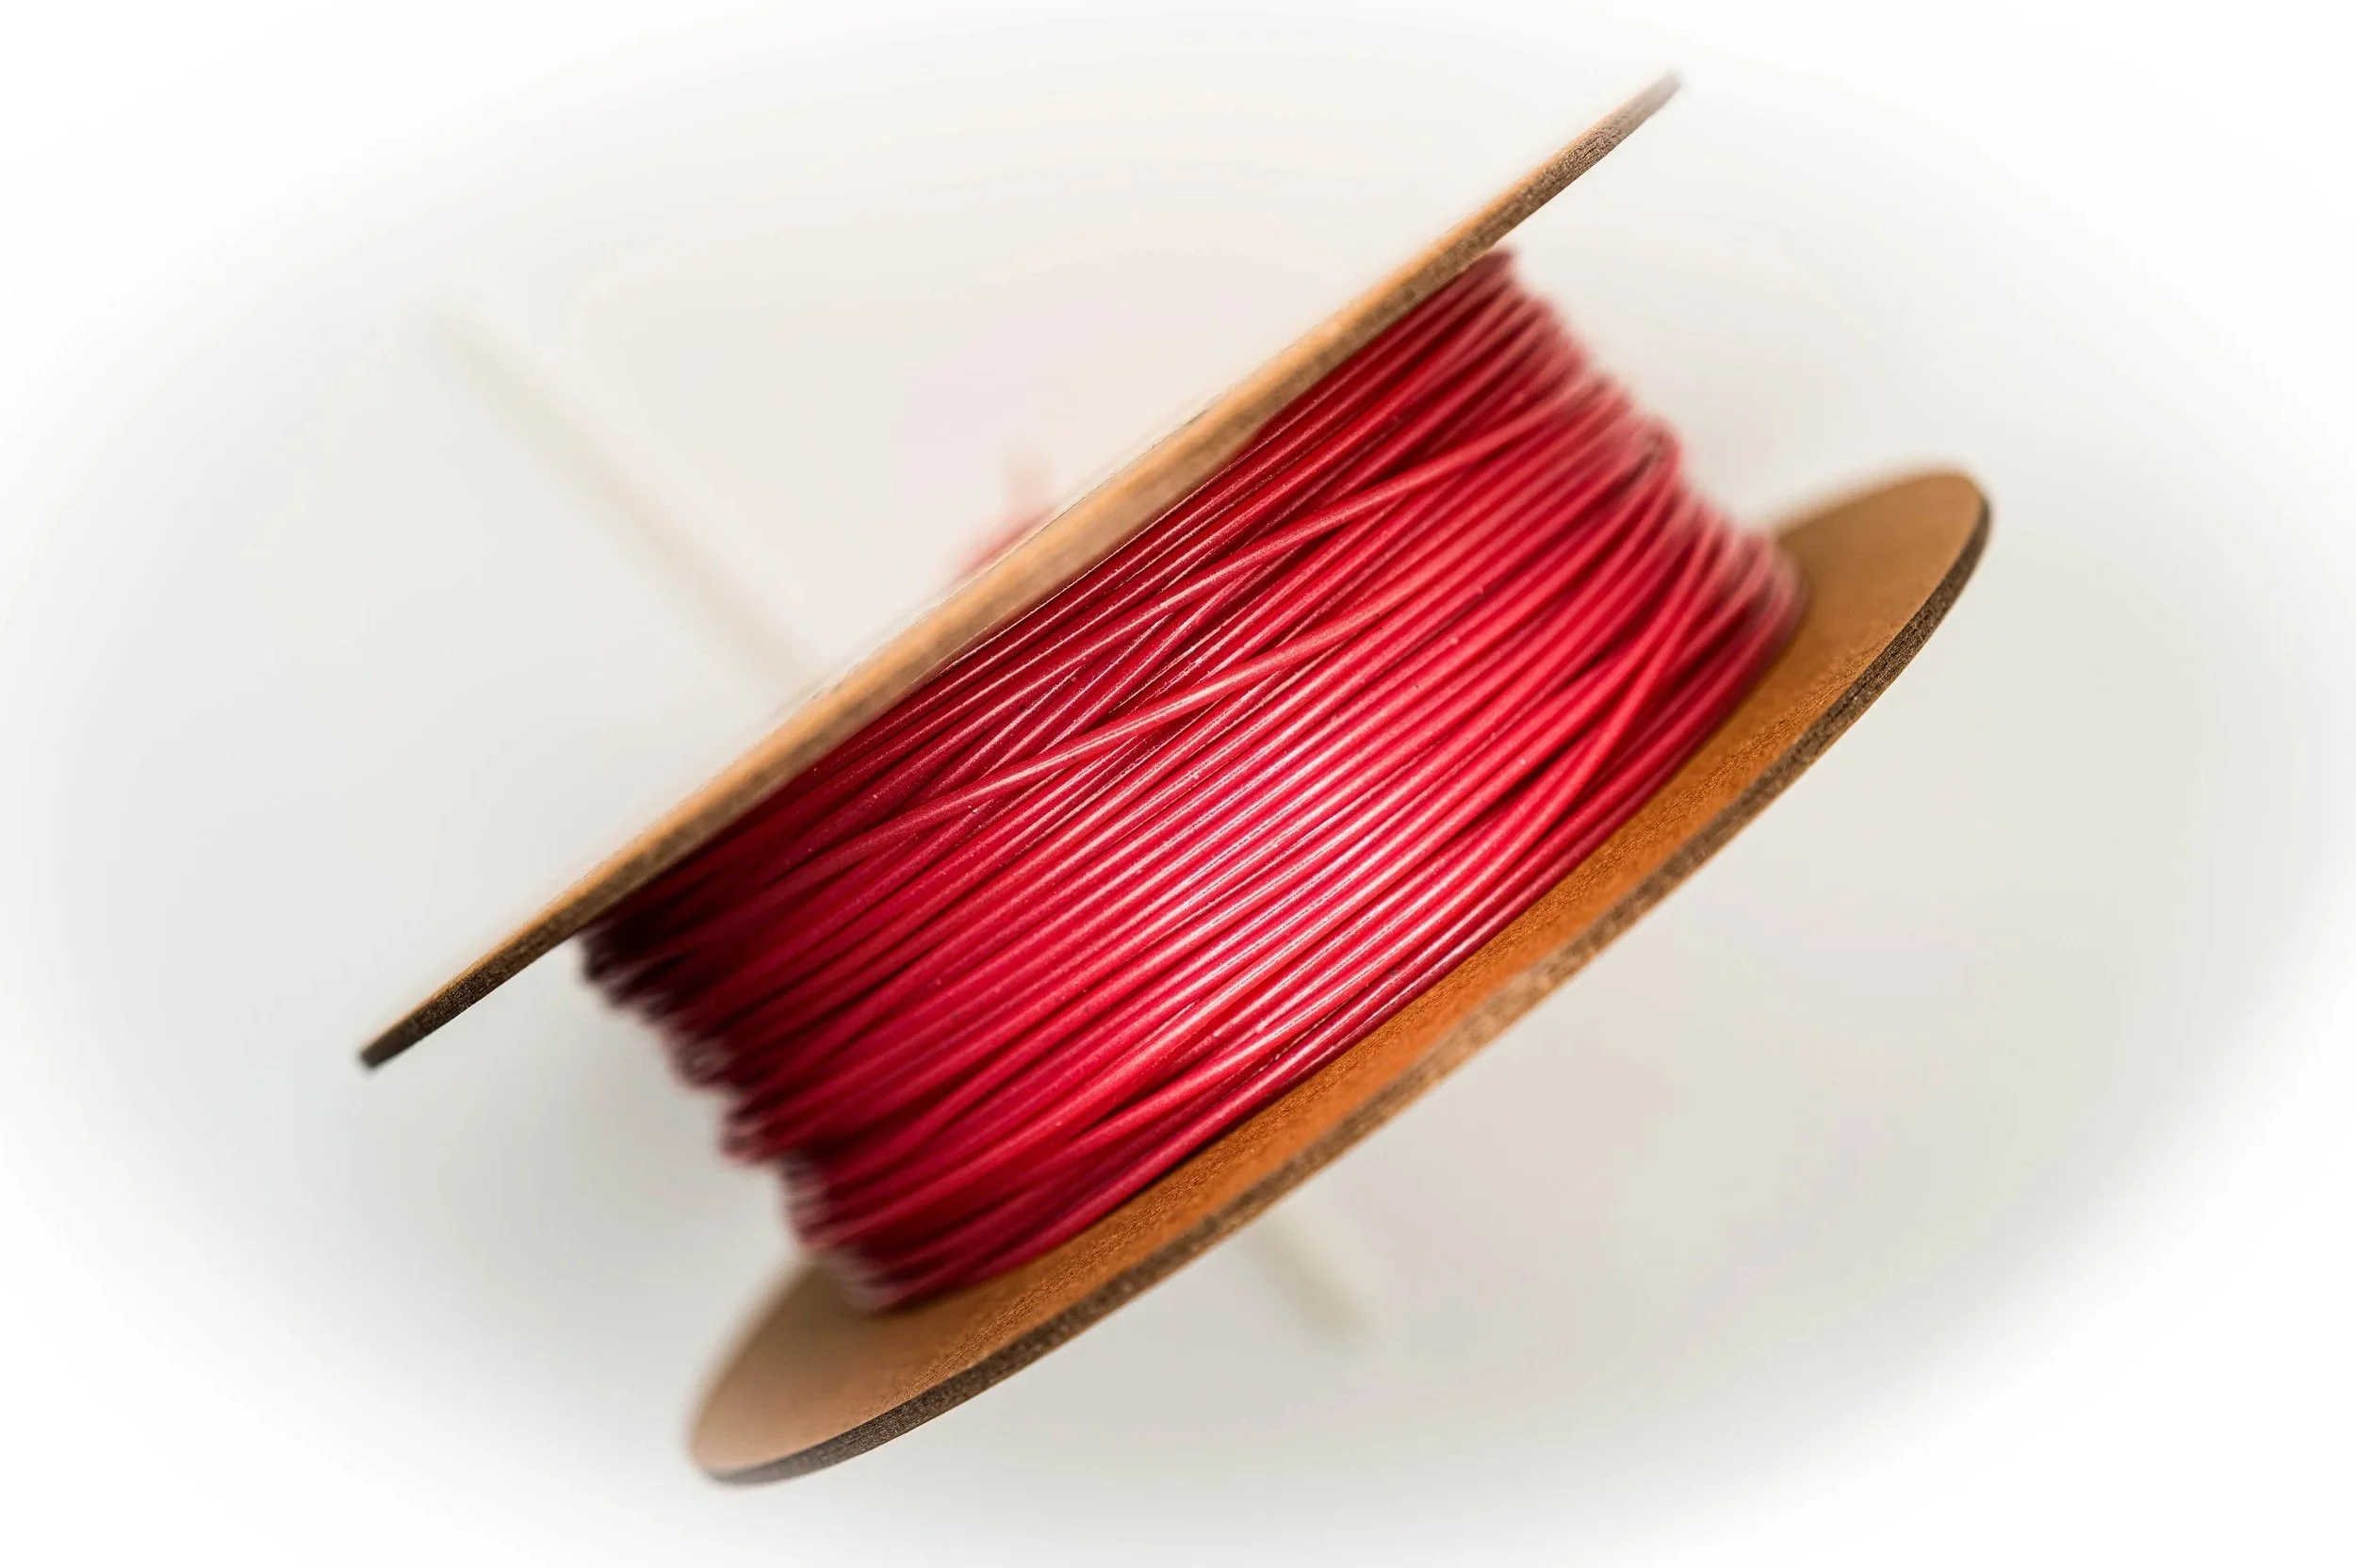
-
This bug-busting filament is loaded with slow-release diatomaceous earth (silicon dioxide) and built for safe, chemical-free pest control. When printed, it acts as a micro-abrasive that physically damages insect exoskeletons upon contact.
No poison. No smell. Just mechanical insect control.
How it works:
Humidity-activated release combined with rough surfaces deliver a continuous anti-insect effect.
Kills roaches, fleas, ants, bedbugs, silverfish—and keeps working for weeks.
Core Material:
Diatomaceous Earth: 35% – Sharp, fine particles destroy insect shells
Hydrophilic Matrix: 65% – Activates in moist environments for better coverage
Where to use it:
Indoor pest control – Line baseboards, under sinks, behind fridges
Garden bug shields – Safe for organic gardening (OMRI listed)
Pet-safe zones – Create custom traps or feeders
-
Click here to access our new and improved TimeMass GPT Assistant. Just tell it your printer model and the TimeMass filament you're using—it will instantly recommend the exact parameters you need to start printing successfully.
1. Introduction
These parameters are designed to help avoid printing issues; however, temperatures and speed timings can be adjusted based on your specific goals. For example, if you prefer a less rigid result, we recommend using a lower temperature. This section outlines a complete slicing and printing profile for TimeMass Bug Killer, tailored for printers with a 0.8 mm nozzle. If the print is not being successful, please lower the nozzle temperature by 10°C and start over until an optimal print is achieved. Please check the manual for printing parameters.2. Temperature Settings
2.aNozzle Temperature: 230°C — Optimal for flowability while avoiding decomposition (which begins around 250°C).
2.bBed Temperature: 75°C — Ensures strong first-layer adhesion and prevents moisture bubbling.
2.cNozzle Temperature Range: 230–245°C — Timeplast melts around 165°C but prints best at 240°C for precise viscosity control.3. Cooling Settings
3.aNo Cooling for First Layers: 3 layers — Prevents shrinkage due to rapid cooling of moisture-rich filament.
3.bFan Minimum Speed: 0% for the first 100 seconds — Allows heat retention during early layers.
3.cFan Maximum Speed: 15% starting at 8 seconds — Avoids overcooling that can lead to warping.
3.dKeep Fan Always On: OFF — Allows vapor to escape and avoids internal fogging.
3.eSlow Down for Cooling: ON — Improves surface finish with controlled cooling.
3.fForce Cooling for Overhangs: OFF — Overcooling can deform bridges in Timeplast.
3.gFan for Overhangs: 15% — Only for essential cooling in complex areas.
3.hPre-Start Fan Time: 2 seconds — Minimizes pressure differential during the first layer.4. Volumetric Flow
4.aMax Volumetric Speed: 12 mm³/s — Based on a melt flow index of ~15 g/10min, allows high-speed printing.
4.bRamming Speed: 3 mm³/s — Prevents bubbles or popping from pressure spikes.5. Retraction and Flow
5.aRetraction Distance: 0.4 mm — Minimal retraction required for soft filaments to avoid stringing.
5.bRetraction Speed: 15 mm/s — Slow enough to avoid pulling molten plastic.
5.cPressure Advance: 0.05 — Compensates for nozzle lag at high flow rates.
5.dFlow Ratio: 92% — Slight under-extrusion avoids swelling and surface artifacts.6. Precision Settings
6.aGap Closing Radius: 0.1 mm — Tolerant of gaps in thicker walls.
6.bArc Fitting: ON — Reduces G-code size and smooths curve transitions.
6.cElephant Foot Compensation: 0.1 mm — Offsets squishing in the first layer caused by large bead sizes.7. Walls and Shells
7.aWall Loops: 2 — Minimum for strength when using a 0.8 mm nozzle.
7.bDetect Thin Walls: ON — Ensures tight geometries aren’t skipped.
7.cTop/Bottom Shell Layers: 3 — Provides good coverage; increase if watertightness is needed.
7.dTop/Bottom Thickness: 1.2 mm — Equals 1.5x the nozzle size for solid strength.
7.eTop/Bottom Pattern: Monotonic — Distributes tension evenly and improves surface finish.8. Geometry and Movement
8.aWall Order: Inner before Outer — Creates cleaner outer surfaces.
8.bInfill First: OFF — Maintains precise outer dimensions.
8.cSmooth Speed Transition: ON — Prevents ringing caused by abrupt speed changes.
8.dSmooth Coefficient: 80 — Ideal damping for soft materials.
8.eAvoid Crossing Wall: ON — Minimizes stringing across part walls.
8.fMax Detour for Crossing: 10 mm or 5% — Balances time with print cleanliness.9. Layer and Width Settings
9.aLayer Height: 0.3 mm — Optimal for strength and resolution using a 0.8 mm nozzle.
9.bInitial Layer Height: 0.35 mm — Slightly higher to improve adhesion.
9.cLine Widths (all): 0.8 mm — Matches nozzle diameter for consistent extrusion.10. Seam Settings
10.aSeam Position: Aligned or Back — Use aligned for mechanical consistency, back for visual appeal.
10.bSmart Scarf Seam: ON — Automatically adjusts seam location to reduce visual impact.
10.cSeam Angle: 155° — Standard seam angle for clean transitions.
10.dSeam Steps: 10 — Smooths seam path and improves visual finish.11. Infill Settings
11.aWall/Infill Overlap: 10% — Prevents infill from deforming soft exterior walls.
11.bInfill Combination: ON — Consolidates paths for efficiency.
11.cDetect Floating Shells: ON — Ensures unsupported vertical structures are printed reliably.
11.dSparse Infill Density: 20–25% — Balanced rigidity vs. material use.
11.eSparse Pattern: Grid — Stable and efficient for flexible geometries.12. Speed Settings
12.aTravel: 160 mm/s — Fast but safe against backlash.
12.bInitial Layer: 15 mm/s — Prevents nozzle from skimming and ensures bed adhesion.
12.cOuter Wall: 60 mm/s — Controlled speed for surface quality.
12.dInner Wall: 90 mm/s — Slightly faster without compromising control.
12.eSmall Perimeter: 35 mm/s — Reduced speed for detailed geometry.
12.fTop Surface: 40 mm/s — Improves finish on topmost layers.
12.gInfill: 100–120 mm/s — Takes advantage of high flowability.13. Acceleration Settings
13.aNormal Print: 2000 mm/s² — Prevents ringing in soft filaments.
13.bTravel: 4000 mm/s² — Enables fast movement without harsh transitions.
13.cInitial Layer: 300 mm/s² — Gentle movement prevents lifting from the bed.
13.dOuter Wall: 1500 mm/s² — Improves outer surface clarity.
13.eInner Wall: 2000 mm/s² — Balanced for structural components.
13.fTop Surface: 1500 mm/s² — Ensures smooth detailing.14. Adhesion and Brims
14.aSkirt Loops: 2 — Helps prime nozzle and start cleanly.
14.bBrim Width: 6 mm — Helps hold soft materials down.
14.cBrim Gap: 0.15 mm — Allows for easy removal without tearing.15. Prime Tower and Flush Settings
15.aPrime Tower: ON — Purges moisture and early flow inconsistencies.
15.bTower Width: 40 mm — Prevents collapse due to heat.
15.cBrim Width (Tower): 4 mm — Adds stability to the purge base.
15.dFlush Into Support: ON — Discards unwanted early flow safely.16. G-Code Start Script
M900 K0.05 ; Pressure Advance M106 S0 ; Fan off G92 E0 G1 E15 F300 ; purge line G92 E0
17. Additional Notes
17.aDry filament at 155 F for 2 hours before use.
17.bStore with desiccant.
17.cKeep extruder door open to allow vapor to escape.
17.dAvoid long dwell times at high temperatures.If you need any other assistance, feel free to reach out to us anytime at timeplast@timeplast.com — we’ll be happy to help.
Free U.S. standard shipping on orders of 5+ spools!
Toilet Color
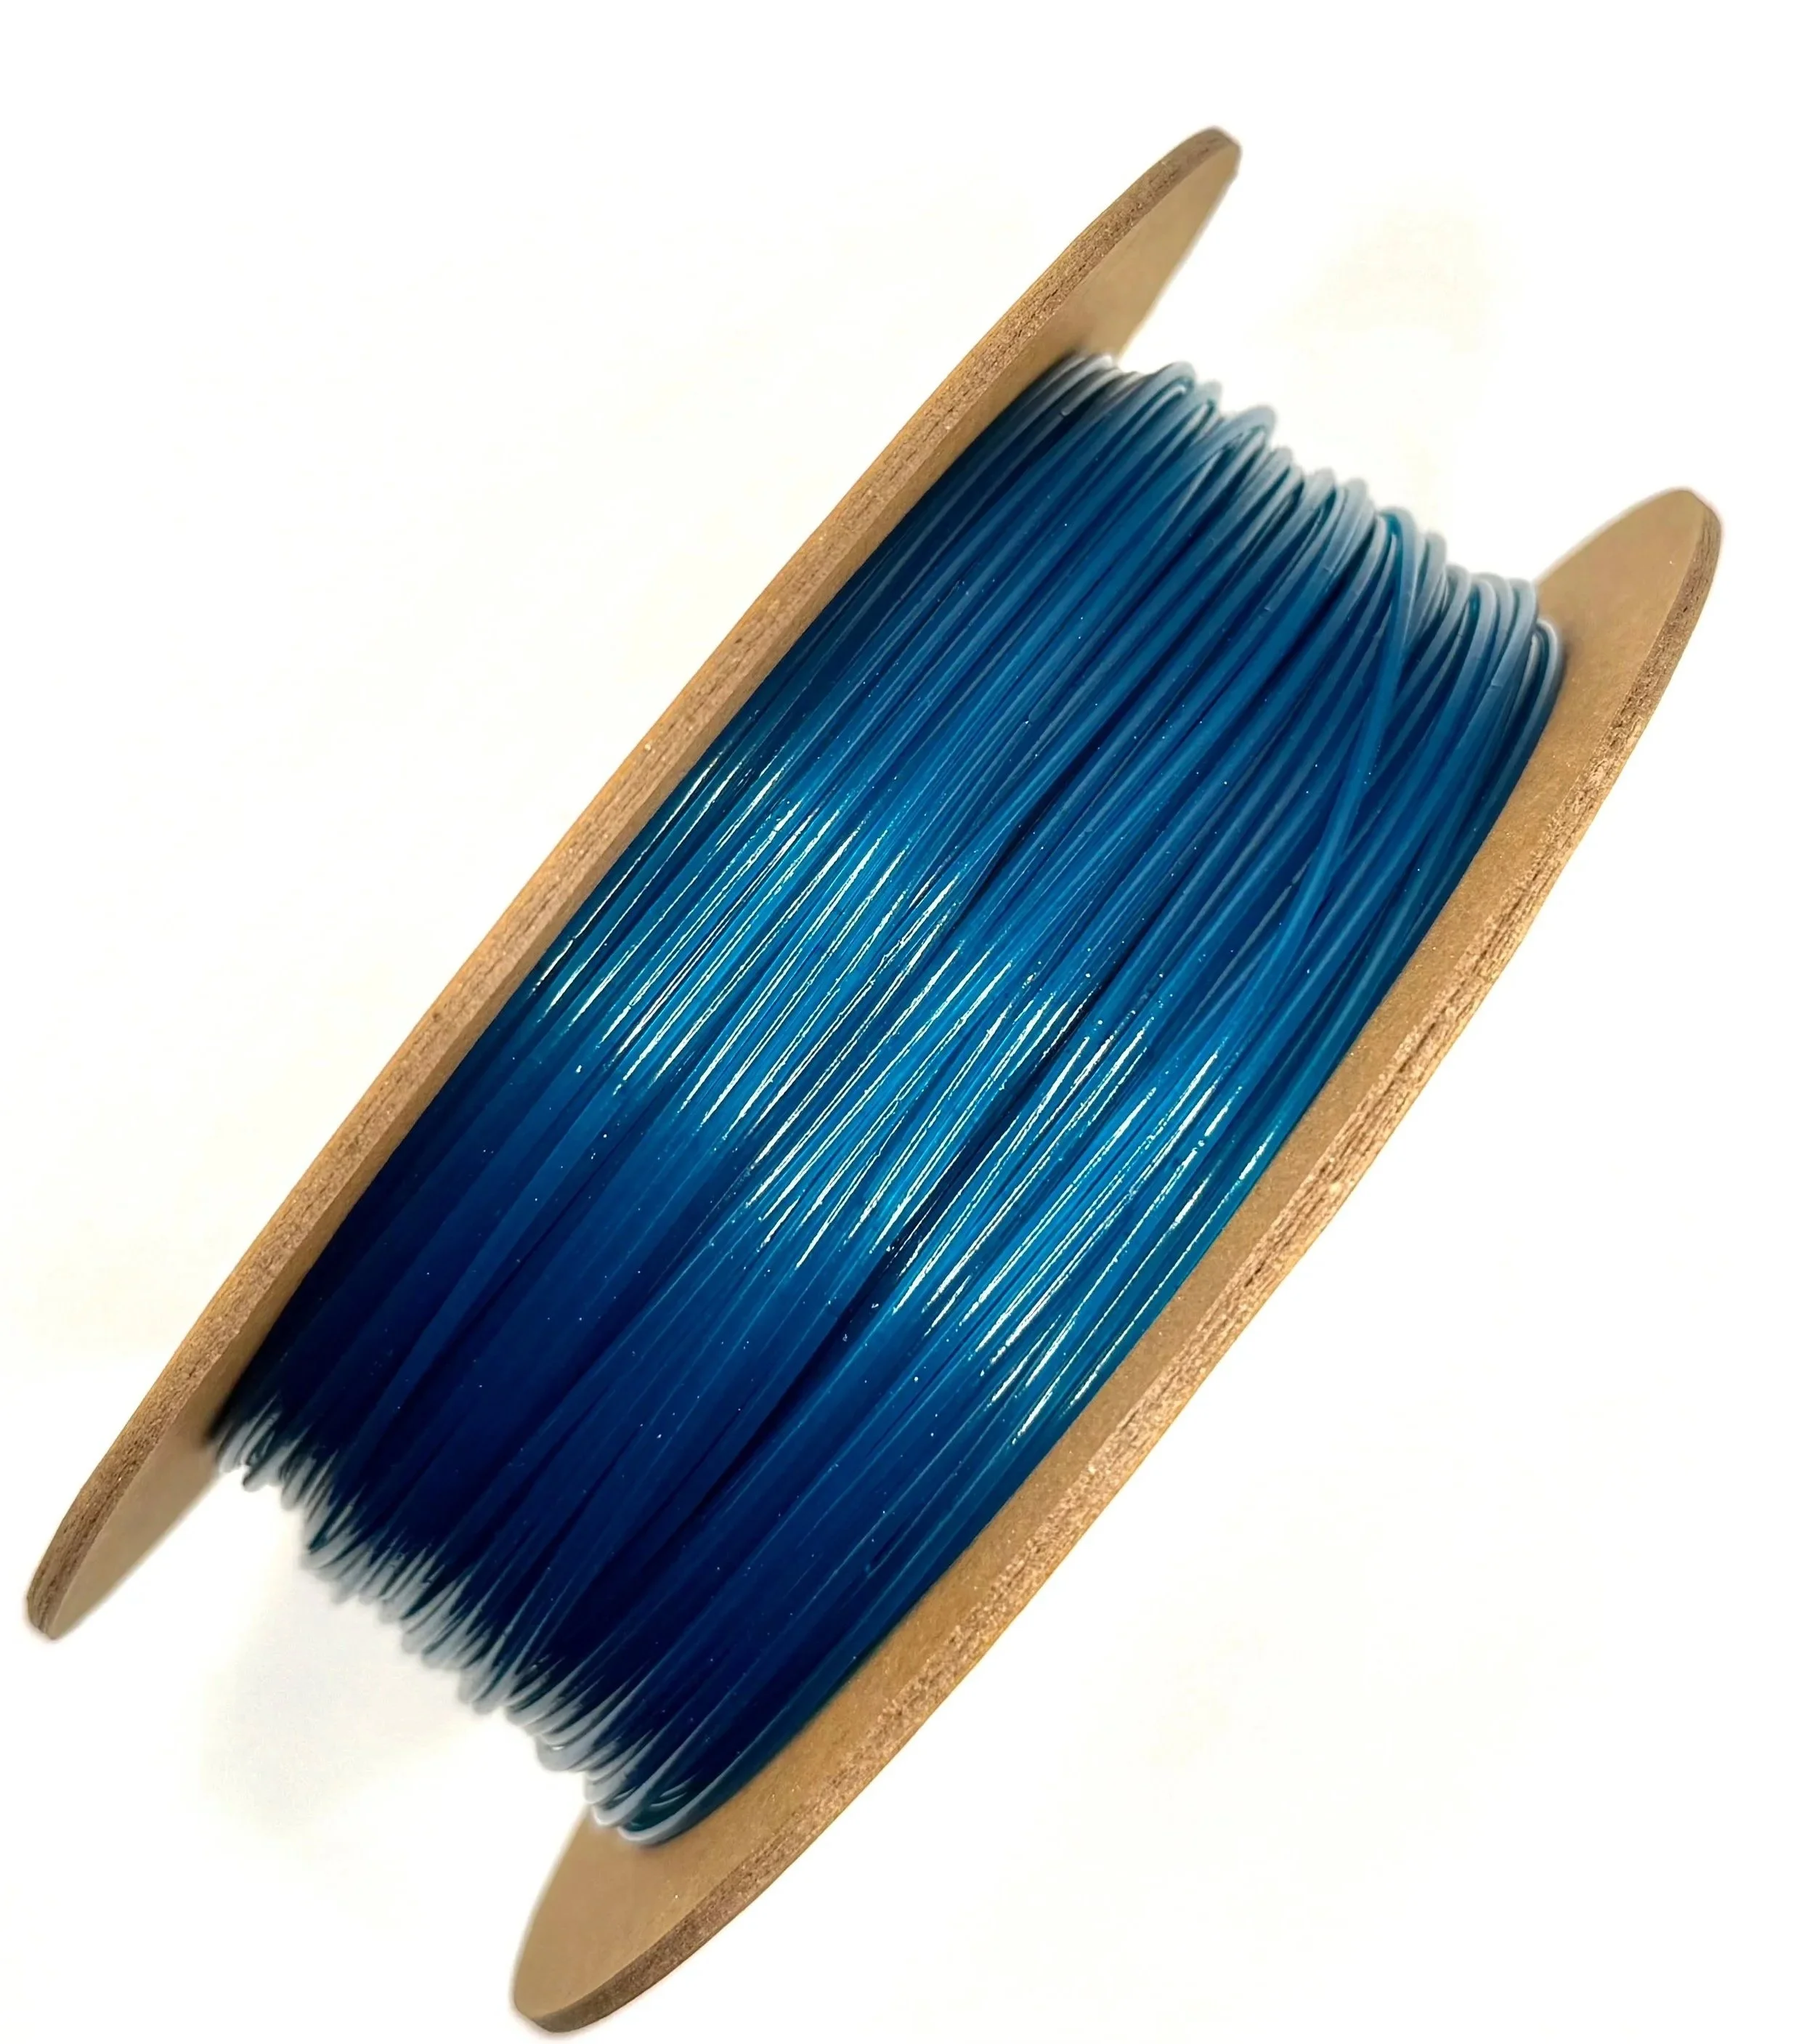
-
A disinfecting, water-tinting filament built to clean and color your toilet bowl from inside the tank. Formulated with borax and chlorine-based disinfectants, it releases slowly, turning water blue (or other colors) while actively sanitizing.
Looks clean. Is clean.
How it works:
Moisture triggers gradual leaching of color and cleaning agents over 2–4 weeks.
Core Composition:
Borax + Chloride Compounds – Kill bacteria and neutralize odors
Color Agents – Tints water for visual hygiene cue
Where to use it:
Toilet tank discs – Replace commercial drop-ins with your own design
Travel toilets or portables – Custom color + clean units
Bathroom branding – Hotels, restaurants, or creative use
-
Click here to access our new and improved TimeMass GPT Assistant. Just tell it your printer model and the TimeMass filament you're using—it will instantly recommend the exact parameters you need to start printing successfully.
1. Introduction
These parameters are designed to help avoid printing issues; however, temperatures and speed timings can be adjusted based on your specific goals. For example, if you prefer a less rigid result, we recommend using a lower temperature. This section outlines a complete slicing and printing profile for TimeMass Toilet Color, tailored for printers with a 0.8 mm nozzle. If the print is not being successful, please lower the nozzle temperature by 10°C and start over until an optimal print is achieved. Please check the manual for printing parameters.2. Temperature Settings
2.aNozzle Temperature: 230°C — Optimal for flowability while avoiding decomposition (which begins around 250°C).
2.bBed Temperature: 75°C — Ensures strong first-layer adhesion and prevents moisture bubbling.
2.cNozzle Temperature Range: 230–245°C — Timeplast melts around 165°C but prints best at 240°C for precise viscosity control.3. Cooling Settings
3.aNo Cooling for First Layers: 3 layers — Prevents shrinkage due to rapid cooling of moisture-rich filament.
3.bFan Minimum Speed: 0% for the first 100 seconds — Allows heat retention during early layers.
3.cFan Maximum Speed: 15% starting at 8 seconds — Avoids overcooling that can lead to warping.
3.dKeep Fan Always On: OFF — Allows vapor to escape and avoids internal fogging.
3.eSlow Down for Cooling: ON — Improves surface finish with controlled cooling.
3.fForce Cooling for Overhangs: OFF — Overcooling can deform bridges in Timeplast.
3.gFan for Overhangs: 15% — Only for essential cooling in complex areas.
3.hPre-Start Fan Time: 2 seconds — Minimizes pressure differential during the first layer.4. Volumetric Flow
4.aMax Volumetric Speed: 12 mm³/s — Based on a melt flow index of ~15 g/10min, allows high-speed printing.
4.bRamming Speed: 3 mm³/s — Prevents bubbles or popping from pressure spikes.5. Retraction and Flow
5.aRetraction Distance: 0.4 mm — Minimal retraction required for soft filaments to avoid stringing.
5.bRetraction Speed: 15 mm/s — Slow enough to avoid pulling molten plastic.
5.cPressure Advance: 0.05 — Compensates for nozzle lag at high flow rates.
5.dFlow Ratio: 92% — Slight under-extrusion avoids swelling and surface artifacts.6. Precision Settings
6.aGap Closing Radius: 0.1 mm — Tolerant of gaps in thicker walls.
6.bArc Fitting: ON — Reduces G-code size and smooths curve transitions.
6.cElephant Foot Compensation: 0.1 mm — Offsets squishing in the first layer caused by large bead sizes.7. Walls and Shells
7.aWall Loops: 2 — Minimum for strength when using a 0.8 mm nozzle.
7.bDetect Thin Walls: ON — Ensures tight geometries aren’t skipped.
7.cTop/Bottom Shell Layers: 3 — Provides good coverage; increase if watertightness is needed.
7.dTop/Bottom Thickness: 1.2 mm — Equals 1.5x the nozzle size for solid strength.
7.eTop/Bottom Pattern: Monotonic — Distributes tension evenly and improves surface finish.8. Geometry and Movement
8.aWall Order: Inner before Outer — Creates cleaner outer surfaces.
8.bInfill First: OFF — Maintains precise outer dimensions.
8.cSmooth Speed Transition: ON — Prevents ringing caused by abrupt speed changes.
8.dSmooth Coefficient: 80 — Ideal damping for soft materials.
8.eAvoid Crossing Wall: ON — Minimizes stringing across part walls.
8.fMax Detour for Crossing: 10 mm or 5% — Balances time with print cleanliness.9. Layer and Width Settings
9.aLayer Height: 0.3 mm — Optimal for strength and resolution using a 0.8 mm nozzle.
9.bInitial Layer Height: 0.35 mm — Slightly higher to improve adhesion.
9.cLine Widths (all): 0.8 mm — Matches nozzle diameter for consistent extrusion.10. Seam Settings
10.aSeam Position: Aligned or Back — Use aligned for mechanical consistency, back for visual appeal.
10.bSmart Scarf Seam: ON — Automatically adjusts seam location to reduce visual impact.
10.cSeam Angle: 155° — Standard seam angle for clean transitions.
10.dSeam Steps: 10 — Smooths seam path and improves visual finish.11. Infill Settings
11.aWall/Infill Overlap: 10% — Prevents infill from deforming soft exterior walls.
11.bInfill Combination: ON — Consolidates paths for efficiency.
11.cDetect Floating Shells: ON — Ensures unsupported vertical structures are printed reliably.
11.dSparse Infill Density: 20–25% — Balanced rigidity vs. material use.
11.eSparse Pattern: Grid — Stable and efficient for flexible geometries.12. Speed Settings
12.aTravel: 160 mm/s — Fast but safe against backlash.
12.bInitial Layer: 15 mm/s — Prevents nozzle from skimming and ensures bed adhesion.
12.cOuter Wall: 60 mm/s — Controlled speed for surface quality.
12.dInner Wall: 90 mm/s — Slightly faster without compromising control.
12.eSmall Perimeter: 35 mm/s — Reduced speed for detailed geometry.
12.fTop Surface: 40 mm/s — Improves finish on topmost layers.
12.gInfill: 100–120 mm/s — Takes advantage of high flowability.13. Acceleration Settings
13.aNormal Print: 2000 mm/s² — Prevents ringing in soft filaments.
13.bTravel: 4000 mm/s² — Enables fast movement without harsh transitions.
13.cInitial Layer: 300 mm/s² — Gentle movement prevents lifting from the bed.
13.dOuter Wall: 1500 mm/s² — Improves outer surface clarity.
13.eInner Wall: 2000 mm/s² — Balanced for structural components.
13.fTop Surface: 1500 mm/s² — Ensures smooth detailing.14. Adhesion and Brims
14.aSkirt Loops: 2 — Helps prime nozzle and start cleanly.
14.bBrim Width: 6 mm — Helps hold soft materials down.
14.cBrim Gap: 0.15 mm — Allows for easy removal without tearing.15. Prime Tower and Flush Settings
15.aPrime Tower: ON — Purges moisture and early flow inconsistencies.
15.bTower Width: 40 mm — Prevents collapse due to heat.
15.cBrim Width (Tower): 4 mm — Adds stability to the purge base.
15.dFlush Into Support: ON — Discards unwanted early flow safely.16. G-Code Start Script
M900 K0.05 ; Pressure Advance M106 S0 ; Fan off G92 E0 G1 E15 F300 ; purge line G92 E0
17. Additional Notes
17.aDry filament at 155 F for 2 hours before use.
17.bStore with desiccant.
17.cKeep extruder door open to allow vapor to escape.
17.dAvoid long dwell times at high temperatures.If you need any other assistance, feel free to reach out to us anytime at timeplast@timeplast.com — we’ll be happy to help.
Free U.S. standard shipping on orders of 5+ spools!
Vinegar
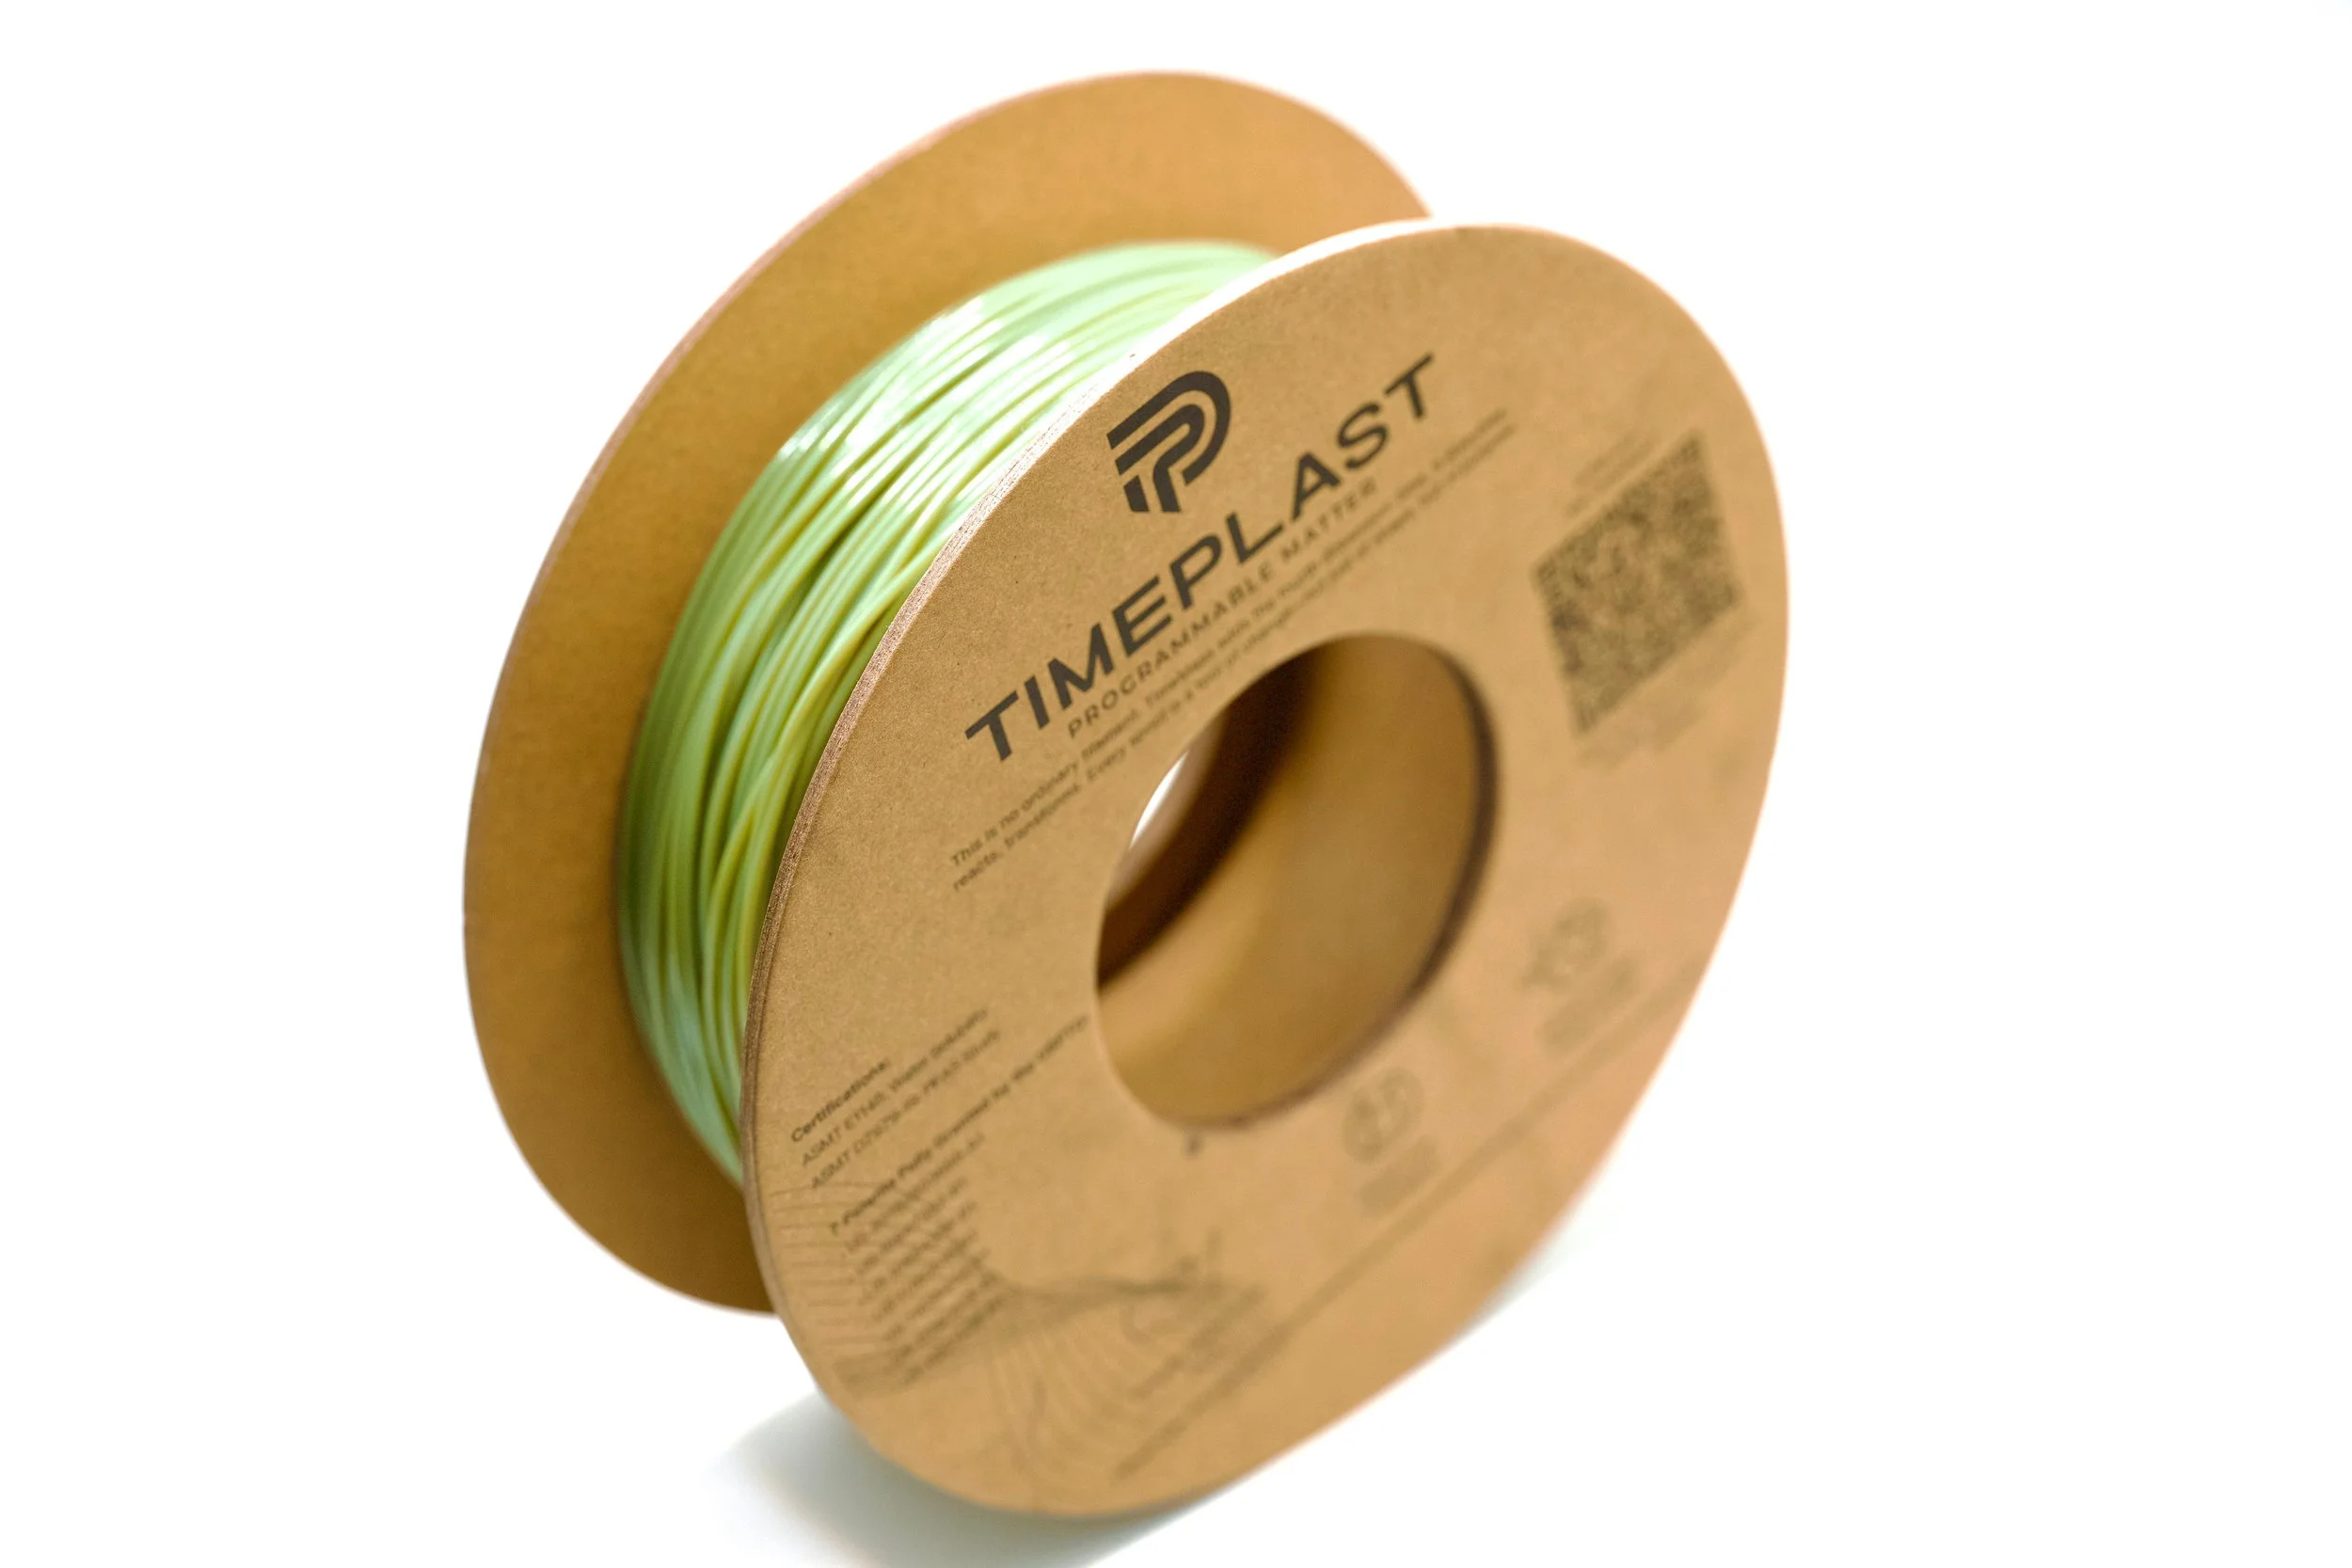
-
A humidity-activated filament loaded with vinegar for natural cleaning and disinfection. Releases over time to maintain localized acidity and remove odors or biofilm.
Clean with nature’s oldest solvent.
How it works:
Moisture triggers acid release in a controlled manner, useful for deodorizing or sanitizing small spaces.
Where to use it:
Deodorizing plugs – Trash cans, lockers, shoe cabinets
Natural cleaning pads – Kitchen and bath tools
Pet-safe disinfecting tools
-
Click here to access our new and improved TimeMass GPT Assistant. Just tell it your printer model and the TimeMass filament you're using—it will instantly recommend the exact parameters you need to start printing successfully.
1. Introduction
These parameters are designed to help avoid printing issues; however, temperatures and speed timings can be adjusted based on your specific goals. For example, if you prefer a less rigid result, we recommend using a lower temperature. This section outlines a complete slicing and printing profile for TimeMass Vinegar, tailored for printers with a 0.8 mm nozzle. If the print is not being successful, please lower the nozzle temperature by 10°C and start over until an optimal print is achieved. Please check the manual for printing parameters.2. Temperature Settings
2.aNozzle Temperature: 230°C — Optimal for flowability while avoiding decomposition (which begins around 250°C).
2.bBed Temperature: 75°C — Ensures strong first-layer adhesion and prevents moisture bubbling.
2.cNozzle Temperature Range: 230–245°C — Timeplast melts around 165°C but prints best at 240°C for precise viscosity control.3. Cooling Settings
3.aNo Cooling for First Layers: 3 layers — Prevents shrinkage due to rapid cooling of moisture-rich filament.
3.bFan Minimum Speed: 0% for the first 100 seconds — Allows heat retention during early layers.
3.cFan Maximum Speed: 15% starting at 8 seconds — Avoids overcooling that can lead to warping.
3.dKeep Fan Always On: OFF — Allows vapor to escape and avoids internal fogging.
3.eSlow Down for Cooling: ON — Improves surface finish with controlled cooling.
3.fForce Cooling for Overhangs: OFF — Overcooling can deform bridges in Timeplast.
3.gFan for Overhangs: 15% — Only for essential cooling in complex areas.
3.hPre-Start Fan Time: 2 seconds — Minimizes pressure differential during the first layer.4. Volumetric Flow
4.aMax Volumetric Speed: 12 mm³/s — Based on a melt flow index of ~15 g/10min, allows high-speed printing.
4.bRamming Speed: 3 mm³/s — Prevents bubbles or popping from pressure spikes.5. Retraction and Flow
5.aRetraction Distance: 0.4 mm — Minimal retraction required for soft filaments to avoid stringing.
5.bRetraction Speed: 15 mm/s — Slow enough to avoid pulling molten plastic.
5.cPressure Advance: 0.05 — Compensates for nozzle lag at high flow rates.
5.dFlow Ratio: 92% — Slight under-extrusion avoids swelling and surface artifacts.6. Precision Settings
6.aGap Closing Radius: 0.1 mm — Tolerant of gaps in thicker walls.
6.bArc Fitting: ON — Reduces G-code size and smooths curve transitions.
6.cElephant Foot Compensation: 0.1 mm — Offsets squishing in the first layer caused by large bead sizes.7. Walls and Shells
7.aWall Loops: 2 — Minimum for strength when using a 0.8 mm nozzle.
7.bDetect Thin Walls: ON — Ensures tight geometries aren’t skipped.
7.cTop/Bottom Shell Layers: 3 — Provides good coverage; increase if watertightness is needed.
7.dTop/Bottom Thickness: 1.2 mm — Equals 1.5x the nozzle size for solid strength.
7.eTop/Bottom Pattern: Monotonic — Distributes tension evenly and improves surface finish.8. Geometry and Movement
8.aWall Order: Inner before Outer — Creates cleaner outer surfaces.
8.bInfill First: OFF — Maintains precise outer dimensions.
8.cSmooth Speed Transition: ON — Prevents ringing caused by abrupt speed changes.
8.dSmooth Coefficient: 80 — Ideal damping for soft materials.
8.eAvoid Crossing Wall: ON — Minimizes stringing across part walls.
8.fMax Detour for Crossing: 10 mm or 5% — Balances time with print cleanliness.9. Layer and Width Settings
9.aLayer Height: 0.3 mm — Optimal for strength and resolution using a 0.8 mm nozzle.
9.bInitial Layer Height: 0.35 mm — Slightly higher to improve adhesion.
9.cLine Widths (all): 0.8 mm — Matches nozzle diameter for consistent extrusion.10. Seam Settings
10.aSeam Position: Aligned or Back — Use aligned for mechanical consistency, back for visual appeal.
10.bSmart Scarf Seam: ON — Automatically adjusts seam location to reduce visual impact.
10.cSeam Angle: 155° — Standard seam angle for clean transitions.
10.dSeam Steps: 10 — Smooths seam path and improves visual finish.11. Infill Settings
11.aWall/Infill Overlap: 10% — Prevents infill from deforming soft exterior walls.
11.bInfill Combination: ON — Consolidates paths for efficiency.
11.cDetect Floating Shells: ON — Ensures unsupported vertical structures are printed reliably.
11.dSparse Infill Density: 20–25% — Balanced rigidity vs. material use.
11.eSparse Pattern: Grid — Stable and efficient for flexible geometries.12. Speed Settings
12.aTravel: 160 mm/s — Fast but safe against backlash.
12.bInitial Layer: 15 mm/s — Prevents nozzle from skimming and ensures bed adhesion.
12.cOuter Wall: 60 mm/s — Controlled speed for surface quality.
12.dInner Wall: 90 mm/s — Slightly faster without compromising control.
12.eSmall Perimeter: 35 mm/s — Reduced speed for detailed geometry.
12.fTop Surface: 40 mm/s — Improves finish on topmost layers.
12.gInfill: 100–120 mm/s — Takes advantage of high flowability.13. Acceleration Settings
13.aNormal Print: 2000 mm/s² — Prevents ringing in soft filaments.
13.bTravel: 4000 mm/s² — Enables fast movement without harsh transitions.
13.cInitial Layer: 300 mm/s² — Gentle movement prevents lifting from the bed.
13.dOuter Wall: 1500 mm/s² — Improves outer surface clarity.
13.eInner Wall: 2000 mm/s² — Balanced for structural components.
13.fTop Surface: 1500 mm/s² — Ensures smooth detailing.14. Adhesion and Brims
14.aSkirt Loops: 2 — Helps prime nozzle and start cleanly.
14.bBrim Width: 6 mm — Helps hold soft materials down.
14.cBrim Gap: 0.15 mm — Allows for easy removal without tearing.15. Prime Tower and Flush Settings
15.aPrime Tower: ON — Purges moisture and early flow inconsistencies.
15.bTower Width: 40 mm — Prevents collapse due to heat.
15.cBrim Width (Tower): 4 mm — Adds stability to the purge base.
15.dFlush Into Support: ON — Discards unwanted early flow safely.16. G-Code Start Script
M900 K0.05 ; Pressure Advance M106 S0 ; Fan off G92 E0 G1 E15 F300 ; purge line G92 E0
17. Additional Notes
17.aDry filament at 155 F for 2 hours before use.
17.bStore with desiccant.
17.cKeep extruder door open to allow vapor to escape.
17.dAvoid long dwell times at high temperatures.If you need any other assistance, feel free to reach out to us anytime at timeplast@timeplast.com — we’ll be happy to help.
Free U.S. standard shipping on orders of 5+ spools!
Multifunctional
Stick & Glow
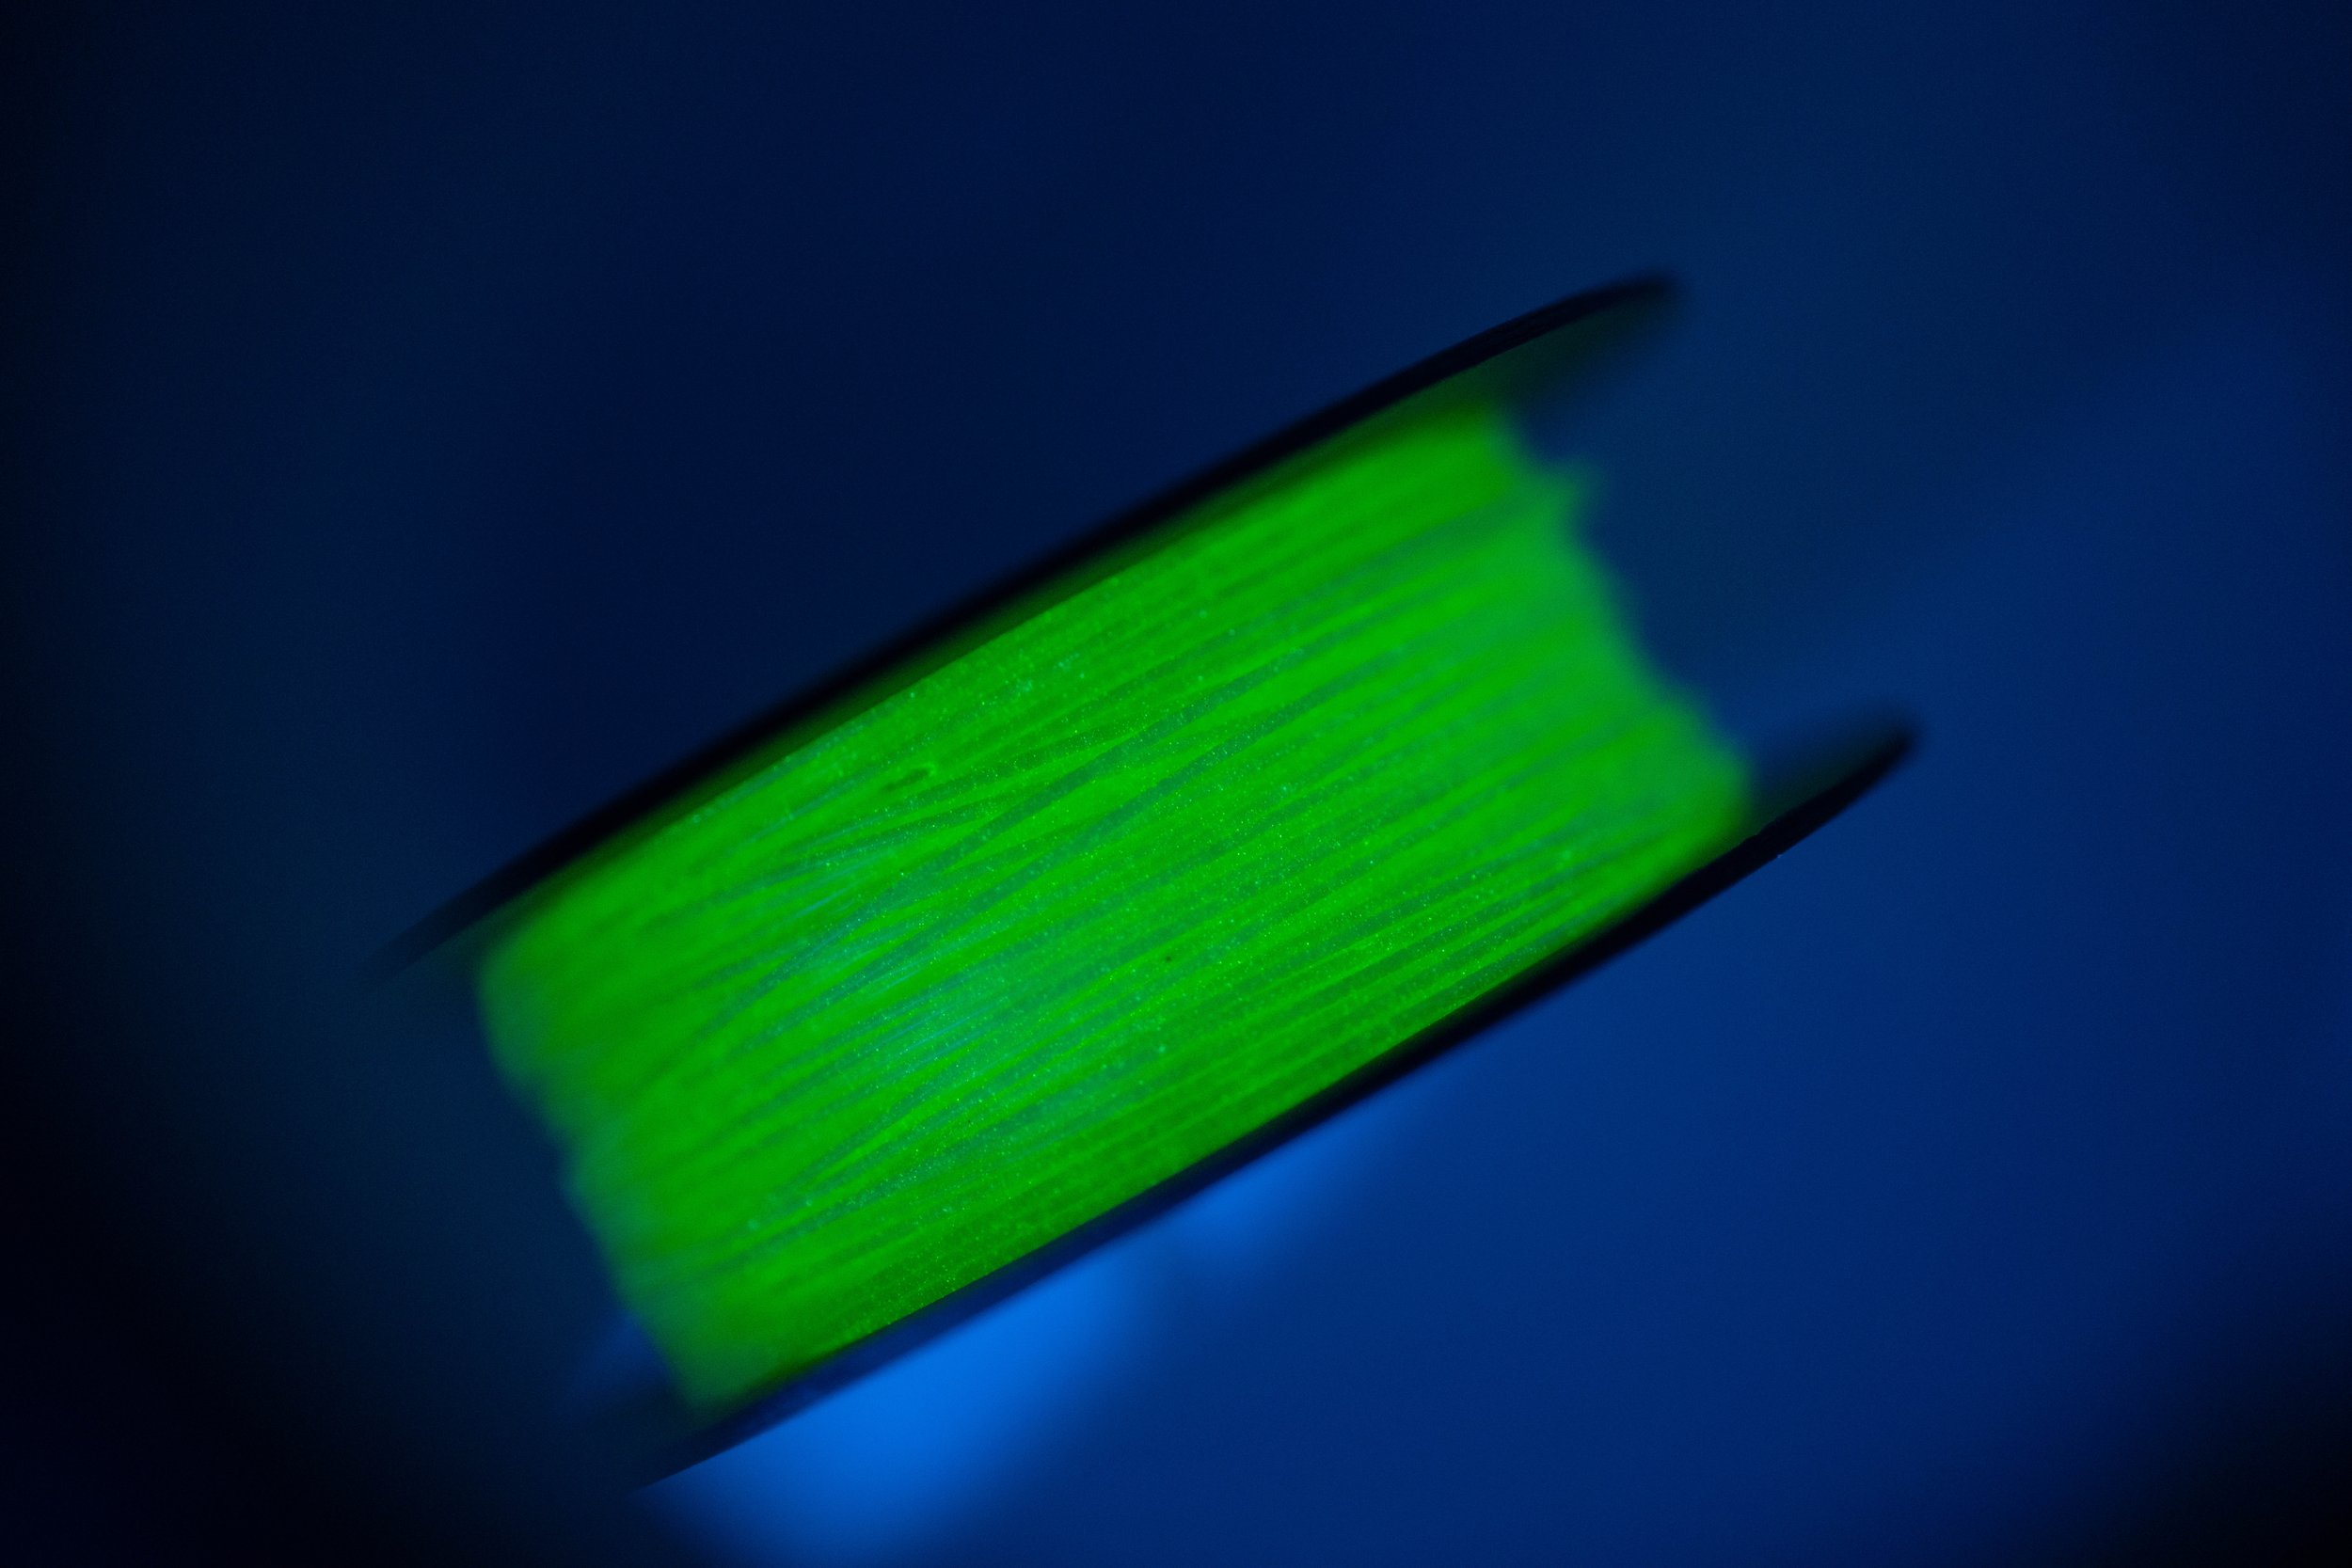
-
A triple-visibility filament that glows in the dark, reflects light, and sparkles in daylight. Made for visibility, safety, and unapologetic flair. If you want your prints to pop—day or night—this is your go-to.
Shine. Reflect. Dazzle.
How it works:
Multiple light-responsive additives are embedded within a durable polymer carrier, activated by natural or artificial light.
Day or night – it never goes unnoticed.
Core Components:
Photoluminescent Pigments: 30% – Recharge in light, glow for hours
Retroreflective Microbeads: 20% – Bounce light directly back to source
Iridescent Flakes: 10% – Add visual punch under sunlight
Base Material: 40% – Tough and printable for long-lasting use
Where to use it:
Night cycling accessories – Make yourself seen
Safety gear prototypes – Reflective tools for visibility testing
Party/event props – Light up the night with flair
Fashion or cosplay – Wearable elements that glow and shimmer.
-
Click here to access our new and improved TimeMass GPT Assistant. Just tell it your printer model and the TimeMass filament you're using—it will instantly recommend the exact parameters you need to start printing successfully.
1. Introduction
These parameters are designed to help avoid printing issues; however, temperatures and speed timings can be adjusted based on your specific goals. For example, if you prefer a less rigid result, we recommend using a lower temperature. This section outlines a complete slicing and printing profile for TimeMass Stick & Glow, tailored for printers with a 0.8 mm nozzle. If the print is not being successful, please lower the nozzle temperature by 10°C and start over until an optimal print is achieved. Please check the manual for printing parameters.2. Temperature Settings
2.aNozzle Temperature: 230°C — Optimal for flowability while avoiding decomposition (which begins around 250°C).
2.bBed Temperature: 75°C — Ensures strong first-layer adhesion and prevents moisture bubbling.
2.cNozzle Temperature Range: 230–245°C — Timeplast melts around 165°C but prints best at 240°C for precise viscosity control.3. Cooling Settings
3.aNo Cooling for First Layers: 3 layers — Prevents shrinkage due to rapid cooling of moisture-rich filament.
3.bFan Minimum Speed: 0% for the first 100 seconds — Allows heat retention during early layers.
3.cFan Maximum Speed: 15% starting at 8 seconds — Avoids overcooling that can lead to warping.
3.dKeep Fan Always On: OFF — Allows vapor to escape and avoids internal fogging.
3.eSlow Down for Cooling: ON — Improves surface finish with controlled cooling.
3.fForce Cooling for Overhangs: OFF — Overcooling can deform bridges in Timeplast.
3.gFan for Overhangs: 15% — Only for essential cooling in complex areas.
3.hPre-Start Fan Time: 2 seconds — Minimizes pressure differential during the first layer.4. Volumetric Flow
4.aMax Volumetric Speed: 12 mm³/s — Based on a melt flow index of ~15 g/10min, allows high-speed printing.
4.bRamming Speed: 3 mm³/s — Prevents bubbles or popping from pressure spikes.5. Retraction and Flow
5.aRetraction Distance: 0.4 mm — Minimal retraction required for soft filaments to avoid stringing.
5.bRetraction Speed: 15 mm/s — Slow enough to avoid pulling molten plastic.
5.cPressure Advance: 0.05 — Compensates for nozzle lag at high flow rates.
5.dFlow Ratio: 92% — Slight under-extrusion avoids swelling and surface artifacts.6. Precision Settings
6.aGap Closing Radius: 0.1 mm — Tolerant of gaps in thicker walls.
6.bArc Fitting: ON — Reduces G-code size and smooths curve transitions.
6.cElephant Foot Compensation: 0.1 mm — Offsets squishing in the first layer caused by large bead sizes.7. Walls and Shells
7.aWall Loops: 2 — Minimum for strength when using a 0.8 mm nozzle.
7.bDetect Thin Walls: ON — Ensures tight geometries aren’t skipped.
7.cTop/Bottom Shell Layers: 3 — Provides good coverage; increase if watertightness is needed.
7.dTop/Bottom Thickness: 1.2 mm — Equals 1.5x the nozzle size for solid strength.
7.eTop/Bottom Pattern: Monotonic — Distributes tension evenly and improves surface finish.8. Geometry and Movement
8.aWall Order: Inner before Outer — Creates cleaner outer surfaces.
8.bInfill First: OFF — Maintains precise outer dimensions.
8.cSmooth Speed Transition: ON — Prevents ringing caused by abrupt speed changes.
8.dSmooth Coefficient: 80 — Ideal damping for soft materials.
8.eAvoid Crossing Wall: ON — Minimizes stringing across part walls.
8.fMax Detour for Crossing: 10 mm or 5% — Balances time with print cleanliness.9. Layer and Width Settings
9.aLayer Height: 0.3 mm — Optimal for strength and resolution using a 0.8 mm nozzle.
9.bInitial Layer Height: 0.35 mm — Slightly higher to improve adhesion.
9.cLine Widths (all): 0.8 mm — Matches nozzle diameter for consistent extrusion.10. Seam Settings
10.aSeam Position: Aligned or Back — Use aligned for mechanical consistency, back for visual appeal.
10.bSmart Scarf Seam: ON — Automatically adjusts seam location to reduce visual impact.
10.cSeam Angle: 155° — Standard seam angle for clean transitions.
10.dSeam Steps: 10 — Smooths seam path and improves visual finish.11. Infill Settings
11.aWall/Infill Overlap: 10% — Prevents infill from deforming soft exterior walls.
11.bInfill Combination: ON — Consolidates paths for efficiency.
11.cDetect Floating Shells: ON — Ensures unsupported vertical structures are printed reliably.
11.dSparse Infill Density: 20–25% — Balanced rigidity vs. material use.
11.eSparse Pattern: Grid — Stable and efficient for flexible geometries.12. Speed Settings
12.aTravel: 160 mm/s — Fast but safe against backlash.
12.bInitial Layer: 15 mm/s — Prevents nozzle from skimming and ensures bed adhesion.
12.cOuter Wall: 60 mm/s — Controlled speed for surface quality.
12.dInner Wall: 90 mm/s — Slightly faster without compromising control.
12.eSmall Perimeter: 35 mm/s — Reduced speed for detailed geometry.
12.fTop Surface: 40 mm/s — Improves finish on topmost layers.
12.gInfill: 100–120 mm/s — Takes advantage of high flowability.13. Acceleration Settings
13.aNormal Print: 2000 mm/s² — Prevents ringing in soft filaments.
13.bTravel: 4000 mm/s² — Enables fast movement without harsh transitions.
13.cInitial Layer: 300 mm/s² — Gentle movement prevents lifting from the bed.
13.dOuter Wall: 1500 mm/s² — Improves outer surface clarity.
13.eInner Wall: 2000 mm/s² — Balanced for structural components.
13.fTop Surface: 1500 mm/s² — Ensures smooth detailing.14. Adhesion and Brims
14.aSkirt Loops: 2 — Helps prime nozzle and start cleanly.
14.bBrim Width: 6 mm — Helps hold soft materials down.
14.cBrim Gap: 0.15 mm — Allows for easy removal without tearing.15. Prime Tower and Flush Settings
15.aPrime Tower: ON — Purges moisture and early flow inconsistencies.
15.bTower Width: 40 mm — Prevents collapse due to heat.
15.cBrim Width (Tower): 4 mm — Adds stability to the purge base.
15.dFlush Into Support: ON — Discards unwanted early flow safely.16. G-Code Start Script
M900 K0.05 ; Pressure Advance M106 S0 ; Fan off G92 E0 G1 E15 F300 ; purge line G92 E0
17. Additional Notes
17.aDry filament at 155 F for 2 hours before use.
17.bStore with desiccant.
17.cKeep extruder door open to allow vapor to escape.
17.dAvoid long dwell times at high temperatures.If you need any other assistance, feel free to reach out to us anytime at timeplast@timeplast.com — we’ll be happy to help.
Free U.S. standard shipping on orders of 5+ spools!
Light - Gen 2
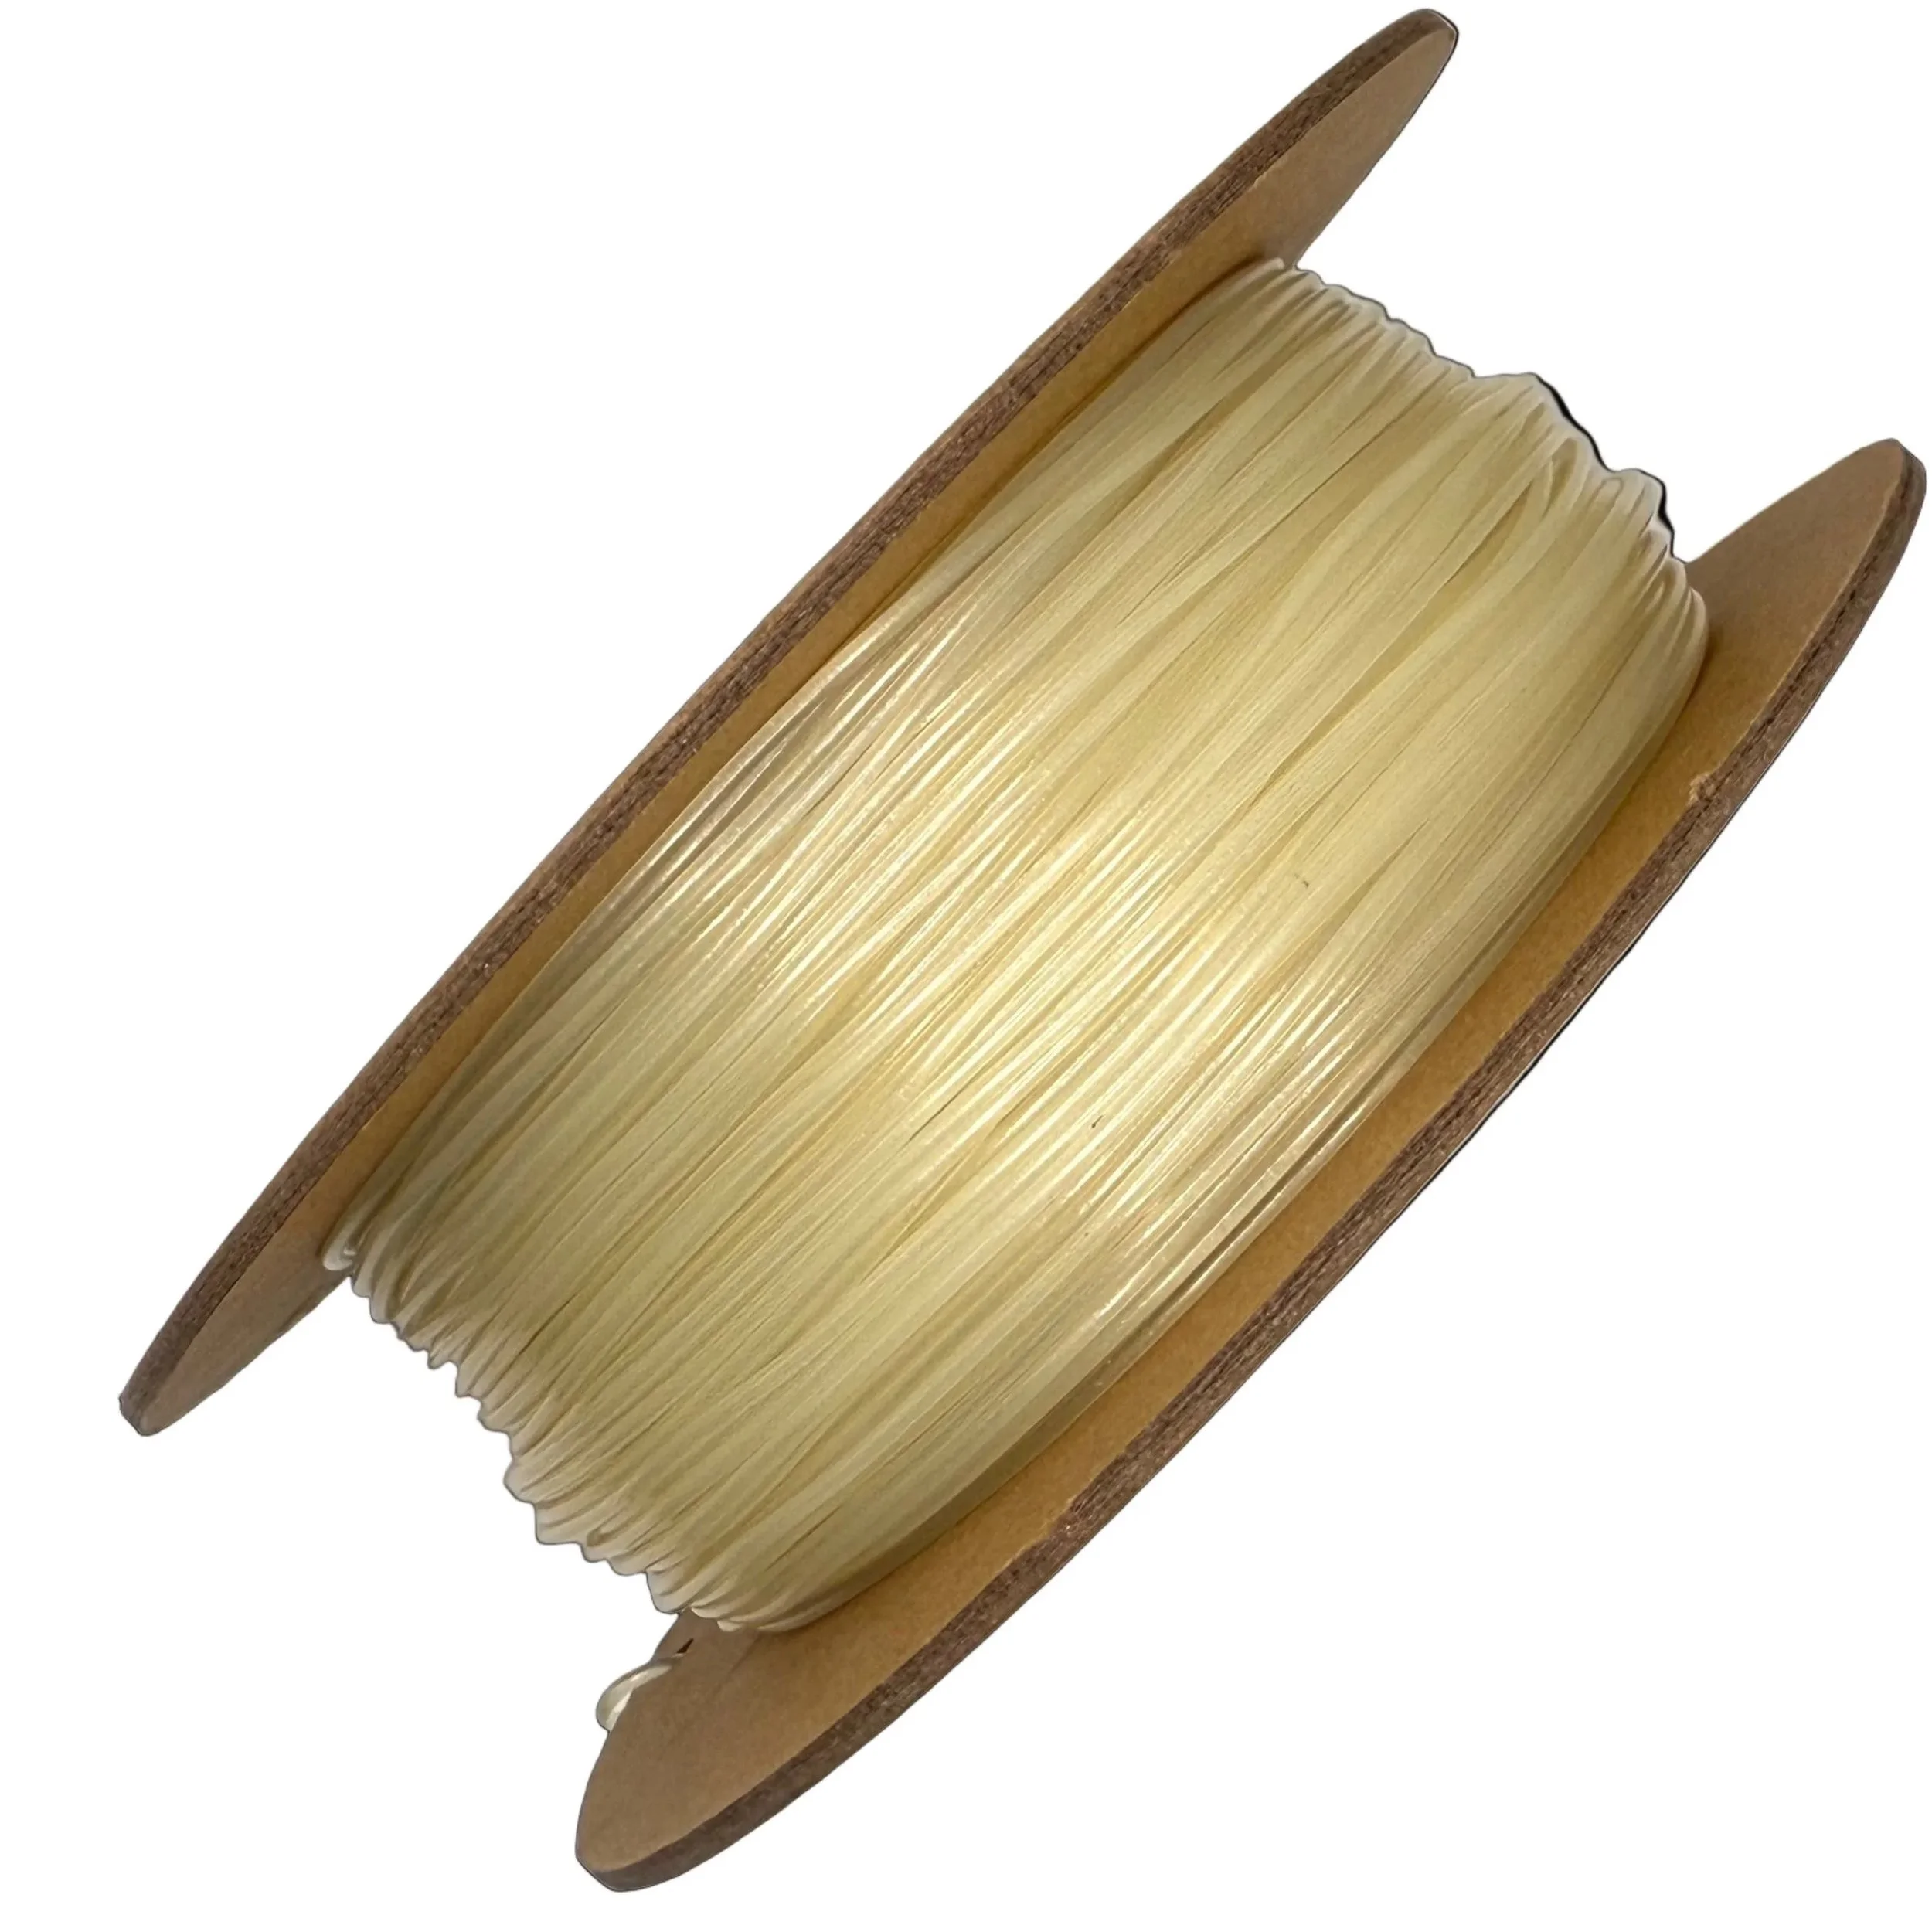
-
TimeMass Light - Make It Glow Without Wiring a Small City
TimeMass Light works like optical fiber… if optical fiber decided to chill out and light up everything, not just one boring line. Instead of shooting light straight through like a laser pointer at a PowerPoint, this filament scatters and diffuses it across its entire body. Translation? The whole thing glows like it knows it’s being admired.
Here’s how the magic works (without the wand):
• Microstructured diffusion:
We pack the filament with microscopic voids, sneaky shifts in refractive index, and nanoparticles that scatter light like it owes them money.
• Selective diffraction:
Unlike transparent materials that pretend to be cool and just let light pass through, TimeMass Light stays interesting—spreading the glow evenly instead of making one pixel overheat with existential pressure.
• Smart light entry:
Want it to glow properly? Cut or sand the base flat. The smoother it is, the easier it is for your LED, flashlight, or candle (yes, we make those too) to pump light inside and let it party.
Polishing the entry point isn’t extra credit—it’s how you avoid “tiny flashlight trapped in plastic cube” vibes. The flatter and cleaner the surface, the better the filament does its thing: glowing like it was born to.
⸻
Stuff You Can Do With It (That Looks Cooler in the Dark):
• Low-energy lighting: Glowing structures that don’t need 47 LEDs and a power grid.
• Wearables: Print accessories that light up your outfit and make you visible to cars and confused party guests.
• Art & signage: Want a glowing logo with no wires? Done. Just don’t spell your name wrong.
• Emergency lighting: Self-lit exit signs for power outages, low-key apocalypses, or overly dramatic basements.
• Sci-fi layering experiments: Create semi-transparent, light-diffusing structures that make it look like you’re up to something.
-
Click here to access our new and improved TimeMass GPT Assistant. Just tell it your printer model and the TimeMass filament you're using—it will instantly recommend the exact parameters you need to start printing successfully.
1. Introduction
These parameters are designed to help avoid printing issues; however, temperatures and speed timings can be adjusted based on your specific goals. For example, if you prefer a less rigid result, we recommend using a lower temperature. This section outlines a complete slicing and printing profile for TimeMass Light, tailored for printers with a 0.8 mm nozzle. If the print is not being successful, please lower the nozzle temperature by 10°C and start over until an optimal print is achieved. Please check the manual for printing parameters.2. Temperature Settings
2.aNozzle Temperature: 230°C — Optimal for flowability while avoiding decomposition (which begins around 250°C).
2.bBed Temperature: 75°C — Ensures strong first-layer adhesion and prevents moisture bubbling.
2.cNozzle Temperature Range: 230–245°C — Timeplast melts around 165°C but prints best at 240°C for precise viscosity control.3. Cooling Settings
3.aNo Cooling for First Layers: 3 layers — Prevents shrinkage due to rapid cooling of moisture-rich filament.
3.bFan Minimum Speed: 0% for the first 100 seconds — Allows heat retention during early layers.
3.cFan Maximum Speed: 15% starting at 8 seconds — Avoids overcooling that can lead to warping.
3.dKeep Fan Always On: OFF — Allows vapor to escape and avoids internal fogging.
3.eSlow Down for Cooling: ON — Improves surface finish with controlled cooling.
3.fForce Cooling for Overhangs: OFF — Overcooling can deform bridges in Timeplast.
3.gFan for Overhangs: 15% — Only for essential cooling in complex areas.
3.hPre-Start Fan Time: 2 seconds — Minimizes pressure differential during the first layer.4. Volumetric Flow
4.aMax Volumetric Speed: 12 mm³/s — Based on a melt flow index of ~15 g/10min, allows high-speed printing.
4.bRamming Speed: 3 mm³/s — Prevents bubbles or popping from pressure spikes.5. Retraction and Flow
5.aRetraction Distance: 0.4 mm — Minimal retraction required for soft filaments to avoid stringing.
5.bRetraction Speed: 15 mm/s — Slow enough to avoid pulling molten plastic.
5.cPressure Advance: 0.05 — Compensates for nozzle lag at high flow rates.
5.dFlow Ratio: 92% — Slight under-extrusion avoids swelling and surface artifacts.6. Precision Settings
6.aGap Closing Radius: 0.1 mm — Tolerant of gaps in thicker walls.
6.bArc Fitting: ON — Reduces G-code size and smooths curve transitions.
6.cElephant Foot Compensation: 0.1 mm — Offsets squishing in the first layer caused by large bead sizes.7. Walls and Shells
7.aWall Loops: 2 — Minimum for strength when using a 0.8 mm nozzle.
7.bDetect Thin Walls: ON — Ensures tight geometries aren’t skipped.
7.cTop/Bottom Shell Layers: 3 — Provides good coverage; increase if watertightness is needed.
7.dTop/Bottom Thickness: 1.2 mm — Equals 1.5x the nozzle size for solid strength.
7.eTop/Bottom Pattern: Monotonic — Distributes tension evenly and improves surface finish.8. Geometry and Movement
8.aWall Order: Inner before Outer — Creates cleaner outer surfaces.
8.bInfill First: OFF — Maintains precise outer dimensions.
8.cSmooth Speed Transition: ON — Prevents ringing caused by abrupt speed changes.
8.dSmooth Coefficient: 80 — Ideal damping for soft materials.
8.eAvoid Crossing Wall: ON — Minimizes stringing across part walls.
8.fMax Detour for Crossing: 10 mm or 5% — Balances time with print cleanliness.9. Layer and Width Settings
9.aLayer Height: 0.3 mm — Optimal for strength and resolution using a 0.8 mm nozzle.
9.bInitial Layer Height: 0.35 mm — Slightly higher to improve adhesion.
9.cLine Widths (all): 0.8 mm — Matches nozzle diameter for consistent extrusion.10. Seam Settings
10.aSeam Position: Aligned or Back — Use aligned for mechanical consistency, back for visual appeal.
10.bSmart Scarf Seam: ON — Automatically adjusts seam location to reduce visual impact.
10.cSeam Angle: 155° — Standard seam angle for clean transitions.
10.dSeam Steps: 10 — Smooths seam path and improves visual finish.11. Infill Settings
11.aWall/Infill Overlap: 10% — Prevents infill from deforming soft exterior walls.
11.bInfill Combination: ON — Consolidates paths for efficiency.
11.cDetect Floating Shells: ON — Ensures unsupported vertical structures are printed reliably.
11.dSparse Infill Density: 20–25% — Balanced rigidity vs. material use.
11.eSparse Pattern: Grid — Stable and efficient for flexible geometries.12. Speed Settings
12.aTravel: 160 mm/s — Fast but safe against backlash.
12.bInitial Layer: 15 mm/s — Prevents nozzle from skimming and ensures bed adhesion.
12.cOuter Wall: 60 mm/s — Controlled speed for surface quality.
12.dInner Wall: 90 mm/s — Slightly faster without compromising control.
12.eSmall Perimeter: 35 mm/s — Reduced speed for detailed geometry.
12.fTop Surface: 40 mm/s — Improves finish on topmost layers.
12.gInfill: 100–120 mm/s — Takes advantage of high flowability.13. Acceleration Settings
13.aNormal Print: 2000 mm/s² — Prevents ringing in soft filaments.
13.bTravel: 4000 mm/s² — Enables fast movement without harsh transitions.
13.cInitial Layer: 300 mm/s² — Gentle movement prevents lifting from the bed.
13.dOuter Wall: 1500 mm/s² — Improves outer surface clarity.
13.eInner Wall: 2000 mm/s² — Balanced for structural components.
13.fTop Surface: 1500 mm/s² — Ensures smooth detailing.14. Adhesion and Brims
14.aSkirt Loops: 2 — Helps prime nozzle and start cleanly.
14.bBrim Width: 6 mm — Helps hold soft materials down.
14.cBrim Gap: 0.15 mm — Allows for easy removal without tearing.15. Prime Tower and Flush Settings
15.aPrime Tower: ON — Purges moisture and early flow inconsistencies.
15.bTower Width: 40 mm — Prevents collapse due to heat.
15.cBrim Width (Tower): 4 mm — Adds stability to the purge base.
15.dFlush Into Support: ON — Discards unwanted early flow safely.16. G-Code Start Script
M900 K0.05 ; Pressure Advance M106 S0 ; Fan off G92 E0 G1 E15 F300 ; purge line G92 E0
17. Additional Notes
17.aDry filament at 155 F for 2 hours before use.
17.bStore with desiccant.
17.cKeep extruder door open to allow vapor to escape.
17.dAvoid long dwell times at high temperatures.If you need any other assistance, feel free to reach out to us anytime at timeplast@timeplast.com — we’ll be happy to help.
Free U.S. standard shipping on orders of 5+ spools!
Stick, Spark & Glow
-
A triple-visibility filament that glows in the dark, reflects light, and sparkles in daylight. Made for visibility, safety, and unapologetic flair. If you want your prints to pop—day or night—this is your go-to.
Shine. Reflect. Dazzle.
How it works:
Multiple light-responsive additives are embedded within a durable polymer carrier, activated by natural or artificial light.
Day or night – it never goes unnoticed.
Core Components:
Photoluminescent Pigments: 30% – Recharge in light, glow for hours
Retroreflective Microbeads: 20% – Bounce light directly back to source
Iridescent Flakes: 10% – Add visual punch under sunlight
Base Material: 40% – Tough and printable for long-lasting use
Where to use it:
Night cycling accessories – Make yourself seen
Safety gear prototypes – Reflective tools for visibility testing
Party/event props – Light up the night with flair
Fashion or cosplay – Wearable elements that glow and shimmer
-
Click here to access our new and improved TimeMass GPT Assistant. Just tell it your printer model and the TimeMass filament you're using—it will instantly recommend the exact parameters you need to start printing successfully.
1. Introduction
These parameters are designed to help avoid printing issues; however, temperatures and speed timings can be adjusted based on your specific goals. For example, if you prefer a less rigid result, we recommend using a lower temperature. This section outlines a complete slicing and printing profile for TimeMass Stick, Spark and Glow, tailored for printers with a 0.8 mm nozzle. If the print is not being successful, please lower the nozzle temperature by 10°C and start over until an optimal print is achieved. Please check the manual for printing parameters.2. Temperature Settings
2.aNozzle Temperature: 230°C — Optimal for flowability while avoiding decomposition (which begins around 250°C).
2.bBed Temperature: 75°C — Ensures strong first-layer adhesion and prevents moisture bubbling.
2.cNozzle Temperature Range: 230–245°C — Timeplast melts around 165°C but prints best at 240°C for precise viscosity control.3. Cooling Settings
3.aNo Cooling for First Layers: 3 layers — Prevents shrinkage due to rapid cooling of moisture-rich filament.
3.bFan Minimum Speed: 0% for the first 100 seconds — Allows heat retention during early layers.
3.cFan Maximum Speed: 15% starting at 8 seconds — Avoids overcooling that can lead to warping.
3.dKeep Fan Always On: OFF — Allows vapor to escape and avoids internal fogging.
3.eSlow Down for Cooling: ON — Improves surface finish with controlled cooling.
3.fForce Cooling for Overhangs: OFF — Overcooling can deform bridges in Timeplast.
3.gFan for Overhangs: 15% — Only for essential cooling in complex areas.
3.hPre-Start Fan Time: 2 seconds — Minimizes pressure differential during the first layer.4. Volumetric Flow
4.aMax Volumetric Speed: 12 mm³/s — Based on a melt flow index of ~15 g/10min, allows high-speed printing.
4.bRamming Speed: 3 mm³/s — Prevents bubbles or popping from pressure spikes.5. Retraction and Flow
5.aRetraction Distance: 0.4 mm — Minimal retraction required for soft filaments to avoid stringing.
5.bRetraction Speed: 15 mm/s — Slow enough to avoid pulling molten plastic.
5.cPressure Advance: 0.05 — Compensates for nozzle lag at high flow rates.
5.dFlow Ratio: 92% — Slight under-extrusion avoids swelling and surface artifacts.6. Precision Settings
6.aGap Closing Radius: 0.1 mm — Tolerant of gaps in thicker walls.
6.bArc Fitting: ON — Reduces G-code size and smooths curve transitions.
6.cElephant Foot Compensation: 0.1 mm — Offsets squishing in the first layer caused by large bead sizes.7. Walls and Shells
7.aWall Loops: 2 — Minimum for strength when using a 0.8 mm nozzle.
7.bDetect Thin Walls: ON — Ensures tight geometries aren’t skipped.
7.cTop/Bottom Shell Layers: 3 — Provides good coverage; increase if watertightness is needed.
7.dTop/Bottom Thickness: 1.2 mm — Equals 1.5x the nozzle size for solid strength.
7.eTop/Bottom Pattern: Monotonic — Distributes tension evenly and improves surface finish.8. Geometry and Movement
8.aWall Order: Inner before Outer — Creates cleaner outer surfaces.
8.bInfill First: OFF — Maintains precise outer dimensions.
8.cSmooth Speed Transition: ON — Prevents ringing caused by abrupt speed changes.
8.dSmooth Coefficient: 80 — Ideal damping for soft materials.
8.eAvoid Crossing Wall: ON — Minimizes stringing across part walls.
8.fMax Detour for Crossing: 10 mm or 5% — Balances time with print cleanliness.9. Layer and Width Settings
9.aLayer Height: 0.3 mm — Optimal for strength and resolution using a 0.8 mm nozzle.
9.bInitial Layer Height: 0.35 mm — Slightly higher to improve adhesion.
9.cLine Widths (all): 0.8 mm — Matches nozzle diameter for consistent extrusion.10. Seam Settings
10.aSeam Position: Aligned or Back — Use aligned for mechanical consistency, back for visual appeal.
10.bSmart Scarf Seam: ON — Automatically adjusts seam location to reduce visual impact.
10.cSeam Angle: 155° — Standard seam angle for clean transitions.
10.dSeam Steps: 10 — Smooths seam path and improves visual finish.11. Infill Settings
11.aWall/Infill Overlap: 10% — Prevents infill from deforming soft exterior walls.
11.bInfill Combination: ON — Consolidates paths for efficiency.
11.cDetect Floating Shells: ON — Ensures unsupported vertical structures are printed reliably.
11.dSparse Infill Density: 20–25% — Balanced rigidity vs. material use.
11.eSparse Pattern: Grid — Stable and efficient for flexible geometries.12. Speed Settings
12.aTravel: 160 mm/s — Fast but safe against backlash.
12.bInitial Layer: 15 mm/s — Prevents nozzle from skimming and ensures bed adhesion.
12.cOuter Wall: 60 mm/s — Controlled speed for surface quality.
12.dInner Wall: 90 mm/s — Slightly faster without compromising control.
12.eSmall Perimeter: 35 mm/s — Reduced speed for detailed geometry.
12.fTop Surface: 40 mm/s — Improves finish on topmost layers.
12.gInfill: 100–120 mm/s — Takes advantage of high flowability.13. Acceleration Settings
13.aNormal Print: 2000 mm/s² — Prevents ringing in soft filaments.
13.bTravel: 4000 mm/s² — Enables fast movement without harsh transitions.
13.cInitial Layer: 300 mm/s² — Gentle movement prevents lifting from the bed.
13.dOuter Wall: 1500 mm/s² — Improves outer surface clarity.
13.eInner Wall: 2000 mm/s² — Balanced for structural components.
13.fTop Surface: 1500 mm/s² — Ensures smooth detailing.14. Adhesion and Brims
14.aSkirt Loops: 2 — Helps prime nozzle and start cleanly.
14.bBrim Width: 6 mm — Helps hold soft materials down.
14.cBrim Gap: 0.15 mm — Allows for easy removal without tearing.15. Prime Tower and Flush Settings
15.aPrime Tower: ON — Purges moisture and early flow inconsistencies.
15.bTower Width: 40 mm — Prevents collapse due to heat.
15.cBrim Width (Tower): 4 mm — Adds stability to the purge base.
15.dFlush Into Support: ON — Discards unwanted early flow safely.16. G-Code Start Script
M900 K0.05 ; Pressure Advance M106 S0 ; Fan off G92 E0 G1 E15 F300 ; purge line G92 E0
17. Additional Notes
17.aDry filament at 155 F for 2 hours before use.
17.bStore with desiccant.
17.cKeep extruder door open to allow vapor to escape.
17.dAvoid long dwell times at high temperatures.If you need any other assistance, feel free to reach out to us anytime at timeplast@timeplast.com — we’ll be happy to help.
Free U.S. standard shipping on orders of 5+ spools!
UV Reveal

-
A stealthy, light-shifting filament that looks neutral in daylight—but under UV or blacklight? It glows a vivid, electric purple. Engineered with photo-reactive dyes, it's perfect for hidden messages, party prints, or security-related applications.
Plain by day. Purple by blacklight.
How it works:
UV-reactive compounds stay invisible in visible light, but emit bright fluorescence under ultraviolet light sources.
No batteries. No electronics. Just physics and photochemistry.
Core Composition:
UV-reactive Fluorophores: 18% – Designed for high-contrast glow
Neutral Carrier Polymer: 82% – Maintains daylight camouflage
Where to use it:
Secret messages & codes – Hide visual data in plain sight
Escape rooms & puzzles – Reveal clues only under UV
Event décor – Prints that transform under party lighting
Counterfeit deterrents – Secure packaging and labels
-
Click here to access our new and improved TimeMass GPT Assistant. Just tell it your printer model and the TimeMass filament you're using—it will instantly recommend the exact parameters you need to start printing successfully.
1. Introduction
These parameters are designed to help avoid printing issues; however, temperatures and speed timings can be adjusted based on your specific goals. For example, if you prefer a less rigid result, we recommend using a lower temperature. This section outlines a complete slicing and printing profile for TimeMass UV tailored for printers with a 0.8 mm nozzle. If the print is not being successful, please lower the nozzle temperature by 10°C and start over until an optimal print is achieved. Please check the manual for printing parameters with all the other nozzle sizes.2. Temperature Settings
2.aNozzle Temperature: 230°C — Optimal for flowability while avoiding decomposition (which begins around 250°C).
2.bBed Temperature: 75°C — Ensures strong first-layer adhesion and prevents moisture bubbling.
2.cNozzle Temperature Range: 230–245°C — Timeplast melts around 165°C but prints best at 240°C for precise viscosity control.3. Cooling Settings
3.aNo Cooling for First Layers: 3 layers — Prevents shrinkage due to rapid cooling of moisture-rich filament.
3.bFan Minimum Speed: 0% for the first 100 seconds — Allows heat retention during early layers.
3.cFan Maximum Speed: 15% starting at 8 seconds — Avoids overcooling that can lead to warping.
3.dKeep Fan Always On: OFF — Allows vapor to escape and avoids internal fogging.
3.eSlow Down for Cooling: ON — Improves surface finish with controlled cooling.
3.fForce Cooling for Overhangs: OFF — Overcooling can deform bridges in Timeplast.
3.gFan for Overhangs: 15% — Only for essential cooling in complex areas.
3.hPre-Start Fan Time: 2 seconds — Minimizes pressure differential during the first layer.4. Volumetric Flow
4.aMax Volumetric Speed: 12 mm³/s — Based on a melt flow index of ~15 g/10min, allows high-speed printing.
4.bRamming Speed: 3 mm³/s — Prevents bubbles or popping from pressure spikes.5. Retraction and Flow
5.aRetraction Distance: 0.4 mm — Minimal retraction required for soft filaments to avoid stringing.
5.bRetraction Speed: 15 mm/s — Slow enough to avoid pulling molten plastic.
5.cPressure Advance: 0.05 — Compensates for nozzle lag at high flow rates.
5.dFlow Ratio: 92% — Slight under-extrusion avoids swelling and surface artifacts.6. Precision Settings
6.aGap Closing Radius: 0.1 mm — Tolerant of gaps in thicker walls.
6.bArc Fitting: ON — Reduces G-code size and smooths curve transitions.
6.cElephant Foot Compensation: 0.1 mm — Offsets squishing in the first layer caused by large bead sizes.7. Walls and Shells
7.aWall Loops: 2 — Minimum for strength when using a 0.8 mm nozzle.
7.bDetect Thin Walls: ON — Ensures tight geometries aren’t skipped.
7.cTop/Bottom Shell Layers: 3 — Provides good coverage; increase if watertightness is needed.
7.dTop/Bottom Thickness: 1.2 mm — Equals 1.5x the nozzle size for solid strength.
7.eTop/Bottom Pattern: Monotonic — Distributes tension evenly and improves surface finish.8. Geometry and Movement
8.aWall Order: Inner before Outer — Creates cleaner outer surfaces.
8.bInfill First: OFF — Maintains precise outer dimensions.
8.cSmooth Speed Transition: ON — Prevents ringing caused by abrupt speed changes.
8.dSmooth Coefficient: 80 — Ideal damping for soft materials.
8.eAvoid Crossing Wall: ON — Minimizes stringing across part walls.
8.fMax Detour for Crossing: 10 mm or 5% — Balances time with print cleanliness.9. Layer and Width Settings
9.aLayer Height: 0.3 mm — Optimal for strength and resolution using a 0.8 mm nozzle.
9.bInitial Layer Height: 0.35 mm — Slightly higher to improve adhesion.
9.cLine Widths (all): 0.8 mm — Matches nozzle diameter for consistent extrusion.10. Seam Settings
10.aSeam Position: Aligned or Back — Use aligned for mechanical consistency, back for visual appeal.
10.bSmart Scarf Seam: ON — Automatically adjusts seam location to reduce visual impact.
10.cSeam Angle: 155° — Standard seam angle for clean transitions.
10.dSeam Steps: 10 — Smooths seam path and improves visual finish.11. Infill Settings
11.aWall/Infill Overlap: 10% — Prevents infill from deforming soft exterior walls.
11.bInfill Combination: ON — Consolidates paths for efficiency.
11.cDetect Floating Shells: ON — Ensures unsupported vertical structures are printed reliably.
11.dSparse Infill Density: 20–25% — Balanced rigidity vs. material use.
11.eSparse Pattern: Grid — Stable and efficient for flexible geometries.12. Speed Settings
12.aTravel: 160 mm/s — Fast but safe against backlash.
12.bInitial Layer: 15 mm/s — Prevents nozzle from skimming and ensures bed adhesion.
12.cOuter Wall: 60 mm/s — Controlled speed for surface quality.
12.dInner Wall: 90 mm/s — Slightly faster without compromising control.
12.eSmall Perimeter: 35 mm/s — Reduced speed for detailed geometry.
12.fTop Surface: 40 mm/s — Improves finish on topmost layers.
12.gInfill: 100–120 mm/s — Takes advantage of high flowability.13. Acceleration Settings
13.aNormal Print: 2000 mm/s² — Prevents ringing in soft filaments.
13.bTravel: 4000 mm/s² — Enables fast movement without harsh transitions.
13.cInitial Layer: 300 mm/s² — Gentle movement prevents lifting from the bed.
13.dOuter Wall: 1500 mm/s² — Improves outer surface clarity.
13.eInner Wall: 2000 mm/s² — Balanced for structural components.
13.fTop Surface: 1500 mm/s² — Ensures smooth detailing.14. Adhesion and Brims
14.aSkirt Loops: 2 — Helps prime nozzle and start cleanly.
14.bBrim Width: 6 mm — Helps hold soft materials down.
14.cBrim Gap: 0.15 mm — Allows for easy removal without tearing.15. Prime Tower and Flush Settings
15.aPrime Tower: ON — Purges moisture and early flow inconsistencies.
15.bTower Width: 40 mm — Prevents collapse due to heat.
15.cBrim Width (Tower): 4 mm — Adds stability to the purge base.
15.dFlush Into Support: ON — Discards unwanted early flow safely.16. G-Code Start Script
M900 K0.05 ; Pressure Advance M106 S0 ; Fan off G92 E0 G1 E15 F300 ; purge line G92 E0
17. Additional Notes
17.aDry filament at 155 F for 2 hours before use.
17.bStore with desiccant.
17.cKeep extruder door open to allow vapor to escape.
17.dAvoid long dwell times at high temperatures.If you need any other assistance, feel free to reach out to us anytime at timeplast@timeplast.com — we’ll be happy to help.
Free U.S. standard shipping on orders of 5+ spools!
Multi Material Printing
Support - Gen 2
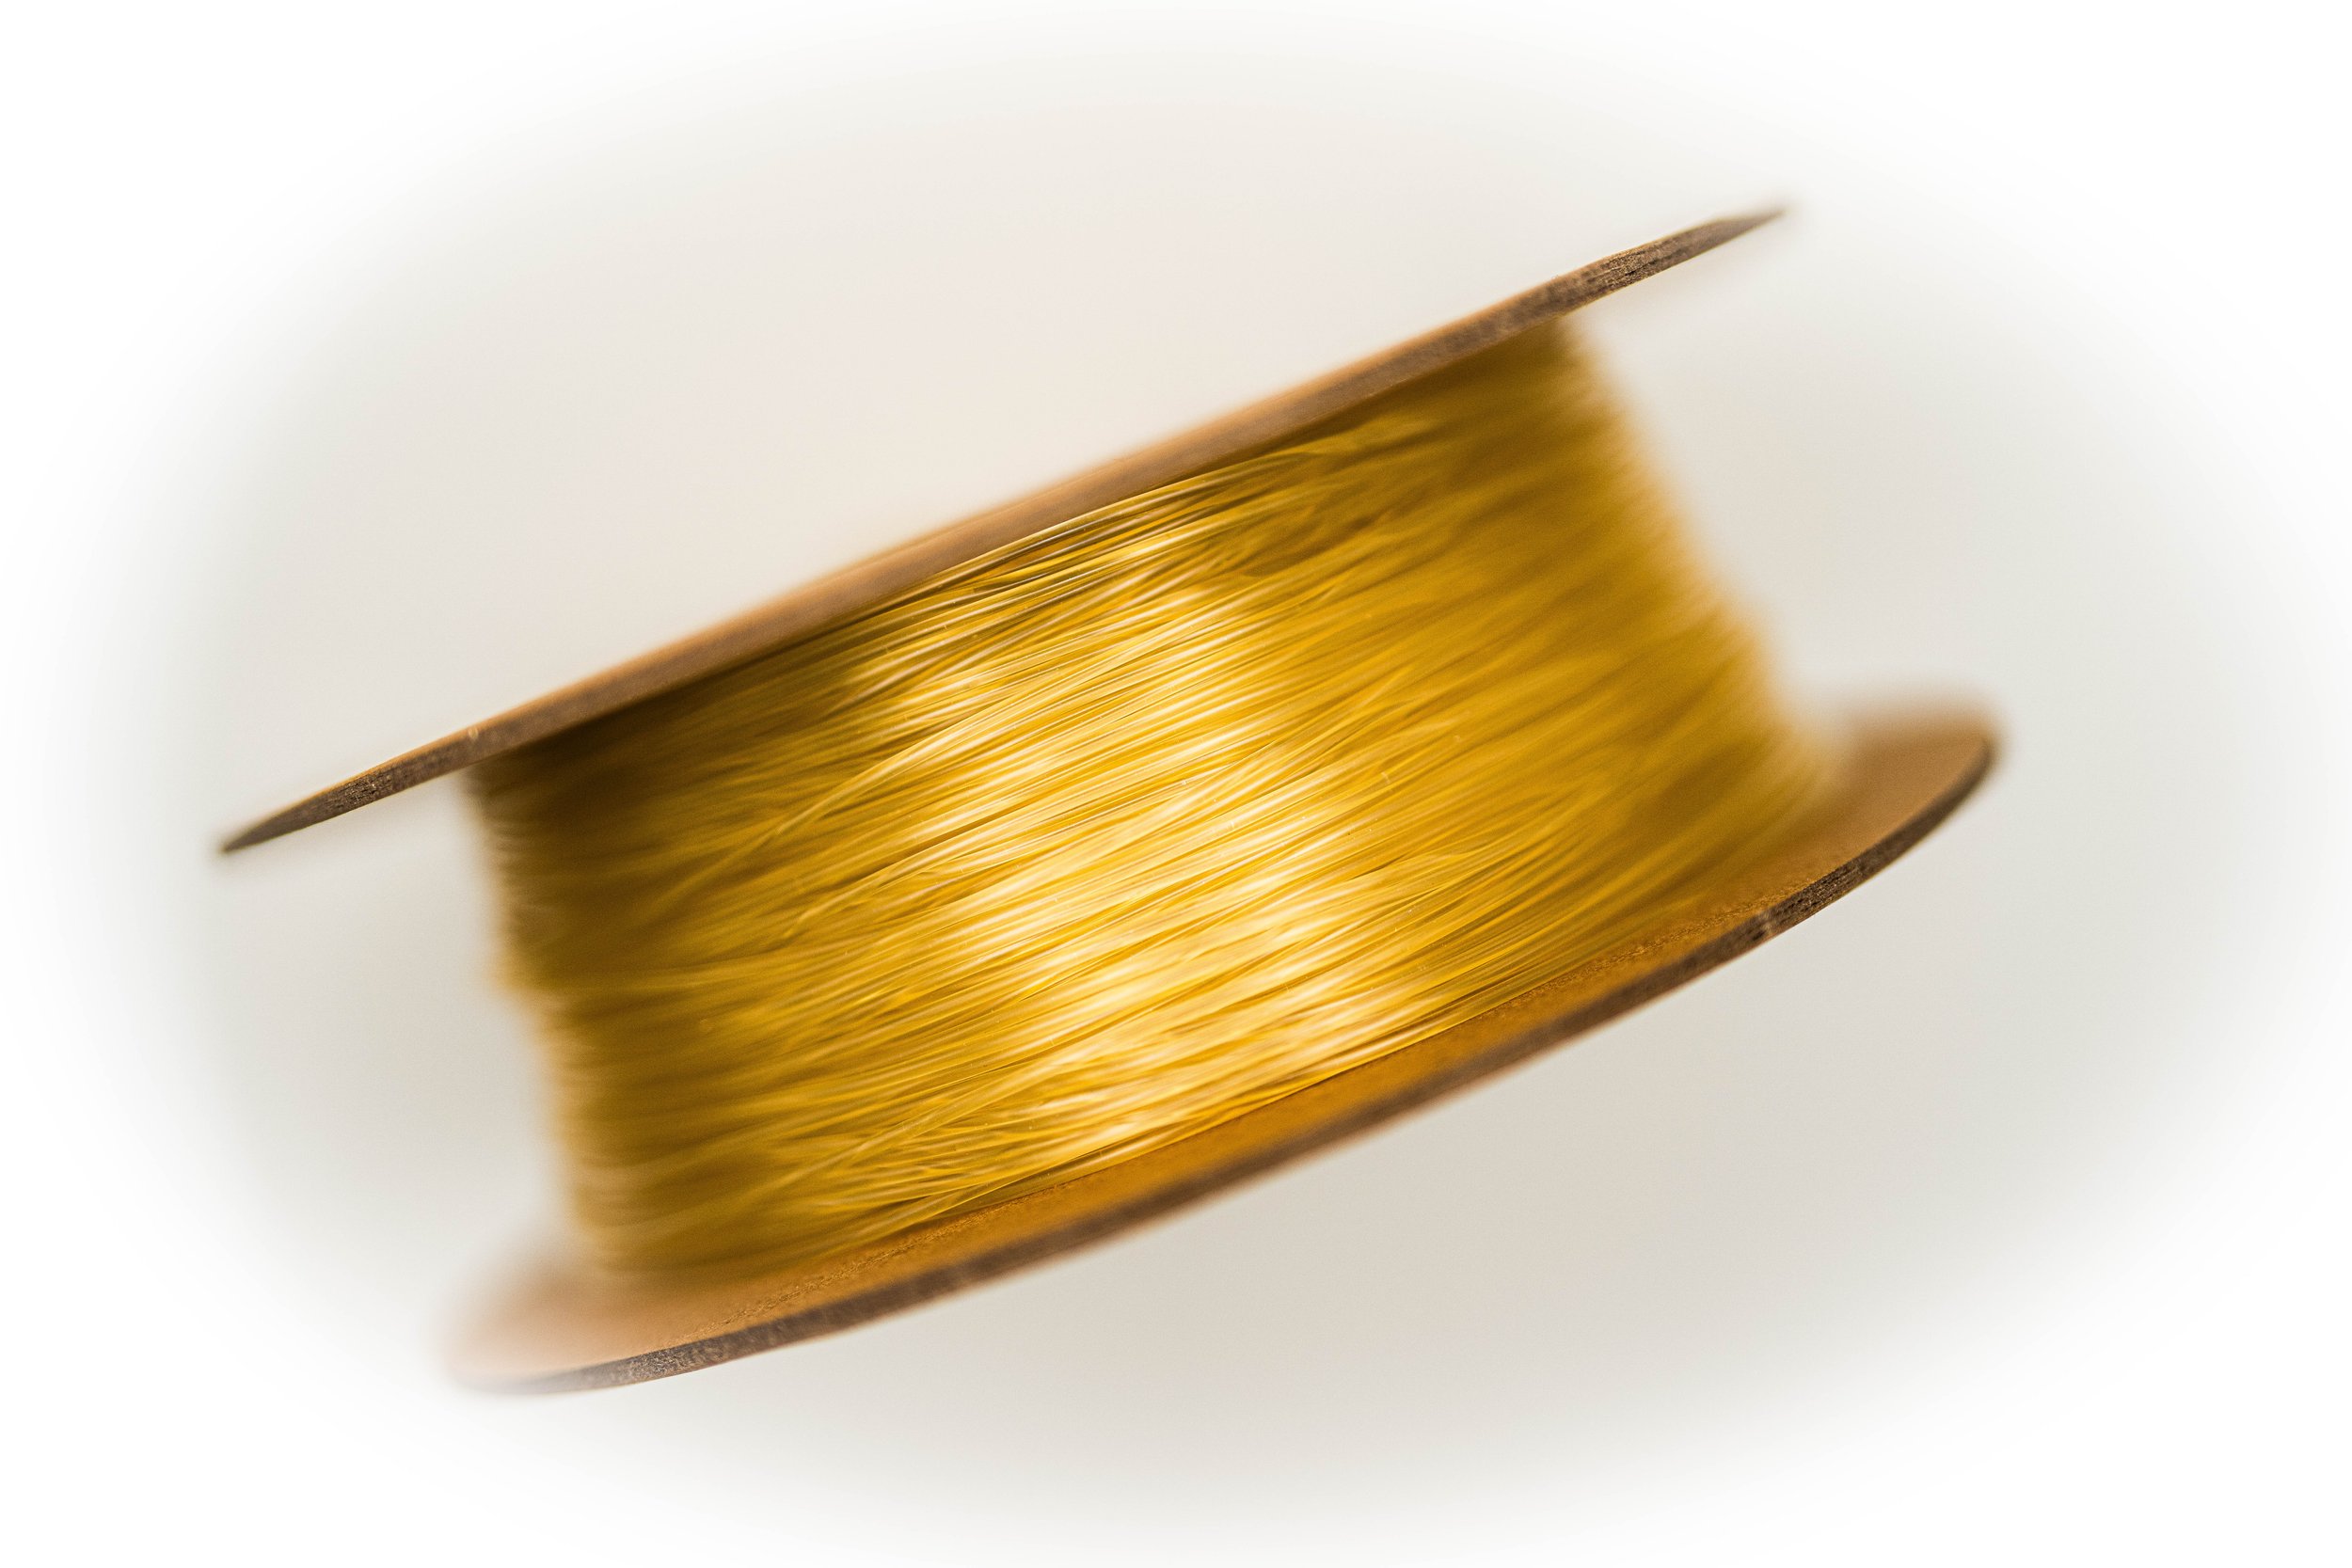
-
TimeMass Support is a flexible, ultra high molecular weight support filament that peels off in one clean stroke. No scraping. No dissolving. No drama.
Unlike brittle support materials that shatter like dry pasta, this one bends, flexes, and then just... comes off. Perfect for big prints, weird angles, and geometry that usually sends slicers into therapy.
What makes it different:
Flexible but removable – Bends instead of snapping, then detaches without a fight.
No cleanup – Leaves your print smooth, not scarred. No water, no solvents, no wasted time.
Geometry-friendly – Built for overhangs, bridges, and all the complicated nonsense normal supports can't handle.
Eco-conscious – No chemical baths. Just pull, toss, done. It will fully dissolve in water.
TimeMass Support gives you one less thing to fight with. Design crazy. Print smarter.
Need Ideas? Here You Go:
High-End Prototyping – Enables rapid iteration of complex designs without post-processing delays.
Consumer Product Manufacturing – Ideal for mass production where fast and easy support removal is needed.
Medical & Dental Applications – Great for printing intricate prosthetics or dental models without risk of damaging fine details.
Architectural Models – Allows for printing delicate structures that require support but need clean final surfaces.
Soft Robotics & Wearables – Facilitates the creation of flexible, multi-material parts with temporary internal supports.
Jewelry & Artistic Prints – Provides an easy way to remove supports without damaging fine engravings or tiny details.
-
Click here to access our new and improved TimeMass GPT Assistant. Just tell it your printer model and the TimeMass filament you're using—it will instantly recommend the exact parameters you need to start printing successfully.
1. Introduction
These parameters are designed to help avoid printing issues; however, temperatures and speed timings can be adjusted based on your specific goals. For example, if you prefer a less rigid result, we recommend using a lower temperature. This section outlines a complete slicing and printing profile for TimeMass Support, tailored for printers with a 0.8 mm nozzle. If the print is not being successful, please lower the nozzle temperature by 10°C and start over until an optimal print is achieved. Please check the manual for printing parameters.2. Temperature Settings
2.aNozzle Temperature: 230°C — Optimal for flowability while avoiding decomposition (which begins around 250°C).
2.bBed Temperature: 75°C — Ensures strong first-layer adhesion and prevents moisture bubbling.
2.cNozzle Temperature Range: 230–245°C — Timeplast melts around 165°C but prints best at 240°C for precise viscosity control.3. Cooling Settings
3.aNo Cooling for First Layers: 3 layers — Prevents shrinkage due to rapid cooling of moisture-rich filament.
3.bFan Minimum Speed: 0% for the first 100 seconds — Allows heat retention during early layers.
3.cFan Maximum Speed: 15% starting at 8 seconds — Avoids overcooling that can lead to warping.
3.dKeep Fan Always On: OFF — Allows vapor to escape and avoids internal fogging.
3.eSlow Down for Cooling: ON — Improves surface finish with controlled cooling.
3.fForce Cooling for Overhangs: OFF — Overcooling can deform bridges in Timeplast.
3.gFan for Overhangs: 15% — Only for essential cooling in complex areas.
3.hPre-Start Fan Time: 2 seconds — Minimizes pressure differential during the first layer.4. Volumetric Flow
4.aMax Volumetric Speed: 12 mm³/s — Based on a melt flow index of ~15 g/10min, allows high-speed printing.
4.bRamming Speed: 3 mm³/s — Prevents bubbles or popping from pressure spikes.5. Retraction and Flow
5.aRetraction Distance: 0.4 mm — Minimal retraction required for soft filaments to avoid stringing.
5.bRetraction Speed: 15 mm/s — Slow enough to avoid pulling molten plastic.
5.cPressure Advance: 0.05 — Compensates for nozzle lag at high flow rates.
5.dFlow Ratio: 92% — Slight under-extrusion avoids swelling and surface artifacts.6. Precision Settings
6.aGap Closing Radius: 0.1 mm — Tolerant of gaps in thicker walls.
6.bArc Fitting: ON — Reduces G-code size and smooths curve transitions.
6.cElephant Foot Compensation: 0.1 mm — Offsets squishing in the first layer caused by large bead sizes.7. Walls and Shells
7.aWall Loops: 2 — Minimum for strength when using a 0.8 mm nozzle.
7.bDetect Thin Walls: ON — Ensures tight geometries aren’t skipped.
7.cTop/Bottom Shell Layers: 3 — Provides good coverage; increase if watertightness is needed.
7.dTop/Bottom Thickness: 1.2 mm — Equals 1.5x the nozzle size for solid strength.
7.eTop/Bottom Pattern: Monotonic — Distributes tension evenly and improves surface finish.8. Geometry and Movement
8.aWall Order: Inner before Outer — Creates cleaner outer surfaces.
8.bInfill First: OFF — Maintains precise outer dimensions.
8.cSmooth Speed Transition: ON — Prevents ringing caused by abrupt speed changes.
8.dSmooth Coefficient: 80 — Ideal damping for soft materials.
8.eAvoid Crossing Wall: ON — Minimizes stringing across part walls.
8.fMax Detour for Crossing: 10 mm or 5% — Balances time with print cleanliness.9. Layer and Width Settings
9.aLayer Height: 0.3 mm — Optimal for strength and resolution using a 0.8 mm nozzle.
9.bInitial Layer Height: 0.35 mm — Slightly higher to improve adhesion.
9.cLine Widths (all): 0.8 mm — Matches nozzle diameter for consistent extrusion.10. Seam Settings
10.aSeam Position: Aligned or Back — Use aligned for mechanical consistency, back for visual appeal.
10.bSmart Scarf Seam: ON — Automatically adjusts seam location to reduce visual impact.
10.cSeam Angle: 155° — Standard seam angle for clean transitions.
10.dSeam Steps: 10 — Smooths seam path and improves visual finish.11. Infill Settings
11.aWall/Infill Overlap: 10% — Prevents infill from deforming soft exterior walls.
11.bInfill Combination: ON — Consolidates paths for efficiency.
11.cDetect Floating Shells: ON — Ensures unsupported vertical structures are printed reliably.
11.dSparse Infill Density: 20–25% — Balanced rigidity vs. material use.
11.eSparse Pattern: Grid — Stable and efficient for flexible geometries.12. Speed Settings
12.aTravel: 160 mm/s — Fast but safe against backlash.
12.bInitial Layer: 15 mm/s — Prevents nozzle from skimming and ensures bed adhesion.
12.cOuter Wall: 60 mm/s — Controlled speed for surface quality.
12.dInner Wall: 90 mm/s — Slightly faster without compromising control.
12.eSmall Perimeter: 35 mm/s — Reduced speed for detailed geometry.
12.fTop Surface: 40 mm/s — Improves finish on topmost layers.
12.gInfill: 100–120 mm/s — Takes advantage of high flowability.13. Acceleration Settings
13.aNormal Print: 2000 mm/s² — Prevents ringing in soft filaments.
13.bTravel: 4000 mm/s² — Enables fast movement without harsh transitions.
13.cInitial Layer: 300 mm/s² — Gentle movement prevents lifting from the bed.
13.dOuter Wall: 1500 mm/s² — Improves outer surface clarity.
13.eInner Wall: 2000 mm/s² — Balanced for structural components.
13.fTop Surface: 1500 mm/s² — Ensures smooth detailing.14. Adhesion and Brims
14.aSkirt Loops: 2 — Helps prime nozzle and start cleanly.
14.bBrim Width: 6 mm — Helps hold soft materials down.
14.cBrim Gap: 0.15 mm — Allows for easy removal without tearing.15. Prime Tower and Flush Settings
15.aPrime Tower: ON — Purges moisture and early flow inconsistencies.
15.bTower Width: 40 mm — Prevents collapse due to heat.
15.cBrim Width (Tower): 4 mm — Adds stability to the purge base.
15.dFlush Into Support: ON — Discards unwanted early flow safely.16. G-Code Start Script
M900 K0.05 ; Pressure Advance M106 S0 ; Fan off G92 E0 G1 E15 F300 ; purge line G92 E0
17. Additional Notes
17.aDry filament at 155 F for 2 hours before use.
17.bStore with desiccant.
17.cKeep extruder door open to allow vapor to escape.
17.dAvoid long dwell times at high temperatures.If you need any other assistance, feel free to reach out to us anytime at timeplast@timeplast.com — we’ll be happy to help.
Free U.S. standard shipping on orders of 5+ spools!
Metal Surface - Gen 2

-
What if 3D-printed objects could look, feel, and behave like real metal—without ever needing a metal printer? TimeMass - Metal Surface is an advanced 4D printing filament that transforms polymer-based prints into metallic masterpieces with just a quick dip in water and fine metal powders.
Unlike conventional metal-infused filaments, which contain embedded metallic particles that dilute their true metal effect, TimeMass - Metal Surface actively bonds with external metals post-print. Engineered with a high-affinity polymer matrix, this filament temporarily becomes hydrophilic upon contact with water, allowing iron filings, copper, brass, or other metallic powders to interlock with its surface. As the print dries, these metallic elements lock into place, creating a high-density, conductive, and slightly ferromagnetic finish.
How It Works: A Revolutionary Surface Chemistry
⚡ Hydrophilic Activation – Once printed, the object briefly absorbs water, creating an ultra-fine microcapillary structure that pulls in metallic powders.
🧲 Metallic Interlocking – The material’s surface chemistry actively bonds with iron, copper, brass, or other metals, ensuring a strong, permanent adhesion without embedded metal particles.
🔄 Real Metal Behavior – Unlike plastic-based metallic finishes, TimeMass - Metal Surface creates a true-to-life metal appearance that interacts with light, magnetism, and oxidation just like an actual metal object.Where Aesthetics Meet Functionality
🏛️ Luxury Finishes & Industrial Design – Print stunning metallic sculptures, architectural models, or machine-like prototypes that look and feel like cast metal.
⚙️ Functional Magnetic & Conductive Surfaces – Use iron-infused finishes to create ferromagnetic parts, magnetic tool holders, or smart electrical components.
🎭 Hyper-Realistic Props & Replicas – Make high-end movie props, jewelry, or antique recreations that pass for real metal at a fraction of the weight.
🚀 Wearable & Fashion Tech – Design jewelry, watches, or metallic-textured accessories that look and behave like polished, brushed, or oxidized metals.
🎨 Custom Art & Home Decor – Develop bespoke metal-finished objects, from bronze-like sculptures to steampunk-inspired creations.
♻️ Sustainable Metal Effects – Achieve real metal looks without the need for costly, heavy, or energy-intensive metal 3D printing processes.Beyond Metal-Inspired—This Is Metal Transformed
With TimeMass - Metal Surface, 3D-printed plastic no longer looks like plastic. By combining advanced 4D material engineering with real metal bonding, this filament makes it possible to replicate the weight, conductivity, and texture of metal—all with the ease of polymer-based printing.
For artists, engineers, and visionaries seeking the power of metal without the constraints of metal printing, TimeMass - Metal Surface is the ultimate breakthrough.
Print it. Dip it. Transform it.
Iron filings is one of the best powders for this filament and you can find them on Amazon.
Need Ideas? Here You Go:
Functional mechanical components with improved weight, density, and partial magnetism.
Artistic and industrial-grade sculptures that require authentic metallic aesthetics.
Custom jewelry and accessories that mimic silver, brass, or iron without requiring metal casting.
Prop and cosplay armor pieces with real metallic reflections and textures.
Magnetic-reactive designs, such as hidden latches, sensors, and magnetic puzzles.
Customized speaker grilles or conductive surfaces for artistic and functional electrical projects.
-
Click here to access our new and improved TimeMass GPT Assistant. Just tell it your printer model and the TimeMass filament you're using—it will instantly recommend the exact parameters you need to start printing successfully.
1. Introduction
These parameters are designed to help avoid printing issues; however, temperatures and speed timings can be adjusted based on your specific goals. For example, if you prefer a less rigid result, we recommend using a lower temperature. This section outlines a complete slicing and printing profile for TimeMass Metal Surface, tailored for printers with a 0.8 mm nozzle. If the print is not being successful, please lower the nozzle temperature by 10°C and start over until an optimal print is achieved. Please check the manual for printing parameters.2. Temperature Settings
2.aNozzle Temperature: 230°C — Optimal for flowability while avoiding decomposition (which begins around 250°C).
2.bBed Temperature: 75°C — Ensures strong first-layer adhesion and prevents moisture bubbling.
2.cNozzle Temperature Range: 230–245°C — Timeplast melts around 165°C but prints best at 240°C for precise viscosity control.3. Cooling Settings
3.aNo Cooling for First Layers: 3 layers — Prevents shrinkage due to rapid cooling of moisture-rich filament.
3.bFan Minimum Speed: 0% for the first 100 seconds — Allows heat retention during early layers.
3.cFan Maximum Speed: 15% starting at 8 seconds — Avoids overcooling that can lead to warping.
3.dKeep Fan Always On: OFF — Allows vapor to escape and avoids internal fogging.
3.eSlow Down for Cooling: ON — Improves surface finish with controlled cooling.
3.fForce Cooling for Overhangs: OFF — Overcooling can deform bridges in Timeplast.
3.gFan for Overhangs: 15% — Only for essential cooling in complex areas.
3.hPre-Start Fan Time: 2 seconds — Minimizes pressure differential during the first layer.4. Volumetric Flow
4.aMax Volumetric Speed: 12 mm³/s — Based on a melt flow index of ~15 g/10min, allows high-speed printing.
4.bRamming Speed: 3 mm³/s — Prevents bubbles or popping from pressure spikes.5. Retraction and Flow
5.aRetraction Distance: 0.4 mm — Minimal retraction required for soft filaments to avoid stringing.
5.bRetraction Speed: 15 mm/s — Slow enough to avoid pulling molten plastic.
5.cPressure Advance: 0.05 — Compensates for nozzle lag at high flow rates.
5.dFlow Ratio: 92% — Slight under-extrusion avoids swelling and surface artifacts.6. Precision Settings
6.aGap Closing Radius: 0.1 mm — Tolerant of gaps in thicker walls.
6.bArc Fitting: ON — Reduces G-code size and smooths curve transitions.
6.cElephant Foot Compensation: 0.1 mm — Offsets squishing in the first layer caused by large bead sizes.7. Walls and Shells
7.aWall Loops: 2 — Minimum for strength when using a 0.8 mm nozzle.
7.bDetect Thin Walls: ON — Ensures tight geometries aren’t skipped.
7.cTop/Bottom Shell Layers: 3 — Provides good coverage; increase if watertightness is needed.
7.dTop/Bottom Thickness: 1.2 mm — Equals 1.5x the nozzle size for solid strength.
7.eTop/Bottom Pattern: Monotonic — Distributes tension evenly and improves surface finish.8. Geometry and Movement
8.aWall Order: Inner before Outer — Creates cleaner outer surfaces.
8.bInfill First: OFF — Maintains precise outer dimensions.
8.cSmooth Speed Transition: ON — Prevents ringing caused by abrupt speed changes.
8.dSmooth Coefficient: 80 — Ideal damping for soft materials.
8.eAvoid Crossing Wall: ON — Minimizes stringing across part walls.
8.fMax Detour for Crossing: 10 mm or 5% — Balances time with print cleanliness.9. Layer and Width Settings
9.aLayer Height: 0.3 mm — Optimal for strength and resolution using a 0.8 mm nozzle.
9.bInitial Layer Height: 0.35 mm — Slightly higher to improve adhesion.
9.cLine Widths (all): 0.8 mm — Matches nozzle diameter for consistent extrusion.10. Seam Settings
10.aSeam Position: Aligned or Back — Use aligned for mechanical consistency, back for visual appeal.
10.bSmart Scarf Seam: ON — Automatically adjusts seam location to reduce visual impact.
10.cSeam Angle: 155° — Standard seam angle for clean transitions.
10.dSeam Steps: 10 — Smooths seam path and improves visual finish.11. Infill Settings
11.aWall/Infill Overlap: 10% — Prevents infill from deforming soft exterior walls.
11.bInfill Combination: ON — Consolidates paths for efficiency.
11.cDetect Floating Shells: ON — Ensures unsupported vertical structures are printed reliably.
11.dSparse Infill Density: 20–25% — Balanced rigidity vs. material use.
11.eSparse Pattern: Grid — Stable and efficient for flexible geometries.12. Speed Settings
12.aTravel: 160 mm/s — Fast but safe against backlash.
12.bInitial Layer: 15 mm/s — Prevents nozzle from skimming and ensures bed adhesion.
12.cOuter Wall: 60 mm/s — Controlled speed for surface quality.
12.dInner Wall: 90 mm/s — Slightly faster without compromising control.
12.eSmall Perimeter: 35 mm/s — Reduced speed for detailed geometry.
12.fTop Surface: 40 mm/s — Improves finish on topmost layers.
12.gInfill: 100–120 mm/s — Takes advantage of high flowability.13. Acceleration Settings
13.aNormal Print: 2000 mm/s² — Prevents ringing in soft filaments.
13.bTravel: 4000 mm/s² — Enables fast movement without harsh transitions.
13.cInitial Layer: 300 mm/s² — Gentle movement prevents lifting from the bed.
13.dOuter Wall: 1500 mm/s² — Improves outer surface clarity.
13.eInner Wall: 2000 mm/s² — Balanced for structural components.
13.fTop Surface: 1500 mm/s² — Ensures smooth detailing.14. Adhesion and Brims
14.aSkirt Loops: 2 — Helps prime nozzle and start cleanly.
14.bBrim Width: 6 mm — Helps hold soft materials down.
14.cBrim Gap: 0.15 mm — Allows for easy removal without tearing.15. Prime Tower and Flush Settings
15.aPrime Tower: ON — Purges moisture and early flow inconsistencies.
15.bTower Width: 40 mm — Prevents collapse due to heat.
15.cBrim Width (Tower): 4 mm — Adds stability to the purge base.
15.dFlush Into Support: ON — Discards unwanted early flow safely.16. G-Code Start Script
M900 K0.05 ; Pressure Advance M106 S0 ; Fan off G92 E0 G1 E15 F300 ; purge line G92 E0
17. Additional Notes
17.aDry filament at 155 F for 2 hours before use.
17.bStore with desiccant.
17.cKeep extruder door open to allow vapor to escape.
17.dAvoid long dwell times at high temperatures.If you need any other assistance, feel free to reach out to us anytime at timeplast@timeplast.com — we’ll be happy to help.
Free U.S. standard shipping on orders of 5+ spools!
Paper Surface

-
What if your 3D print felt like aged parchment but held up like plastic?
TimeMass Paper Surface makes that happen. It’s a post-processing filament that lets you print tough, durable parts with the soft, organic texture of real paper.How it works:
After printing, dunk the object in water—just enough to activate the surface. Then dust it with a cellulose-based powder. As it dries, the fibers bond, giving the piece a matte, fibrous finish that looks handmade but holds up like tech.
Why it’s different:
Paper feel, polymer strength – It won’t tear, crumple, or dissolve like the real thing.
Reactive surface treatment – A water dip + powder coat = authentic texture.
No fake “grain” gimmicks – This isn’t molded plastic pretending to be paper. It is paper—on the surface.
Where to use it:
Fine art & sculpture – Print textured canvases, delicate details, or weird little relics.
Custom packaging & branding – Business cards that don’t suck, packaging that feels like it belongs in an art gallery.
Historical props & replicas – Make museum-worthy “manuscripts” that don’t fall apart.
Interior design & signage – Print lightweight panels that look hand-finished, not injection molded.
Bookbinding & paper prototypes – Covers that feel real, pages that don’t quit.
No gimmicks. No lamination.
Just that clean, warm, paper feel—built right into the print.If you want every layer to say “craft” instead of “plastic,” Paper Surface makes it happen.
Need Ideas? Here You Go:
Books, scrolls, and artistic paper-like sculptures, preserving a unique handmade aesthetic.
Paper-textured prototypes for product design and packaging concepts.
Custom greeting cards, business cards, and invitations with intricate 3D textures.
Tactile signage and educational tools, combining print durability with a paper feel.
Handwritten notebooks or calligraphy-ready sheets, offering 3D-printed permanence with a paper finish.
⚠️ Please note: the cellulose-based finishing powder is sold separately.
-
Click here to access our new and improved TimeMass GPT Assistant. Just tell it your printer model and the TimeMass filament you're using—it will instantly recommend the exact parameters you need to start printing successfully.
1. Introduction
These parameters are designed to help avoid printing issues; however, temperatures and speed timings can be adjusted based on your specific goals. For example, if you prefer a less rigid result, we recommend using a lower temperature. This section outlines a complete slicing and printing profile for TimeMass Paper Surface, tailored for printers with a 0.8 mm nozzle. If the print is not being successful, please lower the nozzle temperature by 10°C and start over until an optimal print is achieved. Please check the manual for printing parameters.2. Temperature Settings
2.aNozzle Temperature: 230°C — Optimal for flowability while avoiding decomposition (which begins around 250°C).
2.bBed Temperature: 75°C — Ensures strong first-layer adhesion and prevents moisture bubbling.
2.cNozzle Temperature Range: 230–245°C — Timeplast melts around 165°C but prints best at 240°C for precise viscosity control.3. Cooling Settings
3.aNo Cooling for First Layers: 3 layers — Prevents shrinkage due to rapid cooling of moisture-rich filament.
3.bFan Minimum Speed: 0% for the first 100 seconds — Allows heat retention during early layers.
3.cFan Maximum Speed: 15% starting at 8 seconds — Avoids overcooling that can lead to warping.
3.dKeep Fan Always On: OFF — Allows vapor to escape and avoids internal fogging.
3.eSlow Down for Cooling: ON — Improves surface finish with controlled cooling.
3.fForce Cooling for Overhangs: OFF — Overcooling can deform bridges in Timeplast.
3.gFan for Overhangs: 15% — Only for essential cooling in complex areas.
3.hPre-Start Fan Time: 2 seconds — Minimizes pressure differential during the first layer.4. Volumetric Flow
4.aMax Volumetric Speed: 12 mm³/s — Based on a melt flow index of ~15 g/10min, allows high-speed printing.
4.bRamming Speed: 3 mm³/s — Prevents bubbles or popping from pressure spikes.5. Retraction and Flow
5.aRetraction Distance: 0.4 mm — Minimal retraction required for soft filaments to avoid stringing.
5.bRetraction Speed: 15 mm/s — Slow enough to avoid pulling molten plastic.
5.cPressure Advance: 0.05 — Compensates for nozzle lag at high flow rates.
5.dFlow Ratio: 92% — Slight under-extrusion avoids swelling and surface artifacts.6. Precision Settings
6.aGap Closing Radius: 0.1 mm — Tolerant of gaps in thicker walls.
6.bArc Fitting: ON — Reduces G-code size and smooths curve transitions.
6.cElephant Foot Compensation: 0.1 mm — Offsets squishing in the first layer caused by large bead sizes.7. Walls and Shells
7.aWall Loops: 2 — Minimum for strength when using a 0.8 mm nozzle.
7.bDetect Thin Walls: ON — Ensures tight geometries aren’t skipped.
7.cTop/Bottom Shell Layers: 3 — Provides good coverage; increase if watertightness is needed.
7.dTop/Bottom Thickness: 1.2 mm — Equals 1.5x the nozzle size for solid strength.
7.eTop/Bottom Pattern: Monotonic — Distributes tension evenly and improves surface finish.8. Geometry and Movement
8.aWall Order: Inner before Outer — Creates cleaner outer surfaces.
8.bInfill First: OFF — Maintains precise outer dimensions.
8.cSmooth Speed Transition: ON — Prevents ringing caused by abrupt speed changes.
8.dSmooth Coefficient: 80 — Ideal damping for soft materials.
8.eAvoid Crossing Wall: ON — Minimizes stringing across part walls.
8.fMax Detour for Crossing: 10 mm or 5% — Balances time with print cleanliness.9. Layer and Width Settings
9.aLayer Height: 0.3 mm — Optimal for strength and resolution using a 0.8 mm nozzle.
9.bInitial Layer Height: 0.35 mm — Slightly higher to improve adhesion.
9.cLine Widths (all): 0.8 mm — Matches nozzle diameter for consistent extrusion.10. Seam Settings
10.aSeam Position: Aligned or Back — Use aligned for mechanical consistency, back for visual appeal.
10.bSmart Scarf Seam: ON — Automatically adjusts seam location to reduce visual impact.
10.cSeam Angle: 155° — Standard seam angle for clean transitions.
10.dSeam Steps: 10 — Smooths seam path and improves visual finish.11. Infill Settings
11.aWall/Infill Overlap: 10% — Prevents infill from deforming soft exterior walls.
11.bInfill Combination: ON — Consolidates paths for efficiency.
11.cDetect Floating Shells: ON — Ensures unsupported vertical structures are printed reliably.
11.dSparse Infill Density: 20–25% — Balanced rigidity vs. material use.
11.eSparse Pattern: Grid — Stable and efficient for flexible geometries.12. Speed Settings
12.aTravel: 160 mm/s — Fast but safe against backlash.
12.bInitial Layer: 15 mm/s — Prevents nozzle from skimming and ensures bed adhesion.
12.cOuter Wall: 60 mm/s — Controlled speed for surface quality.
12.dInner Wall: 90 mm/s — Slightly faster without compromising control.
12.eSmall Perimeter: 35 mm/s — Reduced speed for detailed geometry.
12.fTop Surface: 40 mm/s — Improves finish on topmost layers.
12.gInfill: 100–120 mm/s — Takes advantage of high flowability.13. Acceleration Settings
13.aNormal Print: 2000 mm/s² — Prevents ringing in soft filaments.
13.bTravel: 4000 mm/s² — Enables fast movement without harsh transitions.
13.cInitial Layer: 300 mm/s² — Gentle movement prevents lifting from the bed.
13.dOuter Wall: 1500 mm/s² — Improves outer surface clarity.
13.eInner Wall: 2000 mm/s² — Balanced for structural components.
13.fTop Surface: 1500 mm/s² — Ensures smooth detailing.14. Adhesion and Brims
14.aSkirt Loops: 2 — Helps prime nozzle and start cleanly.
14.bBrim Width: 6 mm — Helps hold soft materials down.
14.cBrim Gap: 0.15 mm — Allows for easy removal without tearing.15. Prime Tower and Flush Settings
15.aPrime Tower: ON — Purges moisture and early flow inconsistencies.
15.bTower Width: 40 mm — Prevents collapse due to heat.
15.cBrim Width (Tower): 4 mm — Adds stability to the purge base.
15.dFlush Into Support: ON — Discards unwanted early flow safely.16. G-Code Start Script
M900 K0.05 ; Pressure Advance M106 S0 ; Fan off G92 E0 G1 E15 F300 ; purge line G92 E0
17. Additional Notes
17.aDry filament at 155 F for 2 hours before use.
17.bStore with desiccant.
17.cKeep extruder door open to allow vapor to escape.
17.dAvoid long dwell times at high temperatures.If you need any other assistance, feel free to reach out to us anytime at timeplast@timeplast.com — we’ll be happy to help.
Free U.S. standard shipping on orders of 5+ spools!
Texture
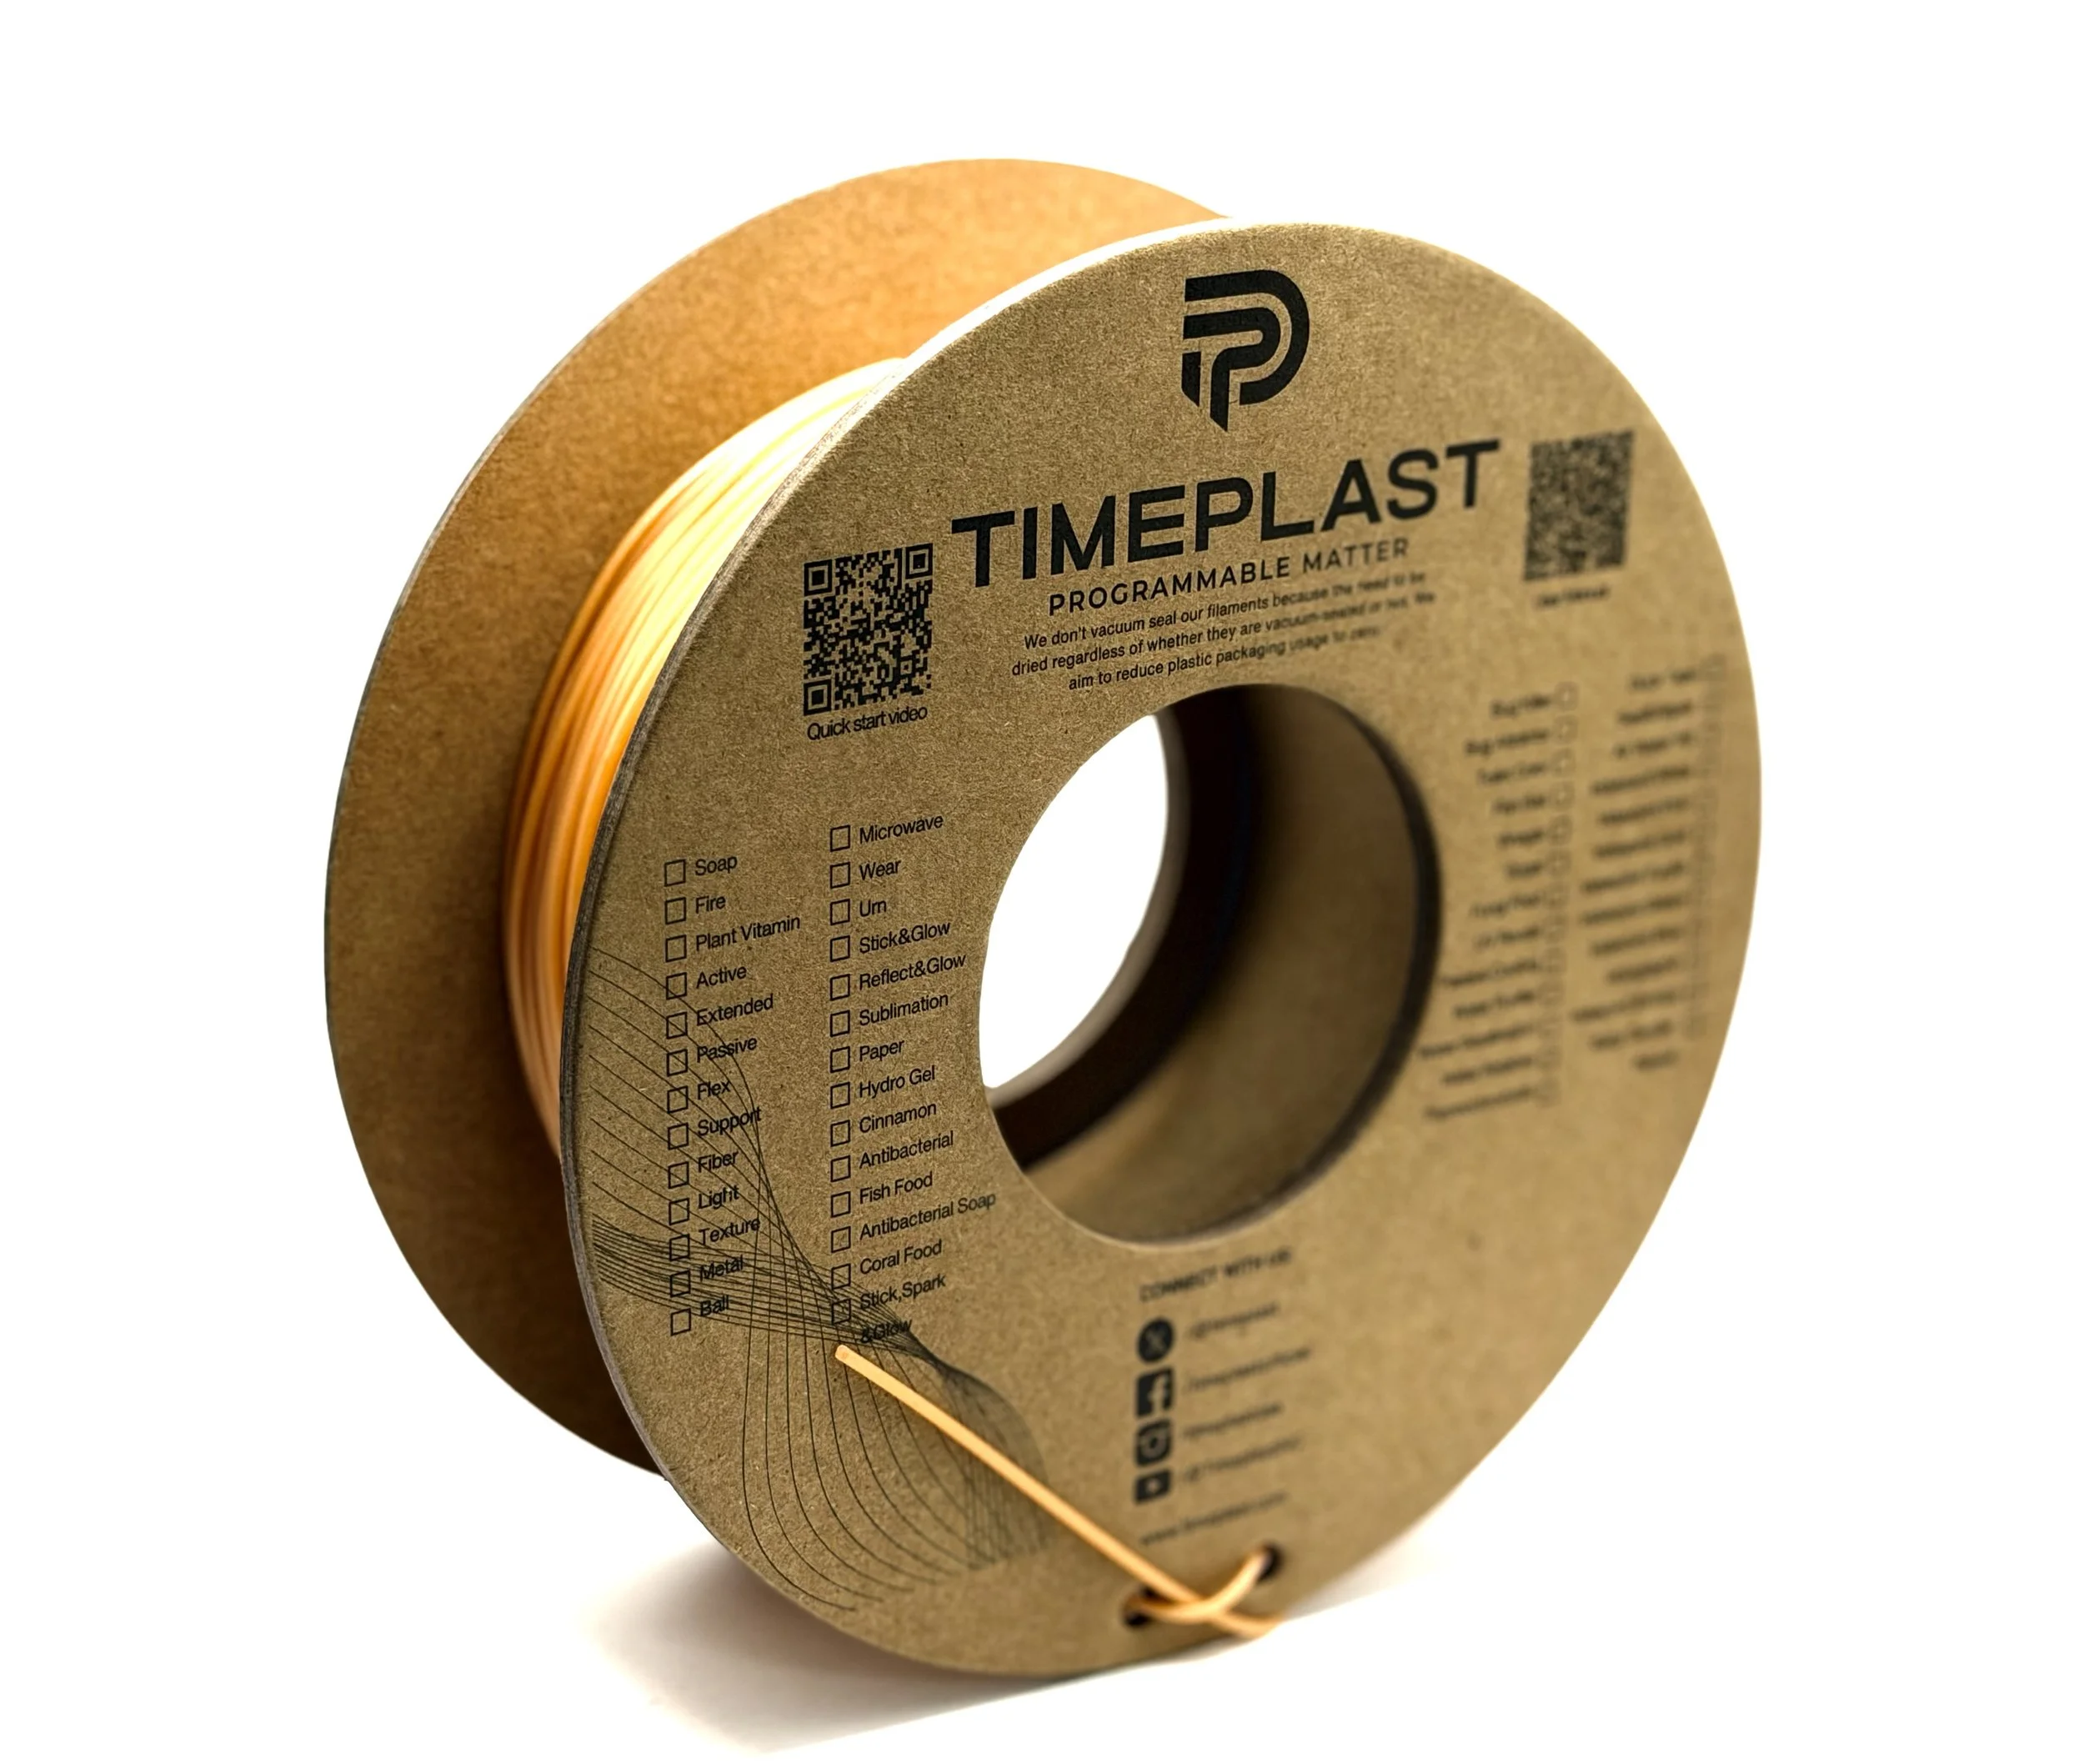
-
TimeMass Texture is a flexible, semi-water-soluble filament that temporarily becomes sticky upon a quick dip in water so that it can then be covered in any powder material, altering 100% of its texture, and making it a non-plastic feel print.
After successfully printing your object, submerge it in water for 2 to 5 seconds, then briefly dry it. Next, coat it with your chosen powder to create the desired texture—for example, stone powder for a stone-like appearance.
If you want a thicker texture layer, leave the object in water for a longer period and dry it less, allowing the material to absorb and retain more of the powder.
Once coated, use a paper towel to remove any excess powder. After 48 hours, you can refine the texture further with light sandpaper to achieve the final desired finish.
Surface treatment compatibility: The sticky surface can bond with fine powders, creating a textured, non-plastic finish.
Need Ideas? Here You Go:
Hyper-realistic models: Print objects, then coat them with fine materials (sand, dirt, stone powder) to create ultra-realistic terrain, fossils, or artifacts.
Naturally degradable textures: Print and coat objects with benign materials for natural-looking prototypes.
Anti-plastic aesthetic: Produce objects that feel organic by layering them with non-plastic textures like wood dust, chalk, or minerals.
Special effects & cosplay: Create lightweight, flexible armor or props that look like solid stone or metal.
Medical & ergonomic surfaces: Create handles or grips that become naturally textured when exposed to moisture, improving grip without synthetic rubber.
-
Click here to access our new and improved TimeMass GPT Assistant. Just tell it your printer model and the TimeMass filament you're using—it will instantly recommend the exact parameters you need to start printing successfully.
1. Introduction
These parameters are designed to help avoid printing issues; however, temperatures and speed timings can be adjusted based on your specific goals. For example, if you prefer a less rigid result, we recommend using a lower temperature. This section outlines a complete slicing and printing profile for TimeMass Texture, tailored for printers with a 0.8 mm nozzle. If the print is not being successful, please lower the nozzle temperature by 10°C and start over until an optimal print is achieved. Please check the manual for printing parameters.2. Temperature Settings
2.aNozzle Temperature: 230°C — Optimal for flowability while avoiding decomposition (which begins around 250°C).
2.bBed Temperature: 75°C — Ensures strong first-layer adhesion and prevents moisture bubbling.
2.cNozzle Temperature Range: 230–245°C — Timeplast melts around 165°C but prints best at 240°C for precise viscosity control.3. Cooling Settings
3.aNo Cooling for First Layers: 3 layers — Prevents shrinkage due to rapid cooling of moisture-rich filament.
3.bFan Minimum Speed: 0% for the first 100 seconds — Allows heat retention during early layers.
3.cFan Maximum Speed: 15% starting at 8 seconds — Avoids overcooling that can lead to warping.
3.dKeep Fan Always On: OFF — Allows vapor to escape and avoids internal fogging.
3.eSlow Down for Cooling: ON — Improves surface finish with controlled cooling.
3.fForce Cooling for Overhangs: OFF — Overcooling can deform bridges in Timeplast.
3.gFan for Overhangs: 15% — Only for essential cooling in complex areas.
3.hPre-Start Fan Time: 2 seconds — Minimizes pressure differential during the first layer.4. Volumetric Flow
4.aMax Volumetric Speed: 12 mm³/s — Based on a melt flow index of ~15 g/10min, allows high-speed printing.
4.bRamming Speed: 3 mm³/s — Prevents bubbles or popping from pressure spikes.5. Retraction and Flow
5.aRetraction Distance: 0.4 mm — Minimal retraction required for soft filaments to avoid stringing.
5.bRetraction Speed: 15 mm/s — Slow enough to avoid pulling molten plastic.
5.cPressure Advance: 0.05 — Compensates for nozzle lag at high flow rates.
5.dFlow Ratio: 92% — Slight under-extrusion avoids swelling and surface artifacts.6. Precision Settings
6.aGap Closing Radius: 0.1 mm — Tolerant of gaps in thicker walls.
6.bArc Fitting: ON — Reduces G-code size and smooths curve transitions.
6.cElephant Foot Compensation: 0.1 mm — Offsets squishing in the first layer caused by large bead sizes.7. Walls and Shells
7.aWall Loops: 2 — Minimum for strength when using a 0.8 mm nozzle.
7.bDetect Thin Walls: ON — Ensures tight geometries aren’t skipped.
7.cTop/Bottom Shell Layers: 3 — Provides good coverage; increase if watertightness is needed.
7.dTop/Bottom Thickness: 1.2 mm — Equals 1.5x the nozzle size for solid strength.
7.eTop/Bottom Pattern: Monotonic — Distributes tension evenly and improves surface finish.8. Geometry and Movement
8.aWall Order: Inner before Outer — Creates cleaner outer surfaces.
8.bInfill First: OFF — Maintains precise outer dimensions.
8.cSmooth Speed Transition: ON — Prevents ringing caused by abrupt speed changes.
8.dSmooth Coefficient: 80 — Ideal damping for soft materials.
8.eAvoid Crossing Wall: ON — Minimizes stringing across part walls.
8.fMax Detour for Crossing: 10 mm or 5% — Balances time with print cleanliness.9. Layer and Width Settings
9.aLayer Height: 0.3 mm — Optimal for strength and resolution using a 0.8 mm nozzle.
9.bInitial Layer Height: 0.35 mm — Slightly higher to improve adhesion.
9.cLine Widths (all): 0.8 mm — Matches nozzle diameter for consistent extrusion.10. Seam Settings
10.aSeam Position: Aligned or Back — Use aligned for mechanical consistency, back for visual appeal.
10.bSmart Scarf Seam: ON — Automatically adjusts seam location to reduce visual impact.
10.cSeam Angle: 155° — Standard seam angle for clean transitions.
10.dSeam Steps: 10 — Smooths seam path and improves visual finish.11. Infill Settings
11.aWall/Infill Overlap: 10% — Prevents infill from deforming soft exterior walls.
11.bInfill Combination: ON — Consolidates paths for efficiency.
11.cDetect Floating Shells: ON — Ensures unsupported vertical structures are printed reliably.
11.dSparse Infill Density: 20–25% — Balanced rigidity vs. material use.
11.eSparse Pattern: Grid — Stable and efficient for flexible geometries.12. Speed Settings
12.aTravel: 160 mm/s — Fast but safe against backlash.
12.bInitial Layer: 15 mm/s — Prevents nozzle from skimming and ensures bed adhesion.
12.cOuter Wall: 60 mm/s — Controlled speed for surface quality.
12.dInner Wall: 90 mm/s — Slightly faster without compromising control.
12.eSmall Perimeter: 35 mm/s — Reduced speed for detailed geometry.
12.fTop Surface: 40 mm/s — Improves finish on topmost layers.
12.gInfill: 100–120 mm/s — Takes advantage of high flowability.13. Acceleration Settings
13.aNormal Print: 2000 mm/s² — Prevents ringing in soft filaments.
13.bTravel: 4000 mm/s² — Enables fast movement without harsh transitions.
13.cInitial Layer: 300 mm/s² — Gentle movement prevents lifting from the bed.
13.dOuter Wall: 1500 mm/s² — Improves outer surface clarity.
13.eInner Wall: 2000 mm/s² — Balanced for structural components.
13.fTop Surface: 1500 mm/s² — Ensures smooth detailing.14. Adhesion and Brims
14.aSkirt Loops: 2 — Helps prime nozzle and start cleanly.
14.bBrim Width: 6 mm — Helps hold soft materials down.
14.cBrim Gap: 0.15 mm — Allows for easy removal without tearing.15. Prime Tower and Flush Settings
15.aPrime Tower: ON — Purges moisture and early flow inconsistencies.
15.bTower Width: 40 mm — Prevents collapse due to heat.
15.cBrim Width (Tower): 4 mm — Adds stability to the purge base.
15.dFlush Into Support: ON — Discards unwanted early flow safely.16. G-Code Start Script
M900 K0.05 ; Pressure Advance M106 S0 ; Fan off G92 E0 G1 E15 F300 ; purge line G92 E0
17. Additional Notes
17.aDry filament at 155 F for 2 hours before use.
17.bStore with desiccant.
17.cKeep extruder door open to allow vapor to escape.
17.dAvoid long dwell times at high temperatures.If you need any other assistance, feel free to reach out to us anytime at timeplast@timeplast.com — we’ll be happy to help.
Free U.S. standard shipping on orders of 5+ spools!
Scientific Exploration
Fiber
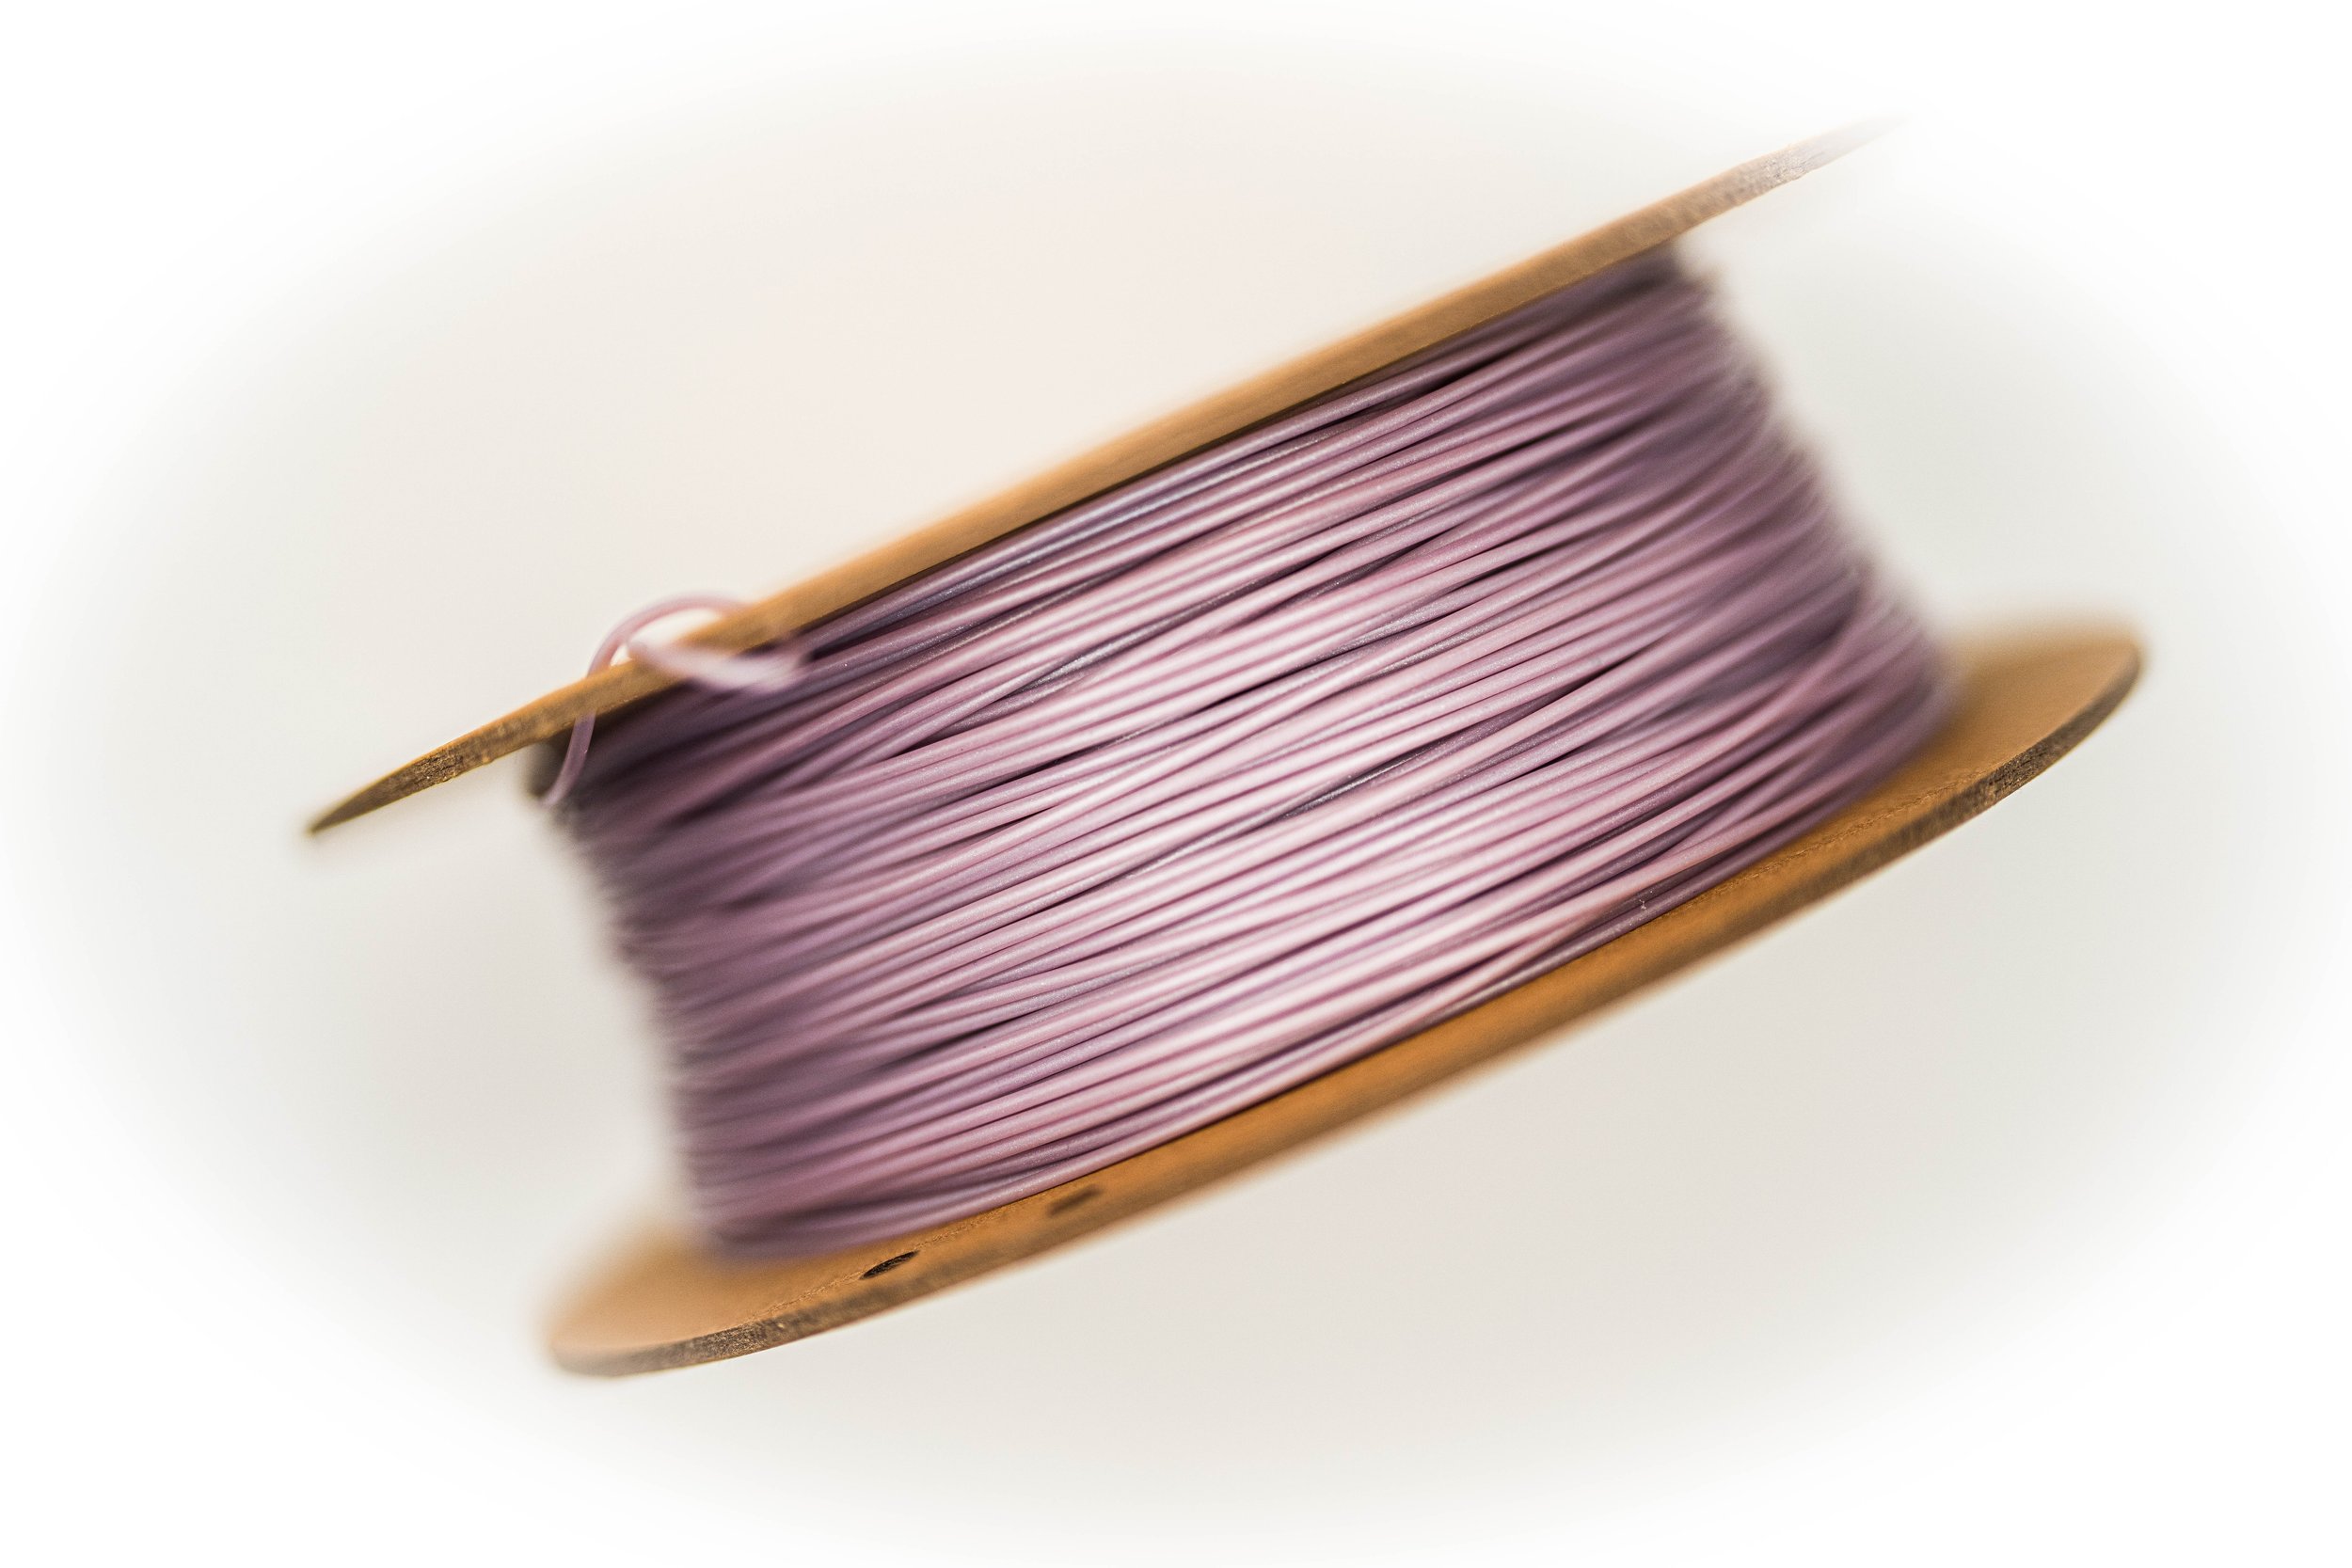
-
TimeMass Fiber incorporates sacrificial polymer technology, which enables specific portions of the material to dissolve in a controlled manner. This feature is especially valuable in 3D printed soft fabrics, due to the small diameter of the remaining fibers. It is also used for advanced manufacturing and prototyping, as it allows for internal embedded supports, temporary reinforcements, or multi-material prints that transition over time.
After successfully printing an intricate fabric-like object using our TimeMass Fiber filament, you’ll need to submerge it in water for a period directly proportional to the softness you want to achieve.
For very soft fabrics, soak the object for 24 to 48 hours, depending on its thickness. The longer it remains submerged, the more of the sacrificial polymer will dissolve, leaving behind finer and more delicate fibers.
After the water treatment, it’s crucial to properly dry the material to finalize its structure. You can air-dry it in the sun or use a food dehydrator for a controlled process. The level of drying will directly impact the final texture—the more it dries, the firmer it becomes.
Mastering this filament involves experimentation, as balancing water exposure and drying time allows you to tailor the fabric’s softness to your specific needs and creative ideas.
How Sacrificial Polymer Technology Works in Time-Mass Fiber
Dual-Phase Composition – The filament consists of a durable, fiber-reinforced phase and a strategically embedded sacrificial polymer that weakens under water.
Post-Processing Activation – After printing, the sacrificial polymer can be removed through dissolution, thermal degradation, or mechanical peeling, leaving behind the intended final structure.
Self-Optimizing Material – The controlled removal of the sacrificial polymer can reduce weight, create internal channels, or improve flexibility in certain regions of the printed object.
Enhanced Printability – This technology ensures complex geometries print more reliably by integrating internal support structures that disappear when no longer needed.
Need Ideas? Here You Go:
Structural Components – Ideal for lightweight but strong or very soft parts in aerospace, automotive, and robotics. Depending on the sacrificial treatment.
Load-Bearing Prototypes – Useful for creating prototypes that need mechanical stress testing.
Sports Equipment & Protective Gear – Can be used in helmets, padding, and high-impact sports gear.
Medical Devices & Braces – Suitable for orthopedic supports and custom medical applications.
High-Performance Tooling – Can be used in jigs, fixtures, and manufacturing tools that require resilience.
Sustainable Consumer Products – Could be applied in eco-friendly furniture, accessories, or industrial design projects.
-
Click here to access our new and improved TimeMass GPT Assistant. Just tell it your printer model and the TimeMass filament you're using—it will instantly recommend the exact parameters you need to start printing successfully.
These parameters are designed to help avoid printing issues; however, temperatures and speed timings can be adjusted based on your specific goals. For example, if you prefer a less rigid result, we recommend using a lower temperature. This is the printing reference for TimeMass Fiber filament, tested on the Bambu Labs A1 printer, and optimized for 0.8 mm nozzles. TimeMass Fiber is more thermally sensitive and features a dual-phase structure, which emits more vapor during printing. It benefits from careful temperature ramping and reduced internal pressure. All settings are specifically optimized to reduce bubbling, fogging, and material instability. If the print fails, it is recommended to lower the nozzle temperature by 10°C and restart until optimal results are achieved. Please check the manual for printing parameters.
Temperature Settings : 0.8 mm nozzle should be set to 235°C, helping vapor escape from the larger filament volume without causing clogs. A textured PEI plate is required for adhesion—avoid smooth plates unless properly primed.
Cooling Settings should disable cooling for the first 3 layers to prevent fog formation under sensors. Set the fan minimum speed to 0% for the first 100 seconds to allow vapor to escape without becoming trapped. The maximum fan speed should be limited to 10–15%, preventing filament oval deformation. Keep the fan always off to avoid thermal shock and material stiffening mid-print. Do not force cooling on overhangs, and use only minimal airflow (10–15%)for structural overhangs.
Maximum Volumetric Flow varies per nozzle. For 0.2 mm, keep the flow at 1.5 mm³/s, which is sensitive to clogging due to low melt strength. For 0.4 mm, set it at 4 mm³/s, balancing for higher viscosity variance. The 0.6 mm should run at 6 mm³/s, avoiding pressure spikes and bubbles, and the 0.8 mm at 9 mm³/s, preventing vapor entrapment and melt lag. Ramming speed should be adjusted between 1–3 mm³/s depending on your purge tower strategy.
Retraction and Pressure Advance should be configured as follows: 0.8 mm nozzle performs best with 0.4 mm retraction, 15 mm/s, and 0.055 pressure advance. These values help manage off-gassing during slowdowns.
For Layer Height and Line Width, use 0.12 mm layer height, 0.18 mm initial layer, and 0.25 mm line width for the 0.2 mm nozzle. For 0.4 mm: 0.2 mm height, 0.22 mm initial, and 0.42 mm width. For 0.6 mm: 0.3 mm height, 0.32 mm initial, and 0.6 mm width. And for 0.8 mm: 0.3 mm height, 0.35 mm initial, and 0.8 mm width.
In terms of Wall, Shell, and Infill Settings, use 3 wall loops and 4 top/bottom shells for 0.2 mm and 0.4 mm nozzles, and 2 wall loops and 3 shells for 0.6 mm and 0.8 mm. Set top/bottom thickness to 1 mm for smaller nozzles and 1.2 mm for larger ones. Sparse infill density should be 30% for 0.2 mm, 25% for 0.4 mm, and 20–25% for 0.6 mm and 0.8 mm. These configurations support vapor containment inside internal zones.
Speed and Acceleration settings are as follows: For travel speed, use 100 mm/s (0.2 mm), 130 mm/s (0.4 mm), 140 mm/s (0.6 mm), and 150 mm/s (0.8 mm). Set outer wall speed to 30 mm/s, 35 mm/s, 45 mm/s, and 55 mm/s, respectively. Infill speed should be 50 mm/s to 100 mm/s, depending on nozzle size. For acceleration, print acceleration should range from 1000 mm/s² (0.2 mm) to 1800 mm/s² (0.8 mm), and travel acceleration from 2500 mm/s² to 4000 mm/s². These values are calibrated to reduce vibration and pressure surges.
For Adhesion and Brims, use 2 skirt loops to purge water vapor early. Set the brim width between 4 and 6 mm to stabilize softened edges during print start. A brim gap of 0.15 mm ensures easy release after printing.
Under Flush, Prime, and G-code, the use of a prime tower is recommended due to the heavy vapor released at the start of the print. Suggested start G-code is:
M900 K[PA] ; Pressure Advance M106 S0 ; Fan off G92 E0 G1 E15 F300 ; purge line G92 E0
Replace [PA] with the pressure advance value corresponding to your nozzle.
Lastly, parameters consistent across all nozzles include: Bed temperature of 60°C with a textured PEI bed, "Avoid crossing walls" set to ON, "Smart seam" ON, a cooling delay of 3 layers, and brim/skirt defaults remain functional. Always dry the filament before use, and it is recommended to print with the door open for optimal ventilation.
If you need any other assistance, feel free to reach out to us anytime at timeplast@timeplast.com — we’ll be happy to help.
Free U.S. standard shipping on orders of 5+ spools!
Hydro Gel
-
A moisture-activated, shape-retaining filament that turns into a soft gel after printing. Engineered with Timeplast’s proprietary hydrogel matrix, it absorbs water post-print to become pliable, squishy, and tactile—perfect for soft robotics, aquatic enrichment tools, or sensory tech.
Print. Soak. Transform.
How it works:
Hydrophilic polymer blends absorb and lock in water, expanding the printed structure up to 3x its original volume.
Soak time = behavior – Customize squishiness and size by controlling the submersion duration (1–4 hours).
No solvents. No post-processing. Just water-activated performance.
Core Material Composition:
Hydrogel Matrix: 75% – Creates gel-like consistency through water entrapment
Alcohol-based Polymers: 25% – Maintain structural form pre- and post-swelling
Tunable Softness:
1 hr soak = Slight flex
2–3 hr soak = Full gel feel
4 hr soak = Maximum expansion
Where to use it:
Soft robotics prototypes – Create compliant, adaptive components
Sensory toys – Print stress balls or squishy elements for therapy or fun
Aquarium enrichment – Submersible, gentle-texture objects for aquatic pets
Hydrophilic gaskets – Expands to form watertight seals
-
Click here to access our new and improved TimeMass GPT Assistant. Just tell it your printer model and the TimeMass filament you're using—it will instantly recommend the exact parameters you need to start printing successfully.
1. Introduction
These parameters are designed to help avoid printing issues; however, temperatures and speed timings can be adjusted based on your specific goals. For example, if you prefer a less rigid result, we recommend using a lower temperature. This section outlines a complete slicing and printing profile for TimeMass Hydro Gel, tailored for printers with a 0.8 mm nozzle. If the print is not being successful, please lower the nozzle temperature by 10°C and start over until an optimal print is achieved. Please check the manual for printing parameters with all the other nozzle sizes.2. Temperature Settings
2.aNozzle Temperature: 230°C — Optimal for flowability while avoiding decomposition (which begins around 250°C).
2.bBed Temperature: 75°C — Ensures strong first-layer adhesion and prevents moisture bubbling.
2.cNozzle Temperature Range: 230–245°C — Timeplast melts around 165°C but prints best at 240°C for precise viscosity control.3. Cooling Settings
3.aNo Cooling for First Layers: 3 layers — Prevents shrinkage due to rapid cooling of moisture-rich filament.
3.bFan Minimum Speed: 0% for the first 100 seconds — Allows heat retention during early layers.
3.cFan Maximum Speed: 15% starting at 8 seconds — Avoids overcooling that can lead to warping.
3.dKeep Fan Always On: OFF — Allows vapor to escape and avoids internal fogging.
3.eSlow Down for Cooling: ON — Improves surface finish with controlled cooling.
3.fForce Cooling for Overhangs: OFF — Overcooling can deform bridges in Timeplast.
3.gFan for Overhangs: 15% — Only for essential cooling in complex areas.
3.hPre-Start Fan Time: 2 seconds — Minimizes pressure differential during the first layer.4. Volumetric Flow
4.aMax Volumetric Speed: 12 mm³/s — Based on a melt flow index of ~15 g/10min, allows high-speed printing.
4.bRamming Speed: 3 mm³/s — Prevents bubbles or popping from pressure spikes.5. Retraction and Flow
5.aRetraction Distance: 0.4 mm — Minimal retraction required for soft filaments to avoid stringing.
5.bRetraction Speed: 15 mm/s — Slow enough to avoid pulling molten plastic.
5.cPressure Advance: 0.05 — Compensates for nozzle lag at high flow rates.
5.dFlow Ratio: 92% — Slight under-extrusion avoids swelling and surface artifacts.6. Precision Settings
6.aGap Closing Radius: 0.1 mm — Tolerant of gaps in thicker walls.
6.bArc Fitting: ON — Reduces G-code size and smooths curve transitions.
6.cElephant Foot Compensation: 0.1 mm — Offsets squishing in the first layer caused by large bead sizes.7. Walls and Shells
7.aWall Loops: 2 — Minimum for strength when using a 0.8 mm nozzle.
7.bDetect Thin Walls: ON — Ensures tight geometries aren’t skipped.
7.cTop/Bottom Shell Layers: 3 — Provides good coverage; increase if watertightness is needed.
7.dTop/Bottom Thickness: 1.2 mm — Equals 1.5x the nozzle size for solid strength.
7.eTop/Bottom Pattern: Monotonic — Distributes tension evenly and improves surface finish.8. Geometry and Movement
8.aWall Order: Inner before Outer — Creates cleaner outer surfaces.
8.bInfill First: OFF — Maintains precise outer dimensions.
8.cSmooth Speed Transition: ON — Prevents ringing caused by abrupt speed changes.
8.dSmooth Coefficient: 80 — Ideal damping for soft materials.
8.eAvoid Crossing Wall: ON — Minimizes stringing across part walls.
8.fMax Detour for Crossing: 10 mm or 5% — Balances time with print cleanliness.9. Layer and Width Settings
9.aLayer Height: 0.3 mm — Optimal for strength and resolution using a 0.8 mm nozzle.
9.bInitial Layer Height: 0.35 mm — Slightly higher to improve adhesion.
9.cLine Widths (all): 0.8 mm — Matches nozzle diameter for consistent extrusion.10. Seam Settings
10.aSeam Position: Aligned or Back — Use aligned for mechanical consistency, back for visual appeal.
10.bSmart Scarf Seam: ON — Automatically adjusts seam location to reduce visual impact.
10.cSeam Angle: 155° — Standard seam angle for clean transitions.
10.dSeam Steps: 10 — Smooths seam path and improves visual finish.11. Infill Settings
11.aWall/Infill Overlap: 10% — Prevents infill from deforming soft exterior walls.
11.bInfill Combination: ON — Consolidates paths for efficiency.
11.cDetect Floating Shells: ON — Ensures unsupported vertical structures are printed reliably.
11.dSparse Infill Density: 20–25% — Balanced rigidity vs. material use.
11.eSparse Pattern: Grid — Stable and efficient for flexible geometries.12. Speed Settings
12.aTravel: 160 mm/s — Fast but safe against backlash.
12.bInitial Layer: 15 mm/s — Prevents nozzle from skimming and ensures bed adhesion.
12.cOuter Wall: 60 mm/s — Controlled speed for surface quality.
12.dInner Wall: 90 mm/s — Slightly faster without compromising control.
12.eSmall Perimeter: 35 mm/s — Reduced speed for detailed geometry.
12.fTop Surface: 40 mm/s — Improves finish on topmost layers.
12.gInfill: 100–120 mm/s — Takes advantage of high flowability.13. Acceleration Settings
13.aNormal Print: 2000 mm/s² — Prevents ringing in soft filaments.
13.bTravel: 4000 mm/s² — Enables fast movement without harsh transitions.
13.cInitial Layer: 300 mm/s² — Gentle movement prevents lifting from the bed.
13.dOuter Wall: 1500 mm/s² — Improves outer surface clarity.
13.eInner Wall: 2000 mm/s² — Balanced for structural components.
13.fTop Surface: 1500 mm/s² — Ensures smooth detailing.14. Adhesion and Brims
14.aSkirt Loops: 2 — Helps prime nozzle and start cleanly.
14.bBrim Width: 6 mm — Helps hold soft materials down.
14.cBrim Gap: 0.15 mm — Allows for easy removal without tearing.15. Prime Tower and Flush Settings
15.aPrime Tower: ON — Purges moisture and early flow inconsistencies.
15.bTower Width: 40 mm — Prevents collapse due to heat.
15.cBrim Width (Tower): 4 mm — Adds stability to the purge base.
15.dFlush Into Support: ON — Discards unwanted early flow safely.16. G-Code Start Script
M900 K0.05 ; Pressure Advance M106 S0 ; Fan off G92 E0 G1 E15 F300 ; purge line G92 E0
17. Additional Notes
17.aDry filament at 155 F for 2 hours before use.
17.bStore with desiccant.
17.cKeep extruder door open to allow vapor to escape.
17.dAvoid long dwell times at high temperatures.If you need any other assistance, feel free to reach out to us anytime at timeplast@timeplast.com — we’ll be happy to help.
Free U.S. standard shipping on orders of 5+ spools!
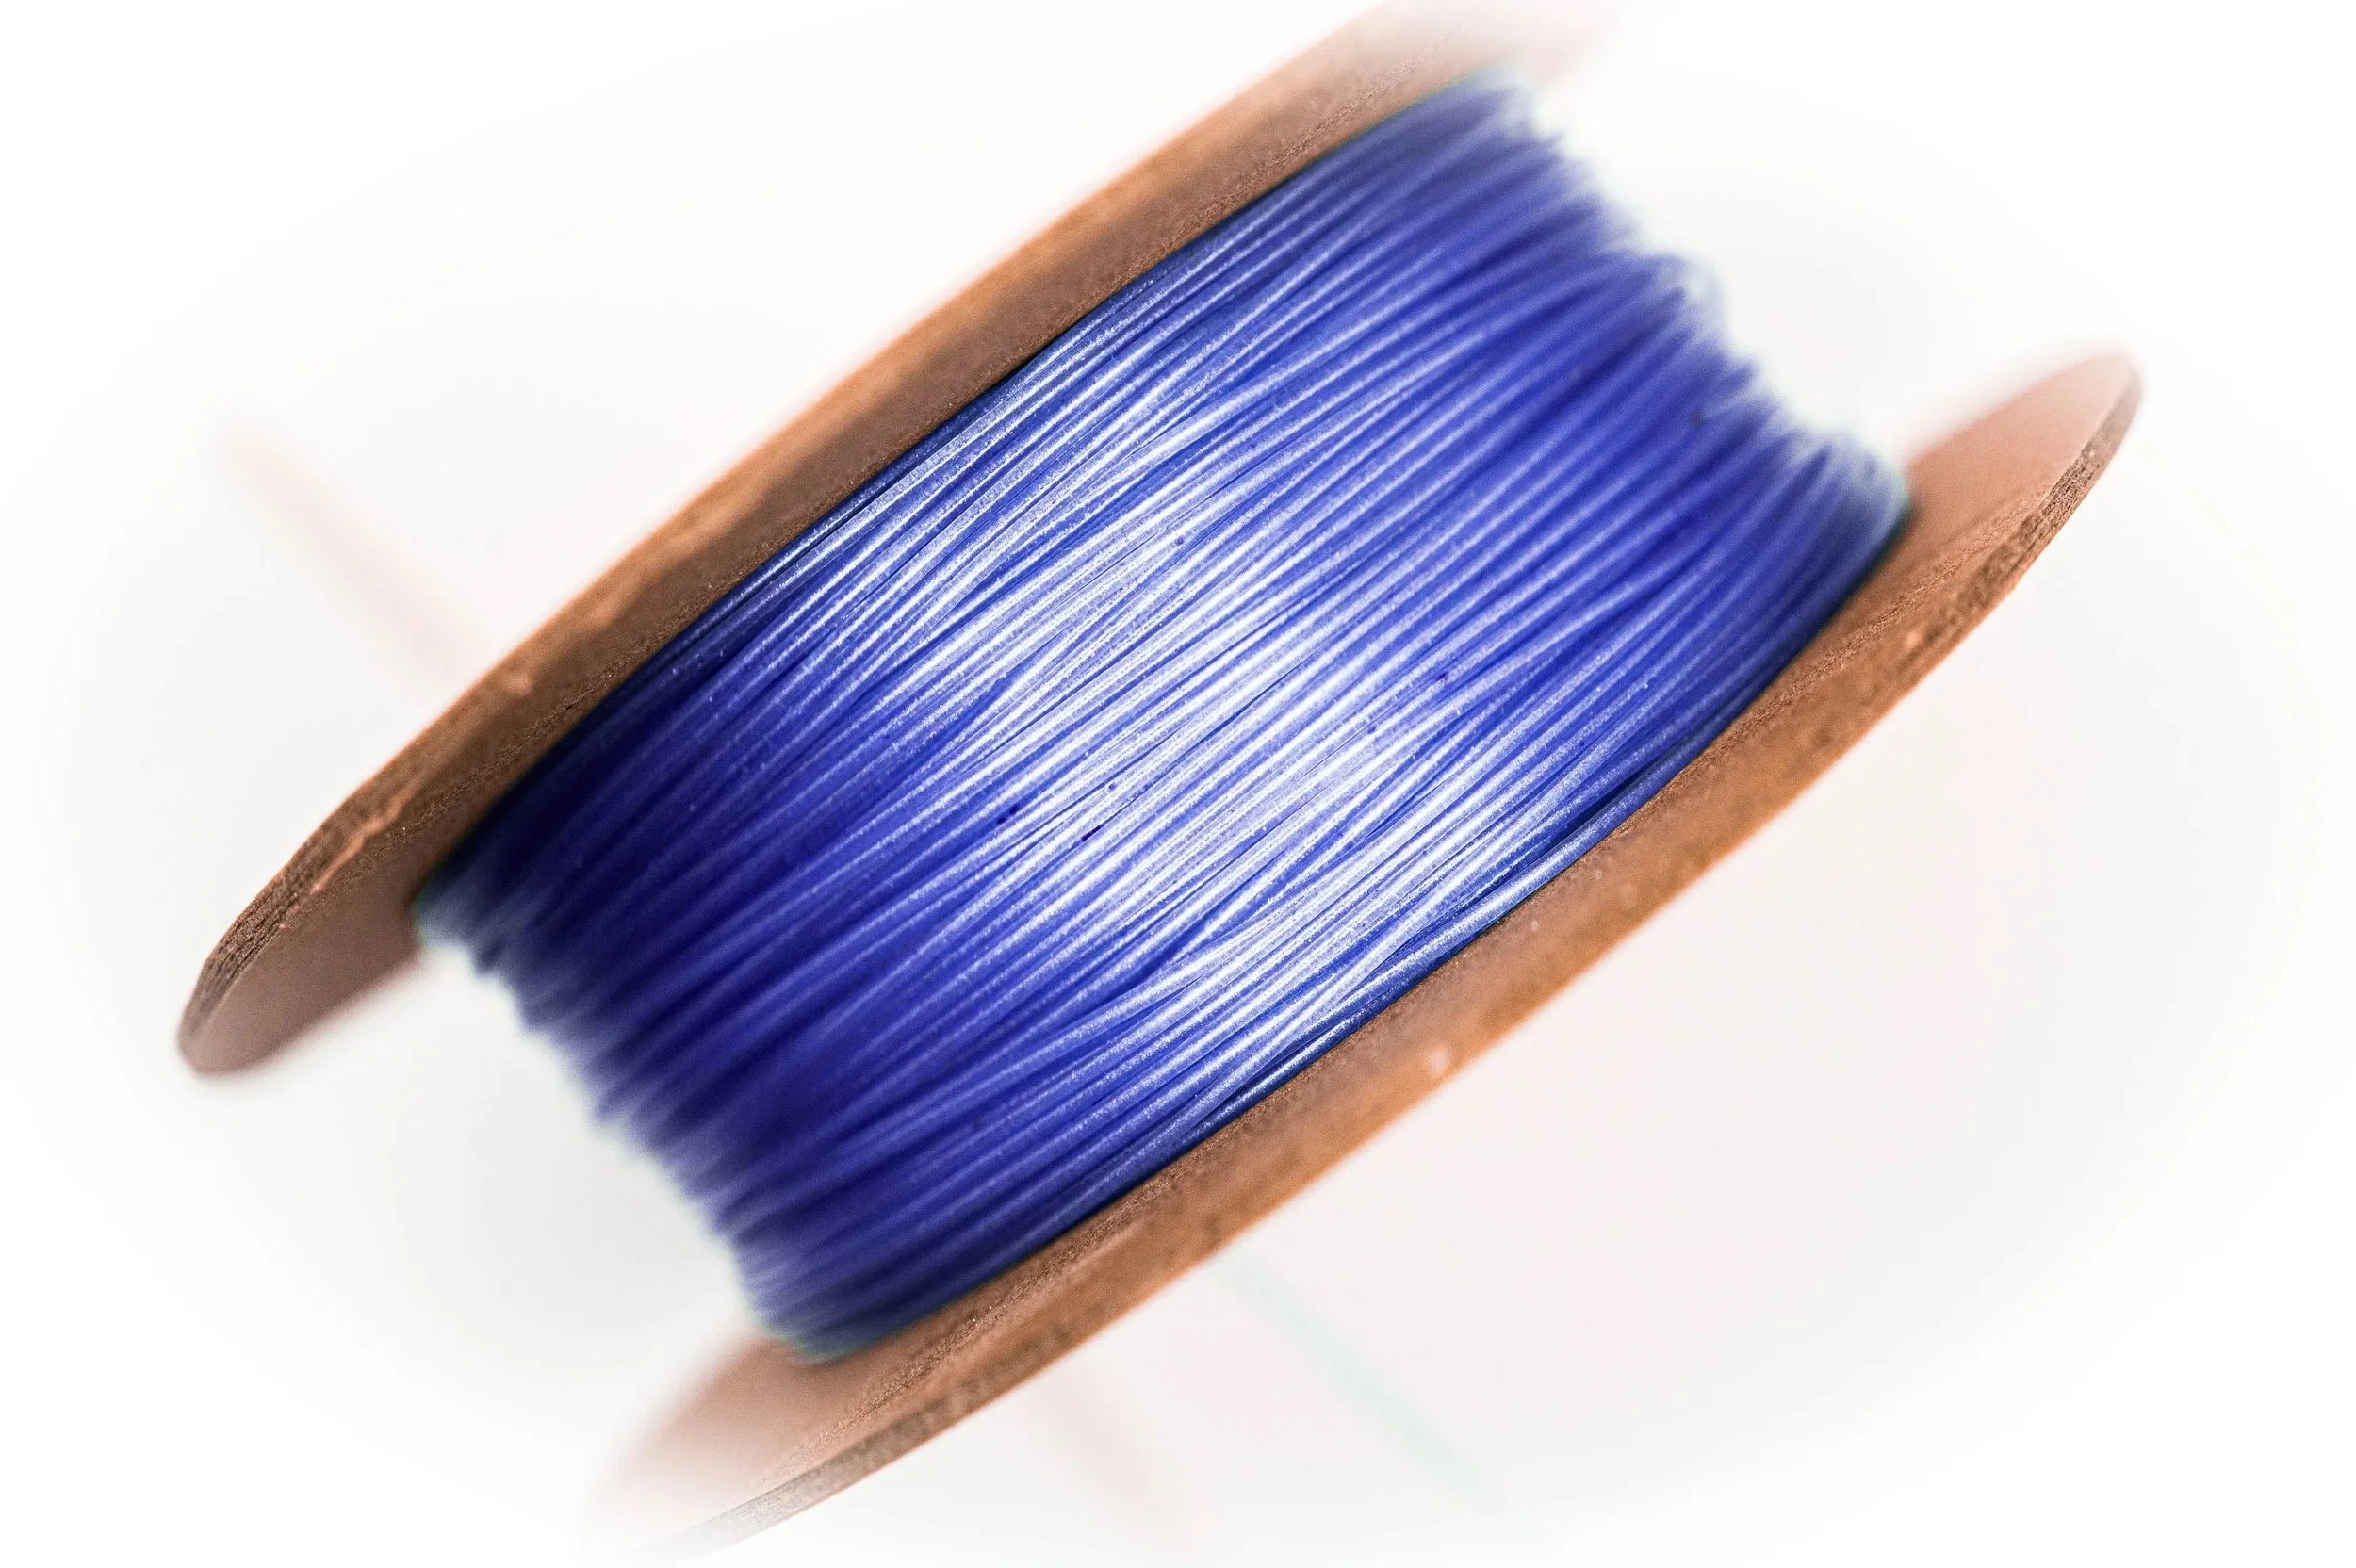
Passive Cooling
-
A water-loaded filament that acts like a printed chemical radiator. Once hydrated, it cools its surroundings through controlled evapotranspiration, using environmental heat as activation energy to release water vapor removing heat in the process, just like a radiator cools.
No fans. No circuits. Just dip in water and get chemical-powered cooling.
How it works:
The high water content stores thermal energy, while evaporation pulls heat from the air—reducing surrounding temperature by several degrees in small spaces where print sizes and its locations are purposefully designed.
Recharge weekly. Repeat endlessly.
Core Composition:
Water Content after hydration: 85% – Primary cooling medium
Porous Matrix: 15% – Facilitates slow, even evaporation
Where to use it:
Passive cooling tiles – Attach to walls, planters, or cases
Enclosures for electronics – Keep components cooler
Greenhouse regulators – Evaporative microclimate creation
Desktop science experiments – Visualize energy exchange
-
Click here to access our new and improved TimeMass GPT Assistant. Just tell it your printer model and the TimeMass filament you're using—it will instantly recommend the exact parameters you need to start printing successfully.
1. Introduction
These parameters are designed to help avoid printing issues; however, temperatures and speed timings can be adjusted based on your specific goals. For example, if you prefer a less rigid result, we recommend using a lower temperature. This section outlines a complete slicing and printing profile for TimeMass Passive Cooling, tailored for printers with a 0.8 mm nozzle. If the print is not being successful, please lower the nozzle temperature by 10°C and start over until an optimal print is achieved. Please check the manual for printing parameters.2. Temperature Settings
2.aNozzle Temperature: 230°C — Optimal for flowability while avoiding decomposition (which begins around 250°C).
2.bBed Temperature: 75°C — Ensures strong first-layer adhesion and prevents moisture bubbling.
2.cNozzle Temperature Range: 230–245°C — Timeplast melts around 165°C but prints best at 240°C for precise viscosity control.3. Cooling Settings
3.aNo Cooling for First Layers: 3 layers — Prevents shrinkage due to rapid cooling of moisture-rich filament.
3.bFan Minimum Speed: 0% for the first 100 seconds — Allows heat retention during early layers.
3.cFan Maximum Speed: 15% starting at 8 seconds — Avoids overcooling that can lead to warping.
3.dKeep Fan Always On: OFF — Allows vapor to escape and avoids internal fogging.
3.eSlow Down for Cooling: ON — Improves surface finish with controlled cooling.
3.fForce Cooling for Overhangs: OFF — Overcooling can deform bridges in Timeplast.
3.gFan for Overhangs: 15% — Only for essential cooling in complex areas.
3.hPre-Start Fan Time: 2 seconds — Minimizes pressure differential during the first layer.4. Volumetric Flow
4.aMax Volumetric Speed: 12 mm³/s — Based on a melt flow index of ~15 g/10min, allows high-speed printing.
4.bRamming Speed: 3 mm³/s — Prevents bubbles or popping from pressure spikes.5. Retraction and Flow
5.aRetraction Distance: 0.4 mm — Minimal retraction required for soft filaments to avoid stringing.
5.bRetraction Speed: 15 mm/s — Slow enough to avoid pulling molten plastic.
5.cPressure Advance: 0.05 — Compensates for nozzle lag at high flow rates.
5.dFlow Ratio: 92% — Slight under-extrusion avoids swelling and surface artifacts.6. Precision Settings
6.aGap Closing Radius: 0.1 mm — Tolerant of gaps in thicker walls.
6.bArc Fitting: ON — Reduces G-code size and smooths curve transitions.
6.cElephant Foot Compensation: 0.1 mm — Offsets squishing in the first layer caused by large bead sizes.7. Walls and Shells
7.aWall Loops: 2 — Minimum for strength when using a 0.8 mm nozzle.
7.bDetect Thin Walls: ON — Ensures tight geometries aren’t skipped.
7.cTop/Bottom Shell Layers: 3 — Provides good coverage; increase if watertightness is needed.
7.dTop/Bottom Thickness: 1.2 mm — Equals 1.5x the nozzle size for solid strength.
7.eTop/Bottom Pattern: Monotonic — Distributes tension evenly and improves surface finish.8. Geometry and Movement
8.aWall Order: Inner before Outer — Creates cleaner outer surfaces.
8.bInfill First: OFF — Maintains precise outer dimensions.
8.cSmooth Speed Transition: ON — Prevents ringing caused by abrupt speed changes.
8.dSmooth Coefficient: 80 — Ideal damping for soft materials.
8.eAvoid Crossing Wall: ON — Minimizes stringing across part walls.
8.fMax Detour for Crossing: 10 mm or 5% — Balances time with print cleanliness.9. Layer and Width Settings
9.aLayer Height: 0.3 mm — Optimal for strength and resolution using a 0.8 mm nozzle.
9.bInitial Layer Height: 0.35 mm — Slightly higher to improve adhesion.
9.cLine Widths (all): 0.8 mm — Matches nozzle diameter for consistent extrusion.10. Seam Settings
10.aSeam Position: Aligned or Back — Use aligned for mechanical consistency, back for visual appeal.
10.bSmart Scarf Seam: ON — Automatically adjusts seam location to reduce visual impact.
10.cSeam Angle: 155° — Standard seam angle for clean transitions.
10.dSeam Steps: 10 — Smooths seam path and improves visual finish.11. Infill Settings
11.aWall/Infill Overlap: 10% — Prevents infill from deforming soft exterior walls.
11.bInfill Combination: ON — Consolidates paths for efficiency.
11.cDetect Floating Shells: ON — Ensures unsupported vertical structures are printed reliably.
11.dSparse Infill Density: 20–25% — Balanced rigidity vs. material use.
11.eSparse Pattern: Grid — Stable and efficient for flexible geometries.12. Speed Settings
12.aTravel: 160 mm/s — Fast but safe against backlash.
12.bInitial Layer: 15 mm/s — Prevents nozzle from skimming and ensures bed adhesion.
12.cOuter Wall: 60 mm/s — Controlled speed for surface quality.
12.dInner Wall: 90 mm/s — Slightly faster without compromising control.
12.eSmall Perimeter: 35 mm/s — Reduced speed for detailed geometry.
12.fTop Surface: 40 mm/s — Improves finish on topmost layers.
12.gInfill: 100–120 mm/s — Takes advantage of high flowability.13. Acceleration Settings
13.aNormal Print: 2000 mm/s² — Prevents ringing in soft filaments.
13.bTravel: 4000 mm/s² — Enables fast movement without harsh transitions.
13.cInitial Layer: 300 mm/s² — Gentle movement prevents lifting from the bed.
13.dOuter Wall: 1500 mm/s² — Improves outer surface clarity.
13.eInner Wall: 2000 mm/s² — Balanced for structural components.
13.fTop Surface: 1500 mm/s² — Ensures smooth detailing.14. Adhesion and Brims
14.aSkirt Loops: 2 — Helps prime nozzle and start cleanly.
14.bBrim Width: 6 mm — Helps hold soft materials down.
14.cBrim Gap: 0.15 mm — Allows for easy removal without tearing.15. Prime Tower and Flush Settings
15.aPrime Tower: ON — Purges moisture and early flow inconsistencies.
15.bTower Width: 40 mm — Prevents collapse due to heat.
15.cBrim Width (Tower): 4 mm — Adds stability to the purge base.
15.dFlush Into Support: ON — Discards unwanted early flow safely.16. G-Code Start Script
M900 K0.05 ; Pressure Advance M106 S0 ; Fan off G92 E0 G1 E15 F300 ; purge line G92 E0
17. Additional Notes
17.aDry filament at 155 F for 2 hours before use.
17.bStore with desiccant.
17.cKeep extruder door open to allow vapor to escape.
17.dAvoid long dwell times at high temperatures.If you need any other assistance, feel free to reach out to us anytime at timeplast@timeplast.com — we’ll be happy to help.
Free U.S. standard shipping on orders of 5+ spools!
Meaningful Prints
Urn

-
The passing of a loved one is a moment of profound loss, but also an opportunity to honor their life in a way that is as unique as they were.
TimeMass - Urn is a thoughtfully crafted 4D-filament, designed to provide a respectful, beautiful, and meaningful way to create a custom urn for someone dear.
Imagine a farewell that merges remembrance with renewal—an urn that floats gently upon the water, carrying the ashes of a loved one under the night sky. As it dissolves, it leaves behind something greater: Lotus seeds, symbolizing rebirth and enlightenment across many cultures, and Kelp spores, fostering new marine life in the waters that embrace them.
Crafted from planet-neutral, water-soluble materials, TimeMass - Urn is infused with:
Lotus Seeds (Nelumbo nucifera) – representing purity, spiritual awakening, and the cycle of life.
Kelp Spores (Macrocystis pyrifera) – nourishing marine environments, sustaining underwater ecosystems.
Crushed Coral (Calcium Carbonate) – aiding reef regeneration and symbolizing eternal connection to the ocean.If combined with TimeMass Fire, Light, or Glow, you can create a one-of-a-kind urn that glows softly in the twilight, offering a final radiant tribute before gracefully dissolving into the water.
As TimeMass - Urn gently breaks down, it disperses its embedded elements to support aquatic ecosystems—a final act of giving, turning loss into renewal, and remembrance into life.
For those seeking a farewell as beautiful as the life it honors, TimeMass - Urn offers a serene, unforgettable goodbye—one that echoes in the waters and hearts forever.
Need Ideas? Here You Go:
Floating urns for ceremonies, allowing ashes to be released into natural waters.
Commemorative sculptures that gradually dissolve over time, leaving no waste.
Aquatic life-support structures, such as artificial reef foundations or eco-art projects.
Eco-conscious time capsules that release elements into the water when needed.
-
Click here to access our new and improved TimeMass GPT Assistant. Just tell it your printer model and the TimeMass filament you're using—it will instantly recommend the exact parameters you need to start printing successfully.
1. Introduction
These parameters are designed to help avoid printing issues; however, temperatures and speed timings can be adjusted based on your specific goals. For example, if you prefer a less rigid result, we recommend using a lower temperature. This section outlines a complete slicing and printing profile for TimeMass Urn, tailored for printers with a 0.8 mm nozzle. If the print is not being successful, please lower the nozzle temperature by 10°C and start over . Please check the manual for printing parameters.2. Temperature Settings
2.aNozzle Temperature: 230°C — Optimal for flowability while avoiding decomposition (which begins around 250°C).
2.bBed Temperature: 75°C — Ensures strong first-layer adhesion and prevents moisture bubbling.
2.cNozzle Temperature Range: 230–245°C — Timeplast melts around 165°C but prints best at 240°C for precise viscosity control.3. Cooling Settings
3.aNo Cooling for First Layers: 3 layers — Prevents shrinkage due to rapid cooling of moisture-rich filament.
3.bFan Minimum Speed: 0% for the first 100 seconds — Allows heat retention during early layers.
3.cFan Maximum Speed: 15% starting at 8 seconds — Avoids overcooling that can lead to warping.
3.dKeep Fan Always On: OFF — Allows vapor to escape and avoids internal fogging.
3.eSlow Down for Cooling: ON — Improves surface finish with controlled cooling.
3.fForce Cooling for Overhangs: OFF — Overcooling can deform bridges in Timeplast.
3.gFan for Overhangs: 15% — Only for essential cooling in complex areas.
3.hPre-Start Fan Time: 2 seconds — Minimizes pressure differential during the first layer.4. Volumetric Flow
4.aMax Volumetric Speed: 12 mm³/s — Based on a melt flow index of ~15 g/10min, allows high-speed printing.
4.bRamming Speed: 3 mm³/s — Prevents bubbles or popping from pressure spikes.5. Retraction and Flow
5.aRetraction Distance: 0.4 mm — Minimal retraction required for soft filaments to avoid stringing.
5.bRetraction Speed: 15 mm/s — Slow enough to avoid pulling molten plastic.
5.cPressure Advance: 0.05 — Compensates for nozzle lag at high flow rates.
5.dFlow Ratio: 92% — Slight under-extrusion avoids swelling and surface artifacts.6. Precision Settings
6.aGap Closing Radius: 0.1 mm — Tolerant of gaps in thicker walls.
6.bArc Fitting: ON — Reduces G-code size and smooths curve transitions.
6.cElephant Foot Compensation: 0.1 mm — Offsets squishing in the first layer caused by large bead sizes.7. Walls and Shells
7.aWall Loops: 2 — Minimum for strength when using a 0.8 mm nozzle.
7.bDetect Thin Walls: ON — Ensures tight geometries aren’t skipped.
7.cTop/Bottom Shell Layers: 3 — Provides good coverage; increase if watertightness is needed.
7.dTop/Bottom Thickness: 1.2 mm — Equals 1.5x the nozzle size for solid strength.
7.eTop/Bottom Pattern: Monotonic — Distributes tension evenly and improves surface finish.8. Geometry and Movement
8.aWall Order: Inner before Outer — Creates cleaner outer surfaces.
8.bInfill First: OFF — Maintains precise outer dimensions.
8.cSmooth Speed Transition: ON — Prevents ringing caused by abrupt speed changes.
8.dSmooth Coefficient: 80 — Ideal damping for soft materials.
8.eAvoid Crossing Wall: ON — Minimizes stringing across part walls.
8.fMax Detour for Crossing: 10 mm or 5% — Balances time with print cleanliness.9. Layer and Width Settings
9.aLayer Height: 0.3 mm — Optimal for strength and resolution using a 0.8 mm nozzle.
9.bInitial Layer Height: 0.35 mm — Slightly higher to improve adhesion.
9.cLine Widths (all): 0.8 mm — Matches nozzle diameter for consistent extrusion.10. Seam Settings
10.aSeam Position: Aligned or Back — Use aligned for mechanical consistency, back for visual appeal.
10.bSmart Scarf Seam: ON — Automatically adjusts seam location to reduce visual impact.
10.cSeam Angle: 155° — Standard seam angle for clean transitions.
10.dSeam Steps: 10 — Smooths seam path and improves visual finish.11. Infill Settings
11.aWall/Infill Overlap: 10% — Prevents infill from deforming soft exterior walls.
11.bInfill Combination: ON — Consolidates paths for efficiency.
11.cDetect Floating Shells: ON — Ensures unsupported vertical structures are printed reliably.
11.dSparse Infill Density: 20–25% — Balanced rigidity vs. material use.
11.eSparse Pattern: Grid — Stable and efficient for flexible geometries.12. Speed Settings
12.aTravel: 160 mm/s — Fast but safe against backlash.
12.bInitial Layer: 15 mm/s — Prevents nozzle from skimming and ensures bed adhesion.
12.cOuter Wall: 60 mm/s — Controlled speed for surface quality.
12.dInner Wall: 90 mm/s — Slightly faster without compromising control.
12.eSmall Perimeter: 35 mm/s — Reduced speed for detailed geometry.
12.fTop Surface: 40 mm/s — Improves finish on topmost layers.
12.gInfill: 100–120 mm/s — Takes advantage of high flowability.13. Acceleration Settings
13.aNormal Print: 2000 mm/s² — Prevents ringing in soft filaments.
13.bTravel: 4000 mm/s² — Enables fast movement without harsh transitions.
13.cInitial Layer: 300 mm/s² — Gentle movement prevents lifting from the bed.
13.dOuter Wall: 1500 mm/s² — Improves outer surface clarity.
13.eInner Wall: 2000 mm/s² — Balanced for structural components.
13.fTop Surface: 1500 mm/s² — Ensures smooth detailing.14. Adhesion and Brims
14.aSkirt Loops: 2 — Helps prime nozzle and start cleanly.
14.bBrim Width: 6 mm — Helps hold soft materials down.
14.cBrim Gap: 0.15 mm — Allows for easy removal without tearing.15. Prime Tower and Flush Settings
15.aPrime Tower: ON — Purges moisture and early flow inconsistencies.
15.bTower Width: 40 mm — Prevents collapse due to heat.
15.cBrim Width (Tower): 4 mm — Adds stability to the purge base.
15.dFlush Into Support: ON — Discards unwanted early flow safely.16. G-Code Start Script
M900 K0.05 ; Pressure Advance M106 S0 ; Fan off G92 E0 G1 E15 F300 ; purge line G92 E0
17. Additional Notes
17.aDry filament at 155 F for 2 hours before use.
17.bStore with desiccant.
17.cKeep extruder door open to allow vapor to escape.
17.dAvoid long dwell times at high temperatures.If you need any other assistance, feel free to reach out to us anytime at timeplast@timeplast.com — we’ll be happy to help.
Free U.S. standard shipping on orders of 5+ spools!
Baby Gender Reveal
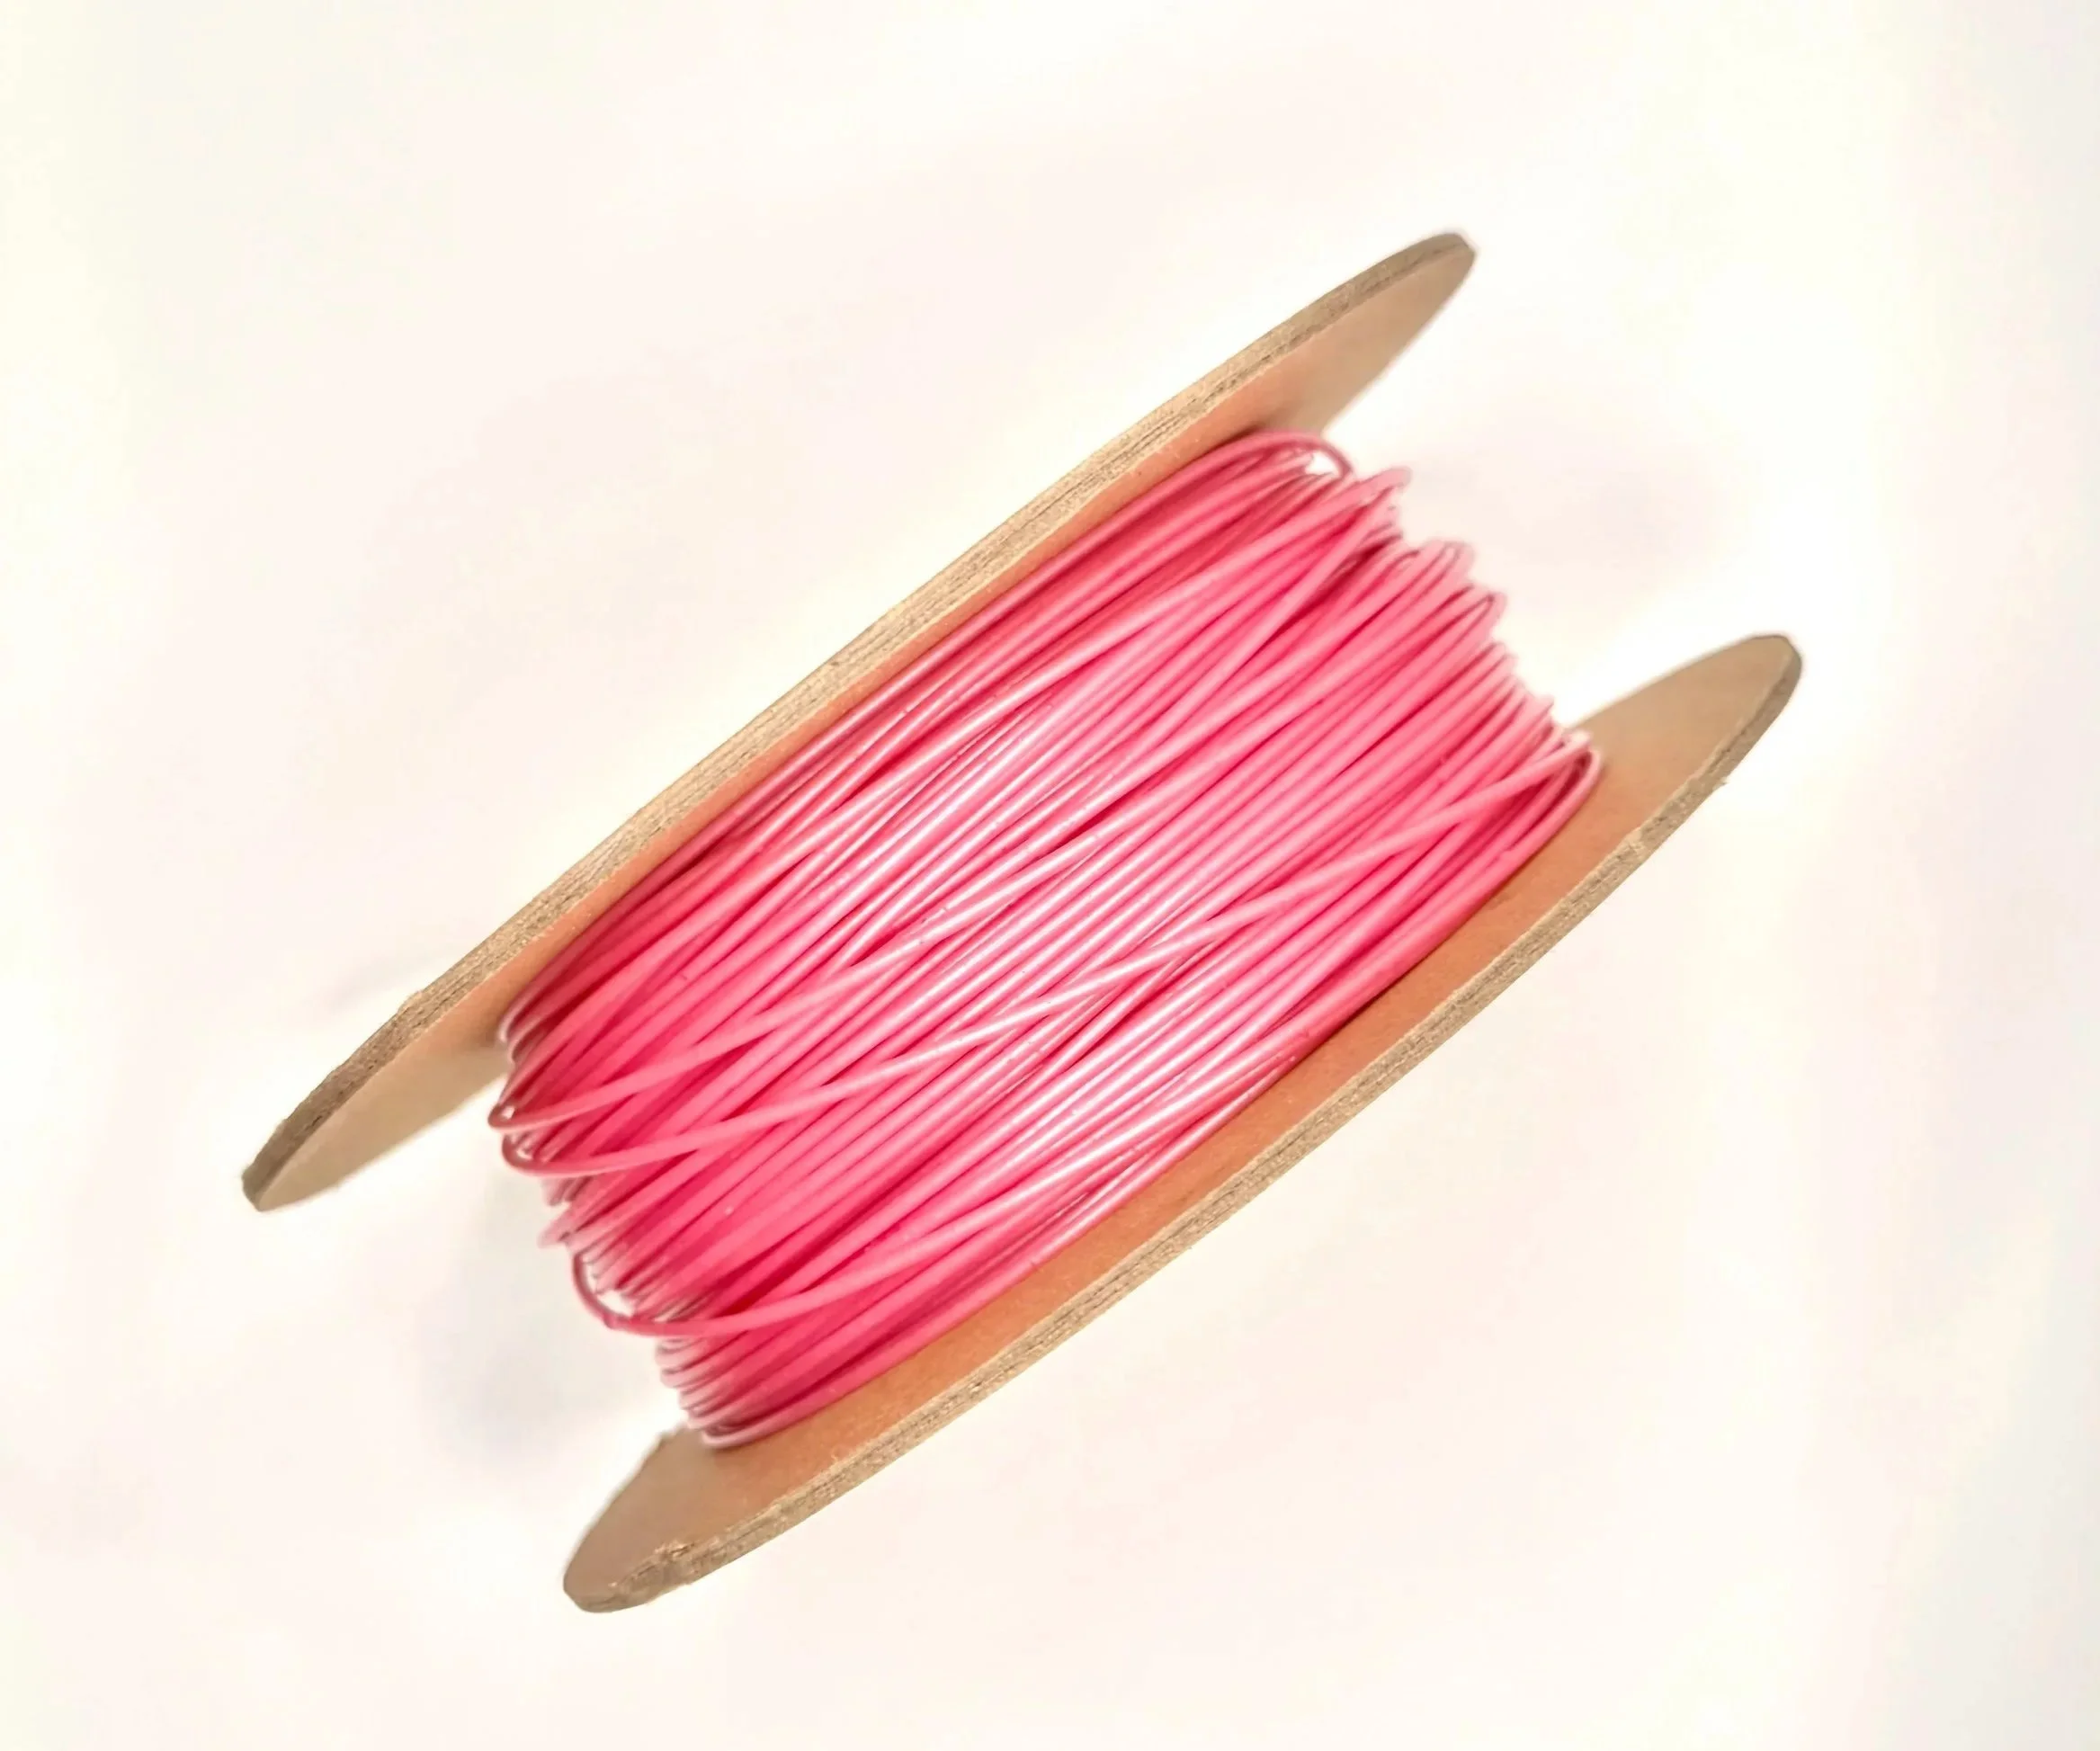
-
Delightful Surprises Revealed
Make your gender reveal memorable with Baby Gender Reveal filament. This innovative two-filament kit features one quick-dissolving filament and another durable, vividly colored filament underneath (blue or pink). When immersed in water, the outer filament dissolves swiftly, unveiling the hidden gender-specific color. Applications include personalized gender-reveal objects like figurines, decorative items, keepsake ornaments, customized reveal boxes, or playful gender-reveal party accessories, ensuring an unforgettable reveal experience.
-
Click here to access our new and improved TimeMass GPT Assistant. Just tell it your printer model and the TimeMass filament you're using—it will instantly recommend the exact parameters you need to start printing successfully.
1. Introduction
These parameters are designed to help avoid printing issues; however, temperatures and speed timings can be adjusted based on your specific goals. For example, if you prefer a less rigid result, we recommend using a lower temperature. This section outlines a complete slicing and printing profile for TimeMass Baby Gender Reveal, tailored for printers with a 0.8 mm nozzle. If the print is not being successful, please lower the nozzle temperature by 10°C and start over until an optimal print is achieved. Please check the manual for printing parameters.2. Temperature Settings
2.aNozzle Temperature: 230°C — Optimal for flowability while avoiding decomposition (which begins around 250°C).
2.bBed Temperature: 75°C — Ensures strong first-layer adhesion and prevents moisture bubbling.
2.cNozzle Temperature Range: 230–245°C — Timeplast melts around 165°C but prints best at 240°C for precise viscosity control.3. Cooling Settings
3.aNo Cooling for First Layers: 3 layers — Prevents shrinkage due to rapid cooling of moisture-rich filament.
3.bFan Minimum Speed: 0% for the first 100 seconds — Allows heat retention during early layers.
3.cFan Maximum Speed: 15% starting at 8 seconds — Avoids overcooling that can lead to warping.
3.dKeep Fan Always On: OFF — Allows vapor to escape and avoids internal fogging.
3.eSlow Down for Cooling: ON — Improves surface finish with controlled cooling.
3.fForce Cooling for Overhangs: OFF — Overcooling can deform bridges in Timeplast.
3.gFan for Overhangs: 15% — Only for essential cooling in complex areas.
3.hPre-Start Fan Time: 2 seconds — Minimizes pressure differential during the first layer.4. Volumetric Flow
4.aMax Volumetric Speed: 12 mm³/s — Based on a melt flow index of ~15 g/10min, allows high-speed printing.
4.bRamming Speed: 3 mm³/s — Prevents bubbles or popping from pressure spikes.5. Retraction and Flow
5.aRetraction Distance: 0.4 mm — Minimal retraction required for soft filaments to avoid stringing.
5.bRetraction Speed: 15 mm/s — Slow enough to avoid pulling molten plastic.
5.cPressure Advance: 0.05 — Compensates for nozzle lag at high flow rates.
5.dFlow Ratio: 92% — Slight under-extrusion avoids swelling and surface artifacts.6. Precision Settings
6.aGap Closing Radius: 0.1 mm — Tolerant of gaps in thicker walls.
6.bArc Fitting: ON — Reduces G-code size and smooths curve transitions.
6.cElephant Foot Compensation: 0.1 mm — Offsets squishing in the first layer caused by large bead sizes.7. Walls and Shells
7.aWall Loops: 2 — Minimum for strength when using a 0.8 mm nozzle.
7.bDetect Thin Walls: ON — Ensures tight geometries aren’t skipped.
7.cTop/Bottom Shell Layers: 3 — Provides good coverage; increase if watertightness is needed.
7.dTop/Bottom Thickness: 1.2 mm — Equals 1.5x the nozzle size for solid strength.
7.eTop/Bottom Pattern: Monotonic — Distributes tension evenly and improves surface finish.8. Geometry and Movement
8.aWall Order: Inner before Outer — Creates cleaner outer surfaces.
8.bInfill First: OFF — Maintains precise outer dimensions.
8.cSmooth Speed Transition: ON — Prevents ringing caused by abrupt speed changes.
8.dSmooth Coefficient: 80 — Ideal damping for soft materials.
8.eAvoid Crossing Wall: ON — Minimizes stringing across part walls.
8.fMax Detour for Crossing: 10 mm or 5% — Balances time with print cleanliness.9. Layer and Width Settings
9.aLayer Height: 0.3 mm — Optimal for strength and resolution using a 0.8 mm nozzle.
9.bInitial Layer Height: 0.35 mm — Slightly higher to improve adhesion.
9.cLine Widths (all): 0.8 mm — Matches nozzle diameter for consistent extrusion.10. Seam Settings
10.aSeam Position: Aligned or Back — Use aligned for mechanical consistency, back for visual appeal.
10.bSmart Scarf Seam: ON — Automatically adjusts seam location to reduce visual impact.
10.cSeam Angle: 155° — Standard seam angle for clean transitions.
10.dSeam Steps: 10 — Smooths seam path and improves visual finish.11. Infill Settings
11.aWall/Infill Overlap: 10% — Prevents infill from deforming soft exterior walls.
11.bInfill Combination: ON — Consolidates paths for efficiency.
11.cDetect Floating Shells: ON — Ensures unsupported vertical structures are printed reliably.
11.dSparse Infill Density: 20–25% — Balanced rigidity vs. material use.
11.eSparse Pattern: Grid — Stable and efficient for flexible geometries.12. Speed Settings
12.aTravel: 160 mm/s — Fast but safe against backlash.
12.bInitial Layer: 15 mm/s — Prevents nozzle from skimming and ensures bed adhesion.
12.cOuter Wall: 60 mm/s — Controlled speed for surface quality.
12.dInner Wall: 90 mm/s — Slightly faster without compromising control.
12.eSmall Perimeter: 35 mm/s — Reduced speed for detailed geometry.
12.fTop Surface: 40 mm/s — Improves finish on topmost layers.
12.gInfill: 100–120 mm/s — Takes advantage of high flowability.13. Acceleration Settings
13.aNormal Print: 2000 mm/s² — Prevents ringing in soft filaments.
13.bTravel: 4000 mm/s² — Enables fast movement without harsh transitions.
13.cInitial Layer: 300 mm/s² — Gentle movement prevents lifting from the bed.
13.dOuter Wall: 1500 mm/s² — Improves outer surface clarity.
13.eInner Wall: 2000 mm/s² — Balanced for structural components.
13.fTop Surface: 1500 mm/s² — Ensures smooth detailing.14. Adhesion and Brims
14.aSkirt Loops: 2 — Helps prime nozzle and start cleanly.
14.bBrim Width: 6 mm — Helps hold soft materials down.
14.cBrim Gap: 0.15 mm — Allows for easy removal without tearing.15. Prime Tower and Flush Settings
15.aPrime Tower: ON — Purges moisture and early flow inconsistencies.
15.bTower Width: 40 mm — Prevents collapse due to heat.
15.cBrim Width (Tower): 4 mm — Adds stability to the purge base.
15.dFlush Into Support: ON — Discards unwanted early flow safely.16. G-Code Start Script
M900 K0.05 ; Pressure Advance M106 S0 ; Fan off G92 E0 G1 E15 F300 ; purge line G92 E0
17. Additional Notes
17.aDry filament at 155 F for 2 hours before use.
17.bStore with desiccant.
17.cKeep extruder door open to allow vapor to escape.
17.dAvoid long dwell times at high temperatures.If you need any other assistance, feel free to reach out to us anytime at timeplast@timeplast.com — we’ll be happy to help.
Free U.S. standard shipping on orders of 5+ spools!
Custom colors for 5+ same-type spools’ orders
Repair & Maintenance
Duck Tape
-
Universal Repair Filament
Meet your ultimate repair companion: Duck Tape filament. This water-activated filament incorporates a strong, flexible polymer blend designed for immediate adhesion after being submerged in water and high durability after dried. Print resistant patches, seals, and quick-fix solutions. Ideal applications include emergency repairs on tents, boats, pipes, backpacks, and outdoor gear—stick it, fix it, and forget it.
-
Click here to access our new and improved TimeMass GPT Assistant. Just tell it your printer model and the TimeMass filament you're using—it will instantly recommend the exact parameters you need to start printing successfully.
1. Introduction
These parameters are designed to help avoid printing issues; however, temperatures and speed timings can be adjusted based on your specific goals. For example, if you prefer a less rigid result, we recommend using a lower temperature. This section outlines a complete slicing and printing profile for TimeMass Duck Tape, tailored for printers with a 0.8 mm nozzle. If the print is not being successful, please lower the nozzle temperature by 10°C and start over until an optimal print is achieved. Please check the manual for printing parameters with all the other nozzle sizes.2. Temperature Settings
2.aNozzle Temperature: 230°C — Optimal for flowability while avoiding decomposition (which begins around 250°C).
2.bBed Temperature: 75°C — Ensures strong first-layer adhesion and prevents moisture bubbling.
2.cNozzle Temperature Range: 230–245°C — Timeplast melts around 165°C but prints best at 240°C for precise viscosity control.3. Cooling Settings
3.aNo Cooling for First Layers: 3 layers — Prevents shrinkage due to rapid cooling of moisture-rich filament.
3.bFan Minimum Speed: 0% for the first 100 seconds — Allows heat retention during early layers.
3.cFan Maximum Speed: 15% starting at 8 seconds — Avoids overcooling that can lead to warping.
3.dKeep Fan Always On: OFF — Allows vapor to escape and avoids internal fogging.
3.eSlow Down for Cooling: ON — Improves surface finish with controlled cooling.
3.fForce Cooling for Overhangs: OFF — Overcooling can deform bridges in Timeplast.
3.gFan for Overhangs: 15% — Only for essential cooling in complex areas.
3.hPre-Start Fan Time: 2 seconds — Minimizes pressure differential during the first layer.4. Volumetric Flow
4.aMax Volumetric Speed: 12 mm³/s — Based on a melt flow index of ~15 g/10min, allows high-speed printing.
4.bRamming Speed: 3 mm³/s — Prevents bubbles or popping from pressure spikes.5. Retraction and Flow
5.aRetraction Distance: 0.4 mm — Minimal retraction required for soft filaments to avoid stringing.
5.bRetraction Speed: 15 mm/s — Slow enough to avoid pulling molten plastic.
5.cPressure Advance: 0.05 — Compensates for nozzle lag at high flow rates.
5.dFlow Ratio: 92% — Slight under-extrusion avoids swelling and surface artifacts.6. Precision Settings
6.aGap Closing Radius: 0.1 mm — Tolerant of gaps in thicker walls.
6.bArc Fitting: ON — Reduces G-code size and smooths curve transitions.
6.cElephant Foot Compensation: 0.1 mm — Offsets squishing in the first layer caused by large bead sizes.7. Walls and Shells
7.aWall Loops: 2 — Minimum for strength when using a 0.8 mm nozzle.
7.bDetect Thin Walls: ON — Ensures tight geometries aren’t skipped.
7.cTop/Bottom Shell Layers: 3 — Provides good coverage; increase if watertightness is needed.
7.dTop/Bottom Thickness: 1.2 mm — Equals 1.5x the nozzle size for solid strength.
7.eTop/Bottom Pattern: Monotonic — Distributes tension evenly and improves surface finish.8. Geometry and Movement
8.aWall Order: Inner before Outer — Creates cleaner outer surfaces.
8.bInfill First: OFF — Maintains precise outer dimensions.
8.cSmooth Speed Transition: ON — Prevents ringing caused by abrupt speed changes.
8.dSmooth Coefficient: 80 — Ideal damping for soft materials.
8.eAvoid Crossing Wall: ON — Minimizes stringing across part walls.
8.fMax Detour for Crossing: 10 mm or 5% — Balances time with print cleanliness.9. Layer and Width Settings
9.aLayer Height: 0.3 mm — Optimal for strength and resolution using a 0.8 mm nozzle.
9.bInitial Layer Height: 0.35 mm — Slightly higher to improve adhesion.
9.cLine Widths (all): 0.8 mm — Matches nozzle diameter for consistent extrusion.10. Seam Settings
10.aSeam Position: Aligned or Back — Use aligned for mechanical consistency, back for visual appeal.
10.bSmart Scarf Seam: ON — Automatically adjusts seam location to reduce visual impact.
10.cSeam Angle: 155° — Standard seam angle for clean transitions.
10.dSeam Steps: 10 — Smooths seam path and improves visual finish.11. Infill Settings
11.aWall/Infill Overlap: 10% — Prevents infill from deforming soft exterior walls.
11.bInfill Combination: ON — Consolidates paths for efficiency.
11.cDetect Floating Shells: ON — Ensures unsupported vertical structures are printed reliably.
11.dSparse Infill Density: 20–25% — Balanced rigidity vs. material use.
11.eSparse Pattern: Grid — Stable and efficient for flexible geometries.12. Speed Settings
12.aTravel: 160 mm/s — Fast but safe against backlash.
12.bInitial Layer: 15 mm/s — Prevents nozzle from skimming and ensures bed adhesion.
12.cOuter Wall: 60 mm/s — Controlled speed for surface quality.
12.dInner Wall: 90 mm/s — Slightly faster without compromising control.
12.eSmall Perimeter: 35 mm/s — Reduced speed for detailed geometry.
12.fTop Surface: 40 mm/s — Improves finish on topmost layers.
12.gInfill: 100–120 mm/s — Takes advantage of high flowability.13. Acceleration Settings
13.aNormal Print: 2000 mm/s² — Prevents ringing in soft filaments.
13.bTravel: 4000 mm/s² — Enables fast movement without harsh transitions.
13.cInitial Layer: 300 mm/s² — Gentle movement prevents lifting from the bed.
13.dOuter Wall: 1500 mm/s² — Improves outer surface clarity.
13.eInner Wall: 2000 mm/s² — Balanced for structural components.
13.fTop Surface: 1500 mm/s² — Ensures smooth detailing.14. Adhesion and Brims
14.aSkirt Loops: 2 — Helps prime nozzle and start cleanly.
14.bBrim Width: 6 mm — Helps hold soft materials down.
14.cBrim Gap: 0.15 mm — Allows for easy removal without tearing.15. Prime Tower and Flush Settings
15.aPrime Tower: ON — Purges moisture and early flow inconsistencies.
15.bTower Width: 40 mm — Prevents collapse due to heat.
15.cBrim Width (Tower): 4 mm — Adds stability to the purge base.
15.dFlush Into Support: ON — Discards unwanted early flow safely.16. G-Code Start Script
M900 K0.05 ; Pressure Advance M106 S0 ; Fan off G92 E0 G1 E15 F300 ; purge line G92 E0
17. Additional Notes
17.aDry filament at 155 F for 2 hours before use.
17.bStore with desiccant.
17.cKeep extruder door open to allow vapor to escape.
17.dAvoid long dwell times at high temperatures.If you need any other assistance, feel free to reach out to us anytime at timeplast@timeplast.com — we’ll be happy to help.
Free U.S. standard shipping on orders of 5+ spools!
Seal & Repair
-
When emergencies happen, rely on Seal & Repair filament. Formulated with water-activated adhesive technology and elastic polymer composites, our filament adheres powerfully after dried. Applications include sealing of leaks in containers, surfaces and rapid-response patching in emergencies.
-
Click here to access our new and improved TimeMass GPT Assistant. Just tell it your printer model and the TimeMass filament you're using—it will instantly recommend the exact parameters you need to start printing successfully.
1. Introduction
These parameters are designed to help avoid printing issues; however, temperatures and speed timings can be adjusted based on your specific goals. For example, if you prefer a less rigid result, we recommend using a lower temperature. This section outlines a complete slicing and printing profile for TimeMass Seal & Repair, tailored for printers with a 0.8 mm nozzle. If the print is not being successful, please lower the nozzle temperature by 10°C and start over until an optimal print is achieved. Please check the manual for printing parameters with all the other nozzle sizes.2. Temperature Settings
2.aNozzle Temperature: 230°C — Optimal for flowability while avoiding decomposition (which begins around 250°C).
2.bBed Temperature: 75°C — Ensures strong first-layer adhesion and prevents moisture bubbling.
2.cNozzle Temperature Range: 230–245°C — Timeplast melts around 165°C but prints best at 240°C for precise viscosity control.3. Cooling Settings
3.aNo Cooling for First Layers: 3 layers — Prevents shrinkage due to rapid cooling of moisture-rich filament.
3.bFan Minimum Speed: 0% for the first 100 seconds — Allows heat retention during early layers.
3.cFan Maximum Speed: 15% starting at 8 seconds — Avoids overcooling that can lead to warping.
3.dKeep Fan Always On: OFF — Allows vapor to escape and avoids internal fogging.
3.eSlow Down for Cooling: ON — Improves surface finish with controlled cooling.
3.fForce Cooling for Overhangs: OFF — Overcooling can deform bridges in Timeplast.
3.gFan for Overhangs: 15% — Only for essential cooling in complex areas.
3.hPre-Start Fan Time: 2 seconds — Minimizes pressure differential during the first layer.4. Volumetric Flow
4.aMax Volumetric Speed: 12 mm³/s — Based on a melt flow index of ~15 g/10min, allows high-speed printing.
4.bRamming Speed: 3 mm³/s — Prevents bubbles or popping from pressure spikes.5. Retraction and Flow
5.aRetraction Distance: 0.4 mm — Minimal retraction required for soft filaments to avoid stringing.
5.bRetraction Speed: 15 mm/s — Slow enough to avoid pulling molten plastic.
5.cPressure Advance: 0.05 — Compensates for nozzle lag at high flow rates.
5.dFlow Ratio: 92% — Slight under-extrusion avoids swelling and surface artifacts.6. Precision Settings
6.aGap Closing Radius: 0.1 mm — Tolerant of gaps in thicker walls.
6.bArc Fitting: ON — Reduces G-code size and smooths curve transitions.
6.cElephant Foot Compensation: 0.1 mm — Offsets squishing in the first layer caused by large bead sizes.7. Walls and Shells
7.aWall Loops: 2 — Minimum for strength when using a 0.8 mm nozzle.
7.bDetect Thin Walls: ON — Ensures tight geometries aren’t skipped.
7.cTop/Bottom Shell Layers: 3 — Provides good coverage; increase if watertightness is needed.
7.dTop/Bottom Thickness: 1.2 mm — Equals 1.5x the nozzle size for solid strength.
7.eTop/Bottom Pattern: Monotonic — Distributes tension evenly and improves surface finish.8. Geometry and Movement
8.aWall Order: Inner before Outer — Creates cleaner outer surfaces.
8.bInfill First: OFF — Maintains precise outer dimensions.
8.cSmooth Speed Transition: ON — Prevents ringing caused by abrupt speed changes.
8.dSmooth Coefficient: 80 — Ideal damping for soft materials.
8.eAvoid Crossing Wall: ON — Minimizes stringing across part walls.
8.fMax Detour for Crossing: 10 mm or 5% — Balances time with print cleanliness.9. Layer and Width Settings
9.aLayer Height: 0.3 mm — Optimal for strength and resolution using a 0.8 mm nozzle.
9.bInitial Layer Height: 0.35 mm — Slightly higher to improve adhesion.
9.cLine Widths (all): 0.8 mm — Matches nozzle diameter for consistent extrusion.10. Seam Settings
10.aSeam Position: Aligned or Back — Use aligned for mechanical consistency, back for visual appeal.
10.bSmart Scarf Seam: ON — Automatically adjusts seam location to reduce visual impact.
10.cSeam Angle: 155° — Standard seam angle for clean transitions.
10.dSeam Steps: 10 — Smooths seam path and improves visual finish.11. Infill Settings
11.aWall/Infill Overlap: 10% — Prevents infill from deforming soft exterior walls.
11.bInfill Combination: ON — Consolidates paths for efficiency.
11.cDetect Floating Shells: ON — Ensures unsupported vertical structures are printed reliably.
11.dSparse Infill Density: 20–25% — Balanced rigidity vs. material use.
11.eSparse Pattern: Grid — Stable and efficient for flexible geometries.12. Speed Settings
12.aTravel: 160 mm/s — Fast but safe against backlash.
12.bInitial Layer: 15 mm/s — Prevents nozzle from skimming and ensures bed adhesion.
12.cOuter Wall: 60 mm/s — Controlled speed for surface quality.
12.dInner Wall: 90 mm/s — Slightly faster without compromising control.
12.eSmall Perimeter: 35 mm/s — Reduced speed for detailed geometry.
12.fTop Surface: 40 mm/s — Improves finish on topmost layers.
12.gInfill: 100–120 mm/s — Takes advantage of high flowability.13. Acceleration Settings
13.aNormal Print: 2000 mm/s² — Prevents ringing in soft filaments.
13.bTravel: 4000 mm/s² — Enables fast movement without harsh transitions.
13.cInitial Layer: 300 mm/s² — Gentle movement prevents lifting from the bed.
13.dOuter Wall: 1500 mm/s² — Improves outer surface clarity.
13.eInner Wall: 2000 mm/s² — Balanced for structural components.
13.fTop Surface: 1500 mm/s² — Ensures smooth detailing.14. Adhesion and Brims
14.aSkirt Loops: 2 — Helps prime nozzle and start cleanly.
14.bBrim Width: 6 mm — Helps hold soft materials down.
14.cBrim Gap: 0.15 mm — Allows for easy removal without tearing.15. Prime Tower and Flush Settings
15.aPrime Tower: ON — Purges moisture and early flow inconsistencies.
15.bTower Width: 40 mm — Prevents collapse due to heat.
15.cBrim Width (Tower): 4 mm — Adds stability to the purge base.
15.dFlush Into Support: ON — Discards unwanted early flow safely.16. G-Code Start Script
M900 K0.05 ; Pressure Advance M106 S0 ; Fan off G92 E0 G1 E15 F300 ; purge line G92 E0
17. Additional Notes
17.aDry filament at 155 F for 2 hours before use.
17.bStore with desiccant.
17.cKeep extruder door open to allow vapor to escape.
17.dAvoid long dwell times at high temperatures.If you need any other assistance, feel free to reach out to us anytime at timeplast@timeplast.com — we’ll be happy to help.
Free U.S. standard shipping on orders of 5+ spools!
Iridescent Prints
Iridescent White
-
A rainbow-catching, eye-dazzling filament that changes color depending on the viewing angle or light source. With multi-layer thin-film pigments, this filament gives a prismatic sheen to your prints, ideal for high-fashion, toys, or artistic pieces.
Color-shifting magic, engineered to shine.
How it works:
Interference pigments bend light at different wavelengths, producing a spectrum of reflected hues as you move around the object.
Light angle = color angle.
Core Material:
Iridescent Flake Complex: 28% – Ultra-thin layered pigments
Flexible Transparent Matrix: 72% – Maintains light mobility across surface
Where to use it:
Fashion accessories – Jewelry, hair clips, bags
Futuristic art – Make your prints alive with color
Display models – Eye-catching effects for collectors
Event props – Shine under LEDs or camera lights
-
Click here to access our new and improved TimeMass GPT Assistant. Just tell it your printer model and the TimeMass filament you're using—it will instantly recommend the exact parameters you need to start printing successfully.
1. Introduction
These parameters are designed to help avoid printing issues; however, temperatures and speed timings can be adjusted based on your specific goals. For example, if you prefer a less rigid result, we recommend using a lower temperature. This section outlines a complete slicing and printing profile for TimeMass Iridescent White, tailored for printers with a 0.8 mm nozzle. If the print is not being successful, please lower the nozzle temperature by 10°C and start over until an optimal print is achieved. Please check the manual for printing parameters.2. Temperature Settings
2.aNozzle Temperature: 230°C — Optimal for flowability while avoiding decomposition (which begins around 250°C).
2.bBed Temperature: 75°C — Ensures strong first-layer adhesion and prevents moisture bubbling.
2.cNozzle Temperature Range: 230–245°C — Timeplast melts around 165°C but prints best at 240°C for precise viscosity control.3. Cooling Settings
3.aNo Cooling for First Layers: 3 layers — Prevents shrinkage due to rapid cooling of moisture-rich filament.
3.bFan Minimum Speed: 0% for the first 100 seconds — Allows heat retention during early layers.
3.cFan Maximum Speed: 15% starting at 8 seconds — Avoids overcooling that can lead to warping.
3.dKeep Fan Always On: OFF — Allows vapor to escape and avoids internal fogging.
3.eSlow Down for Cooling: ON — Improves surface finish with controlled cooling.
3.fForce Cooling for Overhangs: OFF — Overcooling can deform bridges in Timeplast.
3.gFan for Overhangs: 15% — Only for essential cooling in complex areas.
3.hPre-Start Fan Time: 2 seconds — Minimizes pressure differential during the first layer.4. Volumetric Flow
4.aMax Volumetric Speed: 12 mm³/s — Based on a melt flow index of ~15 g/10min, allows high-speed printing.
4.bRamming Speed: 3 mm³/s — Prevents bubbles or popping from pressure spikes.5. Retraction and Flow
5.aRetraction Distance: 0.4 mm — Minimal retraction required for soft filaments to avoid stringing.
5.bRetraction Speed: 15 mm/s — Slow enough to avoid pulling molten plastic.
5.cPressure Advance: 0.05 — Compensates for nozzle lag at high flow rates.
5.dFlow Ratio: 92% — Slight under-extrusion avoids swelling and surface artifacts.6. Precision Settings
6.aGap Closing Radius: 0.1 mm — Tolerant of gaps in thicker walls.
6.bArc Fitting: ON — Reduces G-code size and smooths curve transitions.
6.cElephant Foot Compensation: 0.1 mm — Offsets squishing in the first layer caused by large bead sizes.7. Walls and Shells
7.aWall Loops: 2 — Minimum for strength when using a 0.8 mm nozzle.
7.bDetect Thin Walls: ON — Ensures tight geometries aren’t skipped.
7.cTop/Bottom Shell Layers: 3 — Provides good coverage; increase if watertightness is needed.
7.dTop/Bottom Thickness: 1.2 mm — Equals 1.5x the nozzle size for solid strength.
7.eTop/Bottom Pattern: Monotonic — Distributes tension evenly and improves surface finish.8. Geometry and Movement
8.aWall Order: Inner before Outer — Creates cleaner outer surfaces.
8.bInfill First: OFF — Maintains precise outer dimensions.
8.cSmooth Speed Transition: ON — Prevents ringing caused by abrupt speed changes.
8.dSmooth Coefficient: 80 — Ideal damping for soft materials.
8.eAvoid Crossing Wall: ON — Minimizes stringing across part walls.
8.fMax Detour for Crossing: 10 mm or 5% — Balances time with print cleanliness.9. Layer and Width Settings
9.aLayer Height: 0.3 mm — Optimal for strength and resolution using a 0.8 mm nozzle.
9.bInitial Layer Height: 0.35 mm — Slightly higher to improve adhesion.
9.cLine Widths (all): 0.8 mm — Matches nozzle diameter for consistent extrusion.10. Seam Settings
10.aSeam Position: Aligned or Back — Use aligned for mechanical consistency, back for visual appeal.
10.bSmart Scarf Seam: ON — Automatically adjusts seam location to reduce visual impact.
10.cSeam Angle: 155° — Standard seam angle for clean transitions.
10.dSeam Steps: 10 — Smooths seam path and improves visual finish.11. Infill Settings
11.aWall/Infill Overlap: 10% — Prevents infill from deforming soft exterior walls.
11.bInfill Combination: ON — Consolidates paths for efficiency.
11.cDetect Floating Shells: ON — Ensures unsupported vertical structures are printed reliably.
11.dSparse Infill Density: 20–25% — Balanced rigidity vs. material use.
11.eSparse Pattern: Grid — Stable and efficient for flexible geometries.12. Speed Settings
12.aTravel: 160 mm/s — Fast but safe against backlash.
12.bInitial Layer: 15 mm/s — Prevents nozzle from skimming and ensures bed adhesion.
12.cOuter Wall: 60 mm/s — Controlled speed for surface quality.
12.dInner Wall: 90 mm/s — Slightly faster without compromising control.
12.eSmall Perimeter: 35 mm/s — Reduced speed for detailed geometry.
12.fTop Surface: 40 mm/s — Improves finish on topmost layers.
12.gInfill: 100–120 mm/s — Takes advantage of high flowability.13. Acceleration Settings
13.aNormal Print: 2000 mm/s² — Prevents ringing in soft filaments.
13.bTravel: 4000 mm/s² — Enables fast movement without harsh transitions.
13.cInitial Layer: 300 mm/s² — Gentle movement prevents lifting from the bed.
13.dOuter Wall: 1500 mm/s² — Improves outer surface clarity.
13.eInner Wall: 2000 mm/s² — Balanced for structural components.
13.fTop Surface: 1500 mm/s² — Ensures smooth detailing.14. Adhesion and Brims
14.aSkirt Loops: 2 — Helps prime nozzle and start cleanly.
14.bBrim Width: 6 mm — Helps hold soft materials down.
14.cBrim Gap: 0.15 mm — Allows for easy removal without tearing.15. Prime Tower and Flush Settings
15.aPrime Tower: ON — Purges moisture and early flow inconsistencies.
15.bTower Width: 40 mm — Prevents collapse due to heat.
15.cBrim Width (Tower): 4 mm — Adds stability to the purge base.
15.dFlush Into Support: ON — Discards unwanted early flow safely.16. G-Code Start Script
M900 K0.05 ; Pressure Advance M106 S0 ; Fan off G92 E0 G1 E15 F300 ; purge line G92 E0
17. Additional Notes
17.aDry filament at 155 F for 2 hours before use.
17.bStore with desiccant.
17.cKeep extruder door open to allow vapor to escape.
17.dAvoid long dwell times at high temperatures.If you need any other assistance, feel free to reach out to us anytime at timeplast@timeplast.com — we’ll be happy to help.
Free U.S. standard shipping on orders of 5+ spools!
Iridescent Pink

-
A rainbow-catching, eye-dazzling filament that changes color depending on the viewing angle or light source. With multi-layer thin-film pigments, this filament gives a prismatic sheen to your prints, ideal for high-fashion, toys, or artistic pieces.
Color-shifting magic, engineered to shine.
How it works:
Interference pigments bend light at different wavelengths, producing a spectrum of reflected hues as you move around the object.
Light angle = color angle.
Core Material:
Iridescent Flake Complex: 28% – Ultra-thin layered pigments
Flexible Transparent Matrix: 72% – Maintains light mobility across surface
Where to use it:
Fashion accessories – Jewelry, hair clips, bags
Futuristic art – Make your prints alive with color
Display models – Eye-catching effects for collectors
Event props – Shine under LEDs or camera lights
-
Click here to access our new and improved TimeMass GPT Assistant. Just tell it your printer model and the TimeMass filament you're using—it will instantly recommend the exact parameters you need to start printing successfully.
1. Introduction
These parameters are designed to help avoid printing issues; however, temperatures and speed timings can be adjusted based on your specific goals. For example, if you prefer a less rigid result, we recommend using a lower temperature. This section outlines a complete slicing and printing profile for TimeMass Iridescent Pink, tailored for printers with a 0.8 mm nozzle. If the print is not being successful, please lower the nozzle temperature by 10°C and start over until an optimal print is achieved. Please check the manual for printing parameters.2. Temperature Settings
2.aNozzle Temperature: 230°C — Optimal for flowability while avoiding decomposition (which begins around 250°C).
2.bBed Temperature: 75°C — Ensures strong first-layer adhesion and prevents moisture bubbling.
2.cNozzle Temperature Range: 230–245°C — Timeplast melts around 165°C but prints best at 240°C for precise viscosity control.3. Cooling Settings
3.aNo Cooling for First Layers: 3 layers — Prevents shrinkage due to rapid cooling of moisture-rich filament.
3.bFan Minimum Speed: 0% for the first 100 seconds — Allows heat retention during early layers.
3.cFan Maximum Speed: 15% starting at 8 seconds — Avoids overcooling that can lead to warping.
3.dKeep Fan Always On: OFF — Allows vapor to escape and avoids internal fogging.
3.eSlow Down for Cooling: ON — Improves surface finish with controlled cooling.
3.fForce Cooling for Overhangs: OFF — Overcooling can deform bridges in Timeplast.
3.gFan for Overhangs: 15% — Only for essential cooling in complex areas.
3.hPre-Start Fan Time: 2 seconds — Minimizes pressure differential during the first layer.4. Volumetric Flow
4.aMax Volumetric Speed: 12 mm³/s — Based on a melt flow index of ~15 g/10min, allows high-speed printing.
4.bRamming Speed: 3 mm³/s — Prevents bubbles or popping from pressure spikes.5. Retraction and Flow
5.aRetraction Distance: 0.4 mm — Minimal retraction required for soft filaments to avoid stringing.
5.bRetraction Speed: 15 mm/s — Slow enough to avoid pulling molten plastic.
5.cPressure Advance: 0.05 — Compensates for nozzle lag at high flow rates.
5.dFlow Ratio: 92% — Slight under-extrusion avoids swelling and surface artifacts.6. Precision Settings
6.aGap Closing Radius: 0.1 mm — Tolerant of gaps in thicker walls.
6.bArc Fitting: ON — Reduces G-code size and smooths curve transitions.
6.cElephant Foot Compensation: 0.1 mm — Offsets squishing in the first layer caused by large bead sizes.7. Walls and Shells
7.aWall Loops: 2 — Minimum for strength when using a 0.8 mm nozzle.
7.bDetect Thin Walls: ON — Ensures tight geometries aren’t skipped.
7.cTop/Bottom Shell Layers: 3 — Provides good coverage; increase if watertightness is needed.
7.dTop/Bottom Thickness: 1.2 mm — Equals 1.5x the nozzle size for solid strength.
7.eTop/Bottom Pattern: Monotonic — Distributes tension evenly and improves surface finish.8. Geometry and Movement
8.aWall Order: Inner before Outer — Creates cleaner outer surfaces.
8.bInfill First: OFF — Maintains precise outer dimensions.
8.cSmooth Speed Transition: ON — Prevents ringing caused by abrupt speed changes.
8.dSmooth Coefficient: 80 — Ideal damping for soft materials.
8.eAvoid Crossing Wall: ON — Minimizes stringing across part walls.
8.fMax Detour for Crossing: 10 mm or 5% — Balances time with print cleanliness.9. Layer and Width Settings
9.aLayer Height: 0.3 mm — Optimal for strength and resolution using a 0.8 mm nozzle.
9.bInitial Layer Height: 0.35 mm — Slightly higher to improve adhesion.
9.cLine Widths (all): 0.8 mm — Matches nozzle diameter for consistent extrusion.10. Seam Settings
10.aSeam Position: Aligned or Back — Use aligned for mechanical consistency, back for visual appeal.
10.bSmart Scarf Seam: ON — Automatically adjusts seam location to reduce visual impact.
10.cSeam Angle: 155° — Standard seam angle for clean transitions.
10.dSeam Steps: 10 — Smooths seam path and improves visual finish.11. Infill Settings
11.aWall/Infill Overlap: 10% — Prevents infill from deforming soft exterior walls.
11.bInfill Combination: ON — Consolidates paths for efficiency.
11.cDetect Floating Shells: ON — Ensures unsupported vertical structures are printed reliably.
11.dSparse Infill Density: 20–25% — Balanced rigidity vs. material use.
11.eSparse Pattern: Grid — Stable and efficient for flexible geometries.12. Speed Settings
12.aTravel: 160 mm/s — Fast but safe against backlash.
12.bInitial Layer: 15 mm/s — Prevents nozzle from skimming and ensures bed adhesion.
12.cOuter Wall: 60 mm/s — Controlled speed for surface quality.
12.dInner Wall: 90 mm/s — Slightly faster without compromising control.
12.eSmall Perimeter: 35 mm/s — Reduced speed for detailed geometry.
12.fTop Surface: 40 mm/s — Improves finish on topmost layers.
12.gInfill: 100–120 mm/s — Takes advantage of high flowability.13. Acceleration Settings
13.aNormal Print: 2000 mm/s² — Prevents ringing in soft filaments.
13.bTravel: 4000 mm/s² — Enables fast movement without harsh transitions.
13.cInitial Layer: 300 mm/s² — Gentle movement prevents lifting from the bed.
13.dOuter Wall: 1500 mm/s² — Improves outer surface clarity.
13.eInner Wall: 2000 mm/s² — Balanced for structural components.
13.fTop Surface: 1500 mm/s² — Ensures smooth detailing.14. Adhesion and Brims
14.aSkirt Loops: 2 — Helps prime nozzle and start cleanly.
14.bBrim Width: 6 mm — Helps hold soft materials down.
14.cBrim Gap: 0.15 mm — Allows for easy removal without tearing.15. Prime Tower and Flush Settings
15.aPrime Tower: ON — Purges moisture and early flow inconsistencies.
15.bTower Width: 40 mm — Prevents collapse due to heat.
15.cBrim Width (Tower): 4 mm — Adds stability to the purge base.
15.dFlush Into Support: ON — Discards unwanted early flow safely.16. G-Code Start Script
M900 K0.05 ; Pressure Advance M106 S0 ; Fan off G92 E0 G1 E15 F300 ; purge line G92 E0
17. Additional Notes
17.aDry filament at 155 F for 2 hours before use.
17.bStore with desiccant.
17.cKeep extruder door open to allow vapor to escape.
17.dAvoid long dwell times at high temperatures.If you need print settings for other nozzle sizes, feel free to reach out to us at timeplast@timeplast.com — we’ll be happy to help.
Free U.S. standard shipping on orders of 5+ spools!
Iridescent Gold

-
A rainbow-catching, eye-dazzling filament that changes color depending on the viewing angle or light source. With multi-layer thin-film pigments, this filament gives a prismatic sheen to your prints, ideal for high-fashion, toys, or artistic pieces.
Color-shifting magic, engineered to shine.
How it works:
Interference pigments bend light at different wavelengths, producing a spectrum of reflected hues as you move around the object.
Light angle = color angle.
Core Material:
Iridescent Flake Complex: 28% – Ultra-thin layered pigments
Flexible Transparent Matrix: 72% – Maintains light mobility across surface
Where to use it:
Fashion accessories – Jewelry, hair clips, bags
Futuristic art – Make your prints alive with color
Display models – Eye-catching effects for collectors
Event props – Shine under LEDs or camera lights
-
Click here to access our new and improved TimeMass GPT Assistant. Just tell it your printer model and the TimeMass filament you're using—it will instantly recommend the exact parameters you need to start printing successfully.
1. Introduction
These parameters are designed to help avoid printing issues; however, temperatures and speed timings can be adjusted based on your specific goals. For example, if you prefer a less rigid result, we recommend using a lower temperature. This section outlines a complete slicing and printing profile for TimeMass Iridescent Gold, tailored for printers with a 0.8 mm nozzle. If the print is not being successful, please lower the nozzle temperature by 10°C and start over until an optimal print is achieved. Please check the manual for printing parameters.2. Temperature Settings
2.aNozzle Temperature: 230°C — Optimal for flowability while avoiding decomposition (which begins around 250°C).
2.bBed Temperature: 75°C — Ensures strong first-layer adhesion and prevents moisture bubbling.
2.cNozzle Temperature Range: 230–245°C — Timeplast melts around 165°C but prints best at 240°C for precise viscosity control.3. Cooling Settings
3.aNo Cooling for First Layers: 3 layers — Prevents shrinkage due to rapid cooling of moisture-rich filament.
3.bFan Minimum Speed: 0% for the first 100 seconds — Allows heat retention during early layers.
3.cFan Maximum Speed: 15% starting at 8 seconds — Avoids overcooling that can lead to warping.
3.dKeep Fan Always On: OFF — Allows vapor to escape and avoids internal fogging.
3.eSlow Down for Cooling: ON — Improves surface finish with controlled cooling.
3.fForce Cooling for Overhangs: OFF — Overcooling can deform bridges in Timeplast.
3.gFan for Overhangs: 15% — Only for essential cooling in complex areas.
3.hPre-Start Fan Time: 2 seconds — Minimizes pressure differential during the first layer.4. Volumetric Flow
4.aMax Volumetric Speed: 12 mm³/s — Based on a melt flow index of ~15 g/10min, allows high-speed printing.
4.bRamming Speed: 3 mm³/s — Prevents bubbles or popping from pressure spikes.5. Retraction and Flow
5.aRetraction Distance: 0.4 mm — Minimal retraction required for soft filaments to avoid stringing.
5.bRetraction Speed: 15 mm/s — Slow enough to avoid pulling molten plastic.
5.cPressure Advance: 0.05 — Compensates for nozzle lag at high flow rates.
5.dFlow Ratio: 92% — Slight under-extrusion avoids swelling and surface artifacts.6. Precision Settings
6.aGap Closing Radius: 0.1 mm — Tolerant of gaps in thicker walls.
6.bArc Fitting: ON — Reduces G-code size and smooths curve transitions.
6.cElephant Foot Compensation: 0.1 mm — Offsets squishing in the first layer caused by large bead sizes.7. Walls and Shells
7.aWall Loops: 2 — Minimum for strength when using a 0.8 mm nozzle.
7.bDetect Thin Walls: ON — Ensures tight geometries aren’t skipped.
7.cTop/Bottom Shell Layers: 3 — Provides good coverage; increase if watertightness is needed.
7.dTop/Bottom Thickness: 1.2 mm — Equals 1.5x the nozzle size for solid strength.
7.eTop/Bottom Pattern: Monotonic — Distributes tension evenly and improves surface finish.8. Geometry and Movement
8.aWall Order: Inner before Outer — Creates cleaner outer surfaces.
8.bInfill First: OFF — Maintains precise outer dimensions.
8.cSmooth Speed Transition: ON — Prevents ringing caused by abrupt speed changes.
8.dSmooth Coefficient: 80 — Ideal damping for soft materials.
8.eAvoid Crossing Wall: ON — Minimizes stringing across part walls.
8.fMax Detour for Crossing: 10 mm or 5% — Balances time with print cleanliness.9. Layer and Width Settings
9.aLayer Height: 0.3 mm — Optimal for strength and resolution using a 0.8 mm nozzle.
9.bInitial Layer Height: 0.35 mm — Slightly higher to improve adhesion.
9.cLine Widths (all): 0.8 mm — Matches nozzle diameter for consistent extrusion.10. Seam Settings
10.aSeam Position: Aligned or Back — Use aligned for mechanical consistency, back for visual appeal.
10.bSmart Scarf Seam: ON — Automatically adjusts seam location to reduce visual impact.
10.cSeam Angle: 155° — Standard seam angle for clean transitions.
10.dSeam Steps: 10 — Smooths seam path and improves visual finish.11. Infill Settings
11.aWall/Infill Overlap: 10% — Prevents infill from deforming soft exterior walls.
11.bInfill Combination: ON — Consolidates paths for efficiency.
11.cDetect Floating Shells: ON — Ensures unsupported vertical structures are printed reliably.
11.dSparse Infill Density: 20–25% — Balanced rigidity vs. material use.
11.eSparse Pattern: Grid — Stable and efficient for flexible geometries.12. Speed Settings
12.aTravel: 160 mm/s — Fast but safe against backlash.
12.bInitial Layer: 15 mm/s — Prevents nozzle from skimming and ensures bed adhesion.
12.cOuter Wall: 60 mm/s — Controlled speed for surface quality.
12.dInner Wall: 90 mm/s — Slightly faster without compromising control.
12.eSmall Perimeter: 35 mm/s — Reduced speed for detailed geometry.
12.fTop Surface: 40 mm/s — Improves finish on topmost layers.
12.gInfill: 100–120 mm/s — Takes advantage of high flowability.13. Acceleration Settings
13.aNormal Print: 2000 mm/s² — Prevents ringing in soft filaments.
13.bTravel: 4000 mm/s² — Enables fast movement without harsh transitions.
13.cInitial Layer: 300 mm/s² — Gentle movement prevents lifting from the bed.
13.dOuter Wall: 1500 mm/s² — Improves outer surface clarity.
13.eInner Wall: 2000 mm/s² — Balanced for structural components.
13.fTop Surface: 1500 mm/s² — Ensures smooth detailing.14. Adhesion and Brims
14.aSkirt Loops: 2 — Helps prime nozzle and start cleanly.
14.bBrim Width: 6 mm — Helps hold soft materials down.
14.cBrim Gap: 0.15 mm — Allows for easy removal without tearing.15. Prime Tower and Flush Settings
15.aPrime Tower: ON — Purges moisture and early flow inconsistencies.
15.bTower Width: 40 mm — Prevents collapse due to heat.
15.cBrim Width (Tower): 4 mm — Adds stability to the purge base.
15.dFlush Into Support: ON — Discards unwanted early flow safely.16. G-Code Start Script
M900 K0.05 ; Pressure Advance M106 S0 ; Fan off G92 E0 G1 E15 F300 ; purge line G92 E0
17. Additional Notes
17.aDry filament at 155 F for 2 hours before use.
17.bStore with desiccant.
17.cKeep extruder door open to allow vapor to escape.
17.dAvoid long dwell times at high temperatures.If you need any other assistance, feel free to reach out to us anytime at timeplast@timeplast.com — we’ll be happy to help.
Free U.S. standard shipping on orders of 5+ spools!
Iridescent Purple
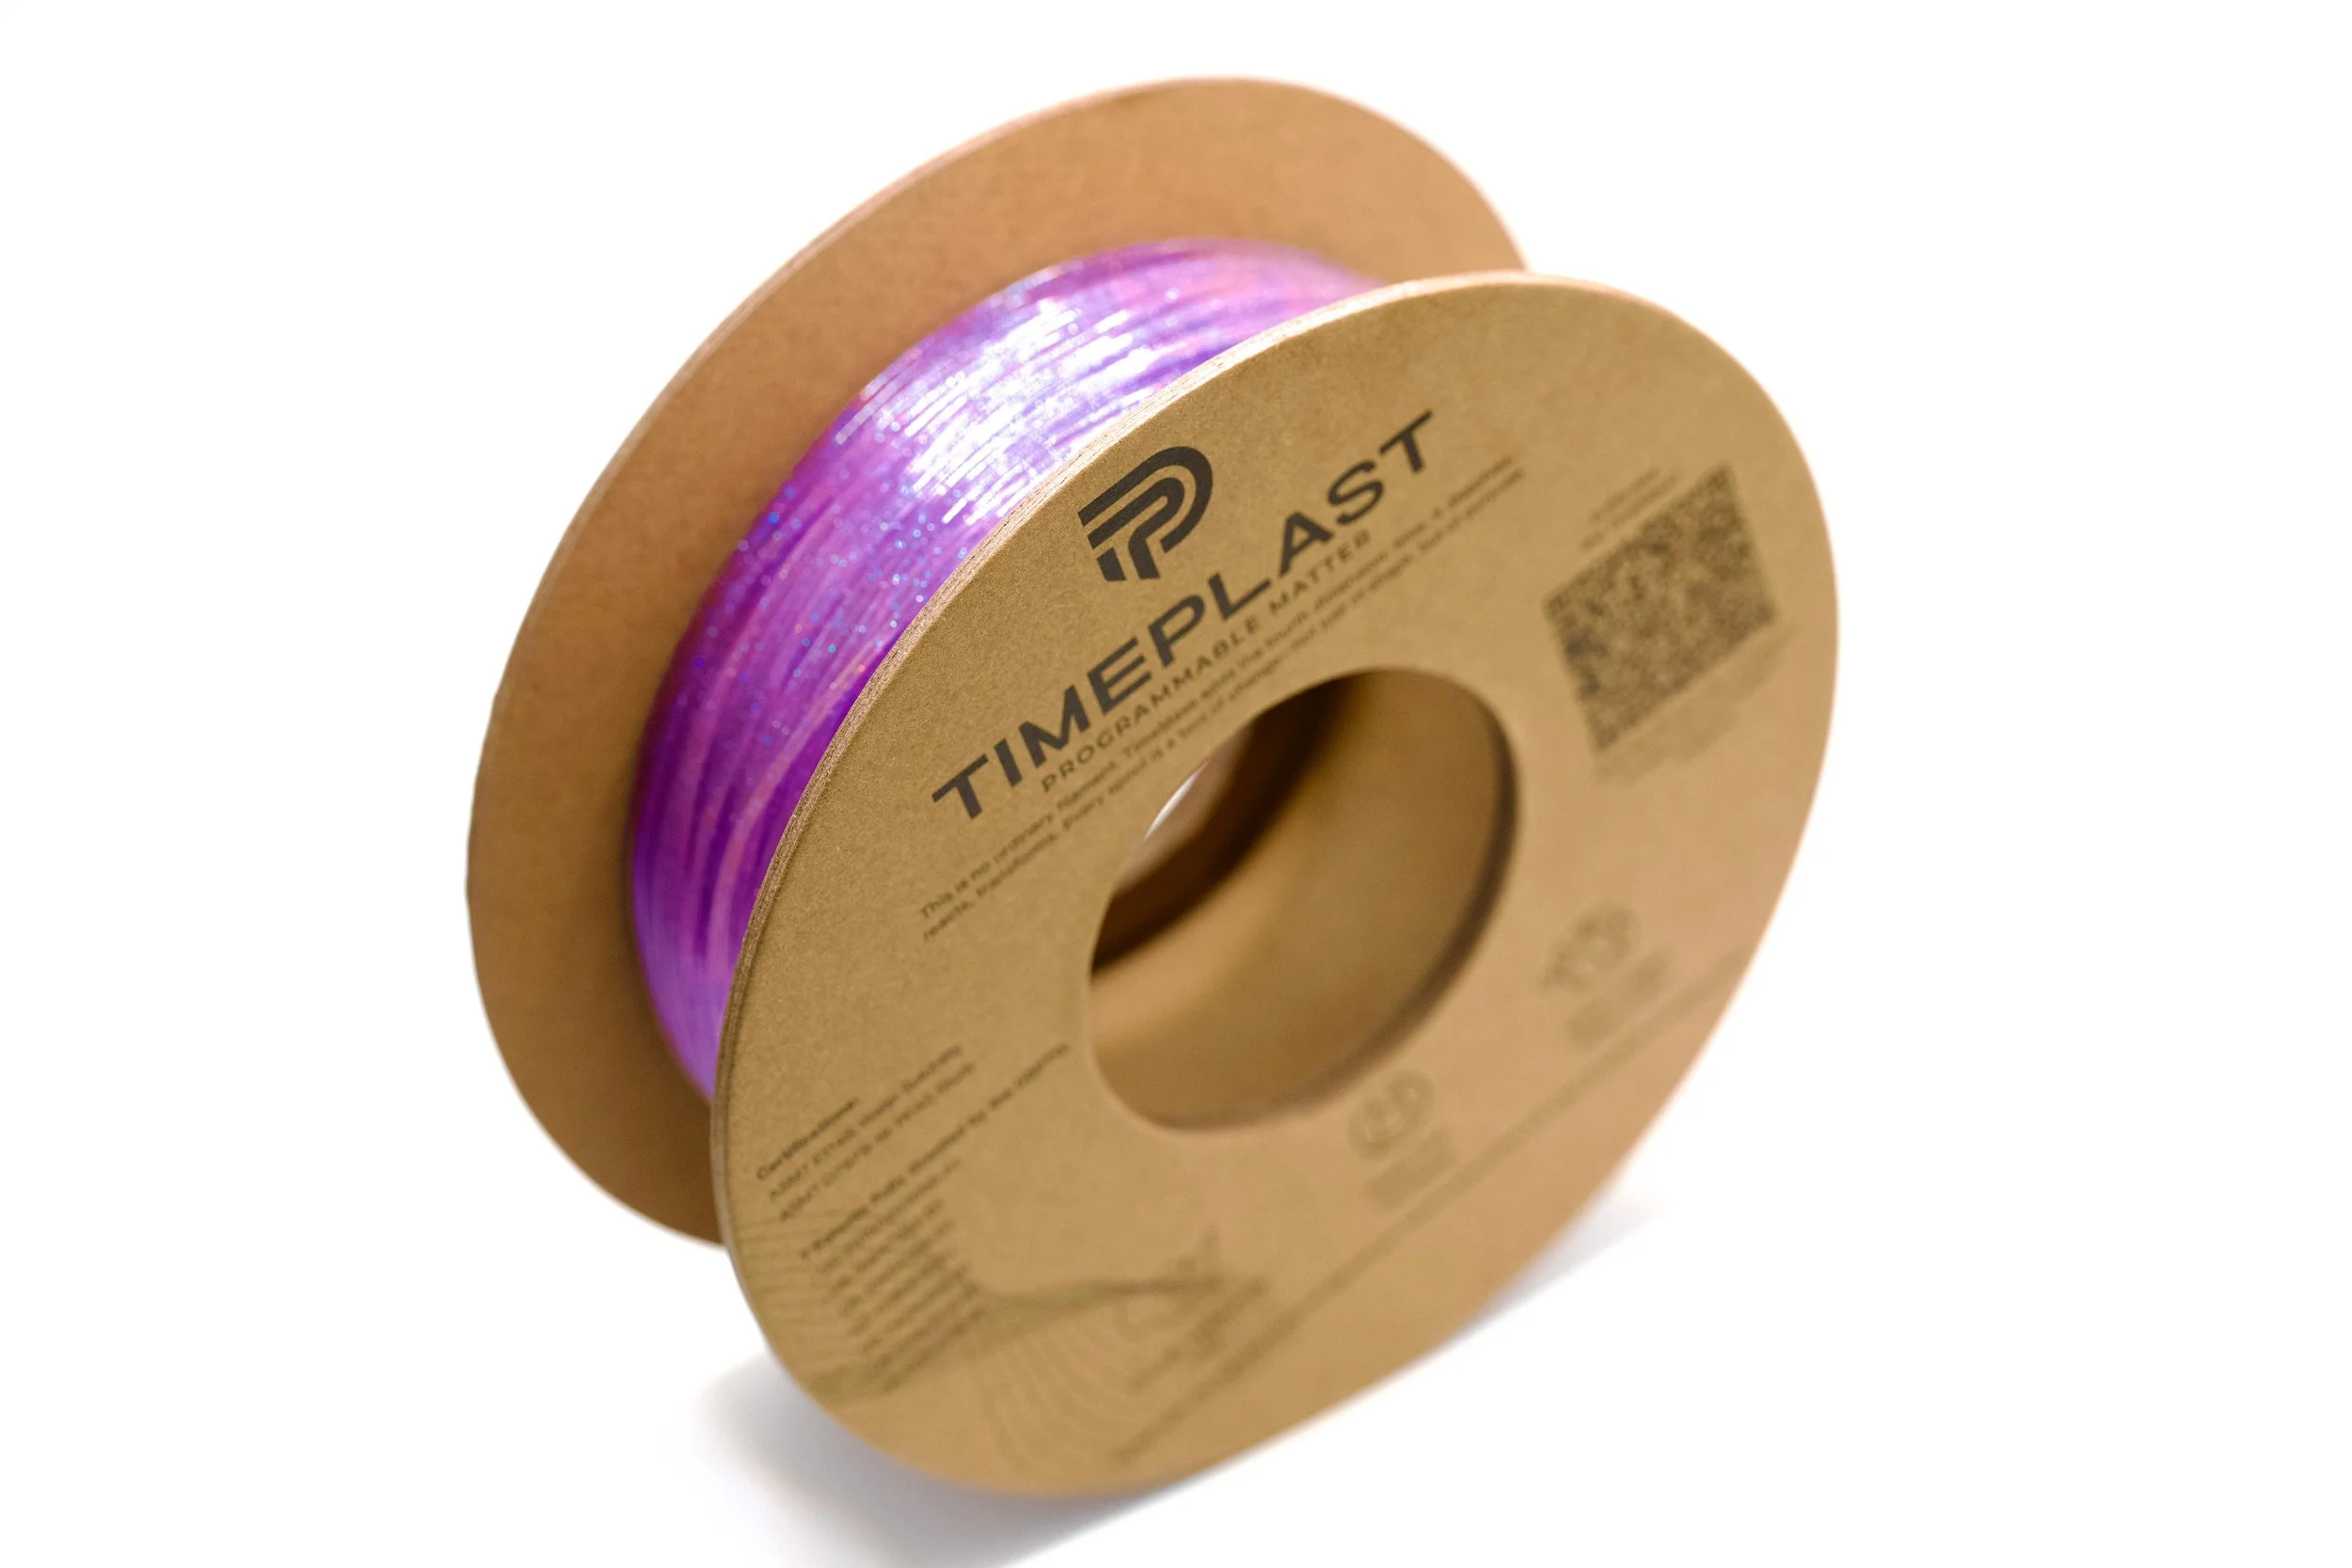
-
A rainbow-catching, eye-dazzling filament that changes color depending on the viewing angle or light source. With multi-layer thin-film pigments, this filament gives a prismatic sheen to your prints, ideal for high-fashion, toys, or artistic pieces.
Color-shifting magic, engineered to shine.
How it works:
Interference pigments bend light at different wavelengths, producing a spectrum of reflected hues as you move around the object.
Light angle = color angle.
Core Material:
Iridescent Flake Complex: 28% – Ultra-thin layered pigments
Flexible Transparent Matrix: 72% – Maintains light mobility across surface
Where to use it:
Fashion accessories – Jewelry, hair clips, bags
Futuristic art – Make your prints alive with color
Display models – Eye-catching effects for collectors
Event props – Shine under LEDs or camera lights
-
Click here to access our new and improved TimeMass GPT Assistant. Just tell it your printer model and the TimeMass filament you're using—it will instantly recommend the exact parameters you need to start printing successfully.
1. Introduction
These parameters are designed to help avoid printing issues; however, temperatures and speed timings can be adjusted based on your specific goals. For example, if you prefer a less rigid result, we recommend using a lower temperature. This section outlines a complete slicing and printing profile for TimeMass Iridescent Purple, tailored for printers with a 0.8 mm nozzle. If the print is not being successful, please lower the nozzle temperature by 10°C and start over until an optimal print is achieved. Please check the manual for printing parameters.2. Temperature Settings
2.aNozzle Temperature: 230°C — Optimal for flowability while avoiding decomposition (which begins around 250°C).
2.bBed Temperature: 75°C — Ensures strong first-layer adhesion and prevents moisture bubbling.
2.cNozzle Temperature Range: 230–245°C — Timeplast melts around 165°C but prints best at 240°C for precise viscosity control.3. Cooling Settings
3.aNo Cooling for First Layers: 3 layers — Prevents shrinkage due to rapid cooling of moisture-rich filament.
3.bFan Minimum Speed: 0% for the first 100 seconds — Allows heat retention during early layers.
3.cFan Maximum Speed: 15% starting at 8 seconds — Avoids overcooling that can lead to warping.
3.dKeep Fan Always On: OFF — Allows vapor to escape and avoids internal fogging.
3.eSlow Down for Cooling: ON — Improves surface finish with controlled cooling.
3.fForce Cooling for Overhangs: OFF — Overcooling can deform bridges in Timeplast.
3.gFan for Overhangs: 15% — Only for essential cooling in complex areas.
3.hPre-Start Fan Time: 2 seconds — Minimizes pressure differential during the first layer.4. Volumetric Flow
4.aMax Volumetric Speed: 12 mm³/s — Based on a melt flow index of ~15 g/10min, allows high-speed printing.
4.bRamming Speed: 3 mm³/s — Prevents bubbles or popping from pressure spikes.5. Retraction and Flow
5.aRetraction Distance: 0.4 mm — Minimal retraction required for soft filaments to avoid stringing.
5.bRetraction Speed: 15 mm/s — Slow enough to avoid pulling molten plastic.
5.cPressure Advance: 0.05 — Compensates for nozzle lag at high flow rates.
5.dFlow Ratio: 92% — Slight under-extrusion avoids swelling and surface artifacts.6. Precision Settings
6.aGap Closing Radius: 0.1 mm — Tolerant of gaps in thicker walls.
6.bArc Fitting: ON — Reduces G-code size and smooths curve transitions.
6.cElephant Foot Compensation: 0.1 mm — Offsets squishing in the first layer caused by large bead sizes.7. Walls and Shells
7.aWall Loops: 2 — Minimum for strength when using a 0.8 mm nozzle.
7.bDetect Thin Walls: ON — Ensures tight geometries aren’t skipped.
7.cTop/Bottom Shell Layers: 3 — Provides good coverage; increase if watertightness is needed.
7.dTop/Bottom Thickness: 1.2 mm — Equals 1.5x the nozzle size for solid strength.
7.eTop/Bottom Pattern: Monotonic — Distributes tension evenly and improves surface finish.8. Geometry and Movement
8.aWall Order: Inner before Outer — Creates cleaner outer surfaces.
8.bInfill First: OFF — Maintains precise outer dimensions.
8.cSmooth Speed Transition: ON — Prevents ringing caused by abrupt speed changes.
8.dSmooth Coefficient: 80 — Ideal damping for soft materials.
8.eAvoid Crossing Wall: ON — Minimizes stringing across part walls.
8.fMax Detour for Crossing: 10 mm or 5% — Balances time with print cleanliness.9. Layer and Width Settings
9.aLayer Height: 0.3 mm — Optimal for strength and resolution using a 0.8 mm nozzle.
9.bInitial Layer Height: 0.35 mm — Slightly higher to improve adhesion.
9.cLine Widths (all): 0.8 mm — Matches nozzle diameter for consistent extrusion.10. Seam Settings
10.aSeam Position: Aligned or Back — Use aligned for mechanical consistency, back for visual appeal.
10.bSmart Scarf Seam: ON — Automatically adjusts seam location to reduce visual impact.
10.cSeam Angle: 155° — Standard seam angle for clean transitions.
10.dSeam Steps: 10 — Smooths seam path and improves visual finish.11. Infill Settings
11.aWall/Infill Overlap: 10% — Prevents infill from deforming soft exterior walls.
11.bInfill Combination: ON — Consolidates paths for efficiency.
11.cDetect Floating Shells: ON — Ensures unsupported vertical structures are printed reliably.
11.dSparse Infill Density: 20–25% — Balanced rigidity vs. material use.
11.eSparse Pattern: Grid — Stable and efficient for flexible geometries.12. Speed Settings
12.aTravel: 160 mm/s — Fast but safe against backlash.
12.bInitial Layer: 15 mm/s — Prevents nozzle from skimming and ensures bed adhesion.
12.cOuter Wall: 60 mm/s — Controlled speed for surface quality.
12.dInner Wall: 90 mm/s — Slightly faster without compromising control.
12.eSmall Perimeter: 35 mm/s — Reduced speed for detailed geometry.
12.fTop Surface: 40 mm/s — Improves finish on topmost layers.
12.gInfill: 100–120 mm/s — Takes advantage of high flowability.13. Acceleration Settings
13.aNormal Print: 2000 mm/s² — Prevents ringing in soft filaments.
13.bTravel: 4000 mm/s² — Enables fast movement without harsh transitions.
13.cInitial Layer: 300 mm/s² — Gentle movement prevents lifting from the bed.
13.dOuter Wall: 1500 mm/s² — Improves outer surface clarity.
13.eInner Wall: 2000 mm/s² — Balanced for structural components.
13.fTop Surface: 1500 mm/s² — Ensures smooth detailing.14. Adhesion and Brims
14.aSkirt Loops: 2 — Helps prime nozzle and start cleanly.
14.bBrim Width: 6 mm — Helps hold soft materials down.
14.cBrim Gap: 0.15 mm — Allows for easy removal without tearing.15. Prime Tower and Flush Settings
15.aPrime Tower: ON — Purges moisture and early flow inconsistencies.
15.bTower Width: 40 mm — Prevents collapse due to heat.
15.cBrim Width (Tower): 4 mm — Adds stability to the purge base.
15.dFlush Into Support: ON — Discards unwanted early flow safely.16. G-Code Start Script
M900 K0.05 ; Pressure Advance M106 S0 ; Fan off G92 E0 G1 E15 F300 ; purge line G92 E0
17. Additional Notes
17.aDry filament at 155 F for 2 hours before use.
17.bStore with desiccant.
17.cKeep extruder door open to allow vapor to escape.
17.dAvoid long dwell times at high temperatures.If you need any other assistance, feel free to reach out to us anytime at timeplast@timeplast.com — we’ll be happy to help.
Free U.S. standard shipping on orders of 5+ spools!
Iridescent Green
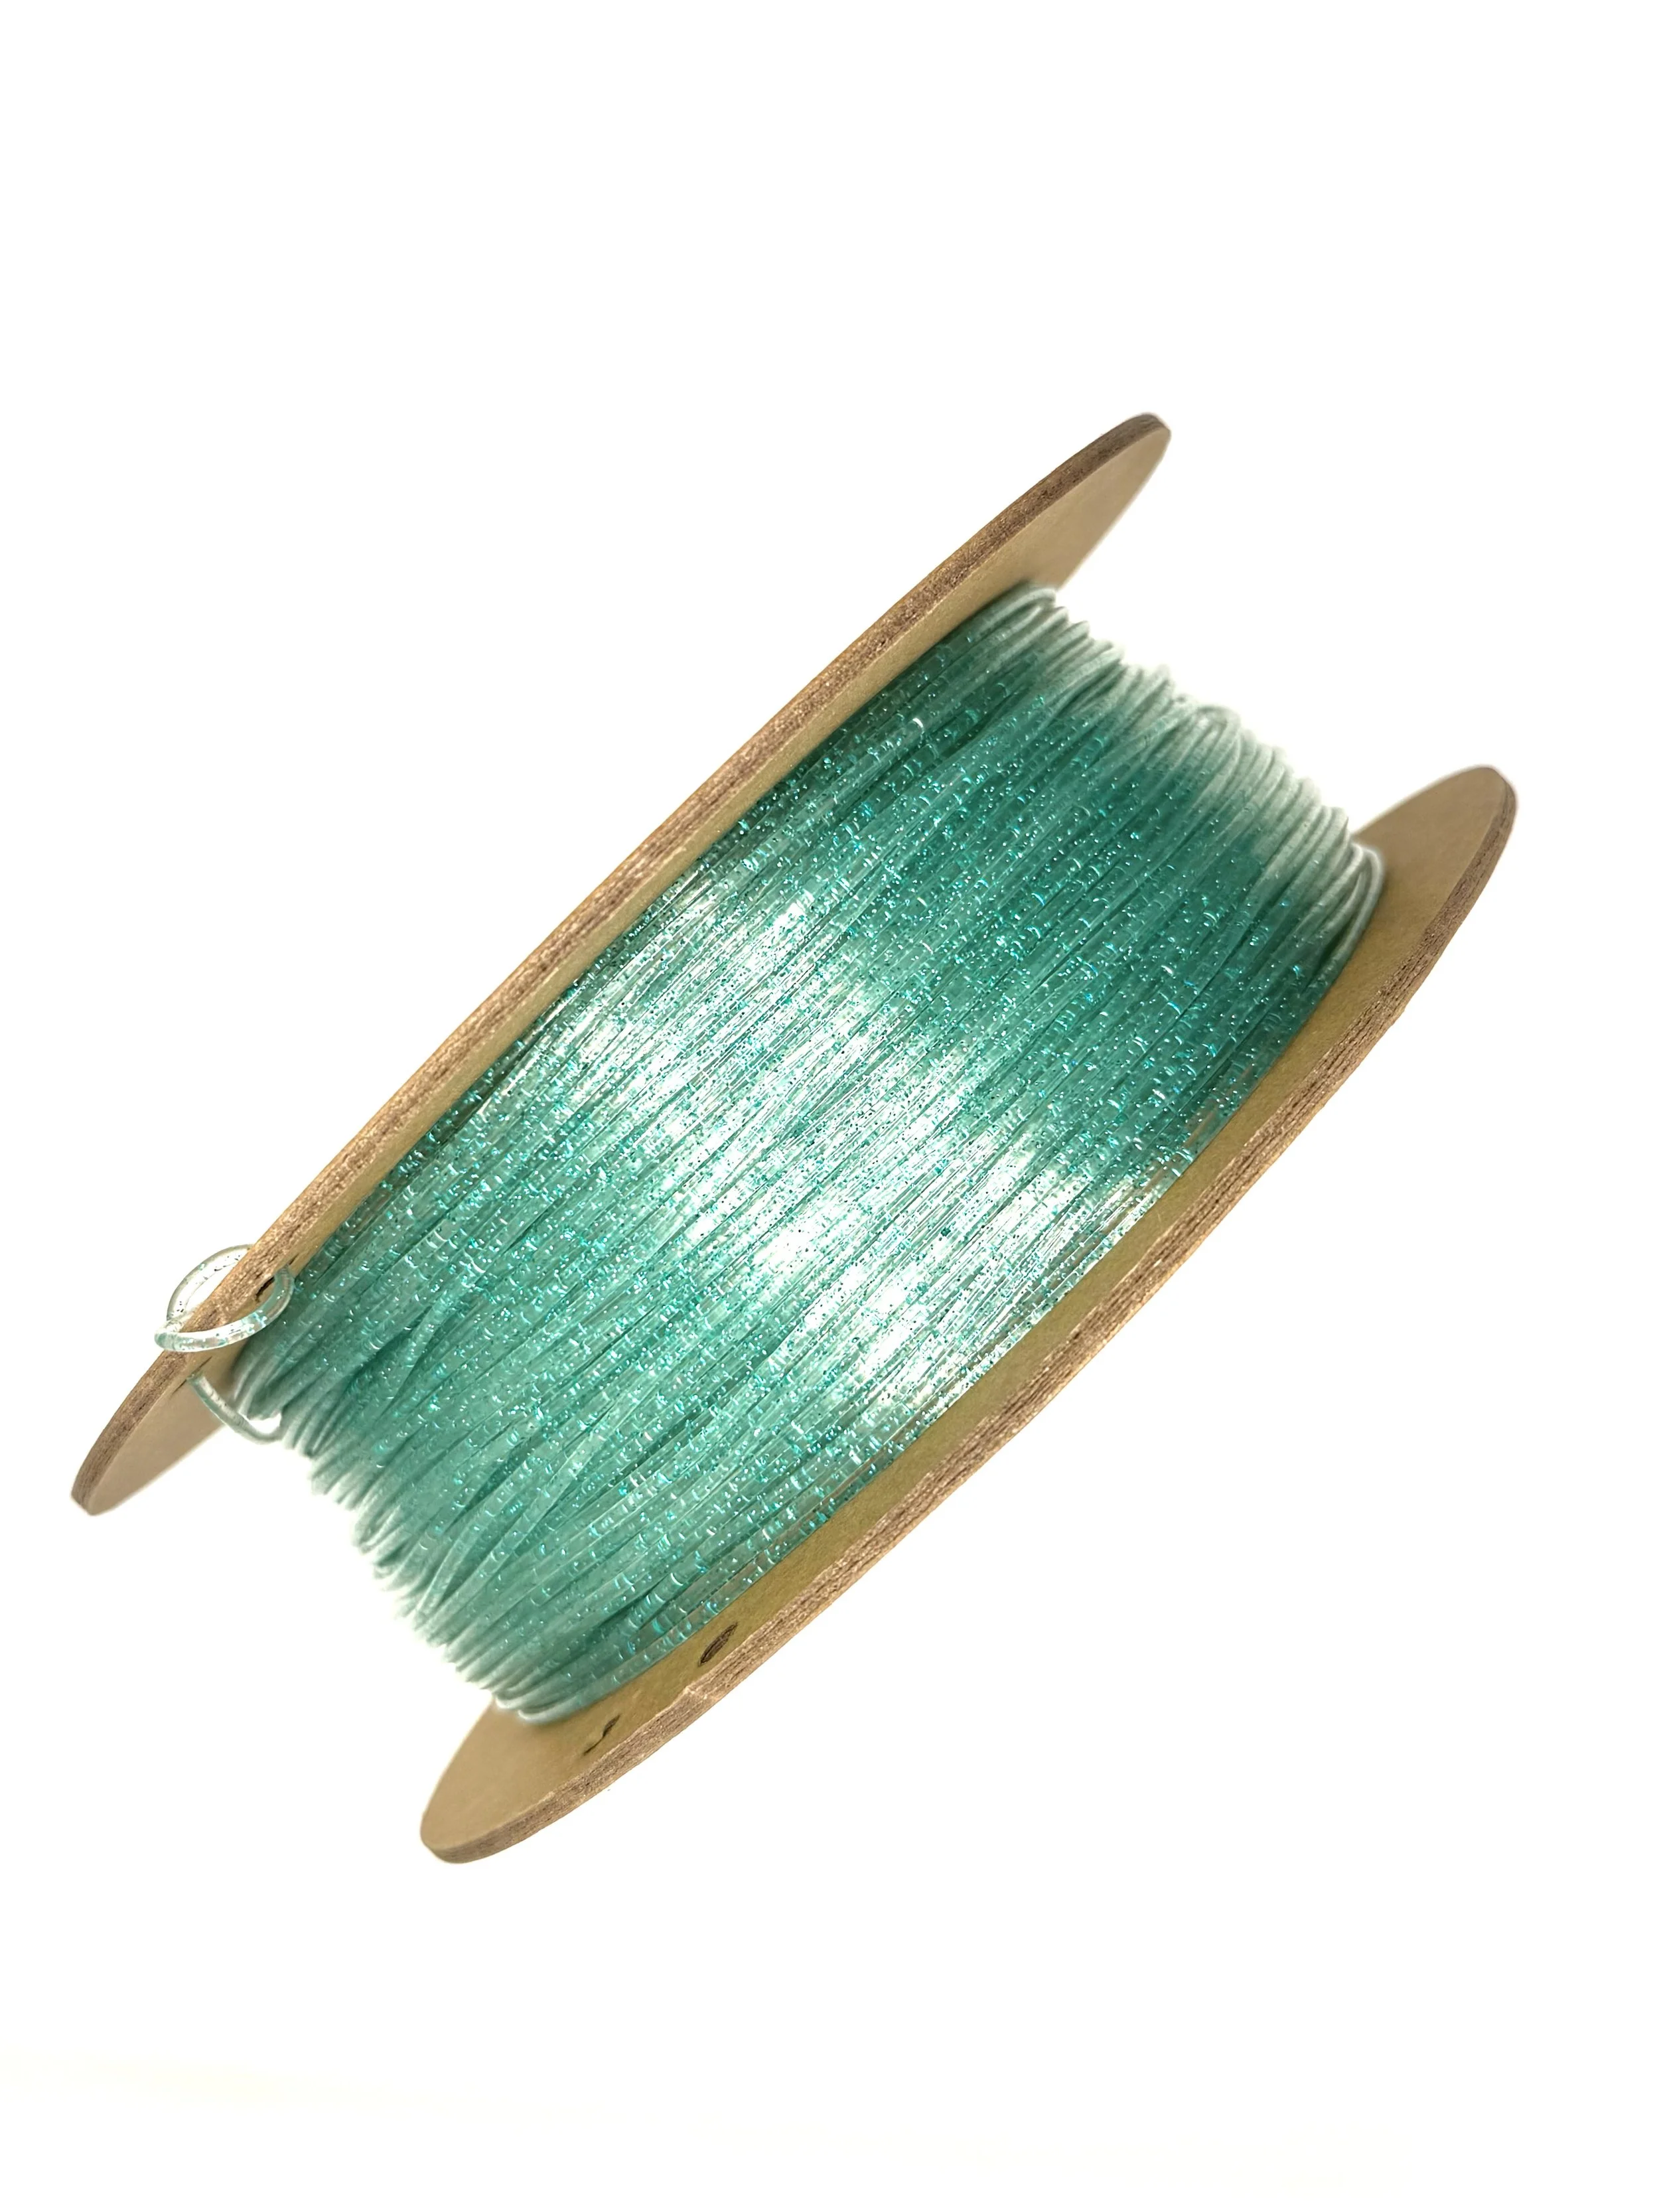
-
A rainbow-catching, eye-dazzling filament that changes color depending on the viewing angle or light source. With multi-layer thin-film pigments, this filament gives a prismatic sheen to your prints, ideal for high-fashion, toys, or artistic pieces.
Color-shifting magic, engineered to shine.
How it works:
Interference pigments bend light at different wavelengths, producing a spectrum of reflected hues as you move around the object.
Light angle = color angle.
Core Material:
Iridescent Flake Complex: 28% – Ultra-thin layered pigments
Flexible Transparent Matrix: 72% – Maintains light mobility across surface
Where to use it:
Fashion accessories – Jewelry, hair clips, bags
Futuristic art – Make your prints alive with color
Display models – Eye-catching effects for collectors
Event props – Shine under LEDs or camera lights
-
Click here to access our new and improved TimeMass GPT Assistant. Just tell it your printer model and the TimeMass filament you're using—it will instantly recommend the exact parameters you need to start printing successfully.
Using a Bambu Lab printer?
Click here to download our updated Bambu Lab profile. All printing parameters are fully optimized and tested—just load the file and start printing.1. Introduction
These parameters are designed to help avoid printing issues; however, temperatures and speed timings can be adjusted based on your specific goals. For example, if you prefer a less rigid result, we recommend using a lower temperature. This section outlines a complete slicing and printing profile for TimeMass Iridescent Green, tailored for printers with a 0.8 mm nozzle. If the print is not being successful, please lower the nozzle temperature by 10°C and start over until an optimal print is achieved. Please check the manual for printing parameters .2. Temperature Settings
2.aNozzle Temperature: 230°C — Optimal for flowability while avoiding decomposition (which begins around 250°C).
2.bBed Temperature: 75°C — Ensures strong first-layer adhesion and prevents moisture bubbling.
2.cNozzle Temperature Range: 230–245°C — Timeplast melts around 165°C but prints best at 240°C for precise viscosity control.3. Cooling Settings
3.aNo Cooling for First Layers: 3 layers — Prevents shrinkage due to rapid cooling of moisture-rich filament.
3.bFan Minimum Speed: 0% for the first 100 seconds — Allows heat retention during early layers.
3.cFan Maximum Speed: 15% starting at 8 seconds — Avoids overcooling that can lead to warping.
3.dKeep Fan Always On: OFF — Allows vapor to escape and avoids internal fogging.
3.eSlow Down for Cooling: ON — Improves surface finish with controlled cooling.
3.fForce Cooling for Overhangs: OFF — Overcooling can deform bridges in Timeplast.
3.gFan for Overhangs: 15% — Only for essential cooling in complex areas.
3.hPre-Start Fan Time: 2 seconds — Minimizes pressure differential during the first layer.4. Volumetric Flow
4.aMax Volumetric Speed: 12 mm³/s — Based on a melt flow index of ~15 g/10min, allows high-speed printing.
4.bRamming Speed: 3 mm³/s — Prevents bubbles or popping from pressure spikes.5. Retraction and Flow
5.aRetraction Distance: 0.4 mm — Minimal retraction required for soft filaments to avoid stringing.
5.bRetraction Speed: 15 mm/s — Slow enough to avoid pulling molten plastic.
5.cPressure Advance: 0.05 — Compensates for nozzle lag at high flow rates.
5.dFlow Ratio: 92% — Slight under-extrusion avoids swelling and surface artifacts.6. Precision Settings
6.aGap Closing Radius: 0.1 mm — Tolerant of gaps in thicker walls.
6.bArc Fitting: ON — Reduces G-code size and smooths curve transitions.
6.cElephant Foot Compensation: 0.1 mm — Offsets squishing in the first layer caused by large bead sizes.7. Walls and Shells
7.aWall Loops: 2 — Minimum for strength when using a 0.8 mm nozzle.
7.bDetect Thin Walls: ON — Ensures tight geometries aren’t skipped.
7.cTop/Bottom Shell Layers: 3 — Provides good coverage; increase if watertightness is needed.
7.dTop/Bottom Thickness: 1.2 mm — Equals 1.5x the nozzle size for solid strength.
7.eTop/Bottom Pattern: Monotonic — Distributes tension evenly and improves surface finish.8. Geometry and Movement
8.aWall Order: Inner before Outer — Creates cleaner outer surfaces.
8.bInfill First: OFF — Maintains precise outer dimensions.
8.cSmooth Speed Transition: ON — Prevents ringing caused by abrupt speed changes.
8.dSmooth Coefficient: 80 — Ideal damping for soft materials.
8.eAvoid Crossing Wall: ON — Minimizes stringing across part walls.
8.fMax Detour for Crossing: 10 mm or 5% — Balances time with print cleanliness.9. Layer and Width Settings
9.aLayer Height: 0.3 mm — Optimal for strength and resolution using a 0.8 mm nozzle.
9.bInitial Layer Height: 0.35 mm — Slightly higher to improve adhesion.
9.cLine Widths (all): 0.8 mm — Matches nozzle diameter for consistent extrusion.10. Seam Settings
10.aSeam Position: Aligned or Back — Use aligned for mechanical consistency, back for visual appeal.
10.bSmart Scarf Seam: ON — Automatically adjusts seam location to reduce visual impact.
10.cSeam Angle: 155° — Standard seam angle for clean transitions.
10.dSeam Steps: 10 — Smooths seam path and improves visual finish.11. Infill Settings
11.aWall/Infill Overlap: 10% — Prevents infill from deforming soft exterior walls.
11.bInfill Combination: ON — Consolidates paths for efficiency.
11.cDetect Floating Shells: ON — Ensures unsupported vertical structures are printed reliably.
11.dSparse Infill Density: 20–25% — Balanced rigidity vs. material use.
11.eSparse Pattern: Grid — Stable and efficient for flexible geometries.12. Speed Settings
12.aTravel: 160 mm/s — Fast but safe against backlash.
12.bInitial Layer: 15 mm/s — Prevents nozzle from skimming and ensures bed adhesion.
12.cOuter Wall: 60 mm/s — Controlled speed for surface quality.
12.dInner Wall: 90 mm/s — Slightly faster without compromising control.
12.eSmall Perimeter: 35 mm/s — Reduced speed for detailed geometry.
12.fTop Surface: 40 mm/s — Improves finish on topmost layers.
12.gInfill: 100–120 mm/s — Takes advantage of high flowability.13. Acceleration Settings
13.aNormal Print: 2000 mm/s² — Prevents ringing in soft filaments.
13.bTravel: 4000 mm/s² — Enables fast movement without harsh transitions.
13.cInitial Layer: 300 mm/s² — Gentle movement prevents lifting from the bed.
13.dOuter Wall: 1500 mm/s² — Improves outer surface clarity.
13.eInner Wall: 2000 mm/s² — Balanced for structural components.
13.fTop Surface: 1500 mm/s² — Ensures smooth detailing.14. Adhesion and Brims
14.aSkirt Loops: 2 — Helps prime nozzle and start cleanly.
14.bBrim Width: 6 mm — Helps hold soft materials down.
14.cBrim Gap: 0.15 mm — Allows for easy removal without tearing.15. Prime Tower and Flush Settings
15.aPrime Tower: ON — Purges moisture and early flow inconsistencies.
15.bTower Width: 40 mm — Prevents collapse due to heat.
15.cBrim Width (Tower): 4 mm — Adds stability to the purge base.
15.dFlush Into Support: ON — Discards unwanted early flow safely.16. G-Code Start Script
M900 K0.05 ; Pressure Advance M106 S0 ; Fan off G92 E0 G1 E15 F300 ; purge line G92 E0
17. Additional Notes
17.aDry filament at 155 F for 2 hours before use.
17.bStore with desiccant.
17.cKeep extruder door open to allow vapor to escape.
17.dAvoid long dwell times at high temperatures.If you need any other assistance, feel free to reach out to us anytime at timeplast@timeplast.com — we’ll be happy to help.
Free U.S. standard shipping on orders of 5+ spools!
Iridescent Blue

-
A rainbow-catching, eye-dazzling filament that changes color depending on the viewing angle or light source. With multi-layer thin-film pigments, this filament gives a prismatic sheen to your prints, ideal for high-fashion, toys, or artistic pieces.
Color-shifting magic, engineered to shine.
How it works:
Interference pigments bend light at different wavelengths, producing a spectrum of reflected hues as you move around the object.
Light angle = color angle.
Core Material:
Iridescent Flake Complex: 28% – Ultra-thin layered pigments
Flexible Transparent Matrix: 72% – Maintains light mobility across surface
Where to use it:
Fashion accessories – Jewelry, hair clips, bags
Futuristic art – Make your prints alive with color
Display models – Eye-catching effects for collectors
Event props – Shine under LEDs or camera lights
-
Click here to access our new and improved TimeMass GPT Assistant. Just tell it your printer model and the TimeMass filament you're using—it will instantly recommend the exact parameters you need to start printing successfully.
1. Introduction
These parameters are designed to help avoid printing issues; however, temperatures and speed timings can be adjusted based on your specific goals. For example, if you prefer a less rigid result, we recommend using a lower temperature. This section outlines a complete slicing and printing profile for TimeMass Iridescent Blue tailored for printers with a 0.8 mm nozzle. If the print is not being successful, please lower the nozzle temperature by 10°C and start over until an optimal print is achieved. Please check the manual for printing parameters.2. Temperature Settings
2.aNozzle Temperature: 230°C — Optimal for flowability while avoiding decomposition (which begins around 250°C).
2.bBed Temperature: 75°C — Ensures strong first-layer adhesion and prevents moisture bubbling.
2.cNozzle Temperature Range: 230–245°C — Timeplast melts around 165°C but prints best at 240°C for precise viscosity control.3. Cooling Settings
3.aNo Cooling for First Layers: 3 layers — Prevents shrinkage due to rapid cooling of moisture-rich filament.
3.bFan Minimum Speed: 0% for the first 100 seconds — Allows heat retention during early layers.
3.cFan Maximum Speed: 15% starting at 8 seconds — Avoids overcooling that can lead to warping.
3.dKeep Fan Always On: OFF — Allows vapor to escape and avoids internal fogging.
3.eSlow Down for Cooling: ON — Improves surface finish with controlled cooling.
3.fForce Cooling for Overhangs: OFF — Overcooling can deform bridges in Timeplast.
3.gFan for Overhangs: 15% — Only for essential cooling in complex areas.
3.hPre-Start Fan Time: 2 seconds — Minimizes pressure differential during the first layer.4. Volumetric Flow
4.aMax Volumetric Speed: 12 mm³/s — Based on a melt flow index of ~15 g/10min, allows high-speed printing.
4.bRamming Speed: 3 mm³/s — Prevents bubbles or popping from pressure spikes.5. Retraction and Flow
5.aRetraction Distance: 0.4 mm — Minimal retraction required for soft filaments to avoid stringing.
5.bRetraction Speed: 15 mm/s — Slow enough to avoid pulling molten plastic.
5.cPressure Advance: 0.05 — Compensates for nozzle lag at high flow rates.
5.dFlow Ratio: 92% — Slight under-extrusion avoids swelling and surface artifacts.6. Precision Settings
6.aGap Closing Radius: 0.1 mm — Tolerant of gaps in thicker walls.
6.bArc Fitting: ON — Reduces G-code size and smooths curve transitions.
6.cElephant Foot Compensation: 0.1 mm — Offsets squishing in the first layer caused by large bead sizes.7. Walls and Shells
7.aWall Loops: 2 — Minimum for strength when using a 0.8 mm nozzle.
7.bDetect Thin Walls: ON — Ensures tight geometries aren’t skipped.
7.cTop/Bottom Shell Layers: 3 — Provides good coverage; increase if watertightness is needed.
7.dTop/Bottom Thickness: 1.2 mm — Equals 1.5x the nozzle size for solid strength.
7.eTop/Bottom Pattern: Monotonic — Distributes tension evenly and improves surface finish.8. Geometry and Movement
8.aWall Order: Inner before Outer — Creates cleaner outer surfaces.
8.bInfill First: OFF — Maintains precise outer dimensions.
8.cSmooth Speed Transition: ON — Prevents ringing caused by abrupt speed changes.
8.dSmooth Coefficient: 80 — Ideal damping for soft materials.
8.eAvoid Crossing Wall: ON — Minimizes stringing across part walls.
8.fMax Detour for Crossing: 10 mm or 5% — Balances time with print cleanliness.9. Layer and Width Settings
9.aLayer Height: 0.3 mm — Optimal for strength and resolution using a 0.8 mm nozzle.
9.bInitial Layer Height: 0.35 mm — Slightly higher to improve adhesion.
9.cLine Widths (all): 0.8 mm — Matches nozzle diameter for consistent extrusion.10. Seam Settings
10.aSeam Position: Aligned or Back — Use aligned for mechanical consistency, back for visual appeal.
10.bSmart Scarf Seam: ON — Automatically adjusts seam location to reduce visual impact.
10.cSeam Angle: 155° — Standard seam angle for clean transitions.
10.dSeam Steps: 10 — Smooths seam path and improves visual finish.11. Infill Settings
11.aWall/Infill Overlap: 10% — Prevents infill from deforming soft exterior walls.
11.bInfill Combination: ON — Consolidates paths for efficiency.
11.cDetect Floating Shells: ON — Ensures unsupported vertical structures are printed reliably.
11.dSparse Infill Density: 20–25% — Balanced rigidity vs. material use.
11.eSparse Pattern: Grid — Stable and efficient for flexible geometries.12. Speed Settings
12.aTravel: 160 mm/s — Fast but safe against backlash.
12.bInitial Layer: 15 mm/s — Prevents nozzle from skimming and ensures bed adhesion.
12.cOuter Wall: 60 mm/s — Controlled speed for surface quality.
12.dInner Wall: 90 mm/s — Slightly faster without compromising control.
12.eSmall Perimeter: 35 mm/s — Reduced speed for detailed geometry.
12.fTop Surface: 40 mm/s — Improves finish on topmost layers.
12.gInfill: 100–120 mm/s — Takes advantage of high flowability.13. Acceleration Settings
13.aNormal Print: 2000 mm/s² — Prevents ringing in soft filaments.
13.bTravel: 4000 mm/s² — Enables fast movement without harsh transitions.
13.cInitial Layer: 300 mm/s² — Gentle movement prevents lifting from the bed.
13.dOuter Wall: 1500 mm/s² — Improves outer surface clarity.
13.eInner Wall: 2000 mm/s² — Balanced for structural components.
13.fTop Surface: 1500 mm/s² — Ensures smooth detailing.14. Adhesion and Brims
14.aSkirt Loops: 2 — Helps prime nozzle and start cleanly.
14.bBrim Width: 6 mm — Helps hold soft materials down.
14.cBrim Gap: 0.15 mm — Allows for easy removal without tearing.15. Prime Tower and Flush Settings
15.aPrime Tower: ON — Purges moisture and early flow inconsistencies.
15.bTower Width: 40 mm — Prevents collapse due to heat.
15.cBrim Width (Tower): 4 mm — Adds stability to the purge base.
15.dFlush Into Support: ON — Discards unwanted early flow safely.16. G-Code Start Script
M900 K0.05 ; Pressure Advance M106 S0 ; Fan off G92 E0 G1 E15 F300 ; purge line G92 E0
17. Additional Notes
17.aDry filament at 155 F for 2 hours before use.
17.bStore with desiccant.
17.cKeep extruder door open to allow vapor to escape.
17.dAvoid long dwell times at high temperatures.If you need any other assistance, feel free to reach out to us anytime at timeplast@timeplast.com — we’ll be happy to help.
Free U.S. standard shipping on orders of 5+ spools!
Holographic
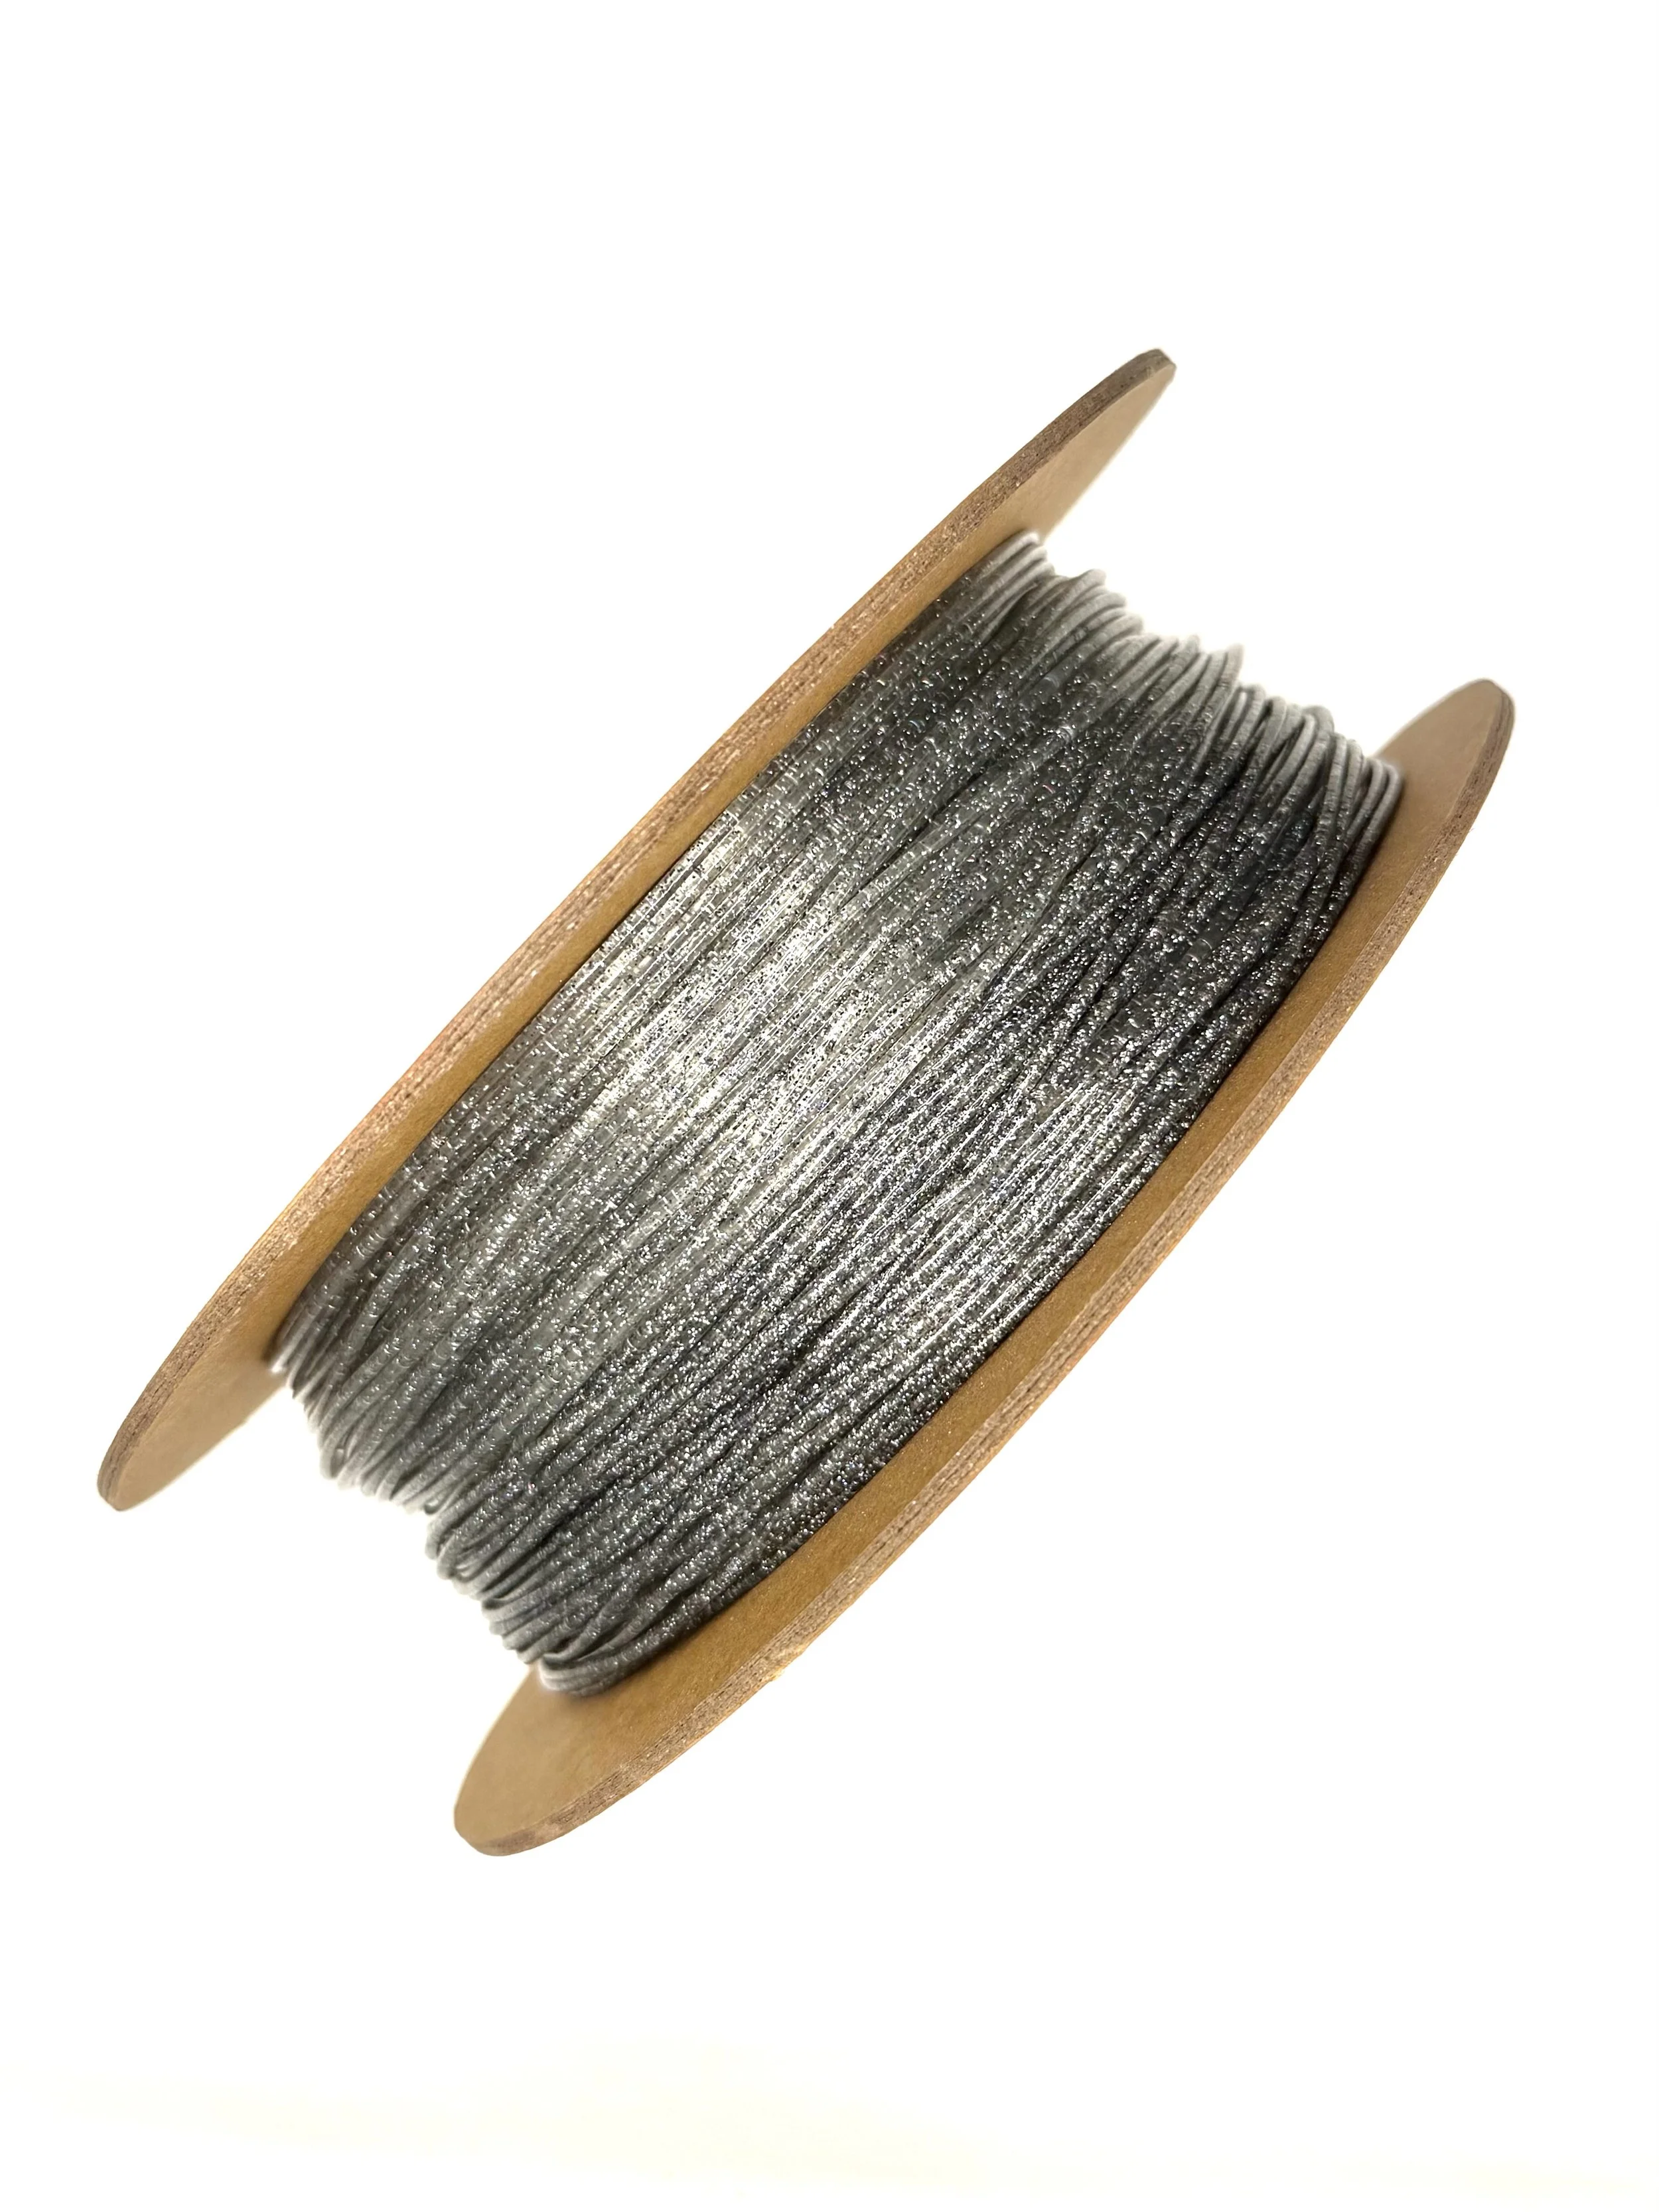
-
A rainbow-catching, eye-dazzling filament that changes color depending on the viewing angle or light source. With multi-layer thin-film pigments, this filament gives a prismatic sheen to your prints, ideal for high-fashion, toys, or artistic pieces.
Color-shifting magic, engineered to shine.
How it works:
Interference pigments bend light at different wavelengths, producing a spectrum of reflected hues as you move around the object.
Light angle = color angle.
Core Material:
Iridescent Flake Complex: 28% – Ultra-thin layered pigments
Flexible Transparent Matrix: 72% – Maintains light mobility across surface
Where to use it:
Fashion accessories – Jewelry, hair clips, bags
Futuristic art – Make your prints alive with color
Display models – Eye-catching effects for collectors
Event props – Shine under LEDs or camera lights
-
Click here to access our new and improved TimeMass GPT Assistant. Just tell it your printer model and the TimeMass filament you're using—it will instantly recommend the exact parameters you need to start printing successfully.
1. Introduction
These parameters are designed to help avoid printing issues; however, temperatures and speed timings can be adjusted based on your specific goals. For example, if you prefer a less rigid result, we recommend using a lower temperature. This section outlines a complete slicing and printing profile for TimeMass Holographic tailored for printers with a 0.8 mm nozzle. If the print is not being successful, please lower the nozzle temperature by 10°C and start over until an optimal print is achieved. Please check the manual for printing parameters.2. Temperature Settings
2.aNozzle Temperature: 230°C — Optimal for flowability while avoiding decomposition (which begins around 250°C).
2.bBed Temperature: 75°C — Ensures strong first-layer adhesion and prevents moisture bubbling.
2.cNozzle Temperature Range: 230–245°C — Timeplast melts around 165°C but prints best at 240°C for precise viscosity control.3. Cooling Settings
3.aNo Cooling for First Layers: 3 layers — Prevents shrinkage due to rapid cooling of moisture-rich filament.
3.bFan Minimum Speed: 0% for the first 100 seconds — Allows heat retention during early layers.
3.cFan Maximum Speed: 15% starting at 8 seconds — Avoids overcooling that can lead to warping.
3.dKeep Fan Always On: OFF — Allows vapor to escape and avoids internal fogging.
3.eSlow Down for Cooling: ON — Improves surface finish with controlled cooling.
3.fForce Cooling for Overhangs: OFF — Overcooling can deform bridges in Timeplast.
3.gFan for Overhangs: 15% — Only for essential cooling in complex areas.
3.hPre-Start Fan Time: 2 seconds — Minimizes pressure differential during the first layer.4. Volumetric Flow
4.aMax Volumetric Speed: 12 mm³/s — Based on a melt flow index of ~15 g/10min, allows high-speed printing.
4.bRamming Speed: 3 mm³/s — Prevents bubbles or popping from pressure spikes.5. Retraction and Flow
5.aRetraction Distance: 0.4 mm — Minimal retraction required for soft filaments to avoid stringing.
5.bRetraction Speed: 15 mm/s — Slow enough to avoid pulling molten plastic.
5.cPressure Advance: 0.05 — Compensates for nozzle lag at high flow rates.
5.dFlow Ratio: 92% — Slight under-extrusion avoids swelling and surface artifacts.6. Precision Settings
6.aGap Closing Radius: 0.1 mm — Tolerant of gaps in thicker walls.
6.bArc Fitting: ON — Reduces G-code size and smooths curve transitions.
6.cElephant Foot Compensation: 0.1 mm — Offsets squishing in the first layer caused by large bead sizes.7. Walls and Shells
7.aWall Loops: 2 — Minimum for strength when using a 0.8 mm nozzle.
7.bDetect Thin Walls: ON — Ensures tight geometries aren’t skipped.
7.cTop/Bottom Shell Layers: 3 — Provides good coverage; increase if watertightness is needed.
7.dTop/Bottom Thickness: 1.2 mm — Equals 1.5x the nozzle size for solid strength.
7.eTop/Bottom Pattern: Monotonic — Distributes tension evenly and improves surface finish.8. Geometry and Movement
8.aWall Order: Inner before Outer — Creates cleaner outer surfaces.
8.bInfill First: OFF — Maintains precise outer dimensions.
8.cSmooth Speed Transition: ON — Prevents ringing caused by abrupt speed changes.
8.dSmooth Coefficient: 80 — Ideal damping for soft materials.
8.eAvoid Crossing Wall: ON — Minimizes stringing across part walls.
8.fMax Detour for Crossing: 10 mm or 5% — Balances time with print cleanliness.9. Layer and Width Settings
9.aLayer Height: 0.3 mm — Optimal for strength and resolution using a 0.8 mm nozzle.
9.bInitial Layer Height: 0.35 mm — Slightly higher to improve adhesion.
9.cLine Widths (all): 0.8 mm — Matches nozzle diameter for consistent extrusion.10. Seam Settings
10.aSeam Position: Aligned or Back — Use aligned for mechanical consistency, back for visual appeal.
10.bSmart Scarf Seam: ON — Automatically adjusts seam location to reduce visual impact.
10.cSeam Angle: 155° — Standard seam angle for clean transitions.
10.dSeam Steps: 10 — Smooths seam path and improves visual finish.11. Infill Settings
11.aWall/Infill Overlap: 10% — Prevents infill from deforming soft exterior walls.
11.bInfill Combination: ON — Consolidates paths for efficiency.
11.cDetect Floating Shells: ON — Ensures unsupported vertical structures are printed reliably.
11.dSparse Infill Density: 20–25% — Balanced rigidity vs. material use.
11.eSparse Pattern: Grid — Stable and efficient for flexible geometries.12. Speed Settings
12.aTravel: 160 mm/s — Fast but safe against backlash.
12.bInitial Layer: 15 mm/s — Prevents nozzle from skimming and ensures bed adhesion.
12.cOuter Wall: 60 mm/s — Controlled speed for surface quality.
12.dInner Wall: 90 mm/s — Slightly faster without compromising control.
12.eSmall Perimeter: 35 mm/s — Reduced speed for detailed geometry.
12.fTop Surface: 40 mm/s — Improves finish on topmost layers.
12.gInfill: 100–120 mm/s — Takes advantage of high flowability.13. Acceleration Settings
13.aNormal Print: 2000 mm/s² — Prevents ringing in soft filaments.
13.bTravel: 4000 mm/s² — Enables fast movement without harsh transitions.
13.cInitial Layer: 300 mm/s² — Gentle movement prevents lifting from the bed.
13.dOuter Wall: 1500 mm/s² — Improves outer surface clarity.
13.eInner Wall: 2000 mm/s² — Balanced for structural components.
13.fTop Surface: 1500 mm/s² — Ensures smooth detailing.14. Adhesion and Brims
14.aSkirt Loops: 2 — Helps prime nozzle and start cleanly.
14.bBrim Width: 6 mm — Helps hold soft materials down.
14.cBrim Gap: 0.15 mm — Allows for easy removal without tearing.15. Prime Tower and Flush Settings
15.aPrime Tower: ON — Purges moisture and early flow inconsistencies.
15.bTower Width: 40 mm — Prevents collapse due to heat.
15.cBrim Width (Tower): 4 mm — Adds stability to the purge base.
15.dFlush Into Support: ON — Discards unwanted early flow safely.16. G-Code Start Script
M900 K0.05 ; Pressure Advance M106 S0 ; Fan off G92 E0 G1 E15 F300 ; purge line G92 E0
17. Additional Notes
17.aDry filament at 155 F for 2 hours before use.
17.bStore with desiccant.
17.cKeep extruder door open to allow vapor to escape.
17.dAvoid long dwell times at high temperatures.If you need any other assistance, feel free to reach out to us anytime at timeplast@timeplast.com — we’ll be happy to help.
Free U.S. standard shipping on orders of 5+ spools!
Iridescent Bronze
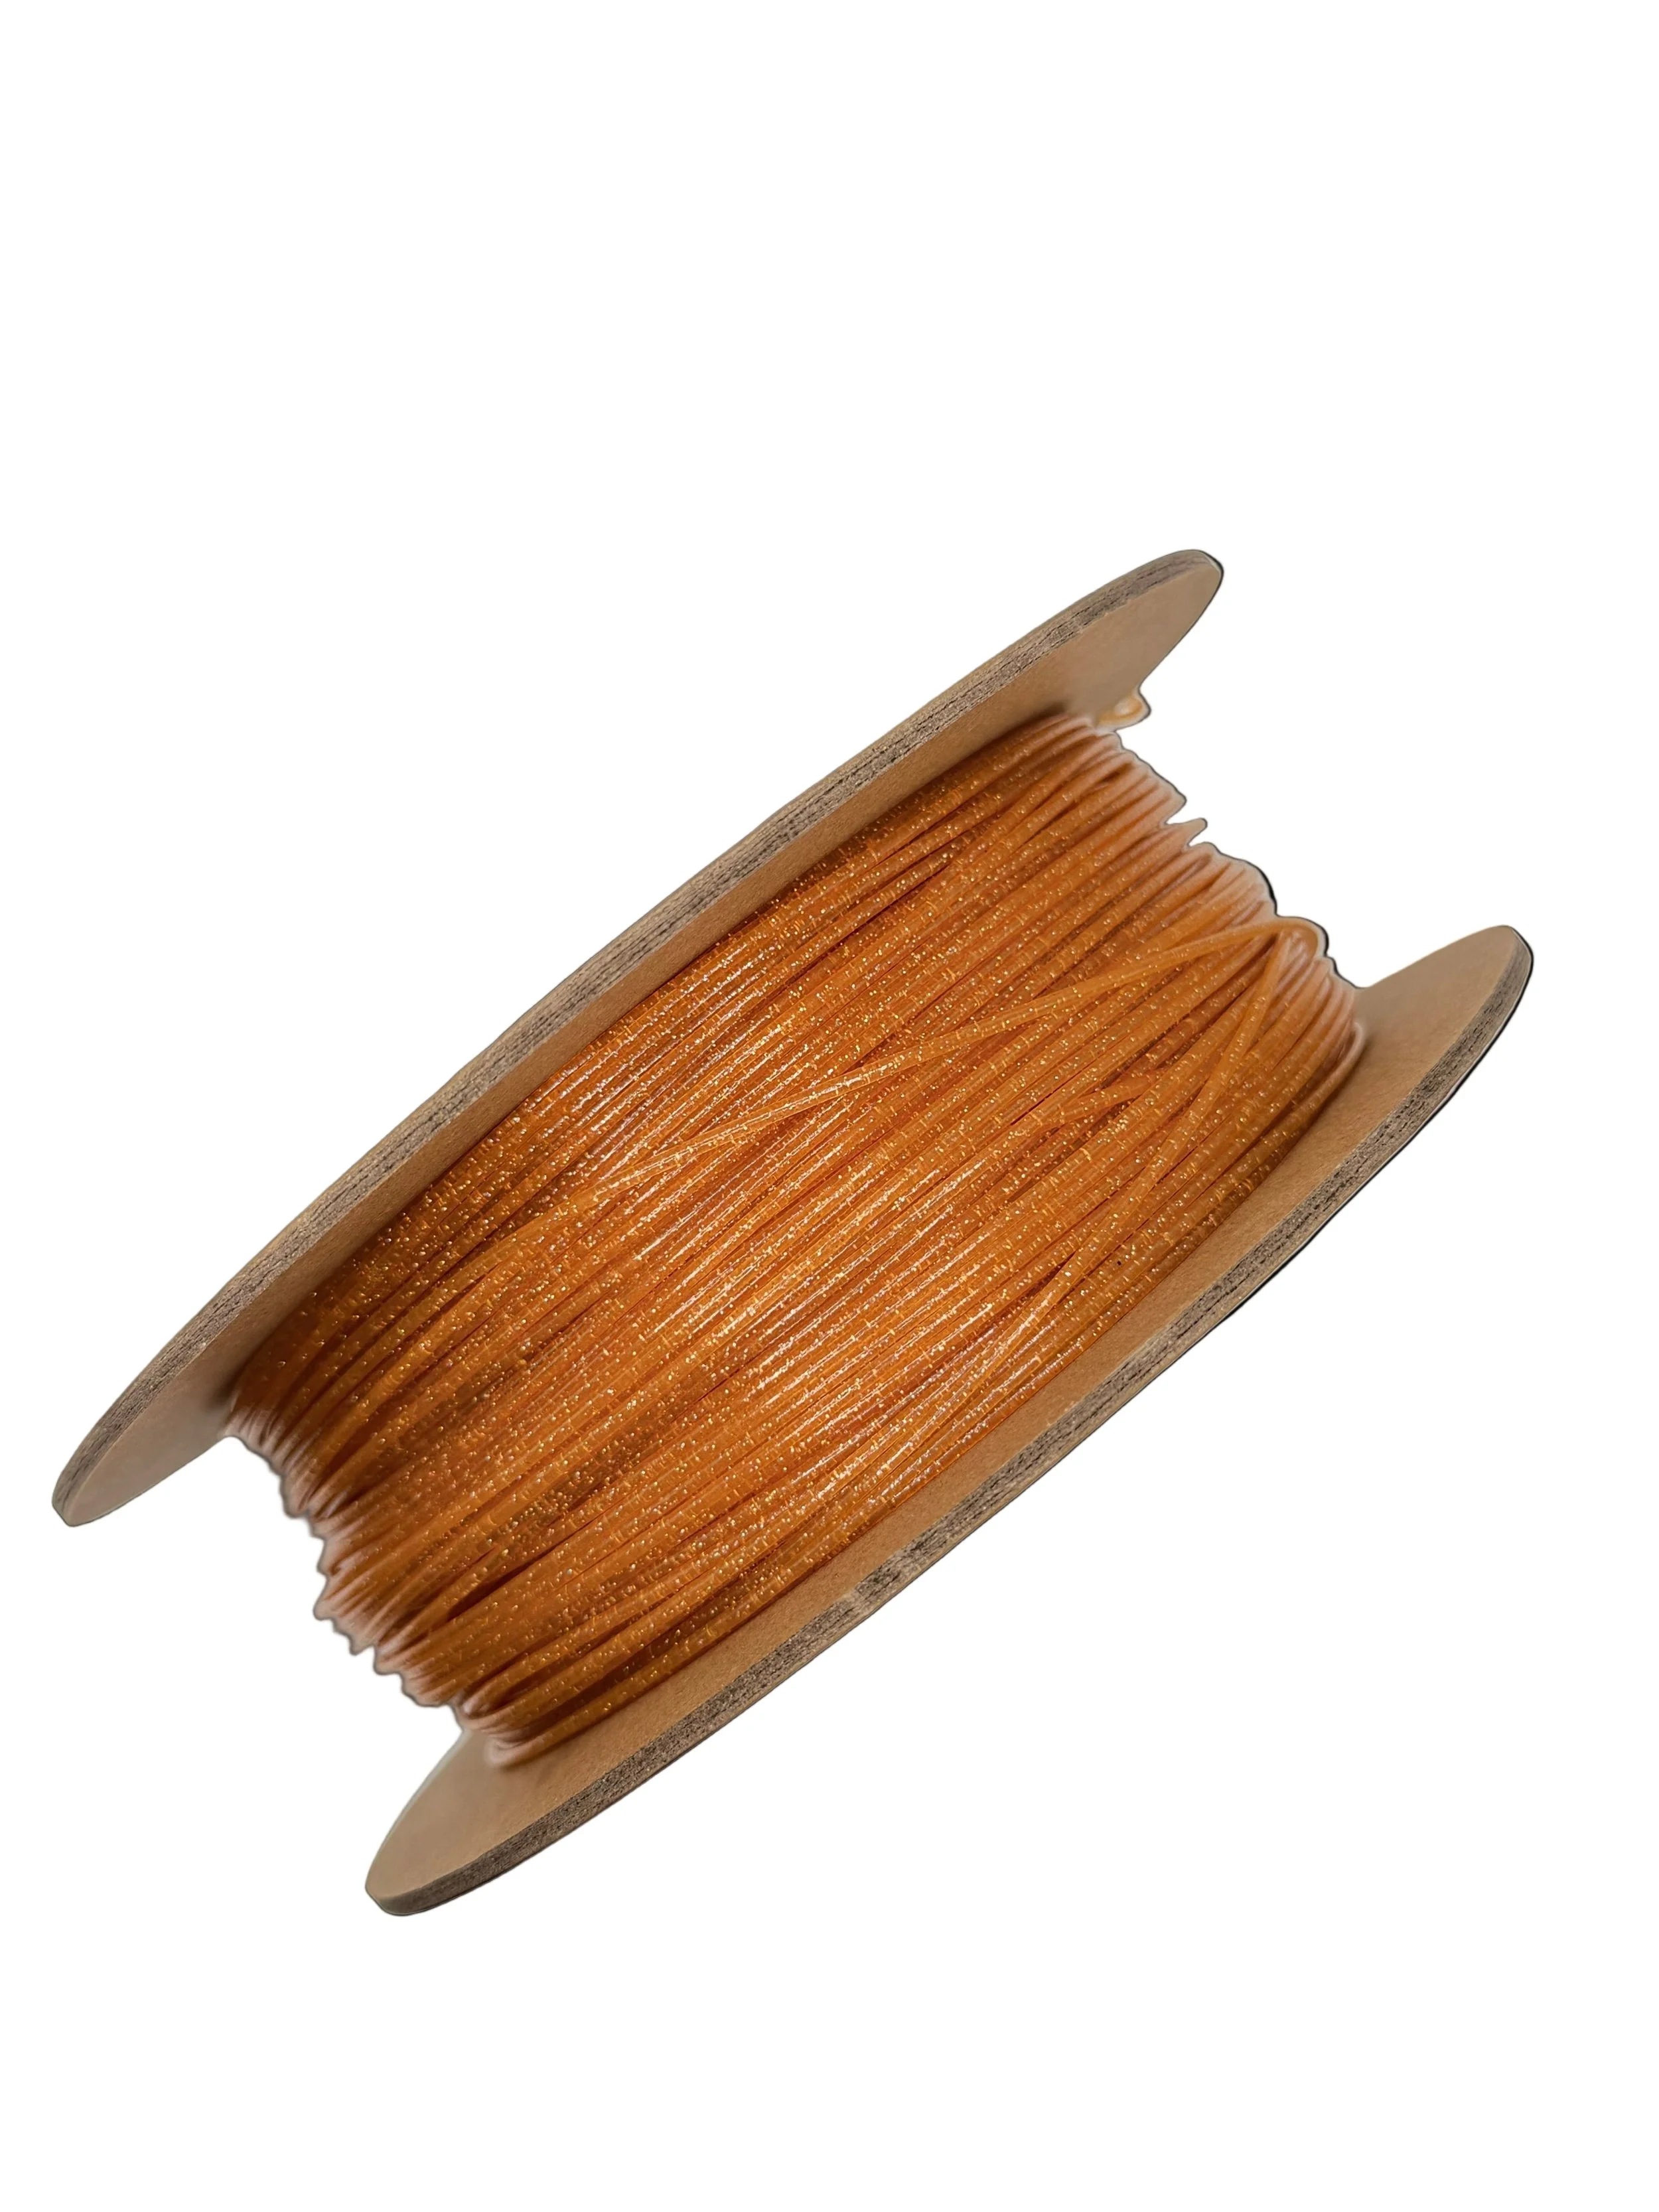
-
A triple-visibility filament that glows in the dark, reflects light, and sparkles in daylight. Made for visibility, safety, and unapologetic flair. If you want your prints to pop—day or night—this is your go-to.
Shine. Reflect. Dazzle.
How it works:
Multiple light-responsive additives are embedded within a durable polymer carrier, activated by natural or artificial light.
Day or night – it never goes unnoticed.
Core Components:
Photoluminescent Pigments: 30% – Recharge in light, glow for hours
Retroreflective Microbeads: 20% – Bounce light directly back to source
Iridescent Flakes: 10% – Add visual punch under sunlight
Base Material: 40% – Tough and printable for long-lasting use
Where to use it:
Night cycling accessories – Make yourself seen
Safety gear prototypes – Reflective tools for visibility testing
Party/event props – Light up the night with flair
Fashion or cosplay – Wearable elements that glow and shimmer
-
Click here to access our new and improved TimeMass GPT Assistant. Just tell it your printer model and the TimeMass filament you're using—it will instantly recommend the exact parameters you need to start printing successfully.
1. Introduction
These parameters are designed to help avoid printing issues; however, temperatures and speed timings can be adjusted based on your specific goals. For example, if you prefer a less rigid result, we recommend using a lower temperature. This section outlines a complete slicing and printing profile for TimeMass Iridescent Bronze, tailored for printers with a 0.8 mm nozzle. If the print is not being successful, please lower the nozzle temperature by 10°C and start over until an optimal print is achieved. Please check the manual for printing parameters.2. Temperature Settings
2.aNozzle Temperature: 230°C — Optimal for flowability while avoiding decomposition (which begins around 250°C).
2.bBed Temperature: 75°C — Ensures strong first-layer adhesion and prevents moisture bubbling.
2.cNozzle Temperature Range: 230–245°C — Timeplast melts around 165°C but prints best at 240°C for precise viscosity control.3. Cooling Settings
3.aNo Cooling for First Layers: 3 layers — Prevents shrinkage due to rapid cooling of moisture-rich filament.
3.bFan Minimum Speed: 0% for the first 100 seconds — Allows heat retention during early layers.
3.cFan Maximum Speed: 15% starting at 8 seconds — Avoids overcooling that can lead to warping.
3.dKeep Fan Always On: OFF — Allows vapor to escape and avoids internal fogging.
3.eSlow Down for Cooling: ON — Improves surface finish with controlled cooling.
3.fForce Cooling for Overhangs: OFF — Overcooling can deform bridges in Timeplast.
3.gFan for Overhangs: 15% — Only for essential cooling in complex areas.
3.hPre-Start Fan Time: 2 seconds — Minimizes pressure differential during the first layer.4. Volumetric Flow
4.aMax Volumetric Speed: 12 mm³/s — Based on a melt flow index of ~15 g/10min, allows high-speed printing.
4.bRamming Speed: 3 mm³/s — Prevents bubbles or popping from pressure spikes.5. Retraction and Flow
5.aRetraction Distance: 0.4 mm — Minimal retraction required for soft filaments to avoid stringing.
5.bRetraction Speed: 15 mm/s — Slow enough to avoid pulling molten plastic.
5.cPressure Advance: 0.05 — Compensates for nozzle lag at high flow rates.
5.dFlow Ratio: 92% — Slight under-extrusion avoids swelling and surface artifacts.6. Precision Settings
6.aGap Closing Radius: 0.1 mm — Tolerant of gaps in thicker walls.
6.bArc Fitting: ON — Reduces G-code size and smooths curve transitions.
6.cElephant Foot Compensation: 0.1 mm — Offsets squishing in the first layer caused by large bead sizes.7. Walls and Shells
7.aWall Loops: 2 — Minimum for strength when using a 0.8 mm nozzle.
7.bDetect Thin Walls: ON — Ensures tight geometries aren’t skipped.
7.cTop/Bottom Shell Layers: 3 — Provides good coverage; increase if watertightness is needed.
7.dTop/Bottom Thickness: 1.2 mm — Equals 1.5x the nozzle size for solid strength.
7.eTop/Bottom Pattern: Monotonic — Distributes tension evenly and improves surface finish.8. Geometry and Movement
8.aWall Order: Inner before Outer — Creates cleaner outer surfaces.
8.bInfill First: OFF — Maintains precise outer dimensions.
8.cSmooth Speed Transition: ON — Prevents ringing caused by abrupt speed changes.
8.dSmooth Coefficient: 80 — Ideal damping for soft materials.
8.eAvoid Crossing Wall: ON — Minimizes stringing across part walls.
8.fMax Detour for Crossing: 10 mm or 5% — Balances time with print cleanliness.9. Layer and Width Settings
9.aLayer Height: 0.3 mm — Optimal for strength and resolution using a 0.8 mm nozzle.
9.bInitial Layer Height: 0.35 mm — Slightly higher to improve adhesion.
9.cLine Widths (all): 0.8 mm — Matches nozzle diameter for consistent extrusion.10. Seam Settings
10.aSeam Position: Aligned or Back — Use aligned for mechanical consistency, back for visual appeal.
10.bSmart Scarf Seam: ON — Automatically adjusts seam location to reduce visual impact.
10.cSeam Angle: 155° — Standard seam angle for clean transitions.
10.dSeam Steps: 10 — Smooths seam path and improves visual finish.11. Infill Settings
11.aWall/Infill Overlap: 10% — Prevents infill from deforming soft exterior walls.
11.bInfill Combination: ON — Consolidates paths for efficiency.
11.cDetect Floating Shells: ON — Ensures unsupported vertical structures are printed reliably.
11.dSparse Infill Density: 20–25% — Balanced rigidity vs. material use.
11.eSparse Pattern: Grid — Stable and efficient for flexible geometries.12. Speed Settings
12.aTravel: 160 mm/s — Fast but safe against backlash.
12.bInitial Layer: 15 mm/s — Prevents nozzle from skimming and ensures bed adhesion.
12.cOuter Wall: 60 mm/s — Controlled speed for surface quality.
12.dInner Wall: 90 mm/s — Slightly faster without compromising control.
12.eSmall Perimeter: 35 mm/s — Reduced speed for detailed geometry.
12.fTop Surface: 40 mm/s — Improves finish on topmost layers.
12.gInfill: 100–120 mm/s — Takes advantage of high flowability.13. Acceleration Settings
13.aNormal Print: 2000 mm/s² — Prevents ringing in soft filaments.
13.bTravel: 4000 mm/s² — Enables fast movement without harsh transitions.
13.cInitial Layer: 300 mm/s² — Gentle movement prevents lifting from the bed.
13.dOuter Wall: 1500 mm/s² — Improves outer surface clarity.
13.eInner Wall: 2000 mm/s² — Balanced for structural components.
13.fTop Surface: 1500 mm/s² — Ensures smooth detailing.14. Adhesion and Brims
14.aSkirt Loops: 2 — Helps prime nozzle and start cleanly.
14.bBrim Width: 6 mm — Helps hold soft materials down.
14.cBrim Gap: 0.15 mm — Allows for easy removal without tearing.15. Prime Tower and Flush Settings
15.aPrime Tower: ON — Purges moisture and early flow inconsistencies.
15.bTower Width: 40 mm — Prevents collapse due to heat.
15.cBrim Width (Tower): 4 mm — Adds stability to the purge base.
15.dFlush Into Support: ON — Discards unwanted early flow safely.16. G-Code Start Script
M900 K0.05 ; Pressure Advance M106 S0 ; Fan off G92 E0 G1 E15 F300 ; purge line G92 E0
17. Additional Notes
17.aDry filament at 155 F for 2 hours before use.
17.bStore with desiccant.
17.cKeep extruder door open to allow vapor to escape.
17.dAvoid long dwell times at high temperatures.If you need any other assistance, feel free to reach out to us anytime at timeplast@timeplast.com — we’ll be happy to help.
Free U.S. standard shipping on orders of 5+ spools!
Raw essence filament line
Clove
-
Inhale the gentle warmth of clove as TimeMass Clove filament brings to life memories of mulled cider and old-world spice markets. This filament carries real clove botanicals, letting you shape creations that exude a cozy, nostalgic charm with every breath. Thanks to our TimeMass technology’s 70% structured water matrix, the rich clove oils are safeguarded even at 200 °C, so the scent remains pure and potent throughout the printing process. Each piece you print becomes a story of comfort and tradition, wrapped in the authentic aroma of clove.
How it works: 70% structured water vents in-process, buffering heat so clove’s character remains after cooling; water-soluble for controlled release.Scent profile: warm spice with a recognizable eugenol edge.
Great for: kitchen fresheners, vintage-style tags, holiday décor.
Printing recommendations: For reliable prints, please always use a 0.8mm nozzle. A texture plate and a printing adhesive. So that first layer will adhere. For all of the other parameters, please use our specialized GPT here.Add a clove-spice accent to any small print.
-
Click here to access our new and improved TimeMass GPT Assistant. Just tell it your printer model and the TimeMass filament you're using—it will instantly recommend the exact parameters you need to start printing successfully.
1. Introduction
These parameters are designed to help avoid printing issues; however, temperatures and speed timings can be adjusted based on your specific goals. For example, if you prefer a less rigid result, we recommend using a lower temperature. This section outlines a complete slicing and printing profile for TimeMass, tailored for printers with a 0.8 mm nozzle. If the print is not being successful, please lower the nozzle temperature by 10°C and start over until an optimal print is achieved. Please check the manual for printing parameters.2. Temperature Settings
2.aNozzle Temperature: 230°C — Optimal for flowability while avoiding decomposition (which begins around 250°C).
2.bBed Temperature: 75°C — Ensures strong first-layer adhesion and prevents moisture bubbling.
2.cNozzle Temperature Range: 230–245°C — Timeplast melts around 165°C but prints best at 235°C for precise viscosity control.3. Cooling Settings
3.aNo Cooling for First Layers: 3 layers — Prevents shrinkage due to rapid cooling of moisture-rich filament.
3.bFan Minimum Speed: 0% for the first 100 seconds — Allows heat retention during early layers.
3.cFan Maximum Speed: 15% starting at 8 seconds — Avoids overcooling that can lead to warping.
3.dKeep Fan Always On: OFF — Allows vapor to escape and avoids internal fogging.
3.eSlow Down for Cooling: ON — Improves surface finish with controlled cooling.
3.fForce Cooling for Overhangs: OFF — Overcooling can deform bridges in Timeplast.
3.gFan for Overhangs: 15% — Only for essential cooling in complex areas.
3.hPre-Start Fan Time: 2 seconds — Minimizes pressure differential during the first layer.4. Volumetric Flow
4.aMax Volumetric Speed: 12 mm³/s — Based on a melt flow index of ~15 g/10min, allows high-speed printing.
4.bRamming Speed: 3 mm³/s — Prevents bubbles or popping from pressure spikes.5. Retraction and Flow
5.aRetraction Distance: 0.4 mm — Minimal retraction required for soft filaments to avoid stringing.
5.bRetraction Speed: 15 mm/s — Slow enough to avoid pulling molten plastic.
5.cPressure Advance: 0.05 — Compensates for nozzle lag at high flow rates.
5.dFlow Ratio: 92% — Slight under-extrusion avoids swelling and surface artifacts.6. Precision Settings
6.aGap Closing Radius: 0.1 mm — Tolerant of gaps in thicker walls.
6.bArc Fitting: ON — Reduces G-code size and smooths curve transitions.
6.cElephant Foot Compensation: 0.1 mm — Offsets squishing in the first layer caused by large bead sizes.7. Walls and Shells
7.aWall Loops: 2 — Minimum for strength when using a 0.8 mm nozzle.
7.bDetect Thin Walls: ON — Ensures tight geometries aren’t skipped.
7.cTop/Bottom Shell Layers: 3 — Provides good coverage; increase if watertightness is needed.
7.dTop/Bottom Thickness: 1.2 mm — Equals 1.5x the nozzle size for solid strength.
7.eTop/Bottom Pattern: Monotonic — Distributes tension evenly and improves surface finish.8. Geometry and Movement
8.aWall Order: Inner before Outer — Creates cleaner outer surfaces.
8.bInfill First: OFF — Maintains precise outer dimensions.
8.cSmooth Speed Transition: ON — Prevents ringing caused by abrupt speed changes.
8.dSmooth Coefficient: 80 — Ideal damping for soft materials.
8.eAvoid Crossing Wall: ON — Minimizes stringing across part walls.
8.fMax Detour for Crossing: 10 mm or 5% — Balances time with print cleanliness.9. Layer and Width Settings
9.aLayer Height: 0.3 mm — Optimal for strength and resolution using a 0.8 mm nozzle.
9.bInitial Layer Height: 0.35 mm — Slightly higher to improve adhesion.
9.cLine Widths (all): 0.8 mm — Matches nozzle diameter for consistent extrusion.10. Seam Settings
10.aSeam Position: Aligned or Back — Use aligned for mechanical consistency, back for visual appeal.
10.bSmart Scarf Seam: ON — Automatically adjusts seam location to reduce visual impact.
10.cSeam Angle: 155° — Standard seam angle for clean transitions.
10.dSeam Steps: 10 — Smooths seam path and improves visual finish.11. Infill Settings
11.aWall/Infill Overlap: 10% — Prevents infill from deforming soft exterior walls.
11.bInfill Combination: ON — Consolidates paths for efficiency.
11.cDetect Floating Shells: ON — Ensures unsupported vertical structures are printed reliably.
11.dSparse Infill Density: 20–25% — Balanced rigidity vs. material use.
11.eSparse Pattern: Grid — Stable and efficient for flexible geometries.12. Speed Settings
12.aTravel: 160 mm/s — Fast but safe against backlash.
12.bInitial Layer: 15 mm/s — Prevents nozzle from skimming and ensures bed adhesion.
12.cOuter Wall: 60 mm/s — Controlled speed for surface quality.
12.dInner Wall: 90 mm/s — Slightly faster without compromising control.
12.eSmall Perimeter: 35 mm/s — Reduced speed for detailed geometry.
12.fTop Surface: 40 mm/s — Improves finish on topmost layers.
12.gInfill: 100–120 mm/s — Takes advantage of high flowability.13. Acceleration Settings
13.aNormal Print: 2000 mm/s² — Prevents ringing in soft filaments.
13.bTravel: 4000 mm/s² — Enables fast movement without harsh transitions.
13.cInitial Layer: 300 mm/s² — Gentle movement prevents lifting from the bed.
13.dOuter Wall: 1500 mm/s² — Improves outer surface clarity.
13.eInner Wall: 2000 mm/s² — Balanced for structural components.
13.fTop Surface: 1500 mm/s² — Ensures smooth detailing.14. Adhesion and Brims
14.aSkirt Loops: 2 — Helps prime nozzle and start cleanly.
14.bBrim Width: 6 mm — Helps hold soft materials down.
14.cBrim Gap: 0.15 mm — Allows for easy removal without tearing.15. Prime Tower and Flush Settings
15.aPrime Tower: ON — Purges moisture and early flow inconsistencies.
15.bTower Width: 40 mm — Prevents collapse due to heat.
15.cBrim Width (Tower): 4 mm — Adds stability to the purge base.
15.dFlush Into Support: ON — Discards unwanted early flow safely.16. G-Code Start Script
M900 K0.05 ; Pressure Advance M106 S0 ; Fan off G92 E0 G1 E15 F300 ; purge line G92 E0
17. Additional Notes
17.aDry filament at 155 F for 2 hours before use.
17.bStore with desiccant.
17.cKeep extruder door open to allow vapor to escape.
17.dAvoid long dwell times at high temperatures.If you need any other assistance, feel free to reach out to us anytime at timeplast@timeplast.com — we’ll be happy to help.
Free U.S. standard shipping on orders of 5+ spools!
Black Pepper
-
TimeMass Black Pepper adds a bold twist to your creative palette, imbuing your prints with the unexpected spark of freshly cracked pepper. There’s an energizing bite to this filament’s aroma—drawn from real black pepper essence—that turns everyday designs into lively, sense-stirring creations. Our TimeMass technology uses a 70% structured water base to shield the pepper’s volatile oils through 200 °C extrusion, ensuring each piece retains that crisp, spicy fragrance without compromise. Dare to print something different: the result is a functional object alive with the warmth and vigor of black pepper, sure to intrigue both hands and noses alike.
How it works: 70% structured water off-gasses and drinks up heat, helping pepper’s signature survive; water-soluble base for long-tail release.
Scent profile: dry wood, warm spice, peppery kick.
Great for: sporty tags, gym gear accents, bold décor.
Printing recommendations: For reliable prints, please always use a 0.8mm nozzle. A texture plate and a printing adhesive. So that first layer will adhere. For all of the other parameters, please use our specialized GPT here.
Give prints an energizing edge.
-
Click here to access our new and improved TimeMass GPT Assistant. Just tell it your printer model and the TimeMass filament you're using—it will instantly recommend the exact parameters you need to start printing successfully.
1. Introduction
These parameters are designed to help avoid printing issues; however, temperatures and speed timings can be adjusted based on your specific goals. For example, if you prefer a less rigid result, we recommend using a lower temperature. This section outlines a complete slicing and printing profile for TimeMass, tailored for printers with a 0.8 mm nozzle. If the print is not being successful, please lower the nozzle temperature by 10°C and start over until an optimal print is achieved. Please check the manual for printing parameters.2. Temperature Settings
2.aNozzle Temperature: 230°C — Optimal for flowability while avoiding decomposition (which begins around 250°C).
2.bBed Temperature: 75°C — Ensures strong first-layer adhesion and prevents moisture bubbling.
2.cNozzle Temperature Range: 230–245°C — Timeplast melts around 165°C but prints best at 235°C for precise viscosity control.3. Cooling Settings
3.aNo Cooling for First Layers: 3 layers — Prevents shrinkage due to rapid cooling of moisture-rich filament.
3.bFan Minimum Speed: 0% for the first 100 seconds — Allows heat retention during early layers.
3.cFan Maximum Speed: 15% starting at 8 seconds — Avoids overcooling that can lead to warping.
3.dKeep Fan Always On: OFF — Allows vapor to escape and avoids internal fogging.
3.eSlow Down for Cooling: ON — Improves surface finish with controlled cooling.
3.fForce Cooling for Overhangs: OFF — Overcooling can deform bridges in Timeplast.
3.gFan for Overhangs: 15% — Only for essential cooling in complex areas.
3.hPre-Start Fan Time: 2 seconds — Minimizes pressure differential during the first layer.4. Volumetric Flow
4.aMax Volumetric Speed: 12 mm³/s — Based on a melt flow index of ~15 g/10min, allows high-speed printing.
4.bRamming Speed: 3 mm³/s — Prevents bubbles or popping from pressure spikes.5. Retraction and Flow
5.aRetraction Distance: 0.4 mm — Minimal retraction required for soft filaments to avoid stringing.
5.bRetraction Speed: 15 mm/s — Slow enough to avoid pulling molten plastic.
5.cPressure Advance: 0.05 — Compensates for nozzle lag at high flow rates.
5.dFlow Ratio: 92% — Slight under-extrusion avoids swelling and surface artifacts.6. Precision Settings
6.aGap Closing Radius: 0.1 mm — Tolerant of gaps in thicker walls.
6.bArc Fitting: ON — Reduces G-code size and smooths curve transitions.
6.cElephant Foot Compensation: 0.1 mm — Offsets squishing in the first layer caused by large bead sizes.7. Walls and Shells
7.aWall Loops: 2 — Minimum for strength when using a 0.8 mm nozzle.
7.bDetect Thin Walls: ON — Ensures tight geometries aren’t skipped.
7.cTop/Bottom Shell Layers: 3 — Provides good coverage; increase if watertightness is needed.
7.dTop/Bottom Thickness: 1.2 mm — Equals 1.5x the nozzle size for solid strength.
7.eTop/Bottom Pattern: Monotonic — Distributes tension evenly and improves surface finish.8. Geometry and Movement
8.aWall Order: Inner before Outer — Creates cleaner outer surfaces.
8.bInfill First: OFF — Maintains precise outer dimensions.
8.cSmooth Speed Transition: ON — Prevents ringing caused by abrupt speed changes.
8.dSmooth Coefficient: 80 — Ideal damping for soft materials.
8.eAvoid Crossing Wall: ON — Minimizes stringing across part walls.
8.fMax Detour for Crossing: 10 mm or 5% — Balances time with print cleanliness.9. Layer and Width Settings
9.aLayer Height: 0.3 mm — Optimal for strength and resolution using a 0.8 mm nozzle.
9.bInitial Layer Height: 0.35 mm — Slightly higher to improve adhesion.
9.cLine Widths (all): 0.8 mm — Matches nozzle diameter for consistent extrusion.10. Seam Settings
10.aSeam Position: Aligned or Back — Use aligned for mechanical consistency, back for visual appeal.
10.bSmart Scarf Seam: ON — Automatically adjusts seam location to reduce visual impact.
10.cSeam Angle: 155° — Standard seam angle for clean transitions.
10.dSeam Steps: 10 — Smooths seam path and improves visual finish.11. Infill Settings
11.aWall/Infill Overlap: 10% — Prevents infill from deforming soft exterior walls.
11.bInfill Combination: ON — Consolidates paths for efficiency.
11.cDetect Floating Shells: ON — Ensures unsupported vertical structures are printed reliably.
11.dSparse Infill Density: 20–25% — Balanced rigidity vs. material use.
11.eSparse Pattern: Grid — Stable and efficient for flexible geometries.12. Speed Settings
12.aTravel: 160 mm/s — Fast but safe against backlash.
12.bInitial Layer: 15 mm/s — Prevents nozzle from skimming and ensures bed adhesion.
12.cOuter Wall: 60 mm/s — Controlled speed for surface quality.
12.dInner Wall: 90 mm/s — Slightly faster without compromising control.
12.eSmall Perimeter: 35 mm/s — Reduced speed for detailed geometry.
12.fTop Surface: 40 mm/s — Improves finish on topmost layers.
12.gInfill: 100–120 mm/s — Takes advantage of high flowability.13. Acceleration Settings
13.aNormal Print: 2000 mm/s² — Prevents ringing in soft filaments.
13.bTravel: 4000 mm/s² — Enables fast movement without harsh transitions.
13.cInitial Layer: 300 mm/s² — Gentle movement prevents lifting from the bed.
13.dOuter Wall: 1500 mm/s² — Improves outer surface clarity.
13.eInner Wall: 2000 mm/s² — Balanced for structural components.
13.fTop Surface: 1500 mm/s² — Ensures smooth detailing.14. Adhesion and Brims
14.aSkirt Loops: 2 — Helps prime nozzle and start cleanly.
14.bBrim Width: 6 mm — Helps hold soft materials down.
14.cBrim Gap: 0.15 mm — Allows for easy removal without tearing.15. Prime Tower and Flush Settings
15.aPrime Tower: ON — Purges moisture and early flow inconsistencies.
15.bTower Width: 40 mm — Prevents collapse due to heat.
15.cBrim Width (Tower): 4 mm — Adds stability to the purge base.
15.dFlush Into Support: ON — Discards unwanted early flow safely.16. G-Code Start Script
M900 K0.05 ; Pressure Advance M106 S0 ; Fan off G92 E0 G1 E15 F300 ; purge line G92 E0
17. Additional Notes
17.aDry filament at 155 F for 2 hours before use.
17.bStore with desiccant.
17.cKeep extruder door open to allow vapor to escape.
17.dAvoid long dwell times at high temperatures.If you need any other assistance, feel free to reach out to us anytime at timeplast@timeplast.com — we’ll be happy to help.
Free U.S. standard shipping on orders of 5+ spools!
Star Anise
-
With TimeMass Star Anise, your prints whisper of exotic spice caravans and starlit nights. Real star anise essence imbues this filament with a sweet, licorice-like aroma that infuses each creation with a touch of mystery and warmth. Our advanced TimeMass technology, containing 70% structured water, cradles the delicate star anise oils through the 200 °C printing process, ensuring their enchanting fragrance survives the journey from spool to finished piece. The result is a design that does more than catch the eye—it gently awakens the senses, leaving a lingering note of star-kissed spice in the air.
How it works: Moisture from 70% structured water vents at the nozzle, lowering the heat hit so aroma remains; controlled release with water-soluble paths.
Scent profile: sweet, clean, enveloping—licorice-like.
Great for: kitchen tags, drawer fresheners, minimalist décor.
Printing recommendations: For reliable prints, please always use a 0.8mm nozzle. A texture plate and a printing adhesive. So that first layer will adhere. For all of the other parameters, please use our specialized GPT here.
Print a tiny token and keep the anise snap.
-
Click here to access our specialized TimeMass GPT Assistant.Just tell it your printer model and the TimeMass filament you're using—it will instantly recommend the exact parameters you need to start printing successfully.
1. Introduction
These parameters are designed to help avoid printing issues; however, temperatures and speed timings can be adjusted based on your specific goals. For example, if you prefer a less rigid result, we recommend using a lower temperature. This section outlines a complete slicing and printing profile for TimeMass, tailored for printers with a 0.8 mm nozzle. If the print is not being successful, please lower the nozzle temperature by 10°C and start over until an optimal print is achieved.While these examples were printed with a 0.8 mm nozzle, TimeMass can be used with any nozzle size. Please check the manual for printing parameters with all the other nozzle sizes.2. Temperature Settings
2.aNozzle Temperature: 240°C — Optimal for flowability while avoiding decomposition (which begins around 250°C).
2.bBed Temperature: 95°C — Ensures strong first-layer adhesion and prevents moisture bubbling.
2.cNozzle Temperature Range: 230–245°C — Timeplast melts around 165°C but prints best at 240°C for precise viscosity control.3. Cooling Settings
3.aNo Cooling for First Layers: 3 layers — Prevents shrinkage due to rapid cooling of moisture-rich filament.
3.bFan Minimum Speed: 0% for the first 100 seconds — Allows heat retention during early layers.
3.cFan Maximum Speed: 15% starting at 8 seconds — Avoids overcooling that can lead to warping.
3.dKeep Fan Always On: OFF — Allows vapor to escape and avoids internal fogging.
3.eSlow Down for Cooling: ON — Improves surface finish with controlled cooling.
3.fForce Cooling for Overhangs: OFF — Overcooling can deform bridges in Timeplast.
3.gFan for Overhangs: 15% — Only for essential cooling in complex areas.
3.hPre-Start Fan Time: 2 seconds — Minimizes pressure differential during the first layer.4. Volumetric Flow
4.aMax Volumetric Speed: 12 mm³/s — Based on a melt flow index of ~15 g/10min, allows high-speed printing.
4.bRamming Speed: 3 mm³/s — Prevents bubbles or popping from pressure spikes.5. Retraction and Flow
5.aRetraction Distance: 0.4 mm — Minimal retraction required for soft filaments to avoid stringing.
5.bRetraction Speed: 15 mm/s — Slow enough to avoid pulling molten plastic.
5.cPressure Advance: 0.05 — Compensates for nozzle lag at high flow rates.
5.dFlow Ratio: 92% — Slight under-extrusion avoids swelling and surface artifacts.6. Precision Settings
6.aGap Closing Radius: 0.1 mm — Tolerant of gaps in thicker walls.
6.bArc Fitting: ON — Reduces G-code size and smooths curve transitions.
6.cElephant Foot Compensation: 0.1 mm — Offsets squishing in the first layer caused by large bead sizes.7. Walls and Shells
7.aWall Loops: 2 — Minimum for strength when using a 0.8 mm nozzle.
7.bDetect Thin Walls: ON — Ensures tight geometries aren’t skipped.
7.cTop/Bottom Shell Layers: 3 — Provides good coverage; increase if watertightness is needed.
7.dTop/Bottom Thickness: 1.2 mm — Equals 1.5x the nozzle size for solid strength.
7.eTop/Bottom Pattern: Monotonic — Distributes tension evenly and improves surface finish.8. Geometry and Movement
8.aWall Order: Inner before Outer — Creates cleaner outer surfaces.
8.bInfill First: OFF — Maintains precise outer dimensions.
8.cSmooth Speed Transition: ON — Prevents ringing caused by abrupt speed changes.
8.dSmooth Coefficient: 80 — Ideal damping for soft materials.
8.eAvoid Crossing Wall: ON — Minimizes stringing across part walls.
8.fMax Detour for Crossing: 10 mm or 5% — Balances time with print cleanliness.9. Layer and Width Settings
9.aLayer Height: 0.3 mm — Optimal for strength and resolution using a 0.8 mm nozzle.
9.bInitial Layer Height: 0.35 mm — Slightly higher to improve adhesion.
9.cLine Widths (all): 0.8 mm — Matches nozzle diameter for consistent extrusion.10. Seam Settings
10.aSeam Position: Aligned or Back — Use aligned for mechanical consistency, back for visual appeal.
10.bSmart Scarf Seam: ON — Automatically adjusts seam location to reduce visual impact.
10.cSeam Angle: 155° — Standard seam angle for clean transitions.
10.dSeam Steps: 10 — Smooths seam path and improves visual finish.11. Infill Settings
11.aWall/Infill Overlap: 10% — Prevents infill from deforming soft exterior walls.
11.bInfill Combination: ON — Consolidates paths for efficiency.
11.cDetect Floating Shells: ON — Ensures unsupported vertical structures are printed reliably.
11.dSparse Infill Density: 20–25% — Balanced rigidity vs. material use.
11.eSparse Pattern: Grid — Stable and efficient for flexible geometries.12. Speed Settings
12.aTravel: 160 mm/s — Fast but safe against backlash.
12.bInitial Layer: 15 mm/s — Prevents nozzle from skimming and ensures bed adhesion.
12.cOuter Wall: 60 mm/s — Controlled speed for surface quality.
12.dInner Wall: 90 mm/s — Slightly faster without compromising control.
12.eSmall Perimeter: 35 mm/s — Reduced speed for detailed geometry.
12.fTop Surface: 40 mm/s — Improves finish on topmost layers.
12.gInfill: 100–120 mm/s — Takes advantage of high flowability.13. Acceleration Settings
13.aNormal Print: 2000 mm/s² — Prevents ringing in soft filaments.
13.bTravel: 4000 mm/s² — Enables fast movement without harsh transitions.
13.cInitial Layer: 300 mm/s² — Gentle movement prevents lifting from the bed.
13.dOuter Wall: 1500 mm/s² — Improves outer surface clarity.
13.eInner Wall: 2000 mm/s² — Balanced for structural components.
13.fTop Surface: 1500 mm/s² — Ensures smooth detailing.14. Adhesion and Brims
14.aSkirt Loops: 2 — Helps prime nozzle and start cleanly.
14.bBrim Width: 6 mm — Helps hold soft materials down.
14.cBrim Gap: 0.15 mm — Allows for easy removal without tearing.15. Prime Tower and Flush Settings
15.aPrime Tower: ON — Purges moisture and early flow inconsistencies.
15.bTower Width: 40 mm — Prevents collapse due to heat.
15.cBrim Width (Tower): 4 mm — Adds stability to the purge base.
15.dFlush Into Support: ON — Discards unwanted early flow safely.16. G-Code Start Script
M900 K0.05 ; Pressure Advance M106 S0 ; Fan off G92 E0 G1 E15 F300 ; purge line G92 E0
17. Additional Notes
17.aDry filament at 100°C for 2 hours before use.
17.bStore with desiccant.
17.cKeep extruder door open to allow vapor to escape.
17.dAvoid long dwell times at high temperatures.If you need print settings for other nozzle sizes, feel free to reach out to us at timeplast@timeplast.com — we’ll be happy to help.
You can also get instant support through our dedicated ChatGPT assistant here:https://chatgpt.com/g/g-6823924241cc8191bbabcf0bc6523e3f-timemass-4d-printing🚀
Lavender
Free U.S. standard shipping on orders of 5+ spools!
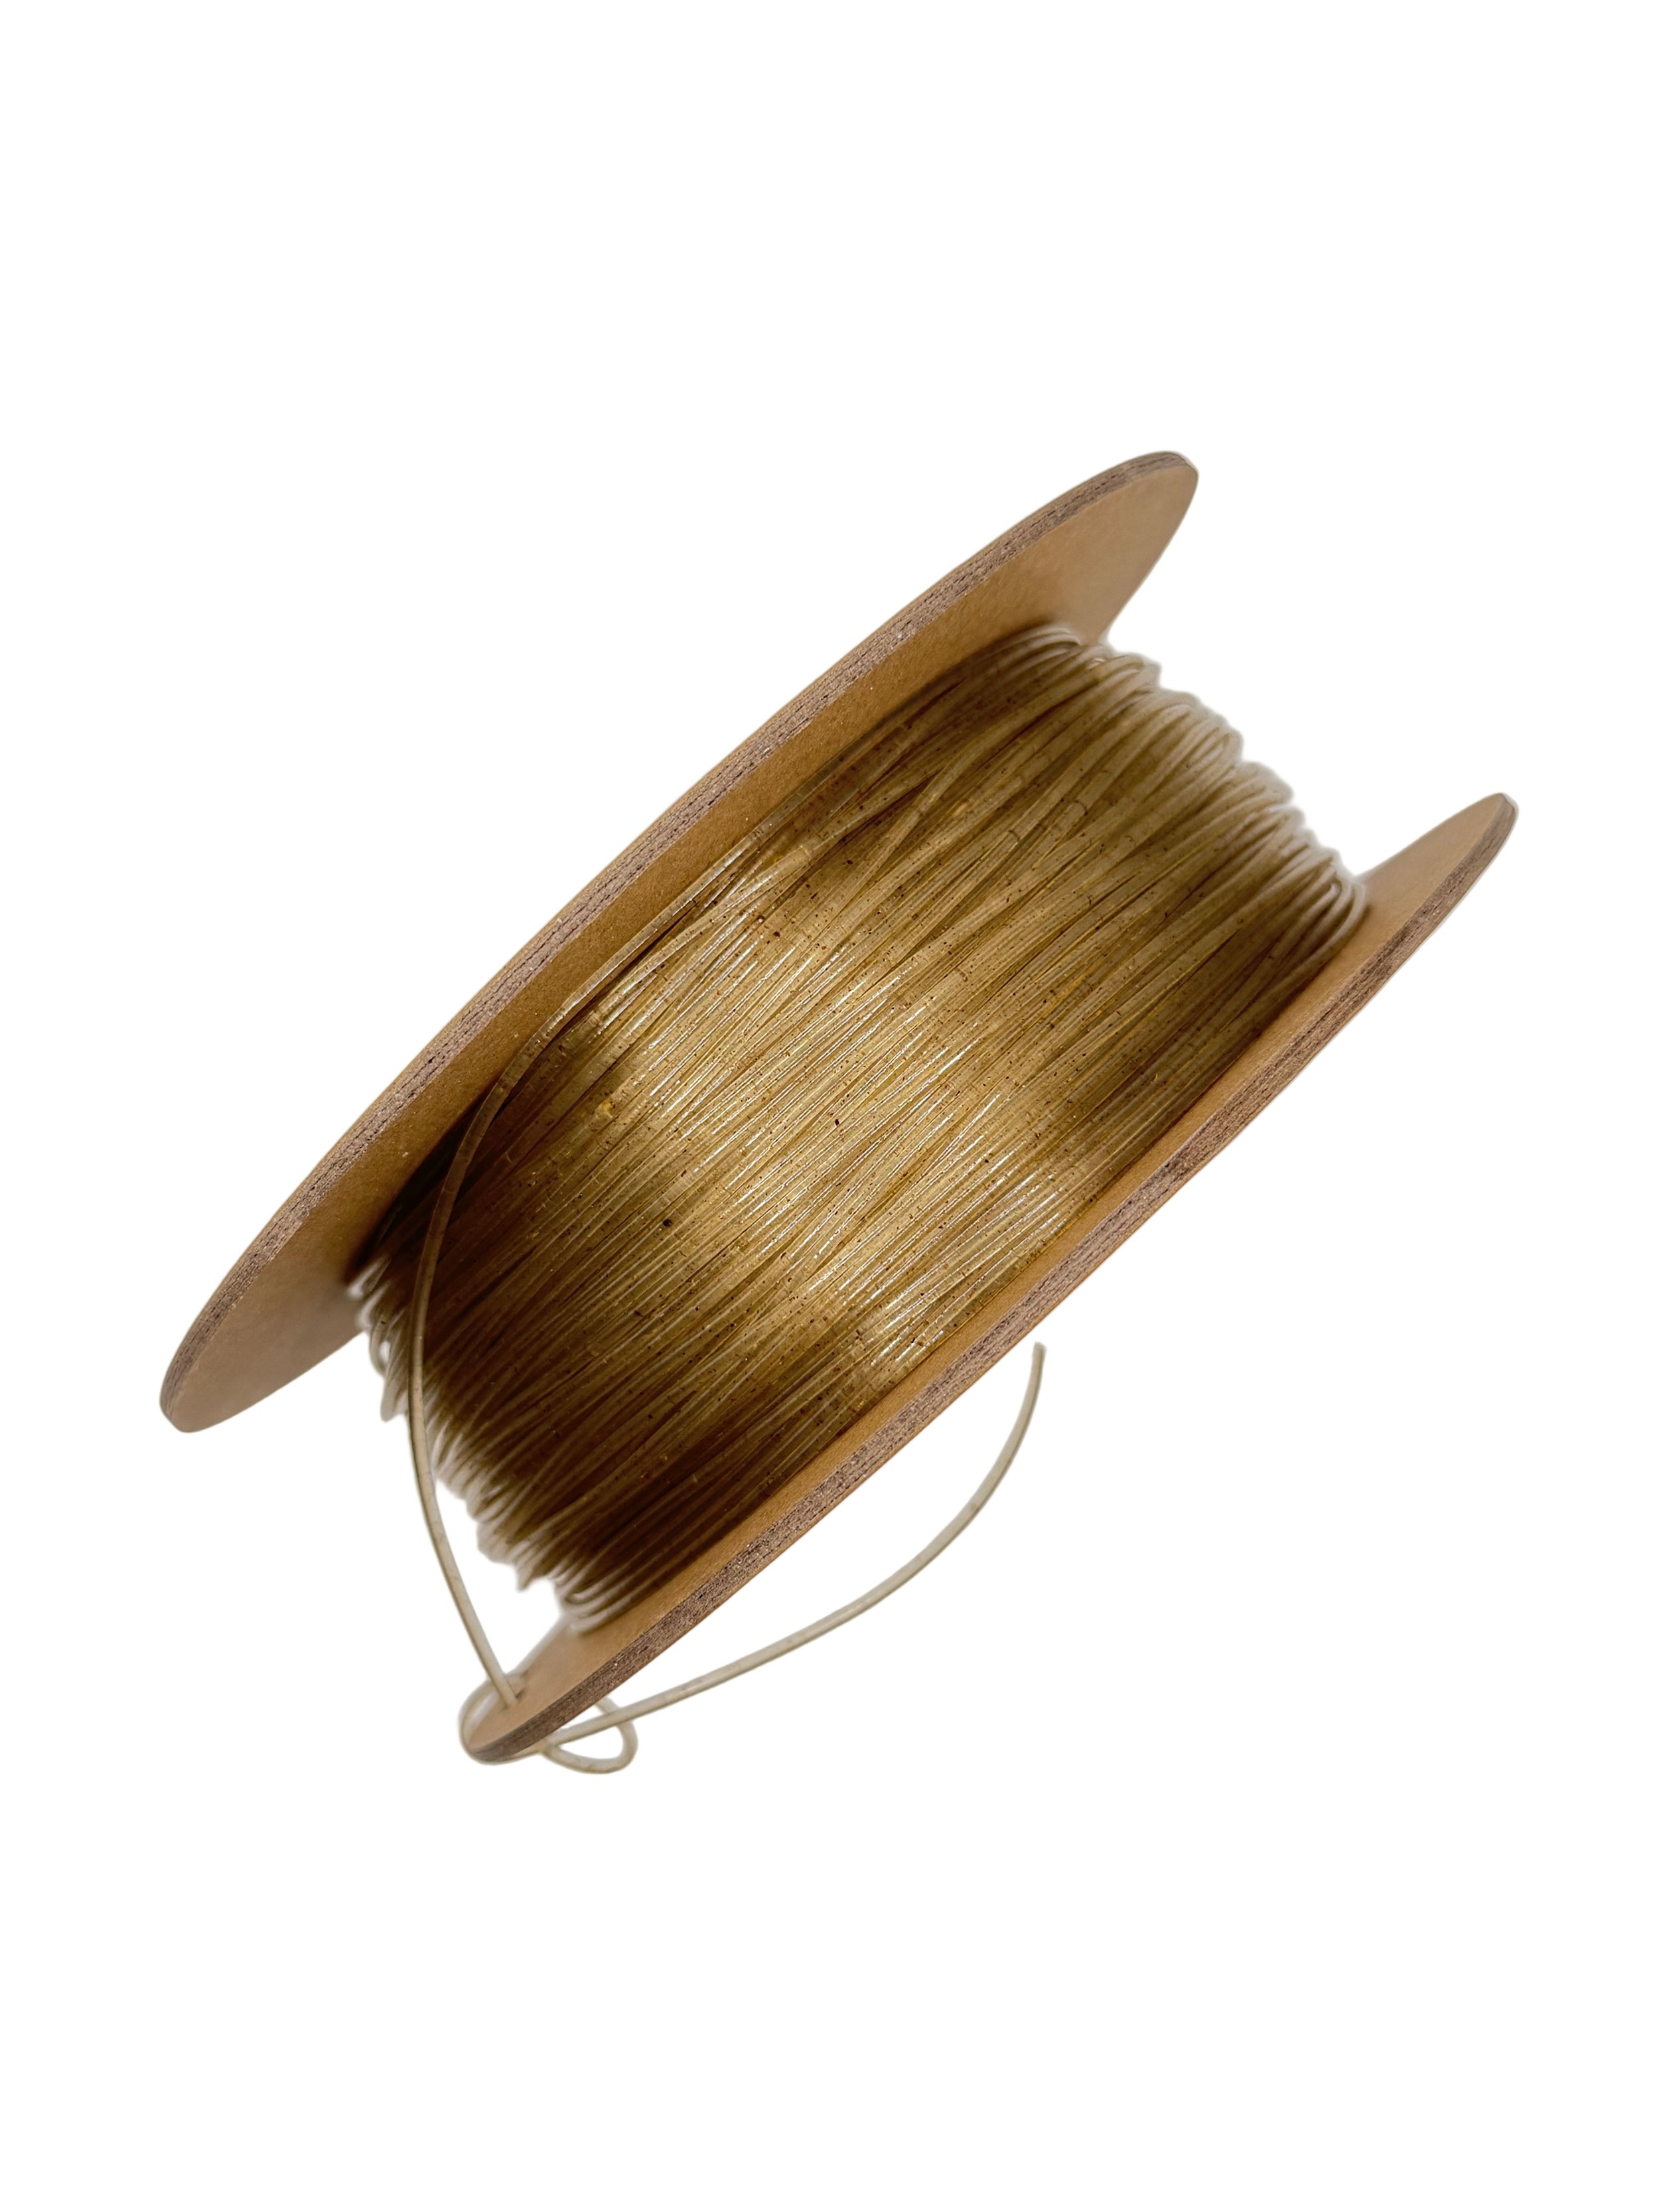
-
TimeMass Lavender brings a breeze of calm to your creative projects, entwining the soothing fragrance of real lavender buds with your 3D prints. Each item you create carries a whisper of lavender fields at dusk—a floral, herbal serenity that transforms your studio into a relaxing atelier. Built on our TimeMass tech with 70% structured water, this filament protects delicate lavender oils through the heat of extrusion (around 200 °C), so the gentle scent infuses your finished piece without losing its purity. The outcome is both artful and therapeutic: objects that not only serve a purpose but also emanate a calming aura, making your creative process as tranquil as the scent itself.
How it works: 70% structured water absorbs energy as it vents, protecting delicate florals; water-soluble for measured diffusion over time.
Scent profile: soft floral-herbal, soothing.
Great for: bedtime décor, spa tokens, drawer fresheners.
Printing recommendations: For reliable prints, please always use a 0.8mm nozzle. A texture plate and a printing adhesive. So that first layer will adhere. For all of the other parameters, please use our specialized GPT here.
Bring a quiet calm to your prints.
-
Click here to access our new and improved TimeMass GPT Assistant. Just tell it your printer model and the TimeMass filament you're using—it will instantly recommend the exact parameters you need to start printing successfully.
Using a Bambu Lab printer?
Click here to download our updated Bambu Lab profile. All printing parameters are fully optimized and tested—just load the file and start printing.1. Introduction
These parameters are designed to help avoid printing issues; however, temperatures and speed timings can be adjusted based on your specific goals. For example, if you prefer a less rigid result, we recommend using a lower temperature. This section outlines a complete slicing and printing profile for TimeMass, tailored for printers with a 0.8 mm nozzle. If the print is not being successful, please lower the nozzle temperature by 10°C and start over until an optimal print is achieved. Please check the manual for printing parameters.2. Temperature Settings
2.aNozzle Temperature: 230°C — Optimal for flowability while avoiding decomposition (which begins around 250°C).
2.bBed Temperature: 75°C — Ensures strong first-layer adhesion and prevents moisture bubbling.
2.cNozzle Temperature Range: 230–245°C — Timeplast melts around 165°C but prints best at 235°C for precise viscosity control.3. Cooling Settings
3.aNo Cooling for First Layers: 3 layers — Prevents shrinkage due to rapid cooling of moisture-rich filament.
3.bFan Minimum Speed: 0% for the first 100 seconds — Allows heat retention during early layers.
3.cFan Maximum Speed: 15% starting at 8 seconds — Avoids overcooling that can lead to warping.
3.dKeep Fan Always On: OFF — Allows vapor to escape and avoids internal fogging.
3.eSlow Down for Cooling: ON — Improves surface finish with controlled cooling.
3.fForce Cooling for Overhangs: OFF — Overcooling can deform bridges in Timeplast.
3.gFan for Overhangs: 15% — Only for essential cooling in complex areas.
3.hPre-Start Fan Time: 2 seconds — Minimizes pressure differential during the first layer.4. Volumetric Flow
4.aMax Volumetric Speed: 12 mm³/s — Based on a melt flow index of ~15 g/10min, allows high-speed printing.
4.bRamming Speed: 3 mm³/s — Prevents bubbles or popping from pressure spikes.5. Retraction and Flow
5.aRetraction Distance: 0.4 mm — Minimal retraction required for soft filaments to avoid stringing.
5.bRetraction Speed: 15 mm/s — Slow enough to avoid pulling molten plastic.
5.cPressure Advance: 0.05 — Compensates for nozzle lag at high flow rates.
5.dFlow Ratio: 92% — Slight under-extrusion avoids swelling and surface artifacts.6. Precision Settings
6.aGap Closing Radius: 0.1 mm — Tolerant of gaps in thicker walls.
6.bArc Fitting: ON — Reduces G-code size and smooths curve transitions.
6.cElephant Foot Compensation: 0.1 mm — Offsets squishing in the first layer caused by large bead sizes.7. Walls and Shells
7.aWall Loops: 2 — Minimum for strength when using a 0.8 mm nozzle.
7.bDetect Thin Walls: ON — Ensures tight geometries aren’t skipped.
7.cTop/Bottom Shell Layers: 3 — Provides good coverage; increase if watertightness is needed.
7.dTop/Bottom Thickness: 1.2 mm — Equals 1.5x the nozzle size for solid strength.
7.eTop/Bottom Pattern: Monotonic — Distributes tension evenly and improves surface finish.8. Geometry and Movement
8.aWall Order: Inner before Outer — Creates cleaner outer surfaces.
8.bInfill First: OFF — Maintains precise outer dimensions.
8.cSmooth Speed Transition: ON — Prevents ringing caused by abrupt speed changes.
8.dSmooth Coefficient: 80 — Ideal damping for soft materials.
8.eAvoid Crossing Wall: ON — Minimizes stringing across part walls.
8.fMax Detour for Crossing: 10 mm or 5% — Balances time with print cleanliness.9. Layer and Width Settings
9.aLayer Height: 0.3 mm — Optimal for strength and resolution using a 0.8 mm nozzle.
9.bInitial Layer Height: 0.35 mm — Slightly higher to improve adhesion.
9.cLine Widths (all): 0.8 mm — Matches nozzle diameter for consistent extrusion.10. Seam Settings
10.aSeam Position: Aligned or Back — Use aligned for mechanical consistency, back for visual appeal.
10.bSmart Scarf Seam: ON — Automatically adjusts seam location to reduce visual impact.
10.cSeam Angle: 155° — Standard seam angle for clean transitions.
10.dSeam Steps: 10 — Smooths seam path and improves visual finish.11. Infill Settings
11.aWall/Infill Overlap: 10% — Prevents infill from deforming soft exterior walls.
11.bInfill Combination: ON — Consolidates paths for efficiency.
11.cDetect Floating Shells: ON — Ensures unsupported vertical structures are printed reliably.
11.dSparse Infill Density: 20–25% — Balanced rigidity vs. material use.
11.eSparse Pattern: Grid — Stable and efficient for flexible geometries.12. Speed Settings
12.aTravel: 160 mm/s — Fast but safe against backlash.
12.bInitial Layer: 15 mm/s — Prevents nozzle from skimming and ensures bed adhesion.
12.cOuter Wall: 60 mm/s — Controlled speed for surface quality.
12.dInner Wall: 90 mm/s — Slightly faster without compromising control.
12.eSmall Perimeter: 35 mm/s — Reduced speed for detailed geometry.
12.fTop Surface: 40 mm/s — Improves finish on topmost layers.
12.gInfill: 100–120 mm/s — Takes advantage of high flowability.13. Acceleration Settings
13.aNormal Print: 2000 mm/s² — Prevents ringing in soft filaments.
13.bTravel: 4000 mm/s² — Enables fast movement without harsh transitions.
13.cInitial Layer: 300 mm/s² — Gentle movement prevents lifting from the bed.
13.dOuter Wall: 1500 mm/s² — Improves outer surface clarity.
13.eInner Wall: 2000 mm/s² — Balanced for structural components.
13.fTop Surface: 1500 mm/s² — Ensures smooth detailing.14. Adhesion and Brims
14.aSkirt Loops: 2 — Helps prime nozzle and start cleanly.
14.bBrim Width: 6 mm — Helps hold soft materials down.
14.cBrim Gap: 0.15 mm — Allows for easy removal without tearing.15. Prime Tower and Flush Settings
15.aPrime Tower: ON — Purges moisture and early flow inconsistencies.
15.bTower Width: 40 mm — Prevents collapse due to heat.
15.cBrim Width (Tower): 4 mm — Adds stability to the purge base.
15.dFlush Into Support: ON — Discards unwanted early flow safely.16. G-Code Start Script
M900 K0.05 ; Pressure Advance M106 S0 ; Fan off G92 E0 G1 E15 F300 ; purge line G92 E0
17. Additional Notes
17.aDry filament at 155 F for 2 hours before use.
17.bStore with desiccant.
17.cKeep extruder door open to allow vapor to escape.
17.dAvoid long dwell times at high temperatures.If you need any other assistance, feel free to reach out to us anytime at timeplast@timeplast.com — we’ll be happy to help.
Free U.S. standard shipping on orders of 5+ spools!
Cocoa
-
ndulge your senses with TimeMass Cocoa, a filament that lets you 3D print the delight of real chocolate aroma into every creation. As it flows, a gentle cocoa fragrance wafts up—rich and comforting, like a sip of hot chocolate on a winter day or the first bite of a favorite dessert. We’ve enriched this filament with true cocoa essence and engineered it with TimeMass technology (70% structured water) to protect those luscious chocolate notes during the 200 °C extrusion, ensuring they emerge smooth and unscorched in the final product. The result is irresistibly charming: prints that not only captivate the eye but also invite a smile with their subtle, heartwarming cocoa scent, turning ordinary objects into little moments of joy.
How it works: 70% structured water lowers the effective heat load, preserving cocoa volatiles; water-soluble for on-demand scent with rinses.
Scent profile: rich, gourmand, indulgent.
Great for: confectionery displays, gifting, cozy décor.
Printing recommendations: For reliable prints, please always use a 0.8mm nozzle. A texture plate and a printing adhesive. So that first layer will adhere. For all of the other parameters, please use our specialized GPT here.
Print a treat for the senses.
-
Click here to access our new and improved TimeMass GPT Assistant. Just tell it your printer model and the TimeMass filament you're using—it will instantly recommend the exact parameters you need to start printing successfully.
1. Introduction
These parameters are designed to help avoid printing issues; however, temperatures and speed timings can be adjusted based on your specific goals. For example, if you prefer a less rigid result, we recommend using a lower temperature. This section outlines a complete slicing and printing profile for TimeMass, tailored for printers with a 0.8 mm nozzle. If the print is not being successful, please lower the nozzle temperature by 10°C and start over until an optimal print is achieved. Please check the manual for printing parameters.2. Temperature Settings
2.aNozzle Temperature: 230°C — Optimal for flowability while avoiding decomposition (which begins around 250°C).
2.bBed Temperature: 75°C — Ensures strong first-layer adhesion and prevents moisture bubbling.
2.cNozzle Temperature Range: 230–245°C — Timeplast melts around 165°C but prints best at 235°C for precise viscosity control.3. Cooling Settings
3.aNo Cooling for First Layers: 3 layers — Prevents shrinkage due to rapid cooling of moisture-rich filament.
3.bFan Minimum Speed: 0% for the first 100 seconds — Allows heat retention during early layers.
3.cFan Maximum Speed: 15% starting at 8 seconds — Avoids overcooling that can lead to warping.
3.dKeep Fan Always On: OFF — Allows vapor to escape and avoids internal fogging.
3.eSlow Down for Cooling: ON — Improves surface finish with controlled cooling.
3.fForce Cooling for Overhangs: OFF — Overcooling can deform bridges in Timeplast.
3.gFan for Overhangs: 15% — Only for essential cooling in complex areas.
3.hPre-Start Fan Time: 2 seconds — Minimizes pressure differential during the first layer.4. Volumetric Flow
4.aMax Volumetric Speed: 12 mm³/s — Based on a melt flow index of ~15 g/10min, allows high-speed printing.
4.bRamming Speed: 3 mm³/s — Prevents bubbles or popping from pressure spikes.5. Retraction and Flow
5.aRetraction Distance: 0.4 mm — Minimal retraction required for soft filaments to avoid stringing.
5.bRetraction Speed: 15 mm/s — Slow enough to avoid pulling molten plastic.
5.cPressure Advance: 0.05 — Compensates for nozzle lag at high flow rates.
5.dFlow Ratio: 92% — Slight under-extrusion avoids swelling and surface artifacts.6. Precision Settings
6.aGap Closing Radius: 0.1 mm — Tolerant of gaps in thicker walls.
6.bArc Fitting: ON — Reduces G-code size and smooths curve transitions.
6.cElephant Foot Compensation: 0.1 mm — Offsets squishing in the first layer caused by large bead sizes.7. Walls and Shells
7.aWall Loops: 2 — Minimum for strength when using a 0.8 mm nozzle.
7.bDetect Thin Walls: ON — Ensures tight geometries aren’t skipped.
7.cTop/Bottom Shell Layers: 3 — Provides good coverage; increase if watertightness is needed.
7.dTop/Bottom Thickness: 1.2 mm — Equals 1.5x the nozzle size for solid strength.
7.eTop/Bottom Pattern: Monotonic — Distributes tension evenly and improves surface finish.8. Geometry and Movement
8.aWall Order: Inner before Outer — Creates cleaner outer surfaces.
8.bInfill First: OFF — Maintains precise outer dimensions.
8.cSmooth Speed Transition: ON — Prevents ringing caused by abrupt speed changes.
8.dSmooth Coefficient: 80 — Ideal damping for soft materials.
8.eAvoid Crossing Wall: ON — Minimizes stringing across part walls.
8.fMax Detour for Crossing: 10 mm or 5% — Balances time with print cleanliness.9. Layer and Width Settings
9.aLayer Height: 0.3 mm — Optimal for strength and resolution using a 0.8 mm nozzle.
9.bInitial Layer Height: 0.35 mm — Slightly higher to improve adhesion.
9.cLine Widths (all): 0.8 mm — Matches nozzle diameter for consistent extrusion.10. Seam Settings
10.aSeam Position: Aligned or Back — Use aligned for mechanical consistency, back for visual appeal.
10.bSmart Scarf Seam: ON — Automatically adjusts seam location to reduce visual impact.
10.cSeam Angle: 155° — Standard seam angle for clean transitions.
10.dSeam Steps: 10 — Smooths seam path and improves visual finish.11. Infill Settings
11.aWall/Infill Overlap: 10% — Prevents infill from deforming soft exterior walls.
11.bInfill Combination: ON — Consolidates paths for efficiency.
11.cDetect Floating Shells: ON — Ensures unsupported vertical structures are printed reliably.
11.dSparse Infill Density: 20–25% — Balanced rigidity vs. material use.
11.eSparse Pattern: Grid — Stable and efficient for flexible geometries.12. Speed Settings
12.aTravel: 160 mm/s — Fast but safe against backlash.
12.bInitial Layer: 15 mm/s — Prevents nozzle from skimming and ensures bed adhesion.
12.cOuter Wall: 60 mm/s — Controlled speed for surface quality.
12.dInner Wall: 90 mm/s — Slightly faster without compromising control.
12.eSmall Perimeter: 35 mm/s — Reduced speed for detailed geometry.
12.fTop Surface: 40 mm/s — Improves finish on topmost layers.
12.gInfill: 100–120 mm/s — Takes advantage of high flowability.13. Acceleration Settings
13.aNormal Print: 2000 mm/s² — Prevents ringing in soft filaments.
13.bTravel: 4000 mm/s² — Enables fast movement without harsh transitions.
13.cInitial Layer: 300 mm/s² — Gentle movement prevents lifting from the bed.
13.dOuter Wall: 1500 mm/s² — Improves outer surface clarity.
13.eInner Wall: 2000 mm/s² — Balanced for structural components.
13.fTop Surface: 1500 mm/s² — Ensures smooth detailing.14. Adhesion and Brims
14.aSkirt Loops: 2 — Helps prime nozzle and start cleanly.
14.bBrim Width: 6 mm — Helps hold soft materials down.
14.cBrim Gap: 0.15 mm — Allows for easy removal without tearing.15. Prime Tower and Flush Settings
15.aPrime Tower: ON — Purges moisture and early flow inconsistencies.
15.bTower Width: 40 mm — Prevents collapse due to heat.
15.cBrim Width (Tower): 4 mm — Adds stability to the purge base.
15.dFlush Into Support: ON — Discards unwanted early flow safely.16. G-Code Start Script
M900 K0.05 ; Pressure Advance M106 S0 ; Fan off G92 E0 G1 E15 F300 ; purge line G92 E0
17. Additional Notes
17.aDry filament at 155 F for 2 hours before use.
17.bStore with desiccant.
17.cKeep extruder door open to allow vapor to escape.
17.dAvoid long dwell times at high temperatures.If you need any other assistance, feel free to reach out to us anytime at timeplast@timeplast.com — we’ll be happy to help.
Free U.S. standard shipping on orders of 5+ spools!
Cardamom
-
Bright and evocative, TimeMass Cardamom filament fills your workspace with the uplifting aroma of this treasured spice. Each layer you print is imbued with real cardamom essence, releasing hints of sweet citrus and herbal warmth reminiscent of morning chai and bustling spice bazaars. Powered by our TimeMass innovation—70% structured water woven into the filament—it protects cardamom’s fragile flavor oils even at 200 °C, preserving their vibrant fragrance as you create. The experience is both creative and sensory: every print emerges as a fragrant token of inspiration, blending the exotic allure of cardamom with cutting-edge craft.
How it works: 70% structured water releases during extrusion, absorbing heat to preserve top notes; water-soluble for programmed diffusion.
Scent profile: vivid, fresh, green-citrus.
Great for: modern décor, desk accents, entryway fresheners.
Printing recommendations: For reliable prints, please always use a 0.8mm nozzle. A texture plate and a printing adhesive. So that first layer will adhere. For all of the other parameters, please use our specialized GPT here.
Add a clean, modern scent cue to prints.
-
Click here to access our specialized TimeMass GPT Assistant.Just tell it your printer model and the TimeMass filament you're using—it will instantly recommend the exact parameters you need to start printing successfully.
1. Introduction
These parameters are designed to help avoid printing issues; however, temperatures and speed timings can be adjusted based on your specific goals. For example, if you prefer a less rigid result, we recommend using a lower temperature. This section outlines a complete slicing and printing profile for TimeMass, tailored for printers with a 0.8 mm nozzle. If the print is not being successful, please lower the nozzle temperature by 10°C and start over until an optimal print is achieved.While these examples were printed with a 0.8 mm nozzle, TimeMass can be used with any nozzle size. Please check the manual for printing parameters with all the other nozzle sizes.2. Temperature Settings
2.aNozzle Temperature: 240°C — Optimal for flowability while avoiding decomposition (which begins around 250°C).
2.bBed Temperature: 95°C — Ensures strong first-layer adhesion and prevents moisture bubbling.
2.cNozzle Temperature Range: 230–245°C — Timeplast melts around 165°C but prints best at 240°C for precise viscosity control.3. Cooling Settings
3.aNo Cooling for First Layers: 3 layers — Prevents shrinkage due to rapid cooling of moisture-rich filament.
3.bFan Minimum Speed: 0% for the first 100 seconds — Allows heat retention during early layers.
3.cFan Maximum Speed: 15% starting at 8 seconds — Avoids overcooling that can lead to warping.
3.dKeep Fan Always On: OFF — Allows vapor to escape and avoids internal fogging.
3.eSlow Down for Cooling: ON — Improves surface finish with controlled cooling.
3.fForce Cooling for Overhangs: OFF — Overcooling can deform bridges in Timeplast.
3.gFan for Overhangs: 15% — Only for essential cooling in complex areas.
3.hPre-Start Fan Time: 2 seconds — Minimizes pressure differential during the first layer.4. Volumetric Flow
4.aMax Volumetric Speed: 12 mm³/s — Based on a melt flow index of ~15 g/10min, allows high-speed printing.
4.bRamming Speed: 3 mm³/s — Prevents bubbles or popping from pressure spikes.5. Retraction and Flow
5.aRetraction Distance: 0.4 mm — Minimal retraction required for soft filaments to avoid stringing.
5.bRetraction Speed: 15 mm/s — Slow enough to avoid pulling molten plastic.
5.cPressure Advance: 0.05 — Compensates for nozzle lag at high flow rates.
5.dFlow Ratio: 92% — Slight under-extrusion avoids swelling and surface artifacts.6. Precision Settings
6.aGap Closing Radius: 0.1 mm — Tolerant of gaps in thicker walls.
6.bArc Fitting: ON — Reduces G-code size and smooths curve transitions.
6.cElephant Foot Compensation: 0.1 mm — Offsets squishing in the first layer caused by large bead sizes.7. Walls and Shells
7.aWall Loops: 2 — Minimum for strength when using a 0.8 mm nozzle.
7.bDetect Thin Walls: ON — Ensures tight geometries aren’t skipped.
7.cTop/Bottom Shell Layers: 3 — Provides good coverage; increase if watertightness is needed.
7.dTop/Bottom Thickness: 1.2 mm — Equals 1.5x the nozzle size for solid strength.
7.eTop/Bottom Pattern: Monotonic — Distributes tension evenly and improves surface finish.8. Geometry and Movement
8.aWall Order: Inner before Outer — Creates cleaner outer surfaces.
8.bInfill First: OFF — Maintains precise outer dimensions.
8.cSmooth Speed Transition: ON — Prevents ringing caused by abrupt speed changes.
8.dSmooth Coefficient: 80 — Ideal damping for soft materials.
8.eAvoid Crossing Wall: ON — Minimizes stringing across part walls.
8.fMax Detour for Crossing: 10 mm or 5% — Balances time with print cleanliness.9. Layer and Width Settings
9.aLayer Height: 0.3 mm — Optimal for strength and resolution using a 0.8 mm nozzle.
9.bInitial Layer Height: 0.35 mm — Slightly higher to improve adhesion.
9.cLine Widths (all): 0.8 mm — Matches nozzle diameter for consistent extrusion.10. Seam Settings
10.aSeam Position: Aligned or Back — Use aligned for mechanical consistency, back for visual appeal.
10.bSmart Scarf Seam: ON — Automatically adjusts seam location to reduce visual impact.
10.cSeam Angle: 155° — Standard seam angle for clean transitions.
10.dSeam Steps: 10 — Smooths seam path and improves visual finish.11. Infill Settings
11.aWall/Infill Overlap: 10% — Prevents infill from deforming soft exterior walls.
11.bInfill Combination: ON — Consolidates paths for efficiency.
11.cDetect Floating Shells: ON — Ensures unsupported vertical structures are printed reliably.
11.dSparse Infill Density: 20–25% — Balanced rigidity vs. material use.
11.eSparse Pattern: Grid — Stable and efficient for flexible geometries.12. Speed Settings
12.aTravel: 160 mm/s — Fast but safe against backlash.
12.bInitial Layer: 15 mm/s — Prevents nozzle from skimming and ensures bed adhesion.
12.cOuter Wall: 60 mm/s — Controlled speed for surface quality.
12.dInner Wall: 90 mm/s — Slightly faster without compromising control.
12.eSmall Perimeter: 35 mm/s — Reduced speed for detailed geometry.
12.fTop Surface: 40 mm/s — Improves finish on topmost layers.
12.gInfill: 100–120 mm/s — Takes advantage of high flowability.13. Acceleration Settings
13.aNormal Print: 2000 mm/s² — Prevents ringing in soft filaments.
13.bTravel: 4000 mm/s² — Enables fast movement without harsh transitions.
13.cInitial Layer: 300 mm/s² — Gentle movement prevents lifting from the bed.
13.dOuter Wall: 1500 mm/s² — Improves outer surface clarity.
13.eInner Wall: 2000 mm/s² — Balanced for structural components.
13.fTop Surface: 1500 mm/s² — Ensures smooth detailing.14. Adhesion and Brims
14.aSkirt Loops: 2 — Helps prime nozzle and start cleanly.
14.bBrim Width: 6 mm — Helps hold soft materials down.
14.cBrim Gap: 0.15 mm — Allows for easy removal without tearing.15. Prime Tower and Flush Settings
15.aPrime Tower: ON — Purges moisture and early flow inconsistencies.
15.bTower Width: 40 mm — Prevents collapse due to heat.
15.cBrim Width (Tower): 4 mm — Adds stability to the purge base.
15.dFlush Into Support: ON — Discards unwanted early flow safely.16. G-Code Start Script
M900 K0.05 ; Pressure Advance M106 S0 ; Fan off G92 E0 G1 E15 F300 ; purge line G92 E0
17. Additional Notes
17.aDry filament at 100°C for 2 hours before use.
17.bStore with desiccant.
17.cKeep extruder door open to allow vapor to escape.
17.dAvoid long dwell times at high temperatures.If you need print settings for other nozzle sizes, feel free to reach out to us at timeplast@timeplast.com — we’ll be happy to help.
Free U.S. standard shipping on orders of 5+ spools!
Nutmeg
-
A dash of warm nutmeg can turn an ordinary moment into a comforting memory—TimeMass Nutmeg captures that magic in a filament. Infused with real nutmeg essence, it lets you 3D print objects that carry a subtly sweet, earthy spice aura reminiscent of holiday baking and cozy evenings. We’ve harnessed our TimeMass technology (built on 70% structured water) to protect nutmeg’s delicate aromatic compounds at extrusion temperatures up to 200 °C, ensuring the scent isn’t lost in the heat. Each creation emerges not just as a functional piece, but as a gentle invitation to savor the nostalgic charm of nutmeg in your everyday designs.
How it works: 70% structured water absorbs activation/evaporation energy during printing, protecting delicate notes; water-soluble for slow scent bloom.
Scent profile: warm, creamy, gently nutty.
Great for: premium packaging inserts, cozy décor, gift toppers.
Printing recommendations: For reliable prints, please always use a 0.8mm nozzle. A texture plate and a printing adhesive. So that first layer will adhere. For all of the other parameters, please use our specialized GPT here.
Give your prints a subtle bakery-warm finish.
-
Click here to access our new and improved TimeMass GPT Assistant. Just tell it your printer model and the TimeMass filament you're using—it will instantly recommend the exact parameters you need to start printing successfully.
1. Introduction
These parameters are designed to help avoid printing issues; however, temperatures and speed timings can be adjusted based on your specific goals. For example, if you prefer a less rigid result, we recommend using a lower temperature. This section outlines a complete slicing and printing profile for TimeMass, tailored for printers with a 0.8 mm nozzle. If the print is not being successful, please lower the nozzle temperature by 10°C and start over until an optimal print is achieved. Please check the manual for printing parameters.2. Temperature Settings
2.aNozzle Temperature: 230°C — Optimal for flowability while avoiding decomposition (which begins around 250°C).
2.bBed Temperature: 75°C — Ensures strong first-layer adhesion and prevents moisture bubbling.
2.cNozzle Temperature Range: 230–245°C — Timeplast melts around 165°C but prints best at 235°C for precise viscosity control.3. Cooling Settings
3.aNo Cooling for First Layers: 3 layers — Prevents shrinkage due to rapid cooling of moisture-rich filament.
3.bFan Minimum Speed: 0% for the first 100 seconds — Allows heat retention during early layers.
3.cFan Maximum Speed: 15% starting at 8 seconds — Avoids overcooling that can lead to warping.
3.dKeep Fan Always On: OFF — Allows vapor to escape and avoids internal fogging.
3.eSlow Down for Cooling: ON — Improves surface finish with controlled cooling.
3.fForce Cooling for Overhangs: OFF — Overcooling can deform bridges in Timeplast.
3.gFan for Overhangs: 15% — Only for essential cooling in complex areas.
3.hPre-Start Fan Time: 2 seconds — Minimizes pressure differential during the first layer.4. Volumetric Flow
4.aMax Volumetric Speed: 12 mm³/s — Based on a melt flow index of ~15 g/10min, allows high-speed printing.
4.bRamming Speed: 3 mm³/s — Prevents bubbles or popping from pressure spikes.5. Retraction and Flow
5.aRetraction Distance: 0.4 mm — Minimal retraction required for soft filaments to avoid stringing.
5.bRetraction Speed: 15 mm/s — Slow enough to avoid pulling molten plastic.
5.cPressure Advance: 0.05 — Compensates for nozzle lag at high flow rates.
5.dFlow Ratio: 92% — Slight under-extrusion avoids swelling and surface artifacts.6. Precision Settings
6.aGap Closing Radius: 0.1 mm — Tolerant of gaps in thicker walls.
6.bArc Fitting: ON — Reduces G-code size and smooths curve transitions.
6.cElephant Foot Compensation: 0.1 mm — Offsets squishing in the first layer caused by large bead sizes.7. Walls and Shells
7.aWall Loops: 2 — Minimum for strength when using a 0.8 mm nozzle.
7.bDetect Thin Walls: ON — Ensures tight geometries aren’t skipped.
7.cTop/Bottom Shell Layers: 3 — Provides good coverage; increase if watertightness is needed.
7.dTop/Bottom Thickness: 1.2 mm — Equals 1.5x the nozzle size for solid strength.
7.eTop/Bottom Pattern: Monotonic — Distributes tension evenly and improves surface finish.8. Geometry and Movement
8.aWall Order: Inner before Outer — Creates cleaner outer surfaces.
8.bInfill First: OFF — Maintains precise outer dimensions.
8.cSmooth Speed Transition: ON — Prevents ringing caused by abrupt speed changes.
8.dSmooth Coefficient: 80 — Ideal damping for soft materials.
8.eAvoid Crossing Wall: ON — Minimizes stringing across part walls.
8.fMax Detour for Crossing: 10 mm or 5% — Balances time with print cleanliness.9. Layer and Width Settings
9.aLayer Height: 0.3 mm — Optimal for strength and resolution using a 0.8 mm nozzle.
9.bInitial Layer Height: 0.35 mm — Slightly higher to improve adhesion.
9.cLine Widths (all): 0.8 mm — Matches nozzle diameter for consistent extrusion.10. Seam Settings
10.aSeam Position: Aligned or Back — Use aligned for mechanical consistency, back for visual appeal.
10.bSmart Scarf Seam: ON — Automatically adjusts seam location to reduce visual impact.
10.cSeam Angle: 155° — Standard seam angle for clean transitions.
10.dSeam Steps: 10 — Smooths seam path and improves visual finish.11. Infill Settings
11.aWall/Infill Overlap: 10% — Prevents infill from deforming soft exterior walls.
11.bInfill Combination: ON — Consolidates paths for efficiency.
11.cDetect Floating Shells: ON — Ensures unsupported vertical structures are printed reliably.
11.dSparse Infill Density: 20–25% — Balanced rigidity vs. material use.
11.eSparse Pattern: Grid — Stable and efficient for flexible geometries.12. Speed Settings
12.aTravel: 160 mm/s — Fast but safe against backlash.
12.bInitial Layer: 15 mm/s — Prevents nozzle from skimming and ensures bed adhesion.
12.cOuter Wall: 60 mm/s — Controlled speed for surface quality.
12.dInner Wall: 90 mm/s — Slightly faster without compromising control.
12.eSmall Perimeter: 35 mm/s — Reduced speed for detailed geometry.
12.fTop Surface: 40 mm/s — Improves finish on topmost layers.
12.gInfill: 100–120 mm/s — Takes advantage of high flowability.13. Acceleration Settings
13.aNormal Print: 2000 mm/s² — Prevents ringing in soft filaments.
13.bTravel: 4000 mm/s² — Enables fast movement without harsh transitions.
13.cInitial Layer: 300 mm/s² — Gentle movement prevents lifting from the bed.
13.dOuter Wall: 1500 mm/s² — Improves outer surface clarity.
13.eInner Wall: 2000 mm/s² — Balanced for structural components.
13.fTop Surface: 1500 mm/s² — Ensures smooth detailing.14. Adhesion and Brims
14.aSkirt Loops: 2 — Helps prime nozzle and start cleanly.
14.bBrim Width: 6 mm — Helps hold soft materials down.
14.cBrim Gap: 0.15 mm — Allows for easy removal without tearing.15. Prime Tower and Flush Settings
15.aPrime Tower: ON — Purges moisture and early flow inconsistencies.
15.bTower Width: 40 mm — Prevents collapse due to heat.
15.cBrim Width (Tower): 4 mm — Adds stability to the purge base.
15.dFlush Into Support: ON — Discards unwanted early flow safely.16. G-Code Start Script
M900 K0.05 ; Pressure Advance M106 S0 ; Fan off G92 E0 G1 E15 F300 ; purge line G92 E0
17. Additional Notes
17.aDry filament at 155 F for 2 hours before use.
17.bStore with desiccant.
17.cKeep extruder door open to allow vapor to escape.
17.dAvoid long dwell times at high temperatures.If you need any other assistance, feel free to reach out to us anytime at timeplast@timeplast.com — we’ll be happy to help.
Free U.S. standard shipping on orders of 5+ spools!
Coffee
-
Awaken your creativity with TimeMass Coffee, the filament that carries the rich, roasted aroma of a fresh morning brew. Infused with real coffee essence, it transforms your prints into comforting, conversation-starting pieces that smell like your favorite café—bringing warmth and energy to any space. Our innovative TimeMass formulation (70% structured water) locks in those delicate coffee notes through the 200 °C printing process, so each design slowly releases that cozy, caffeinated scent long after it’s printed. Every object made with this filament becomes more than a visual delight; it’s a gentle pick-me-up for the senses, forging a delightful bond between technology and the timeless pleasure of coffee.
How it works: 70% structured water tempers the hotspot so roast notes last; water-soluble for gentle, repeated release with use.
Scent profile: deep roast, slightly chocolatey.
Great for: café décor, kitchen tokens, gift toppers.
Printing recommendations: For reliable prints, please always use a 0.8mm nozzle. A texture plate and a printing adhesive. So that first layer will adhere. For all of the other parameters, please use our specialized GPT here.
Print the smell of a fresh grind.
-
Click here to access our new and improved TimeMass GPT Assistant. Just tell it your printer model and the TimeMass filament you're using—it will instantly recommend the exact parameters you need to start printing successfully.
1. Introduction
These parameters are designed to help avoid printing issues; however, temperatures and speed timings can be adjusted based on your specific goals. For example, if you prefer a less rigid result, we recommend using a lower temperature. This section outlines a complete slicing and printing profile for TimeMass, tailored for printers with a 0.8 mm nozzle. If the print is not being successful, please lower the nozzle temperature by 10°C and start over until an optimal print is achieved. Please check the manual for printing parameters.2. Temperature Settings
2.aNozzle Temperature: 230°C — Optimal for flowability while avoiding decomposition (which begins around 250°C).
2.bBed Temperature: 75°C — Ensures strong first-layer adhesion and prevents moisture bubbling.
2.cNozzle Temperature Range: 230–245°C — Timeplast melts around 165°C but prints best at 235°C for precise viscosity control.3. Cooling Settings
3.aNo Cooling for First Layers: 3 layers — Prevents shrinkage due to rapid cooling of moisture-rich filament.
3.bFan Minimum Speed: 0% for the first 100 seconds — Allows heat retention during early layers.
3.cFan Maximum Speed: 15% starting at 8 seconds — Avoids overcooling that can lead to warping.
3.dKeep Fan Always On: OFF — Allows vapor to escape and avoids internal fogging.
3.eSlow Down for Cooling: ON — Improves surface finish with controlled cooling.
3.fForce Cooling for Overhangs: OFF — Overcooling can deform bridges in Timeplast.
3.gFan for Overhangs: 15% — Only for essential cooling in complex areas.
3.hPre-Start Fan Time: 2 seconds — Minimizes pressure differential during the first layer.4. Volumetric Flow
4.aMax Volumetric Speed: 12 mm³/s — Based on a melt flow index of ~15 g/10min, allows high-speed printing.
4.bRamming Speed: 3 mm³/s — Prevents bubbles or popping from pressure spikes.5. Retraction and Flow
5.aRetraction Distance: 0.4 mm — Minimal retraction required for soft filaments to avoid stringing.
5.bRetraction Speed: 15 mm/s — Slow enough to avoid pulling molten plastic.
5.cPressure Advance: 0.05 — Compensates for nozzle lag at high flow rates.
5.dFlow Ratio: 92% — Slight under-extrusion avoids swelling and surface artifacts.6. Precision Settings
6.aGap Closing Radius: 0.1 mm — Tolerant of gaps in thicker walls.
6.bArc Fitting: ON — Reduces G-code size and smooths curve transitions.
6.cElephant Foot Compensation: 0.1 mm — Offsets squishing in the first layer caused by large bead sizes.7. Walls and Shells
7.aWall Loops: 2 — Minimum for strength when using a 0.8 mm nozzle.
7.bDetect Thin Walls: ON — Ensures tight geometries aren’t skipped.
7.cTop/Bottom Shell Layers: 3 — Provides good coverage; increase if watertightness is needed.
7.dTop/Bottom Thickness: 1.2 mm — Equals 1.5x the nozzle size for solid strength.
7.eTop/Bottom Pattern: Monotonic — Distributes tension evenly and improves surface finish.8. Geometry and Movement
8.aWall Order: Inner before Outer — Creates cleaner outer surfaces.
8.bInfill First: OFF — Maintains precise outer dimensions.
8.cSmooth Speed Transition: ON — Prevents ringing caused by abrupt speed changes.
8.dSmooth Coefficient: 80 — Ideal damping for soft materials.
8.eAvoid Crossing Wall: ON — Minimizes stringing across part walls.
8.fMax Detour for Crossing: 10 mm or 5% — Balances time with print cleanliness.9. Layer and Width Settings
9.aLayer Height: 0.3 mm — Optimal for strength and resolution using a 0.8 mm nozzle.
9.bInitial Layer Height: 0.35 mm — Slightly higher to improve adhesion.
9.cLine Widths (all): 0.8 mm — Matches nozzle diameter for consistent extrusion.10. Seam Settings
10.aSeam Position: Aligned or Back — Use aligned for mechanical consistency, back for visual appeal.
10.bSmart Scarf Seam: ON — Automatically adjusts seam location to reduce visual impact.
10.cSeam Angle: 155° — Standard seam angle for clean transitions.
10.dSeam Steps: 10 — Smooths seam path and improves visual finish.11. Infill Settings
11.aWall/Infill Overlap: 10% — Prevents infill from deforming soft exterior walls.
11.bInfill Combination: ON — Consolidates paths for efficiency.
11.cDetect Floating Shells: ON — Ensures unsupported vertical structures are printed reliably.
11.dSparse Infill Density: 20–25% — Balanced rigidity vs. material use.
11.eSparse Pattern: Grid — Stable and efficient for flexible geometries.12. Speed Settings
12.aTravel: 160 mm/s — Fast but safe against backlash.
12.bInitial Layer: 15 mm/s — Prevents nozzle from skimming and ensures bed adhesion.
12.cOuter Wall: 60 mm/s — Controlled speed for surface quality.
12.dInner Wall: 90 mm/s — Slightly faster without compromising control.
12.eSmall Perimeter: 35 mm/s — Reduced speed for detailed geometry.
12.fTop Surface: 40 mm/s — Improves finish on topmost layers.
12.gInfill: 100–120 mm/s — Takes advantage of high flowability.13. Acceleration Settings
13.aNormal Print: 2000 mm/s² — Prevents ringing in soft filaments.
13.bTravel: 4000 mm/s² — Enables fast movement without harsh transitions.
13.cInitial Layer: 300 mm/s² — Gentle movement prevents lifting from the bed.
13.dOuter Wall: 1500 mm/s² — Improves outer surface clarity.
13.eInner Wall: 2000 mm/s² — Balanced for structural components.
13.fTop Surface: 1500 mm/s² — Ensures smooth detailing.14. Adhesion and Brims
14.aSkirt Loops: 2 — Helps prime nozzle and start cleanly.
14.bBrim Width: 6 mm — Helps hold soft materials down.
14.cBrim Gap: 0.15 mm — Allows for easy removal without tearing.15. Prime Tower and Flush Settings
15.aPrime Tower: ON — Purges moisture and early flow inconsistencies.
15.bTower Width: 40 mm — Prevents collapse due to heat.
15.cBrim Width (Tower): 4 mm — Adds stability to the purge base.
15.dFlush Into Support: ON — Discards unwanted early flow safely.16. G-Code Start Script
M900 K0.05 ; Pressure Advance M106 S0 ; Fan off G92 E0 G1 E15 F300 ; purge line G92 E0
17. Additional Notes
17.aDry filament at 155 F for 2 hours before use.
17.bStore with desiccant.
17.cKeep extruder door open to allow vapor to escape.
17.dAvoid long dwell times at high temperatures.If you need any other assistance, feel free to reach out to us anytime at timeplast@timeplast.com — we’ll be happy to help.
Free U.S. standard shipping on orders of 5+ spools!
Vanilla
-
TimeMass Vanilla invites you to create with the soft, universally comforting scent of pure vanilla bean. From the moment it starts extruding, this filament fills the air with a gentle sweetness—evoking visions of home baking, elegant perfumes, and creamy daydreams. Real vanilla essence is encapsulated inside, and our TimeMass technology (with its 70% structured water core) ensures those delicate aromatics endure the 200 °C printing journey intact, emerging in your finished piece as a long-lasting, natural fragrance. The effect is quietly enchanting: each print carries a subtle vanilla warmth that soothes the senses and adds a touch of heartfelt familiarity to your innovative designs.
How it works: 70% structured water releases mid-print and buffers heat, keeping vanilla’s warmth in your finished part; water-soluble for soft, steady bloom.
Scent profile: creamy sweetness—classic and versatile.
Great for: home décor, gift sets, kids’ room accents.
Printing recommendations: For reliable prints, please always use a 0.8mm nozzle. A texture plate and a printing adhesive. So that first layer will adhere. For all of the other parameters, please use our specialized GPT here.
Add a comforting note to any model.
-
Click here to access our new and improved TimeMass GPT Assistant. Just tell it your printer model and the TimeMass filament you're using—it will instantly recommend the exact parameters you need to start printing successfully.
Using a Bambu Lab printer?
1. Introduction
These parameters are designed to help avoid printing issues; however, temperatures and speed timings can be adjusted based on your specific goals. For example, if you prefer a less rigid result, we recommend using a lower temperature. This section outlines a complete slicing and printing profile for TimeMass, tailored for printers with a 0.8 mm nozzle. If the print is not being successful, please lower the nozzle temperature by 10°C and start over until an optimal print is achieved. Please check the manual for printing parameters.2. Temperature Settings
2.aNozzle Temperature: 230°C — Optimal for flowability while avoiding decomposition (which begins around 250°C).
2.bBed Temperature: 75°C — Ensures strong first-layer adhesion and prevents moisture bubbling.
2.cNozzle Temperature Range: 230–245°C — Timeplast melts around 165°C but prints best at 235°C for precise viscosity control.3. Cooling Settings
3.aNo Cooling for First Layers: 3 layers — Prevents shrinkage due to rapid cooling of moisture-rich filament.
3.bFan Minimum Speed: 0% for the first 100 seconds — Allows heat retention during early layers.
3.cFan Maximum Speed: 15% starting at 8 seconds — Avoids overcooling that can lead to warping.
3.dKeep Fan Always On: OFF — Allows vapor to escape and avoids internal fogging.
3.eSlow Down for Cooling: ON — Improves surface finish with controlled cooling.
3.fForce Cooling for Overhangs: OFF — Overcooling can deform bridges in Timeplast.
3.gFan for Overhangs: 15% — Only for essential cooling in complex areas.
3.hPre-Start Fan Time: 2 seconds — Minimizes pressure differential during the first layer.4. Volumetric Flow
4.aMax Volumetric Speed: 12 mm³/s — Based on a melt flow index of ~15 g/10min, allows high-speed printing.
4.bRamming Speed: 3 mm³/s — Prevents bubbles or popping from pressure spikes.5. Retraction and Flow
5.aRetraction Distance: 0.4 mm — Minimal retraction required for soft filaments to avoid stringing.
5.bRetraction Speed: 15 mm/s — Slow enough to avoid pulling molten plastic.
5.cPressure Advance: 0.05 — Compensates for nozzle lag at high flow rates.
5.dFlow Ratio: 92% — Slight under-extrusion avoids swelling and surface artifacts.6. Precision Settings
6.aGap Closing Radius: 0.1 mm — Tolerant of gaps in thicker walls.
6.bArc Fitting: ON — Reduces G-code size and smooths curve transitions.
6.cElephant Foot Compensation: 0.1 mm — Offsets squishing in the first layer caused by large bead sizes.7. Walls and Shells
7.aWall Loops: 2 — Minimum for strength when using a 0.8 mm nozzle.
7.bDetect Thin Walls: ON — Ensures tight geometries aren’t skipped.
7.cTop/Bottom Shell Layers: 3 — Provides good coverage; increase if watertightness is needed.
7.dTop/Bottom Thickness: 1.2 mm — Equals 1.5x the nozzle size for solid strength.
7.eTop/Bottom Pattern: Monotonic — Distributes tension evenly and improves surface finish.8. Geometry and Movement
8.aWall Order: Inner before Outer — Creates cleaner outer surfaces.
8.bInfill First: OFF — Maintains precise outer dimensions.
8.cSmooth Speed Transition: ON — Prevents ringing caused by abrupt speed changes.
8.dSmooth Coefficient: 80 — Ideal damping for soft materials.
8.eAvoid Crossing Wall: ON — Minimizes stringing across part walls.
8.fMax Detour for Crossing: 10 mm or 5% — Balances time with print cleanliness.9. Layer and Width Settings
9.aLayer Height: 0.3 mm — Optimal for strength and resolution using a 0.8 mm nozzle.
9.bInitial Layer Height: 0.35 mm — Slightly higher to improve adhesion.
9.cLine Widths (all): 0.8 mm — Matches nozzle diameter for consistent extrusion.10. Seam Settings
10.aSeam Position: Aligned or Back — Use aligned for mechanical consistency, back for visual appeal.
10.bSmart Scarf Seam: ON — Automatically adjusts seam location to reduce visual impact.
10.cSeam Angle: 155° — Standard seam angle for clean transitions.
10.dSeam Steps: 10 — Smooths seam path and improves visual finish.11. Infill Settings
11.aWall/Infill Overlap: 10% — Prevents infill from deforming soft exterior walls.
11.bInfill Combination: ON — Consolidates paths for efficiency.
11.cDetect Floating Shells: ON — Ensures unsupported vertical structures are printed reliably.
11.dSparse Infill Density: 20–25% — Balanced rigidity vs. material use.
11.eSparse Pattern: Grid — Stable and efficient for flexible geometries.12. Speed Settings
12.aTravel: 160 mm/s — Fast but safe against backlash.
12.bInitial Layer: 15 mm/s — Prevents nozzle from skimming and ensures bed adhesion.
12.cOuter Wall: 60 mm/s — Controlled speed for surface quality.
12.dInner Wall: 90 mm/s — Slightly faster without compromising control.
12.eSmall Perimeter: 35 mm/s — Reduced speed for detailed geometry.
12.fTop Surface: 40 mm/s — Improves finish on topmost layers.
12.gInfill: 100–120 mm/s — Takes advantage of high flowability.13. Acceleration Settings
13.aNormal Print: 2000 mm/s² — Prevents ringing in soft filaments.
13.bTravel: 4000 mm/s² — Enables fast movement without harsh transitions.
13.cInitial Layer: 300 mm/s² — Gentle movement prevents lifting from the bed.
13.dOuter Wall: 1500 mm/s² — Improves outer surface clarity.
13.eInner Wall: 2000 mm/s² — Balanced for structural components.
13.fTop Surface: 1500 mm/s² — Ensures smooth detailing.14. Adhesion and Brims
14.aSkirt Loops: 2 — Helps prime nozzle and start cleanly.
14.bBrim Width: 6 mm — Helps hold soft materials down.
14.cBrim Gap: 0.15 mm — Allows for easy removal without tearing.15. Prime Tower and Flush Settings
15.aPrime Tower: ON — Purges moisture and early flow inconsistencies.
15.bTower Width: 40 mm — Prevents collapse due to heat.
15.cBrim Width (Tower): 4 mm — Adds stability to the purge base.
15.dFlush Into Support: ON — Discards unwanted early flow safely.16. G-Code Start Script
M900 K0.05 ; Pressure Advance M106 S0 ; Fan off G92 E0 G1 E15 F300 ; purge line G92 E0
17. Additional Notes
17.aDry filament at 155 F for 2 hours before use.
17.bStore with desiccant.
17.cKeep extruder door open to allow vapor to escape.
17.dAvoid long dwell times at high temperatures.If you need any other assistance, feel free to reach out to us anytime at timeplast@timeplast.com — we’ll be happy to help.
Lemongrass
Free U.S. standard shipping on orders of 5+ spools!
-
Fresh and invigorating, TimeMass Lemongrass filament fills your workspace with a burst of citrusy vitality as you print. The crisp scent of real lemongrass—think lush green gardens after rain or a rejuvenating spa tea—elevates each creation with a refreshing personality. We use our signature TimeMass technology (a 70% structured water base) to cradle the lemongrass oil through the 200 °C printing process, preserving its bright, lemon-fresh notes without scorch or fade. The finished pieces don’t just look dynamic; they quietly diffuse a clean, uplifting aroma that energizes the room and inspires creativity in everyone who encounters them.
How it works: 70% structured water vents during extrusion, helping citrus notes survive; water-soluble for freshness on rinse.
Scent profile: bright citrus—clean and energizing.
Great for: kitchen hooks, mudroom accents, summer décor.
Printing recommendations: For reliable prints, please always use a 0.8mm nozzle. A texture plate and a printing adhesive. So that first layer will adhere. For all of the other parameters, please use our specialized GPT here.
Snap a clean citrus signal into any space.
-
Click here to access our new and improved TimeMass GPT Assistant. Just tell it your printer model and the TimeMass filament you're using—it will instantly recommend the exact parameters you need to start printing successfully.
1. Introduction
These parameters are designed to help avoid printing issues; however, temperatures and speed timings can be adjusted based on your specific goals. For example, if you prefer a less rigid result, we recommend using a lower temperature. This section outlines a complete slicing and printing profile for TimeMass, tailored for printers with a 0.8 mm nozzle. If the print is not being successful, please lower the nozzle temperature by 10°C and start over until an optimal print is achieved. Please check the manual for printing parameters.2. Temperature Settings
2.aNozzle Temperature: 230°C — Optimal for flowability while avoiding decomposition (which begins around 250°C).
2.bBed Temperature: 75°C — Ensures strong first-layer adhesion and prevents moisture bubbling.
2.cNozzle Temperature Range: 230–245°C — Timeplast melts around 165°C but prints best at 235°C for precise viscosity control.3. Cooling Settings
3.aNo Cooling for First Layers: 3 layers — Prevents shrinkage due to rapid cooling of moisture-rich filament.
3.bFan Minimum Speed: 0% for the first 100 seconds — Allows heat retention during early layers.
3.cFan Maximum Speed: 15% starting at 8 seconds — Avoids overcooling that can lead to warping.
3.dKeep Fan Always On: OFF — Allows vapor to escape and avoids internal fogging.
3.eSlow Down for Cooling: ON — Improves surface finish with controlled cooling.
3.fForce Cooling for Overhangs: OFF — Overcooling can deform bridges in Timeplast.
3.gFan for Overhangs: 15% — Only for essential cooling in complex areas.
3.hPre-Start Fan Time: 2 seconds — Minimizes pressure differential during the first layer.4. Volumetric Flow
4.aMax Volumetric Speed: 12 mm³/s — Based on a melt flow index of ~15 g/10min, allows high-speed printing.
4.bRamming Speed: 3 mm³/s — Prevents bubbles or popping from pressure spikes.5. Retraction and Flow
5.aRetraction Distance: 0.4 mm — Minimal retraction required for soft filaments to avoid stringing.
5.bRetraction Speed: 15 mm/s — Slow enough to avoid pulling molten plastic.
5.cPressure Advance: 0.05 — Compensates for nozzle lag at high flow rates.
5.dFlow Ratio: 92% — Slight under-extrusion avoids swelling and surface artifacts.6. Precision Settings
6.aGap Closing Radius: 0.1 mm — Tolerant of gaps in thicker walls.
6.bArc Fitting: ON — Reduces G-code size and smooths curve transitions.
6.cElephant Foot Compensation: 0.1 mm — Offsets squishing in the first layer caused by large bead sizes.7. Walls and Shells
7.aWall Loops: 2 — Minimum for strength when using a 0.8 mm nozzle.
7.bDetect Thin Walls: ON — Ensures tight geometries aren’t skipped.
7.cTop/Bottom Shell Layers: 3 — Provides good coverage; increase if watertightness is needed.
7.dTop/Bottom Thickness: 1.2 mm — Equals 1.5x the nozzle size for solid strength.
7.eTop/Bottom Pattern: Monotonic — Distributes tension evenly and improves surface finish.8. Geometry and Movement
8.aWall Order: Inner before Outer — Creates cleaner outer surfaces.
8.bInfill First: OFF — Maintains precise outer dimensions.
8.cSmooth Speed Transition: ON — Prevents ringing caused by abrupt speed changes.
8.dSmooth Coefficient: 80 — Ideal damping for soft materials.
8.eAvoid Crossing Wall: ON — Minimizes stringing across part walls.
8.fMax Detour for Crossing: 10 mm or 5% — Balances time with print cleanliness.9. Layer and Width Settings
9.aLayer Height: 0.3 mm — Optimal for strength and resolution using a 0.8 mm nozzle.
9.bInitial Layer Height: 0.35 mm — Slightly higher to improve adhesion.
9.cLine Widths (all): 0.8 mm — Matches nozzle diameter for consistent extrusion.10. Seam Settings
10.aSeam Position: Aligned or Back — Use aligned for mechanical consistency, back for visual appeal.
10.bSmart Scarf Seam: ON — Automatically adjusts seam location to reduce visual impact.
10.cSeam Angle: 155° — Standard seam angle for clean transitions.
10.dSeam Steps: 10 — Smooths seam path and improves visual finish.11. Infill Settings
11.aWall/Infill Overlap: 10% — Prevents infill from deforming soft exterior walls.
11.bInfill Combination: ON — Consolidates paths for efficiency.
11.cDetect Floating Shells: ON — Ensures unsupported vertical structures are printed reliably.
11.dSparse Infill Density: 20–25% — Balanced rigidity vs. material use.
11.eSparse Pattern: Grid — Stable and efficient for flexible geometries.12. Speed Settings
12.aTravel: 160 mm/s — Fast but safe against backlash.
12.bInitial Layer: 15 mm/s — Prevents nozzle from skimming and ensures bed adhesion.
12.cOuter Wall: 60 mm/s — Controlled speed for surface quality.
12.dInner Wall: 90 mm/s — Slightly faster without compromising control.
12.eSmall Perimeter: 35 mm/s — Reduced speed for detailed geometry.
12.fTop Surface: 40 mm/s — Improves finish on topmost layers.
12.gInfill: 100–120 mm/s — Takes advantage of high flowability.13. Acceleration Settings
13.aNormal Print: 2000 mm/s² — Prevents ringing in soft filaments.
13.bTravel: 4000 mm/s² — Enables fast movement without harsh transitions.
13.cInitial Layer: 300 mm/s² — Gentle movement prevents lifting from the bed.
13.dOuter Wall: 1500 mm/s² — Improves outer surface clarity.
13.eInner Wall: 2000 mm/s² — Balanced for structural components.
13.fTop Surface: 1500 mm/s² — Ensures smooth detailing.14. Adhesion and Brims
14.aSkirt Loops: 2 — Helps prime nozzle and start cleanly.
14.bBrim Width: 6 mm — Helps hold soft materials down.
14.cBrim Gap: 0.15 mm — Allows for easy removal without tearing.15. Prime Tower and Flush Settings
15.aPrime Tower: ON — Purges moisture and early flow inconsistencies.
15.bTower Width: 40 mm — Prevents collapse due to heat.
15.cBrim Width (Tower): 4 mm — Adds stability to the purge base.
15.dFlush Into Support: ON — Discards unwanted early flow safely.16. G-Code Start Script
M900 K0.05 ; Pressure Advance M106 S0 ; Fan off G92 E0 G1 E15 F300 ; purge line G92 E0
17. Additional Notes
17.aDry filament at 155 F for 2 hours before use.
17.bStore with desiccant.
17.cKeep extruder door open to allow vapor to escape.
17.dAvoid long dwell times at high temperatures.If you need any other assistance, feel free to reach out to us anytime at timeplast@timeplast.com — we’ll be happy to help.
Free U.S. standard shipping on orders of 5+ spools!
Ginger
-
Spirited and warm, TimeMass Ginger filament channels the zesty kick of fresh ginger into your creative builds. As your design takes shape, notes of real ginger root rise gently—reminiscent of homemade gingerbread and soothing ginger tea—bringing both comfort and a spark of energy to the air. Our advanced TimeMass formula (crafted with 70% structured water) shields ginger’s lively essential oils through 200 °C of extrusion, ensuring that each print retains that bright, spicy fragrance in every layer. The result is a printed piece that feels alive with warmth and vitality: a perfect fusion of dynamic innovation and the timeless, uplifting charm of ginger.
How it works: At ~200 °C ginger would normally burn off; 70% structured water releases during printing and protects the payload. Water-soluble base allows gradual scent bloom over time.
Scent profile: spiced, vibrant, gently citrusy.
Great for: energizing accents, winter gifts, wellness décor.
Printing recommendations: For reliable prints, please always use a 0.8mm nozzle. A texture plate and a printing adhesive. So that first layer will adhere. For all of the other parameters, please use our specialized GPT here.
Add a warm spark to any small print.
-
Click here to access our new and improved TimeMass GPT Assistant. Just tell it your printer model and the TimeMass filament you're using—it will instantly recommend the exact parameters you need to start printing successfully.
1. Introduction
These parameters are designed to help avoid printing issues; however, temperatures and speed timings can be adjusted based on your specific goals. For example, if you prefer a less rigid result, we recommend using a lower temperature. This section outlines a complete slicing and printing profile for TimeMass, tailored for printers with a 0.8 mm nozzle. If the print is not being successful, please lower the nozzle temperature by 10°C and start over until an optimal print is achieved. Please check the manual for printing parameters.2. Temperature Settings
2.aNozzle Temperature: 230°C — Optimal for flowability while avoiding decomposition (which begins around 250°C).
2.bBed Temperature: 75°C — Ensures strong first-layer adhesion and prevents moisture bubbling.
2.cNozzle Temperature Range: 230–245°C — Timeplast melts around 165°C but prints best at 235°C for precise viscosity control.3. Cooling Settings
3.aNo Cooling for First Layers: 3 layers — Prevents shrinkage due to rapid cooling of moisture-rich filament.
3.bFan Minimum Speed: 0% for the first 100 seconds — Allows heat retention during early layers.
3.cFan Maximum Speed: 15% starting at 8 seconds — Avoids overcooling that can lead to warping.
3.dKeep Fan Always On: OFF — Allows vapor to escape and avoids internal fogging.
3.eSlow Down for Cooling: ON — Improves surface finish with controlled cooling.
3.fForce Cooling for Overhangs: OFF — Overcooling can deform bridges in Timeplast.
3.gFan for Overhangs: 15% — Only for essential cooling in complex areas.
3.hPre-Start Fan Time: 2 seconds — Minimizes pressure differential during the first layer.4. Volumetric Flow
4.aMax Volumetric Speed: 12 mm³/s — Based on a melt flow index of ~15 g/10min, allows high-speed printing.
4.bRamming Speed: 3 mm³/s — Prevents bubbles or popping from pressure spikes.5. Retraction and Flow
5.aRetraction Distance: 0.4 mm — Minimal retraction required for soft filaments to avoid stringing.
5.bRetraction Speed: 15 mm/s — Slow enough to avoid pulling molten plastic.
5.cPressure Advance: 0.05 — Compensates for nozzle lag at high flow rates.
5.dFlow Ratio: 92% — Slight under-extrusion avoids swelling and surface artifacts.6. Precision Settings
6.aGap Closing Radius: 0.1 mm — Tolerant of gaps in thicker walls.
6.bArc Fitting: ON — Reduces G-code size and smooths curve transitions.
6.cElephant Foot Compensation: 0.1 mm — Offsets squishing in the first layer caused by large bead sizes.7. Walls and Shells
7.aWall Loops: 2 — Minimum for strength when using a 0.8 mm nozzle.
7.bDetect Thin Walls: ON — Ensures tight geometries aren’t skipped.
7.cTop/Bottom Shell Layers: 3 — Provides good coverage; increase if watertightness is needed.
7.dTop/Bottom Thickness: 1.2 mm — Equals 1.5x the nozzle size for solid strength.
7.eTop/Bottom Pattern: Monotonic — Distributes tension evenly and improves surface finish.8. Geometry and Movement
8.aWall Order: Inner before Outer — Creates cleaner outer surfaces.
8.bInfill First: OFF — Maintains precise outer dimensions.
8.cSmooth Speed Transition: ON — Prevents ringing caused by abrupt speed changes.
8.dSmooth Coefficient: 80 — Ideal damping for soft materials.
8.eAvoid Crossing Wall: ON — Minimizes stringing across part walls.
8.fMax Detour for Crossing: 10 mm or 5% — Balances time with print cleanliness.9. Layer and Width Settings
9.aLayer Height: 0.3 mm — Optimal for strength and resolution using a 0.8 mm nozzle.
9.bInitial Layer Height: 0.35 mm — Slightly higher to improve adhesion.
9.cLine Widths (all): 0.8 mm — Matches nozzle diameter for consistent extrusion.10. Seam Settings
10.aSeam Position: Aligned or Back — Use aligned for mechanical consistency, back for visual appeal.
10.bSmart Scarf Seam: ON — Automatically adjusts seam location to reduce visual impact.
10.cSeam Angle: 155° — Standard seam angle for clean transitions.
10.dSeam Steps: 10 — Smooths seam path and improves visual finish.11. Infill Settings
11.aWall/Infill Overlap: 10% — Prevents infill from deforming soft exterior walls.
11.bInfill Combination: ON — Consolidates paths for efficiency.
11.cDetect Floating Shells: ON — Ensures unsupported vertical structures are printed reliably.
11.dSparse Infill Density: 20–25% — Balanced rigidity vs. material use.
11.eSparse Pattern: Grid — Stable and efficient for flexible geometries.12. Speed Settings
12.aTravel: 160 mm/s — Fast but safe against backlash.
12.bInitial Layer: 15 mm/s — Prevents nozzle from skimming and ensures bed adhesion.
12.cOuter Wall: 60 mm/s — Controlled speed for surface quality.
12.dInner Wall: 90 mm/s — Slightly faster without compromising control.
12.eSmall Perimeter: 35 mm/s — Reduced speed for detailed geometry.
12.fTop Surface: 40 mm/s — Improves finish on topmost layers.
12.gInfill: 100–120 mm/s — Takes advantage of high flowability.13. Acceleration Settings
13.aNormal Print: 2000 mm/s² — Prevents ringing in soft filaments.
13.bTravel: 4000 mm/s² — Enables fast movement without harsh transitions.
13.cInitial Layer: 300 mm/s² — Gentle movement prevents lifting from the bed.
13.dOuter Wall: 1500 mm/s² — Improves outer surface clarity.
13.eInner Wall: 2000 mm/s² — Balanced for structural components.
13.fTop Surface: 1500 mm/s² — Ensures smooth detailing.14. Adhesion and Brims
14.aSkirt Loops: 2 — Helps prime nozzle and start cleanly.
14.bBrim Width: 6 mm — Helps hold soft materials down.
14.cBrim Gap: 0.15 mm — Allows for easy removal without tearing.15. Prime Tower and Flush Settings
15.aPrime Tower: ON — Purges moisture and early flow inconsistencies.
15.bTower Width: 40 mm — Prevents collapse due to heat.
15.cBrim Width (Tower): 4 mm — Adds stability to the purge base.
15.dFlush Into Support: ON — Discards unwanted early flow safely.16. G-Code Start Script
M900 K0.05 ; Pressure Advance M106 S0 ; Fan off G92 E0 G1 E15 F300 ; purge line G92 E0
17. Additional Notes
17.aDry filament at 155 F for 2 hours before use.
17.bStore with desiccant.
17.cKeep extruder door open to allow vapor to escape.
17.dAvoid long dwell times at high temperatures.If you need any other assistance, feel free to reach out to us anytime at timeplast@timeplast.com — we’ll be happy to help.
Free U.S. standard shipping on orders of 5+ spools!
Raw scented Soap lineup
Clove Soap
-
Clove Soap Gen 5 brings the warm, comforting scent of clove into a fully functional 3D-printable soap filament. Built on our Gen 5 formula, it produces a gentle, low-foam lather not the big bubbles of commercial soap, but the effective cleansing action that comes from naturally derived surfactants and emulsifiers. The real clove oil gives each print a nostalgic, apothecary-style aroma with natural antiseptic qualities, making your finished bar both practical and aromatic. Because this filament is designed with 70% structured water and polymerized alcohols, it prints smoothly, hardens beautifully after cooling, and lasts significantly longer than conventional soap, offering a slow, steady release of scent and function with every use. It’s a small ritual of craftsmanship: the spice of clove, the creativity of additive manufacturing, and the satisfaction of using a soap you designed yourself.
How it works: The high water content buffers heat so the clove aroma survives the printing process. The surfactants do the real cleaning,foam is minimal by design.
Why Soap Gen 5? A warm, bold spice profile that naturally helps mask strong odors.
Printing recommendations: For reliable prints, please always use a 0.8mm nozzle.A cryogrip blue plate so that first layer will adhere. So that first layer will adhere. For all of the other parameters, please use our specialized GPT here. And if at any point you have questions, concerns, or difficulty printing, please don’t hesitate to reach out to us at timeplast@timeplast.com. We work with every customer until their filament prints successfully, and we also offer no-questions-asked refunds if the material simply isn’t the right fit for you. Your satisfaction is always our priority.
Add a classic spice note to sink-side prints.
For external use only. Avoid sensitive areas.
-
Click here to access our new and improved TimeMass GPT Assistant. Just tell it your printer model and the TimeMass filament you're using—it will instantly recommend the exact parameters you need to start printing successfully.
1. Introduction
These parameters are designed to help avoid printing issues; however, temperatures and speed timings can be adjusted based on your specific goals. For example, if you prefer a less rigid result, we recommend using a lower temperature. This section outlines a complete slicing and printing profile for TimeMass, tailored for printers with a 0.8 mm nozzle. If the print is not being successful, please lower the nozzle temperature by 10°C and start over until an optimal print is achieved. Please check the manual for printing parameters.2. Temperature Settings
2.aNozzle Temperature: 230°C — Optimal for flowability while avoiding decomposition (which begins around 250°C).
2.bBed Temperature: 75°C — Ensures strong first-layer adhesion and prevents moisture bubbling.
2.cNozzle Temperature Range: 230–245°C — Timeplast melts around 165°C but prints best at 235°C for precise viscosity control.3. Cooling Settings
3.aNo Cooling for First Layers: 3 layers — Prevents shrinkage due to rapid cooling of moisture-rich filament.
3.bFan Minimum Speed: 0% for the first 100 seconds — Allows heat retention during early layers.
3.cFan Maximum Speed: 15% starting at 8 seconds — Avoids overcooling that can lead to warping.
3.dKeep Fan Always On: OFF — Allows vapor to escape and avoids internal fogging.
3.eSlow Down for Cooling: ON — Improves surface finish with controlled cooling.
3.fForce Cooling for Overhangs: OFF — Overcooling can deform bridges in Timeplast.
3.gFan for Overhangs: 15% — Only for essential cooling in complex areas.
3.hPre-Start Fan Time: 2 seconds — Minimizes pressure differential during the first layer.4. Volumetric Flow
4.aMax Volumetric Speed: 12 mm³/s — Based on a melt flow index of ~15 g/10min, allows high-speed printing.
4.bRamming Speed: 3 mm³/s — Prevents bubbles or popping from pressure spikes.5. Retraction and Flow
5.aRetraction Distance: 0.4 mm — Minimal retraction required for soft filaments to avoid stringing.
5.bRetraction Speed: 15 mm/s — Slow enough to avoid pulling molten plastic.
5.cPressure Advance: 0.05 — Compensates for nozzle lag at high flow rates.
5.dFlow Ratio: 92% — Slight under-extrusion avoids swelling and surface artifacts.6. Precision Settings
6.aGap Closing Radius: 0.1 mm — Tolerant of gaps in thicker walls.
6.bArc Fitting: ON — Reduces G-code size and smooths curve transitions.
6.cElephant Foot Compensation: 0.1 mm — Offsets squishing in the first layer caused by large bead sizes.7. Walls and Shells
7.aWall Loops: 2 — Minimum for strength when using a 0.8 mm nozzle.
7.bDetect Thin Walls: ON — Ensures tight geometries aren’t skipped.
7.cTop/Bottom Shell Layers: 3 — Provides good coverage; increase if watertightness is needed.
7.dTop/Bottom Thickness: 1.2 mm — Equals 1.5x the nozzle size for solid strength.
7.eTop/Bottom Pattern: Monotonic — Distributes tension evenly and improves surface finish.8. Geometry and Movement
8.aWall Order: Inner before Outer — Creates cleaner outer surfaces.
8.bInfill First: OFF — Maintains precise outer dimensions.
8.cSmooth Speed Transition: ON — Prevents ringing caused by abrupt speed changes.
8.dSmooth Coefficient: 80 — Ideal damping for soft materials.
8.eAvoid Crossing Wall: ON — Minimizes stringing across part walls.
8.fMax Detour for Crossing: 10 mm or 5% — Balances time with print cleanliness.9. Layer and Width Settings
9.aLayer Height: 0.3 mm — Optimal for strength and resolution using a 0.8 mm nozzle.
9.bInitial Layer Height: 0.35 mm — Slightly higher to improve adhesion.
9.cLine Widths (all): 0.8 mm — Matches nozzle diameter for consistent extrusion.10. Seam Settings
10.aSeam Position: Aligned or Back — Use aligned for mechanical consistency, back for visual appeal.
10.bSmart Scarf Seam: ON — Automatically adjusts seam location to reduce visual impact.
10.cSeam Angle: 155° — Standard seam angle for clean transitions.
10.dSeam Steps: 10 — Smooths seam path and improves visual finish.11. Infill Settings
11.aWall/Infill Overlap: 10% — Prevents infill from deforming soft exterior walls.
11.bInfill Combination: ON — Consolidates paths for efficiency.
11.cDetect Floating Shells: ON — Ensures unsupported vertical structures are printed reliably.
11.dSparse Infill Density: 20–25% — Balanced rigidity vs. material use.
11.eSparse Pattern: Grid — Stable and efficient for flexible geometries.12. Speed Settings
12.aTravel: 160 mm/s — Fast but safe against backlash.
12.bInitial Layer: 15 mm/s — Prevents nozzle from skimming and ensures bed adhesion.
12.cOuter Wall: 60 mm/s — Controlled speed for surface quality.
12.dInner Wall: 90 mm/s — Slightly faster without compromising control.
12.eSmall Perimeter: 35 mm/s — Reduced speed for detailed geometry.
12.fTop Surface: 40 mm/s — Improves finish on topmost layers.
12.gInfill: 100–120 mm/s — Takes advantage of high flowability.13. Acceleration Settings
13.aNormal Print: 2000 mm/s² — Prevents ringing in soft filaments.
13.bTravel: 4000 mm/s² — Enables fast movement without harsh transitions.
13.cInitial Layer: 300 mm/s² — Gentle movement prevents lifting from the bed.
13.dOuter Wall: 1500 mm/s² — Improves outer surface clarity.
13.eInner Wall: 2000 mm/s² — Balanced for structural components.
13.fTop Surface: 1500 mm/s² — Ensures smooth detailing.14. Adhesion and Brims
14.aSkirt Loops: 2 — Helps prime nozzle and start cleanly.
14.bBrim Width: 6 mm — Helps hold soft materials down.
14.cBrim Gap: 0.15 mm — Allows for easy removal without tearing.15. Prime Tower and Flush Settings
15.aPrime Tower: ON — Purges moisture and early flow inconsistencies.
15.bTower Width: 40 mm — Prevents collapse due to heat.
15.cBrim Width (Tower): 4 mm — Adds stability to the purge base.
15.dFlush Into Support: ON — Discards unwanted early flow safely.16. G-Code Start Script
M900 K0.05 ; Pressure Advance M106 S0 ; Fan off G92 E0 G1 E15 F300 ; purge line G92 E0
17. Additional Notes
17.aDry filament at 155 F for 2 hours before use.
17.bStore with desiccant.
17.cKeep extruder door open to allow vapor to escape.
17.dAvoid long dwell times at high temperatures.If you need any other assistance, feel free to reach out to us anytime at timeplast@timeplast.com — we’ll be happy to help.
Free U.S. standard shipping on orders of 5+ spools!
Black Pepper Soap

-
Black Pepper Soap Gen 5 adds a surprising, energizing edge to 3D-printed self-care. Infused with real black pepper essence, each bar you print releases a subtle, warm-spice aroma that feels bright and invigorating rather than sharp, the kind of scent that wakes you up without overwhelming your senses. Like all Gen 5 soaps, it doesn’t rely on large commercial-style bubbles; instead, it produces a soft, effective lather through naturally derived surfactants and emulsifiers, which are what actually clean your skin. The 70% structured-water base helps protect the pepper notes during printing and allows the bar to firm up beautifully as it dries, making it long-lasting, gentle, and satisfying to use. The result is a functional, aromatic soap that you quite literally crafted yourself a small, invigorating ritual built layer by layer.
How it works: Structured water moderates heat during printing to preserve black pepper’s bright, spicy character; natural surfactants provide smooth, effective lather.
Why Soap Gen 5? Ideal for an energizing, post-workout or morning routine thanks to its subtly “wake-up” fragrance profile.
Print an energizing token.
For external use only. Avoid sensitive areas.
-
Click here to access our new and improved TimeMass GPT Assistant. Just tell it your printer model and the TimeMass filament you're using—it will instantly recommend the exact parameters you need to start printing successfully.
1. Introduction
These parameters are designed to help avoid printing issues; however, temperatures and speed timings can be adjusted based on your specific goals. For example, if you prefer a less rigid result, we recommend using a lower temperature. This section outlines a complete slicing and printing profile for TimeMass Soap, tailored for printers with a 0.8 mm nozzle. If the print is not being successful, please lower the nozzle temperature by 10°C and start over until an optimal print is achieved. Please check the manual for printing parameters.2. Temperature Settings
2.aNozzle Temperature: 230°C — Optimal for flowability while avoiding decomposition (which begins around 250°C).
2.bBed Temperature: 75°C — Ensures strong first-layer adhesion and prevents moisture bubbling.
2.cNozzle Temperature Range: 230–245°C — Timeplast melts around 165°C but prints best at 235°C for precise viscosity control.3. Cooling Settings
3.aNo Cooling for First Layers: 3 layers — Prevents shrinkage due to rapid cooling of moisture-rich filament.
3.bFan Minimum Speed: 0% for the first 100 seconds — Allows heat retention during early layers.
3.cFan Maximum Speed: 15% starting at 8 seconds — Avoids overcooling that can lead to warping.
3.dKeep Fan Always On: OFF — Allows vapor to escape and avoids internal fogging.
3.eSlow Down for Cooling: ON — Improves surface finish with controlled cooling.
3.fForce Cooling for Overhangs: OFF — Overcooling can deform bridges in Timeplast.
3.gFan for Overhangs: 15% — Only for essential cooling in complex areas.
3.hPre-Start Fan Time: 2 seconds — Minimizes pressure differential during the first layer.4. Volumetric Flow
4.aMax Volumetric Speed: 12 mm³/s — Based on a melt flow index of ~15 g/10min, allows high-speed printing.
4.bRamming Speed: 3 mm³/s — Prevents bubbles or popping from pressure spikes.5. Retraction and Flow
5.aRetraction Distance: 0.4 mm — Minimal retraction required for soft filaments to avoid stringing.
5.bRetraction Speed: 15 mm/s — Slow enough to avoid pulling molten plastic.
5.cPressure Advance: 0.05 — Compensates for nozzle lag at high flow rates.
5.dFlow Ratio: 92% — Slight under-extrusion avoids swelling and surface artifacts.6. Precision Settings
6.aGap Closing Radius: 0.1 mm — Tolerant of gaps in thicker walls.
6.bArc Fitting: ON — Reduces G-code size and smooths curve transitions.
6.cElephant Foot Compensation: 0.1 mm — Offsets squishing in the first layer caused by large bead sizes.7. Walls and Shells
7.aWall Loops: 2 — Minimum for strength when using a 0.8 mm nozzle.
7.bDetect Thin Walls: ON — Ensures tight geometries aren’t skipped.
7.cTop/Bottom Shell Layers: 3 — Provides good coverage; increase if watertightness is needed.
7.dTop/Bottom Thickness: 1.2 mm — Equals 1.5x the nozzle size for solid strength.
7.eTop/Bottom Pattern: Monotonic — Distributes tension evenly and improves surface finish.8. Geometry and Movement
8.aWall Order: Inner before Outer — Creates cleaner outer surfaces.
8.bInfill First: OFF — Maintains precise outer dimensions.
8.cSmooth Speed Transition: ON — Prevents ringing caused by abrupt speed changes.
8.dSmooth Coefficient: 80 — Ideal damping for soft materials.
8.eAvoid Crossing Wall: ON — Minimizes stringing across part walls.
8.fMax Detour for Crossing: 10 mm or 5% — Balances time with print cleanliness.9. Layer and Width Settings
9.aLayer Height: 0.3 mm — Optimal for strength and resolution using a 0.8 mm nozzle.
9.bInitial Layer Height: 0.35 mm — Slightly higher to improve adhesion.
9.cLine Widths (all): 0.8 mm — Matches nozzle diameter for consistent extrusion.10. Seam Settings
10.aSeam Position: Aligned or Back — Use aligned for mechanical consistency, back for visual appeal.
10.bSmart Scarf Seam: ON — Automatically adjusts seam location to reduce visual impact.
10.cSeam Angle: 155° — Standard seam angle for clean transitions.
10.dSeam Steps: 10 — Smooths seam path and improves visual finish.11. Infill Settings
11.aWall/Infill Overlap: 10% — Prevents infill from deforming soft exterior walls.
11.bInfill Combination: ON — Consolidates paths for efficiency.
11.cDetect Floating Shells: ON — Ensures unsupported vertical structures are printed reliably.
11.dSparse Infill Density: 20–25% — Balanced rigidity vs. material use.
11.eSparse Pattern: Grid — Stable and efficient for flexible geometries.12. Speed Settings
12.aTravel: 160 mm/s — Fast but safe against backlash.
12.bInitial Layer: 15 mm/s — Prevents nozzle from skimming and ensures bed adhesion.
12.cOuter Wall: 60 mm/s — Controlled speed for surface quality.
12.dInner Wall: 90 mm/s — Slightly faster without compromising control.
12.eSmall Perimeter: 35 mm/s — Reduced speed for detailed geometry.
12.fTop Surface: 40 mm/s — Improves finish on topmost layers.
12.gInfill: 100–120 mm/s — Takes advantage of high flowability.13. Acceleration Settings
13.aNormal Print: 2000 mm/s² — Prevents ringing in soft filaments.
13.bTravel: 4000 mm/s² — Enables fast movement without harsh transitions.
13.cInitial Layer: 300 mm/s² — Gentle movement prevents lifting from the bed.
13.dOuter Wall: 1500 mm/s² — Improves outer surface clarity.
13.eInner Wall: 2000 mm/s² — Balanced for structural components.
13.fTop Surface: 1500 mm/s² — Ensures smooth detailing.14. Adhesion and Brims
14.aSkirt Loops: 2 — Helps prime nozzle and start cleanly.
14.bBrim Width: 6 mm — Helps hold soft materials down.
14.cBrim Gap: 0.15 mm — Allows for easy removal without tearing.15. Prime Tower and Flush Settings
15.aPrime Tower: ON — Purges moisture and early flow inconsistencies.
15.bTower Width: 40 mm — Prevents collapse due to heat.
15.cBrim Width (Tower): 4 mm — Adds stability to the purge base.
15.dFlush Into Support: ON — Discards unwanted early flow safely.16. G-Code Start Script
M900 K0.05 ; Pressure Advance M106 S0 ; Fan off G92 E0 G1 E15 F300 ; purge line G92 E0
17. Additional Notes
17.aDry filament at 155 F for 2 hours before use.
17.bStore with desiccant.
17.cKeep extruder door open to allow vapor to escape.
17.dAvoid long dwell times at high temperatures.If you need any other assistance, feel free to reach out to us anytime at timeplast@timeplast.com — we’ll be happy to help.
Free U.S. standard shipping on orders of 5+ spools!
Star Anise Soap

-
Star Anise Soap Gen 5 brings a touch of aromatic magic to your 3D-printed creations. Infused with real star anise, this filament releases a light, licorice-like scent that feels both nostalgic and refreshing. Instead of big commercial-style bubbles, it produces a soft, effective lather powered by naturally derived surfactants and emulsifiers the chemistry that actually cleans. Our 70% structured-water base keeps the aroma intact during printing and helps the bar harden beautifully as it cools, giving you a soap that lasts far longer than store-bought options. With each rinse, the gentle fragrance of star anise comes through, making daily hand-washing feel a little more special. It’s a blend of craft, subtle scent, and practicality created by you.
How it works: The structured-water matrix buffers heat to protect the star anise essence; mild lather comes from natural surfactants, not foam volume.
Why Soap Gen 5? A bright, clean aroma that’s especially helpful in kitchens where strong scents linger.
Print a tidy, anise-fresh helper.
For external use only. Avoid sensitive areas.
-
Click here to access our specialized TimeMass GPT Assistant.Just tell it your printer model and the TimeMass filament you're using—it will instantly recommend the exact parameters you need to start printing successfully.
1. Introduction
These parameters are designed to help avoid printing issues; however, temperatures and speed timings can be adjusted based on your specific goals. For example, if you prefer a less rigid result, we recommend using a lower temperature. This section outlines a complete slicing and printing profile for TimeMass Iridescent Gold, tailored for printers with a 0.8 mm nozzle. If the print is not being successful, please lower the nozzle temperature by 10°C and start over until an optimal print is achieved.While these examples were printed with a 0.8 mm nozzle, TimeMass can be used with any nozzle size. Please check the manual for printing parameters with all the other nozzle sizes.2. Temperature Settings
2.aNozzle Temperature: 240°C — Optimal for flowability while avoiding decomposition (which begins around 250°C).
2.bBed Temperature: 95°C — Ensures strong first-layer adhesion and prevents moisture bubbling.
2.cNozzle Temperature Range: 230–245°C — Timeplast melts around 165°C but prints best at 240°C for precise viscosity control.3. Cooling Settings
3.aNo Cooling for First Layers: 3 layers — Prevents shrinkage due to rapid cooling of moisture-rich filament.
3.bFan Minimum Speed: 0% for the first 100 seconds — Allows heat retention during early layers.
3.cFan Maximum Speed: 15% starting at 8 seconds — Avoids overcooling that can lead to warping.
3.dKeep Fan Always On: OFF — Allows vapor to escape and avoids internal fogging.
3.eSlow Down for Cooling: ON — Improves surface finish with controlled cooling.
3.fForce Cooling for Overhangs: OFF — Overcooling can deform bridges in Timeplast.
3.gFan for Overhangs: 15% — Only for essential cooling in complex areas.
3.hPre-Start Fan Time: 2 seconds — Minimizes pressure differential during the first layer.4. Volumetric Flow
4.aMax Volumetric Speed: 12 mm³/s — Based on a melt flow index of ~15 g/10min, allows high-speed printing.
4.bRamming Speed: 3 mm³/s — Prevents bubbles or popping from pressure spikes.5. Retraction and Flow
5.aRetraction Distance: 0.4 mm — Minimal retraction required for soft filaments to avoid stringing.
5.bRetraction Speed: 15 mm/s — Slow enough to avoid pulling molten plastic.
5.cPressure Advance: 0.05 — Compensates for nozzle lag at high flow rates.
5.dFlow Ratio: 92% — Slight under-extrusion avoids swelling and surface artifacts.6. Precision Settings
6.aGap Closing Radius: 0.1 mm — Tolerant of gaps in thicker walls.
6.bArc Fitting: ON — Reduces G-code size and smooths curve transitions.
6.cElephant Foot Compensation: 0.1 mm — Offsets squishing in the first layer caused by large bead sizes.7. Walls and Shells
7.aWall Loops: 2 — Minimum for strength when using a 0.8 mm nozzle.
7.bDetect Thin Walls: ON — Ensures tight geometries aren’t skipped.
7.cTop/Bottom Shell Layers: 3 — Provides good coverage; increase if watertightness is needed.
7.dTop/Bottom Thickness: 1.2 mm — Equals 1.5x the nozzle size for solid strength.
7.eTop/Bottom Pattern: Monotonic — Distributes tension evenly and improves surface finish.8. Geometry and Movement
8.aWall Order: Inner before Outer — Creates cleaner outer surfaces.
8.bInfill First: OFF — Maintains precise outer dimensions.
8.cSmooth Speed Transition: ON — Prevents ringing caused by abrupt speed changes.
8.dSmooth Coefficient: 80 — Ideal damping for soft materials.
8.eAvoid Crossing Wall: ON — Minimizes stringing across part walls.
8.fMax Detour for Crossing: 10 mm or 5% — Balances time with print cleanliness.9. Layer and Width Settings
9.aLayer Height: 0.3 mm — Optimal for strength and resolution using a 0.8 mm nozzle.
9.bInitial Layer Height: 0.35 mm — Slightly higher to improve adhesion.
9.cLine Widths (all): 0.8 mm — Matches nozzle diameter for consistent extrusion.10. Seam Settings
10.aSeam Position: Aligned or Back — Use aligned for mechanical consistency, back for visual appeal.
10.bSmart Scarf Seam: ON — Automatically adjusts seam location to reduce visual impact.
10.cSeam Angle: 155° — Standard seam angle for clean transitions.
10.dSeam Steps: 10 — Smooths seam path and improves visual finish.11. Infill Settings
11.aWall/Infill Overlap: 10% — Prevents infill from deforming soft exterior walls.
11.bInfill Combination: ON — Consolidates paths for efficiency.
11.cDetect Floating Shells: ON — Ensures unsupported vertical structures are printed reliably.
11.dSparse Infill Density: 20–25% — Balanced rigidity vs. material use.
11.eSparse Pattern: Grid — Stable and efficient for flexible geometries.12. Speed Settings
12.aTravel: 160 mm/s — Fast but safe against backlash.
12.bInitial Layer: 15 mm/s — Prevents nozzle from skimming and ensures bed adhesion.
12.cOuter Wall: 60 mm/s — Controlled speed for surface quality.
12.dInner Wall: 90 mm/s — Slightly faster without compromising control.
12.eSmall Perimeter: 35 mm/s — Reduced speed for detailed geometry.
12.fTop Surface: 40 mm/s — Improves finish on topmost layers.
12.gInfill: 100–120 mm/s — Takes advantage of high flowability.13. Acceleration Settings
13.aNormal Print: 2000 mm/s² — Prevents ringing in soft filaments.
13.bTravel: 4000 mm/s² — Enables fast movement without harsh transitions.
13.cInitial Layer: 300 mm/s² — Gentle movement prevents lifting from the bed.
13.dOuter Wall: 1500 mm/s² — Improves outer surface clarity.
13.eInner Wall: 2000 mm/s² — Balanced for structural components.
13.fTop Surface: 1500 mm/s² — Ensures smooth detailing.14. Adhesion and Brims
14.aSkirt Loops: 2 — Helps prime nozzle and start cleanly.
14.bBrim Width: 6 mm — Helps hold soft materials down.
14.cBrim Gap: 0.15 mm — Allows for easy removal without tearing.15. Prime Tower and Flush Settings
15.aPrime Tower: ON — Purges moisture and early flow inconsistencies.
15.bTower Width: 40 mm — Prevents collapse due to heat.
15.cBrim Width (Tower): 4 mm — Adds stability to the purge base.
15.dFlush Into Support: ON — Discards unwanted early flow safely.16. G-Code Start Script
M900 K0.05 ; Pressure Advance M106 S0 ; Fan off G92 E0 G1 E15 F300 ; purge line G92 E0
17. Additional Notes
17.aDry filament at 100°C for 2 hours before use.
17.bStore with desiccant.
17.cKeep extruder door open to allow vapor to escape.
17.dAvoid long dwell times at high temperatures.If you need print settings for other nozzle sizes, feel free to reach out to us at timeplast@timeplast.com — we’ll be happy to help.
You can also get instant support through our dedicated ChatGPT assistant here:https://chatgpt.com/g/g-6823924241cc8191bbabcf0bc6523e3f-timemass-4d-printing🚀
Free U.S. standard shipping on orders of 5+ spools!
Lavender Soap
-
Lavender Soap Gen 5 turns your 3D printer into a little spa-maker, letting you craft soap bars that release the calm, familiar comfort of real lavender. Infused with pure lavender oil, each printed bar gives off a soft, soothing aroma and produces a gentle, effective lather not big commercial bubbles, but the kind of smooth cleansing you get from naturally derived surfactants and emulsifiers. Built on our Gen 5 formula, the structured-water base helps protect lavender’s delicate notes during printing, allowing them to emerge gradually as the soap dries and is used. The result is a long-lasting, subtly fragrant bar that feels serene and restorative, offering a moment of quiet relaxation you made with your own hands.
How it works: Structured water buffers heat so lavender’s natural aroma survives printing; water-soluble composition allows the scent to release gently with each rinse.
Why Soap Gen 5? Perfect for evening routines or any space where you want a calm, comforting atmosphere.
Print calm.
For external use only. Avoid sensitive areas.
-
Click here to access our new and improved TimeMass GPT Assistant. Just tell it your printer model and the TimeMass filament you're using—it will instantly recommend the exact parameters you need to start printing successfully.
1. Introduction
These parameters are designed to help avoid printing issues; however, temperatures and speed timings can be adjusted based on your specific goals. For example, if you prefer a less rigid result, we recommend using a lower temperature. This section outlines a complete slicing and printing profile for TimeMass Soap, tailored for printers with a 0.8 mm nozzle. If the print is not being successful, please lower the nozzle temperature by 10°C and start over until an optimal print is achieved. Please check the manual for printing parameters.2. Temperature Settings
2.aNozzle Temperature: 230°C — Optimal for flowability while avoiding decomposition (which begins around 250°C).
2.bBed Temperature: 75°C — Ensures strong first-layer adhesion and prevents moisture bubbling.
2.cNozzle Temperature Range: 230–245°C — Timeplast melts around 165°C but prints best at 235°C for precise viscosity control.3. Cooling Settings
3.aNo Cooling for First Layers: 3 layers — Prevents shrinkage due to rapid cooling of moisture-rich filament.
3.bFan Minimum Speed: 0% for the first 100 seconds — Allows heat retention during early layers.
3.cFan Maximum Speed: 15% starting at 8 seconds — Avoids overcooling that can lead to warping.
3.dKeep Fan Always On: OFF — Allows vapor to escape and avoids internal fogging.
3.eSlow Down for Cooling: ON — Improves surface finish with controlled cooling.
3.fForce Cooling for Overhangs: OFF — Overcooling can deform bridges in Timeplast.
3.gFan for Overhangs: 15% — Only for essential cooling in complex areas.
3.hPre-Start Fan Time: 2 seconds — Minimizes pressure differential during the first layer.4. Volumetric Flow
4.aMax Volumetric Speed: 12 mm³/s — Based on a melt flow index of ~15 g/10min, allows high-speed printing.
4.bRamming Speed: 3 mm³/s — Prevents bubbles or popping from pressure spikes.5. Retraction and Flow
5.aRetraction Distance: 0.4 mm — Minimal retraction required for soft filaments to avoid stringing.
5.bRetraction Speed: 15 mm/s — Slow enough to avoid pulling molten plastic.
5.cPressure Advance: 0.05 — Compensates for nozzle lag at high flow rates.
5.dFlow Ratio: 92% — Slight under-extrusion avoids swelling and surface artifacts.6. Precision Settings
6.aGap Closing Radius: 0.1 mm — Tolerant of gaps in thicker walls.
6.bArc Fitting: ON — Reduces G-code size and smooths curve transitions.
6.cElephant Foot Compensation: 0.1 mm — Offsets squishing in the first layer caused by large bead sizes.7. Walls and Shells
7.aWall Loops: 2 — Minimum for strength when using a 0.8 mm nozzle.
7.bDetect Thin Walls: ON — Ensures tight geometries aren’t skipped.
7.cTop/Bottom Shell Layers: 3 — Provides good coverage; increase if watertightness is needed.
7.dTop/Bottom Thickness: 1.2 mm — Equals 1.5x the nozzle size for solid strength.
7.eTop/Bottom Pattern: Monotonic — Distributes tension evenly and improves surface finish.8. Geometry and Movement
8.aWall Order: Inner before Outer — Creates cleaner outer surfaces.
8.bInfill First: OFF — Maintains precise outer dimensions.
8.cSmooth Speed Transition: ON — Prevents ringing caused by abrupt speed changes.
8.dSmooth Coefficient: 80 — Ideal damping for soft materials.
8.eAvoid Crossing Wall: ON — Minimizes stringing across part walls.
8.fMax Detour for Crossing: 10 mm or 5% — Balances time with print cleanliness.9. Layer and Width Settings
9.aLayer Height: 0.3 mm — Optimal for strength and resolution using a 0.8 mm nozzle.
9.bInitial Layer Height: 0.35 mm — Slightly higher to improve adhesion.
9.cLine Widths (all): 0.8 mm — Matches nozzle diameter for consistent extrusion.10. Seam Settings
10.aSeam Position: Aligned or Back — Use aligned for mechanical consistency, back for visual appeal.
10.bSmart Scarf Seam: ON — Automatically adjusts seam location to reduce visual impact.
10.cSeam Angle: 155° — Standard seam angle for clean transitions.
10.dSeam Steps: 10 — Smooths seam path and improves visual finish.11. Infill Settings
11.aWall/Infill Overlap: 10% — Prevents infill from deforming soft exterior walls.
11.bInfill Combination: ON — Consolidates paths for efficiency.
11.cDetect Floating Shells: ON — Ensures unsupported vertical structures are printed reliably.
11.dSparse Infill Density: 20–25% — Balanced rigidity vs. material use.
11.eSparse Pattern: Grid — Stable and efficient for flexible geometries.12. Speed Settings
12.aTravel: 160 mm/s — Fast but safe against backlash.
12.bInitial Layer: 15 mm/s — Prevents nozzle from skimming and ensures bed adhesion.
12.cOuter Wall: 60 mm/s — Controlled speed for surface quality.
12.dInner Wall: 90 mm/s — Slightly faster without compromising control.
12.eSmall Perimeter: 35 mm/s — Reduced speed for detailed geometry.
12.fTop Surface: 40 mm/s — Improves finish on topmost layers.
12.gInfill: 100–120 mm/s — Takes advantage of high flowability.13. Acceleration Settings
13.aNormal Print: 2000 mm/s² — Prevents ringing in soft filaments.
13.bTravel: 4000 mm/s² — Enables fast movement without harsh transitions.
13.cInitial Layer: 300 mm/s² — Gentle movement prevents lifting from the bed.
13.dOuter Wall: 1500 mm/s² — Improves outer surface clarity.
13.eInner Wall: 2000 mm/s² — Balanced for structural components.
13.fTop Surface: 1500 mm/s² — Ensures smooth detailing.14. Adhesion and Brims
14.aSkirt Loops: 2 — Helps prime nozzle and start cleanly.
14.bBrim Width: 6 mm — Helps hold soft materials down.
14.cBrim Gap: 0.15 mm — Allows for easy removal without tearing.15. Prime Tower and Flush Settings
15.aPrime Tower: ON — Purges moisture and early flow inconsistencies.
15.bTower Width: 40 mm — Prevents collapse due to heat.
15.cBrim Width (Tower): 4 mm — Adds stability to the purge base.
15.dFlush Into Support: ON — Discards unwanted early flow safely.16. G-Code Start Script
M900 K0.05 ; Pressure Advance M106 S0 ; Fan off G92 E0 G1 E15 F300 ; purge line G92 E0
17. Additional Notes
17.aDry filament at 155 F for 2 hours before use.
17.bStore with desiccant.
17.cKeep extruder door open to allow vapor to escape.
17.dAvoid long dwell times at high temperatures.If you need any other assistance, feel free to reach out to us anytime at timeplast@timeplast.com — we’ll be happy to help.
Free U.S. standard shipping on orders of 5+ spools!
Cocoa Soap
-
Cocoa Soap Gen 5 brings a gentle touch of chocolate warmth to your daily routine, offering a bathing experience that feels comforting, familiar, and a little bit indulgent. Infused with real cocoa essence, this 3D-printable soap releases a soft, soothing chocolate aroma with every wash not overpowering, just naturally cozy. Like all Gen 5 soaps, it doesn’t aim for big commercial-style bubbles; instead, it creates a smooth, effective lather powered by naturally derived surfactants and emulsifiers, the ingredients that truly clean your skin. Built on our 70% structured-water base, the cocoa notes stay protected during printing and gradually bloom as the bar dries and is used. Long-lasting, gentle, and made to feel like a small daily luxury, this filament lets you print a bar that blends creativity with comfort in the most delightful way.
How it works: Structured water buffers heat during printing so the cocoa aroma remains intact; natural surfactants activate on contact with water to create a soft, effective lather.
Why Soap Gen 5? A warm, gourmand scent that adds a cozy, comforting feel to everyday washing.
Print a sweet touch.
For external use only. Avoid sensitive areas.
-
Click here to access our new and improved TimeMass GPT Assistant. Just tell it your printer model and the TimeMass filament you're using—it will instantly recommend the exact parameters you need to start printing successfully.
1. Introduction
These parameters are designed to help avoid printing issues; however, temperatures and speed timings can be adjusted based on your specific goals. For example, if you prefer a less rigid result, we recommend using a lower temperature. This section outlines a complete slicing and printing profile for TimeMass, tailored for printers with a 0.8 mm nozzle. If the print is not being successful, please lower the nozzle temperature by 10°C and start over until an optimal print is achieved. Please check the manual for printing parameters.2. Temperature Settings
2.aNozzle Temperature: 230°C — Optimal for flowability while avoiding decomposition (which begins around 250°C).
2.bBed Temperature: 75°C — Ensures strong first-layer adhesion and prevents moisture bubbling.
2.cNozzle Temperature Range: 230–245°C — Timeplast melts around 165°C but prints best at 235°C for precise viscosity control.3. Cooling Settings
3.aNo Cooling for First Layers: 3 layers — Prevents shrinkage due to rapid cooling of moisture-rich filament.
3.bFan Minimum Speed: 0% for the first 100 seconds — Allows heat retention during early layers.
3.cFan Maximum Speed: 15% starting at 8 seconds — Avoids overcooling that can lead to warping.
3.dKeep Fan Always On: OFF — Allows vapor to escape and avoids internal fogging.
3.eSlow Down for Cooling: ON — Improves surface finish with controlled cooling.
3.fForce Cooling for Overhangs: OFF — Overcooling can deform bridges in Timeplast.
3.gFan for Overhangs: 15% — Only for essential cooling in complex areas.
3.hPre-Start Fan Time: 2 seconds — Minimizes pressure differential during the first layer.4. Volumetric Flow
4.aMax Volumetric Speed: 12 mm³/s — Based on a melt flow index of ~15 g/10min, allows high-speed printing.
4.bRamming Speed: 3 mm³/s — Prevents bubbles or popping from pressure spikes.5. Retraction and Flow
5.aRetraction Distance: 0.4 mm — Minimal retraction required for soft filaments to avoid stringing.
5.bRetraction Speed: 15 mm/s — Slow enough to avoid pulling molten plastic.
5.cPressure Advance: 0.05 — Compensates for nozzle lag at high flow rates.
5.dFlow Ratio: 92% — Slight under-extrusion avoids swelling and surface artifacts.6. Precision Settings
6.aGap Closing Radius: 0.1 mm — Tolerant of gaps in thicker walls.
6.bArc Fitting: ON — Reduces G-code size and smooths curve transitions.
6.cElephant Foot Compensation: 0.1 mm — Offsets squishing in the first layer caused by large bead sizes.7. Walls and Shells
7.aWall Loops: 2 — Minimum for strength when using a 0.8 mm nozzle.
7.bDetect Thin Walls: ON — Ensures tight geometries aren’t skipped.
7.cTop/Bottom Shell Layers: 3 — Provides good coverage; increase if watertightness is needed.
7.dTop/Bottom Thickness: 1.2 mm — Equals 1.5x the nozzle size for solid strength.
7.eTop/Bottom Pattern: Monotonic — Distributes tension evenly and improves surface finish.8. Geometry and Movement
8.aWall Order: Inner before Outer — Creates cleaner outer surfaces.
8.bInfill First: OFF — Maintains precise outer dimensions.
8.cSmooth Speed Transition: ON — Prevents ringing caused by abrupt speed changes.
8.dSmooth Coefficient: 80 — Ideal damping for soft materials.
8.eAvoid Crossing Wall: ON — Minimizes stringing across part walls.
8.fMax Detour for Crossing: 10 mm or 5% — Balances time with print cleanliness.9. Layer and Width Settings
9.aLayer Height: 0.3 mm — Optimal for strength and resolution using a 0.8 mm nozzle.
9.bInitial Layer Height: 0.35 mm — Slightly higher to improve adhesion.
9.cLine Widths (all): 0.8 mm — Matches nozzle diameter for consistent extrusion.10. Seam Settings
10.aSeam Position: Aligned or Back — Use aligned for mechanical consistency, back for visual appeal.
10.bSmart Scarf Seam: ON — Automatically adjusts seam location to reduce visual impact.
10.cSeam Angle: 155° — Standard seam angle for clean transitions.
10.dSeam Steps: 10 — Smooths seam path and improves visual finish.11. Infill Settings
11.aWall/Infill Overlap: 10% — Prevents infill from deforming soft exterior walls.
11.bInfill Combination: ON — Consolidates paths for efficiency.
11.cDetect Floating Shells: ON — Ensures unsupported vertical structures are printed reliably.
11.dSparse Infill Density: 20–25% — Balanced rigidity vs. material use.
11.eSparse Pattern: Grid — Stable and efficient for flexible geometries.12. Speed Settings
12.aTravel: 160 mm/s — Fast but safe against backlash.
12.bInitial Layer: 15 mm/s — Prevents nozzle from skimming and ensures bed adhesion.
12.cOuter Wall: 60 mm/s — Controlled speed for surface quality.
12.dInner Wall: 90 mm/s — Slightly faster without compromising control.
12.eSmall Perimeter: 35 mm/s — Reduced speed for detailed geometry.
12.fTop Surface: 40 mm/s — Improves finish on topmost layers.
12.gInfill: 100–120 mm/s — Takes advantage of high flowability.13. Acceleration Settings
13.aNormal Print: 2000 mm/s² — Prevents ringing in soft filaments.
13.bTravel: 4000 mm/s² — Enables fast movement without harsh transitions.
13.cInitial Layer: 300 mm/s² — Gentle movement prevents lifting from the bed.
13.dOuter Wall: 1500 mm/s² — Improves outer surface clarity.
13.eInner Wall: 2000 mm/s² — Balanced for structural components.
13.fTop Surface: 1500 mm/s² — Ensures smooth detailing.14. Adhesion and Brims
14.aSkirt Loops: 2 — Helps prime nozzle and start cleanly.
14.bBrim Width: 6 mm — Helps hold soft materials down.
14.cBrim Gap: 0.15 mm — Allows for easy removal without tearing.15. Prime Tower and Flush Settings
15.aPrime Tower: ON — Purges moisture and early flow inconsistencies.
15.bTower Width: 40 mm — Prevents collapse due to heat.
15.cBrim Width (Tower): 4 mm — Adds stability to the purge base.
15.dFlush Into Support: ON — Discards unwanted early flow safely.16. G-Code Start Script
M900 K0.05 ; Pressure Advance M106 S0 ; Fan off G92 E0 G1 E15 F300 ; purge line G92 E0
17. Additional Notes
17.aDry filament at 155 F for 2 hours before use.
17.bStore with desiccant.
17.cKeep extruder door open to allow vapor to escape.
17.dAvoid long dwell times at high temperatures.If you need any other assistance, feel free to reach out to us anytime at timeplast@timeplast.com — we’ll be happy to help.
Free U.S. standard shipping on orders of 5+ spools!
Cardamom Soap
-
Cardamom Soap Gen 5 brings a bright, refreshing twist to 3D-printed soapmaking. Infused with real cardamom oil, each bar you print releases a clean, uplifting aroma more herbal and citrus-kissed than spicy making everyday washing feel calm and rejuvenating. Like all Gen 5 soaps, it doesn’t rely on big commercial-style bubbles; instead, it creates a soft, effective lather through naturally derived surfactants and emulsifiers, which are what truly clean the skin. The formula’s 70% structured-water base protects the delicate cardamom notes during printing and helps the bar firm up beautifully afterward, giving you a long-lasting soap that dissolves gradually with use. It’s a simple, modern kind of luxury: a clean, comforting fragrance wrapped in a material you printed yourself.
How it works: Structured water buffers the nozzle’s heat, helping preserve cardamom’s top notes; natural surfactants provide gentle lather and a fresh rinse.
Why Soap Gen 5? Cardamom’s bright, “just-cleaned” profile makes it perfect for daily use in kitchens, bathrooms, or studio spaces.
Print fresh.
For external use only. Avoid sensitive areas.
-
Click here to access our specialized TimeMass GPT Assistant.Just tell it your printer model and the TimeMass filament you're using—it will instantly recommend the exact parameters you need to start printing successfully.
1. Introduction
These parameters are designed to help avoid printing issues; however, temperatures and speed timings can be adjusted based on your specific goals. For example, if you prefer a less rigid result, we recommend using a lower temperature. This section outlines a complete slicing and printing profile for TimeMass Iridescent Green, tailored for printers with a 0.8 mm nozzle. If the print is not being successful, please lower the nozzle temperature by 10°C and start over until an optimal print is achieved.While these examples were printed with a 0.8 mm nozzle, TimeMass can be used with any nozzle size. Please check the manual for printing parameters with all the other nozzle sizes.2. Temperature Settings
2.aNozzle Temperature: 240°C — Optimal for flowability while avoiding decomposition (which begins around 250°C).
2.bBed Temperature: 95°C — Ensures strong first-layer adhesion and prevents moisture bubbling.
2.cNozzle Temperature Range: 230–245°C — Timeplast melts around 165°C but prints best at 240°C for precise viscosity control.3. Cooling Settings
3.aNo Cooling for First Layers: 3 layers — Prevents shrinkage due to rapid cooling of moisture-rich filament.
3.bFan Minimum Speed: 0% for the first 100 seconds — Allows heat retention during early layers.
3.cFan Maximum Speed: 15% starting at 8 seconds — Avoids overcooling that can lead to warping.
3.dKeep Fan Always On: OFF — Allows vapor to escape and avoids internal fogging.
3.eSlow Down for Cooling: ON — Improves surface finish with controlled cooling.
3.fForce Cooling for Overhangs: OFF — Overcooling can deform bridges in Timeplast.
3.gFan for Overhangs: 15% — Only for essential cooling in complex areas.
3.hPre-Start Fan Time: 2 seconds — Minimizes pressure differential during the first layer.4. Volumetric Flow
4.aMax Volumetric Speed: 12 mm³/s — Based on a melt flow index of ~15 g/10min, allows high-speed printing.
4.bRamming Speed: 3 mm³/s — Prevents bubbles or popping from pressure spikes.5. Retraction and Flow
5.aRetraction Distance: 0.4 mm — Minimal retraction required for soft filaments to avoid stringing.
5.bRetraction Speed: 15 mm/s — Slow enough to avoid pulling molten plastic.
5.cPressure Advance: 0.05 — Compensates for nozzle lag at high flow rates.
5.dFlow Ratio: 92% — Slight under-extrusion avoids swelling and surface artifacts.6. Precision Settings
6.aGap Closing Radius: 0.1 mm — Tolerant of gaps in thicker walls.
6.bArc Fitting: ON — Reduces G-code size and smooths curve transitions.
6.cElephant Foot Compensation: 0.1 mm — Offsets squishing in the first layer caused by large bead sizes.7. Walls and Shells
7.aWall Loops: 2 — Minimum for strength when using a 0.8 mm nozzle.
7.bDetect Thin Walls: ON — Ensures tight geometries aren’t skipped.
7.cTop/Bottom Shell Layers: 3 — Provides good coverage; increase if watertightness is needed.
7.dTop/Bottom Thickness: 1.2 mm — Equals 1.5x the nozzle size for solid strength.
7.eTop/Bottom Pattern: Monotonic — Distributes tension evenly and improves surface finish.8. Geometry and Movement
8.aWall Order: Inner before Outer — Creates cleaner outer surfaces.
8.bInfill First: OFF — Maintains precise outer dimensions.
8.cSmooth Speed Transition: ON — Prevents ringing caused by abrupt speed changes.
8.dSmooth Coefficient: 80 — Ideal damping for soft materials.
8.eAvoid Crossing Wall: ON — Minimizes stringing across part walls.
8.fMax Detour for Crossing: 10 mm or 5% — Balances time with print cleanliness.9. Layer and Width Settings
9.aLayer Height: 0.3 mm — Optimal for strength and resolution using a 0.8 mm nozzle.
9.bInitial Layer Height: 0.35 mm — Slightly higher to improve adhesion.
9.cLine Widths (all): 0.8 mm — Matches nozzle diameter for consistent extrusion.10. Seam Settings
10.aSeam Position: Aligned or Back — Use aligned for mechanical consistency, back for visual appeal.
10.bSmart Scarf Seam: ON — Automatically adjusts seam location to reduce visual impact.
10.cSeam Angle: 155° — Standard seam angle for clean transitions.
10.dSeam Steps: 10 — Smooths seam path and improves visual finish.11. Infill Settings
11.aWall/Infill Overlap: 10% — Prevents infill from deforming soft exterior walls.
11.bInfill Combination: ON — Consolidates paths for efficiency.
11.cDetect Floating Shells: ON — Ensures unsupported vertical structures are printed reliably.
11.dSparse Infill Density: 20–25% — Balanced rigidity vs. material use.
11.eSparse Pattern: Grid — Stable and efficient for flexible geometries.12. Speed Settings
12.aTravel: 160 mm/s — Fast but safe against backlash.
12.bInitial Layer: 15 mm/s — Prevents nozzle from skimming and ensures bed adhesion.
12.cOuter Wall: 60 mm/s — Controlled speed for surface quality.
12.dInner Wall: 90 mm/s — Slightly faster without compromising control.
12.eSmall Perimeter: 35 mm/s — Reduced speed for detailed geometry.
12.fTop Surface: 40 mm/s — Improves finish on topmost layers.
12.gInfill: 100–120 mm/s — Takes advantage of high flowability.13. Acceleration Settings
13.aNormal Print: 2000 mm/s² — Prevents ringing in soft filaments.
13.bTravel: 4000 mm/s² — Enables fast movement without harsh transitions.
13.cInitial Layer: 300 mm/s² — Gentle movement prevents lifting from the bed.
13.dOuter Wall: 1500 mm/s² — Improves outer surface clarity.
13.eInner Wall: 2000 mm/s² — Balanced for structural components.
13.fTop Surface: 1500 mm/s² — Ensures smooth detailing.14. Adhesion and Brims
14.aSkirt Loops: 2 — Helps prime nozzle and start cleanly.
14.bBrim Width: 6 mm — Helps hold soft materials down.
14.cBrim Gap: 0.15 mm — Allows for easy removal without tearing.15. Prime Tower and Flush Settings
15.aPrime Tower: ON — Purges moisture and early flow inconsistencies.
15.bTower Width: 40 mm — Prevents collapse due to heat.
15.cBrim Width (Tower): 4 mm — Adds stability to the purge base.
15.dFlush Into Support: ON — Discards unwanted early flow safely.16. G-Code Start Script
M900 K0.05 ; Pressure Advance M106 S0 ; Fan off G92 E0 G1 E15 F300 ; purge line G92 E0
17. Additional Notes
17.aDry filament at 100°C for 2 hours before use.
17.bStore with desiccant.
17.cKeep extruder door open to allow vapor to escape.
17.dAvoid long dwell times at high temperatures.If you need print settings for other nozzle sizes, feel free to reach out to us at timeplast@timeplast.com — we’ll be happy to help.
Free U.S. standard shipping on orders of 5+ spools!
Nutmeg Soap

-
Nutmeg Soap Gen 5 brings a soft, comforting spice to your 3D-printed creations, turning an everyday wash into something warm and familiar. Infused with real nutmeg essence, this filament releases a gentle aroma with each use not heavy foam, but a mild, effective lather created by naturally derived surfactants and emulsifiers. Built on our Gen 5 formula with its 70% structured-water base, it prints smoothly, hardens beautifully as it cools, and lasts significantly longer than ordinary soap. With every rinse, a bit of nutmeg’s cozy character comes through, creating a soothing, handcrafted experience that blends practical function with aromatic comfort. It’s soap, elevated by creativity.
How it works: The high water content buffers heat during printing so the nutmeg aroma survives; the cleaning comes from the surfactants, not big bubbles.
Why Soap Gen 5? A warm, comforting scent profile that feels naturally soothing in daily use.
Print a warm, welcoming token.
For external use only. Avoid sensitive areas.
-
Click here to access our new and improved TimeMass GPT Assistant. Just tell it your printer model and the TimeMass filament you're using—it will instantly recommend the exact parameters you need to start printing successfully.
1. Introduction
These parameters are designed to help avoid printing issues; however, temperatures and speed timings can be adjusted based on your specific goals. For example, if you prefer a less rigid result, we recommend using a lower temperature. This section outlines a complete slicing and printing profile for TimeMass Soap, tailored for printers with a 0.8 mm nozzle. If the print is not being successful, please lower the nozzle temperature by 10°C and start over until an optimal print is achieved. Please check the manual for printing parameters.2. Temperature Settings
2.aNozzle Temperature: 230°C — Optimal for flowability while avoiding decomposition (which begins around 250°C).
2.bBed Temperature: 75°C — Ensures strong first-layer adhesion and prevents moisture bubbling.
2.cNozzle Temperature Range: 230–245°C — Timeplast melts around 165°C but prints best at 235°C for precise viscosity control.3. Cooling Settings
3.aNo Cooling for First Layers: 3 layers — Prevents shrinkage due to rapid cooling of moisture-rich filament.
3.bFan Minimum Speed: 0% for the first 100 seconds — Allows heat retention during early layers.
3.cFan Maximum Speed: 15% starting at 8 seconds — Avoids overcooling that can lead to warping.
3.dKeep Fan Always On: OFF — Allows vapor to escape and avoids internal fogging.
3.eSlow Down for Cooling: ON — Improves surface finish with controlled cooling.
3.fForce Cooling for Overhangs: OFF — Overcooling can deform bridges in Timeplast.
3.gFan for Overhangs: 15% — Only for essential cooling in complex areas.
3.hPre-Start Fan Time: 2 seconds — Minimizes pressure differential during the first layer.4. Volumetric Flow
4.aMax Volumetric Speed: 12 mm³/s — Based on a melt flow index of ~15 g/10min, allows high-speed printing.
4.bRamming Speed: 3 mm³/s — Prevents bubbles or popping from pressure spikes.5. Retraction and Flow
5.aRetraction Distance: 0.4 mm — Minimal retraction required for soft filaments to avoid stringing.
5.bRetraction Speed: 15 mm/s — Slow enough to avoid pulling molten plastic.
5.cPressure Advance: 0.05 — Compensates for nozzle lag at high flow rates.
5.dFlow Ratio: 92% — Slight under-extrusion avoids swelling and surface artifacts.6. Precision Settings
6.aGap Closing Radius: 0.1 mm — Tolerant of gaps in thicker walls.
6.bArc Fitting: ON — Reduces G-code size and smooths curve transitions.
6.cElephant Foot Compensation: 0.1 mm — Offsets squishing in the first layer caused by large bead sizes.7. Walls and Shells
7.aWall Loops: 2 — Minimum for strength when using a 0.8 mm nozzle.
7.bDetect Thin Walls: ON — Ensures tight geometries aren’t skipped.
7.cTop/Bottom Shell Layers: 3 — Provides good coverage; increase if watertightness is needed.
7.dTop/Bottom Thickness: 1.2 mm — Equals 1.5x the nozzle size for solid strength.
7.eTop/Bottom Pattern: Monotonic — Distributes tension evenly and improves surface finish.8. Geometry and Movement
8.aWall Order: Inner before Outer — Creates cleaner outer surfaces.
8.bInfill First: OFF — Maintains precise outer dimensions.
8.cSmooth Speed Transition: ON — Prevents ringing caused by abrupt speed changes.
8.dSmooth Coefficient: 80 — Ideal damping for soft materials.
8.eAvoid Crossing Wall: ON — Minimizes stringing across part walls.
8.fMax Detour for Crossing: 10 mm or 5% — Balances time with print cleanliness.9. Layer and Width Settings
9.aLayer Height: 0.3 mm — Optimal for strength and resolution using a 0.8 mm nozzle.
9.bInitial Layer Height: 0.35 mm — Slightly higher to improve adhesion.
9.cLine Widths (all): 0.8 mm — Matches nozzle diameter for consistent extrusion.10. Seam Settings
10.aSeam Position: Aligned or Back — Use aligned for mechanical consistency, back for visual appeal.
10.bSmart Scarf Seam: ON — Automatically adjusts seam location to reduce visual impact.
10.cSeam Angle: 155° — Standard seam angle for clean transitions.
10.dSeam Steps: 10 — Smooths seam path and improves visual finish.11. Infill Settings
11.aWall/Infill Overlap: 10% — Prevents infill from deforming soft exterior walls.
11.bInfill Combination: ON — Consolidates paths for efficiency.
11.cDetect Floating Shells: ON — Ensures unsupported vertical structures are printed reliably.
11.dSparse Infill Density: 20–25% — Balanced rigidity vs. material use.
11.eSparse Pattern: Grid — Stable and efficient for flexible geometries.12. Speed Settings
12.aTravel: 160 mm/s — Fast but safe against backlash.
12.bInitial Layer: 15 mm/s — Prevents nozzle from skimming and ensures bed adhesion.
12.cOuter Wall: 60 mm/s — Controlled speed for surface quality.
12.dInner Wall: 90 mm/s — Slightly faster without compromising control.
12.eSmall Perimeter: 35 mm/s — Reduced speed for detailed geometry.
12.fTop Surface: 40 mm/s — Improves finish on topmost layers.
12.gInfill: 100–120 mm/s — Takes advantage of high flowability.13. Acceleration Settings
13.aNormal Print: 2000 mm/s² — Prevents ringing in soft filaments.
13.bTravel: 4000 mm/s² — Enables fast movement without harsh transitions.
13.cInitial Layer: 300 mm/s² — Gentle movement prevents lifting from the bed.
13.dOuter Wall: 1500 mm/s² — Improves outer surface clarity.
13.eInner Wall: 2000 mm/s² — Balanced for structural components.
13.fTop Surface: 1500 mm/s² — Ensures smooth detailing.14. Adhesion and Brims
14.aSkirt Loops: 2 — Helps prime nozzle and start cleanly.
14.bBrim Width: 6 mm — Helps hold soft materials down.
14.cBrim Gap: 0.15 mm — Allows for easy removal without tearing.15. Prime Tower and Flush Settings
15.aPrime Tower: ON — Purges moisture and early flow inconsistencies.
15.bTower Width: 40 mm — Prevents collapse due to heat.
15.cBrim Width (Tower): 4 mm — Adds stability to the purge base.
15.dFlush Into Support: ON — Discards unwanted early flow safely.16. G-Code Start Script
M900 K0.05 ; Pressure Advance M106 S0 ; Fan off G92 E0 G1 E15 F300 ; purge line G92 E0
17. Additional Notes
17.aDry filament at 155 F for 2 hours before use.
17.bStore with desiccant.
17.cKeep extruder door open to allow vapor to escape.
17.dAvoid long dwell times at high temperatures.If you need any other assistance, feel free to reach out to us anytime at timeplast@timeplast.com — we’ll be happy to help.
Free U.S. standard shipping on orders of 5+ spools!
Coffee Soap
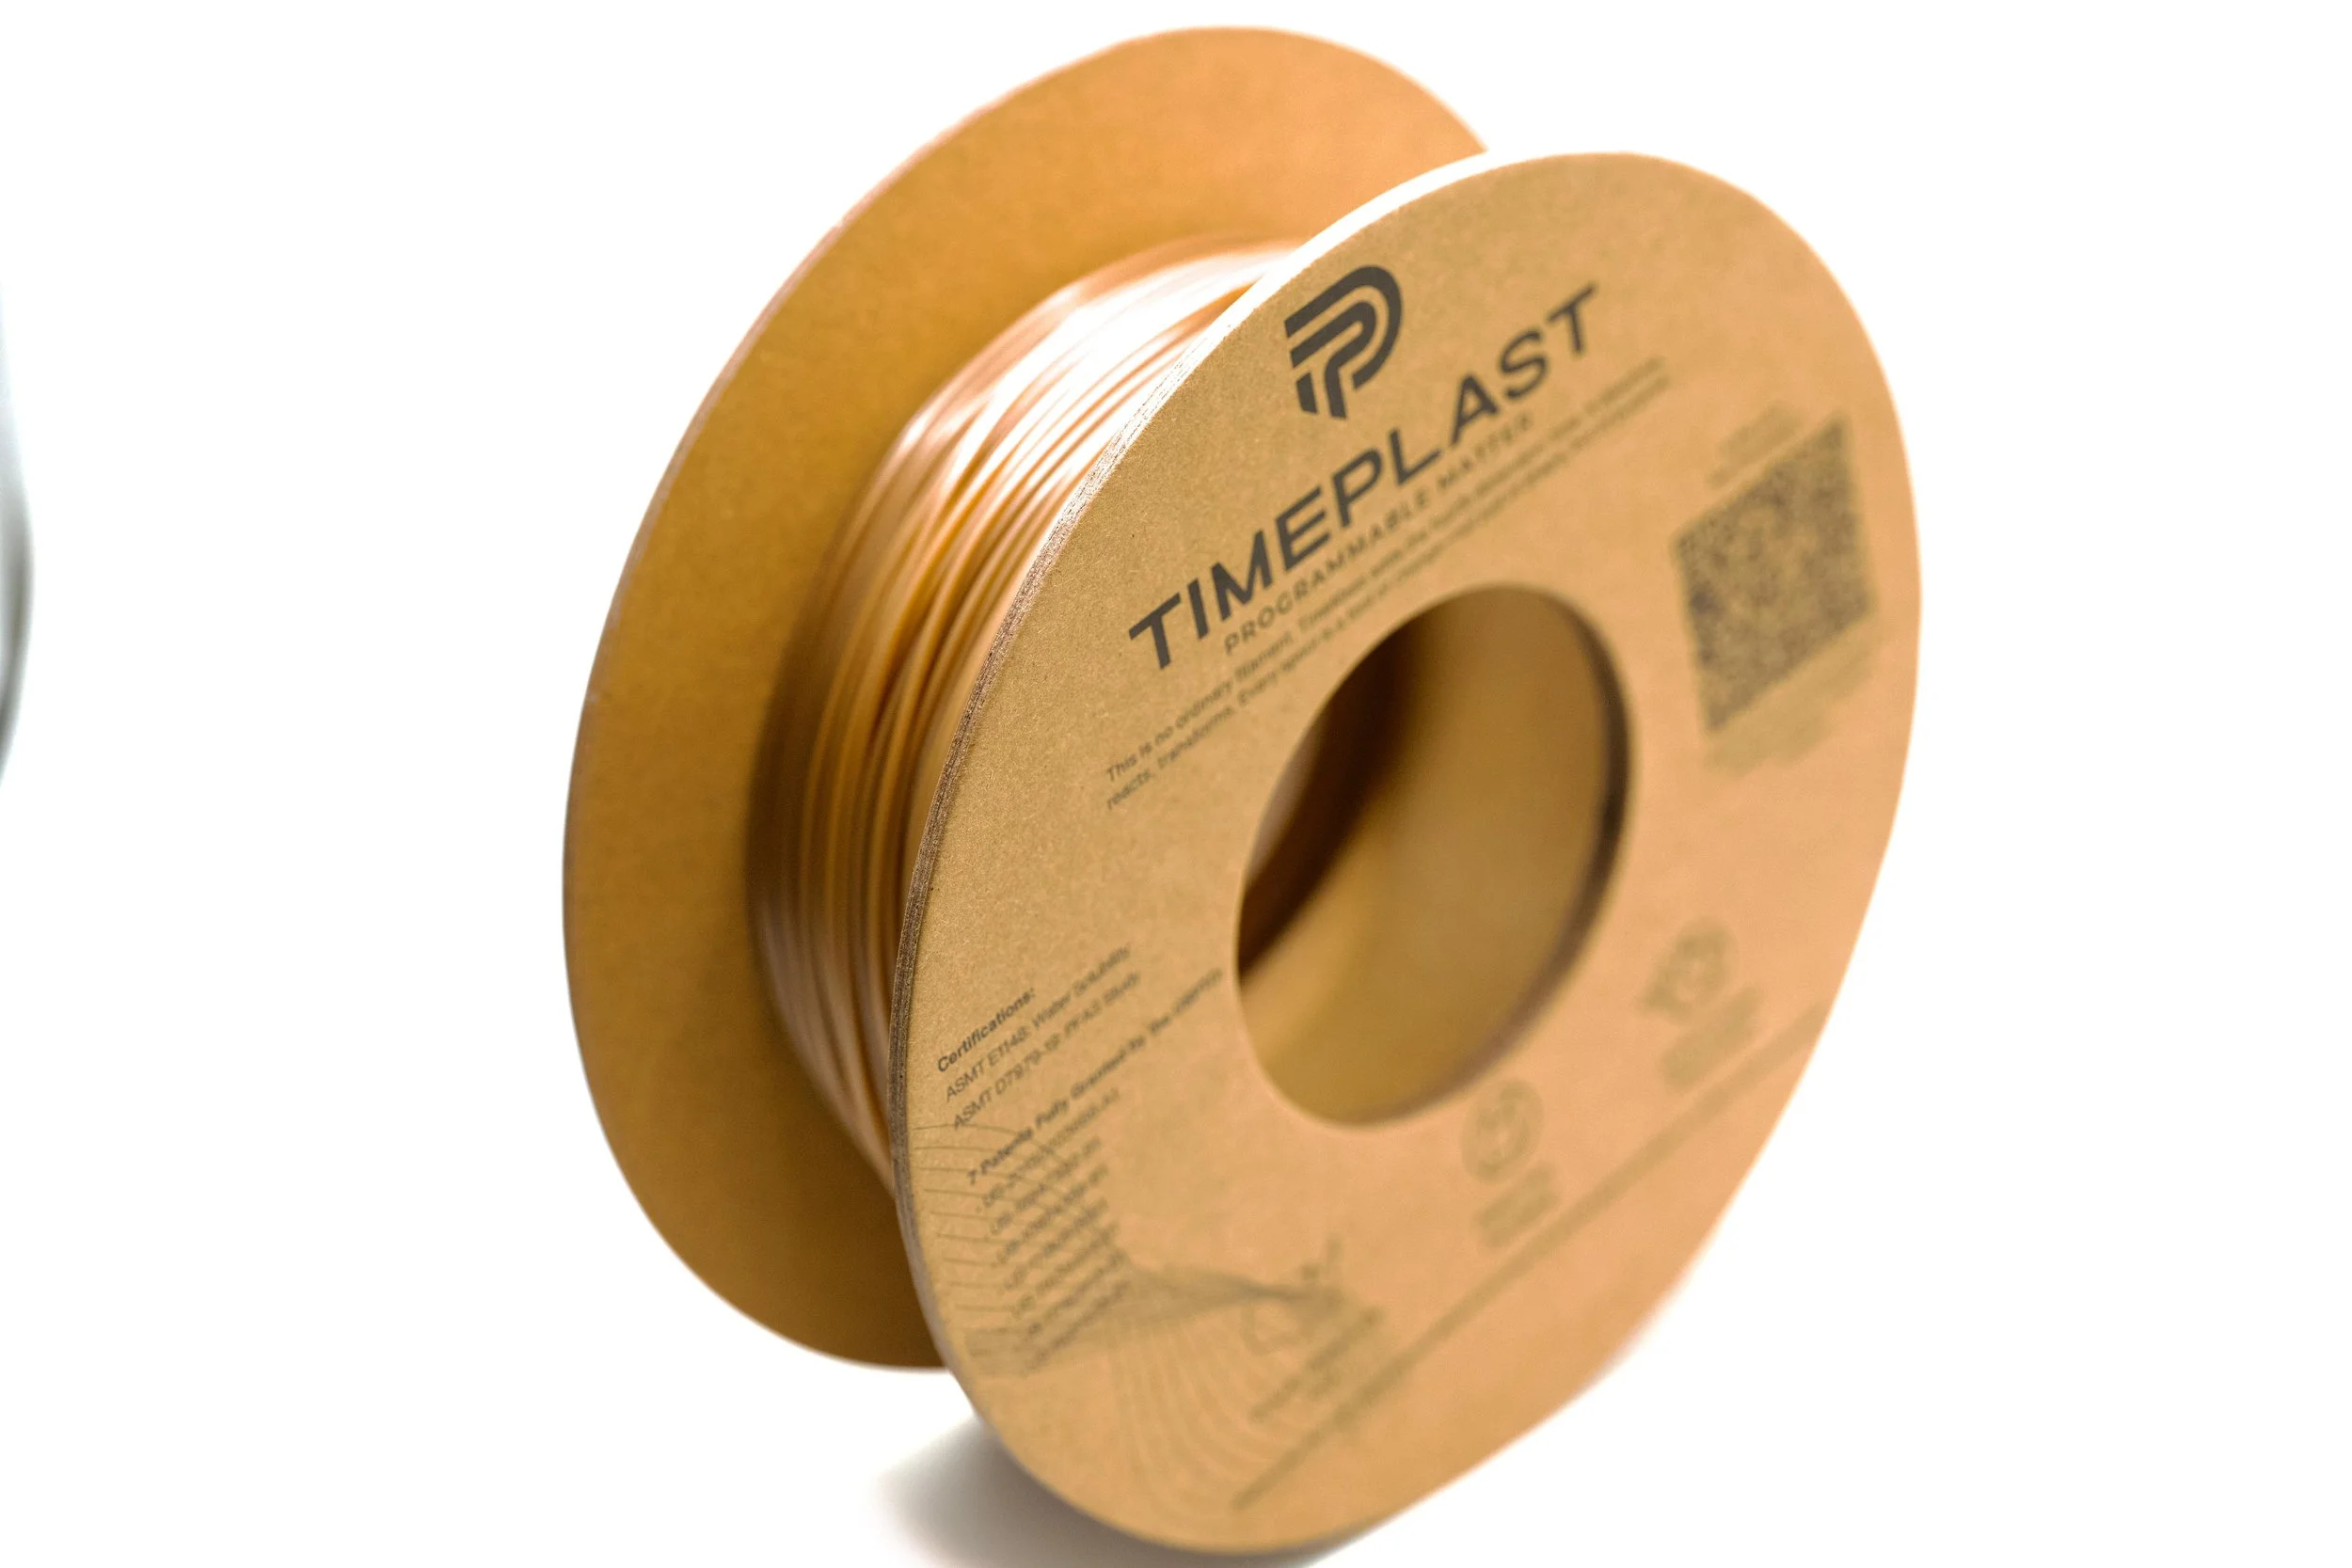
-
Coffee Soap Gen 5 turns your daily wash into a warm, café-fresh ritual you can actually print. Infused with real coffee essence, this 3D-printable soap releases a soft, comforting aroma of roasted beans with each use subtle, cozy, and naturally deodorizing. Like all Gen 5 soaps, it doesn’t aim for big commercial-style bubbles; instead, it creates a smooth, effective lather powered by naturally derived surfactants and emulsifiers, the ingredients that truly clean your skin. With its 70% structured-water base, the coffee aroma is gently protected through printing, and the bar strengthens as it dries, making it long-lasting and satisfying to use. The result is a soap that feels handcrafted and familiar, blending the comfort of a morning brew with the creativity of 3D printing.
How it works: Structured water cushions heat during printing so the coffee notes stay intact; natural surfactants activate on contact with water for a soft, effective lather.
Why Soap Gen 5? Ideal for kitchens, workshops, and morning routines thanks to coffee’s natural odor-neutralizing warmth.
Print a café-fresh token.
For external use only. Avoid sensitive areas.
-
Click here to access our new and improved TimeMass GPT Assistant. Just tell it your printer model and the TimeMass filament you're using—it will instantly recommend the exact parameters you need to start printing successfully.
1. Introduction
These parameters are designed to help avoid printing issues; however, temperatures and speed timings can be adjusted based on your specific goals. For example, if you prefer a less rigid result, we recommend using a lower temperature. This section outlines a complete slicing and printing profile for TimeMass Soap, tailored for printers with a 0.8 mm nozzle. If the print is not being successful, please lower the nozzle temperature by 10°C and start over until an optimal print is achieved. Please check the manual for printing parameters.2. Temperature Settings
2.aNozzle Temperature: 230°C — Optimal for flowability while avoiding decomposition (which begins around 250°C).
2.bBed Temperature: 75°C — Ensures strong first-layer adhesion and prevents moisture bubbling.
2.cNozzle Temperature Range: 230–245°C — Timeplast melts around 165°C but prints best at 235°C for precise viscosity control.3. Cooling Settings
3.aNo Cooling for First Layers: 3 layers — Prevents shrinkage due to rapid cooling of moisture-rich filament.
3.bFan Minimum Speed: 0% for the first 100 seconds — Allows heat retention during early layers.
3.cFan Maximum Speed: 15% starting at 8 seconds — Avoids overcooling that can lead to warping.
3.dKeep Fan Always On: OFF — Allows vapor to escape and avoids internal fogging.
3.eSlow Down for Cooling: ON — Improves surface finish with controlled cooling.
3.fForce Cooling for Overhangs: OFF — Overcooling can deform bridges in Timeplast.
3.gFan for Overhangs: 15% — Only for essential cooling in complex areas.
3.hPre-Start Fan Time: 2 seconds — Minimizes pressure differential during the first layer.4. Volumetric Flow
4.aMax Volumetric Speed: 12 mm³/s — Based on a melt flow index of ~15 g/10min, allows high-speed printing.
4.bRamming Speed: 3 mm³/s — Prevents bubbles or popping from pressure spikes.5. Retraction and Flow
5.aRetraction Distance: 0.4 mm — Minimal retraction required for soft filaments to avoid stringing.
5.bRetraction Speed: 15 mm/s — Slow enough to avoid pulling molten plastic.
5.cPressure Advance: 0.05 — Compensates for nozzle lag at high flow rates.
5.dFlow Ratio: 92% — Slight under-extrusion avoids swelling and surface artifacts.6. Precision Settings
6.aGap Closing Radius: 0.1 mm — Tolerant of gaps in thicker walls.
6.bArc Fitting: ON — Reduces G-code size and smooths curve transitions.
6.cElephant Foot Compensation: 0.1 mm — Offsets squishing in the first layer caused by large bead sizes.7. Walls and Shells
7.aWall Loops: 2 — Minimum for strength when using a 0.8 mm nozzle.
7.bDetect Thin Walls: ON — Ensures tight geometries aren’t skipped.
7.cTop/Bottom Shell Layers: 3 — Provides good coverage; increase if watertightness is needed.
7.dTop/Bottom Thickness: 1.2 mm — Equals 1.5x the nozzle size for solid strength.
7.eTop/Bottom Pattern: Monotonic — Distributes tension evenly and improves surface finish.8. Geometry and Movement
8.aWall Order: Inner before Outer — Creates cleaner outer surfaces.
8.bInfill First: OFF — Maintains precise outer dimensions.
8.cSmooth Speed Transition: ON — Prevents ringing caused by abrupt speed changes.
8.dSmooth Coefficient: 80 — Ideal damping for soft materials.
8.eAvoid Crossing Wall: ON — Minimizes stringing across part walls.
8.fMax Detour for Crossing: 10 mm or 5% — Balances time with print cleanliness.9. Layer and Width Settings
9.aLayer Height: 0.3 mm — Optimal for strength and resolution using a 0.8 mm nozzle.
9.bInitial Layer Height: 0.35 mm — Slightly higher to improve adhesion.
9.cLine Widths (all): 0.8 mm — Matches nozzle diameter for consistent extrusion.10. Seam Settings
10.aSeam Position: Aligned or Back — Use aligned for mechanical consistency, back for visual appeal.
10.bSmart Scarf Seam: ON — Automatically adjusts seam location to reduce visual impact.
10.cSeam Angle: 155° — Standard seam angle for clean transitions.
10.dSeam Steps: 10 — Smooths seam path and improves visual finish.11. Infill Settings
11.aWall/Infill Overlap: 10% — Prevents infill from deforming soft exterior walls.
11.bInfill Combination: ON — Consolidates paths for efficiency.
11.cDetect Floating Shells: ON — Ensures unsupported vertical structures are printed reliably.
11.dSparse Infill Density: 20–25% — Balanced rigidity vs. material use.
11.eSparse Pattern: Grid — Stable and efficient for flexible geometries.12. Speed Settings
12.aTravel: 160 mm/s — Fast but safe against backlash.
12.bInitial Layer: 15 mm/s — Prevents nozzle from skimming and ensures bed adhesion.
12.cOuter Wall: 60 mm/s — Controlled speed for surface quality.
12.dInner Wall: 90 mm/s — Slightly faster without compromising control.
12.eSmall Perimeter: 35 mm/s — Reduced speed for detailed geometry.
12.fTop Surface: 40 mm/s — Improves finish on topmost layers.
12.gInfill: 100–120 mm/s — Takes advantage of high flowability.13. Acceleration Settings
13.aNormal Print: 2000 mm/s² — Prevents ringing in soft filaments.
13.bTravel: 4000 mm/s² — Enables fast movement without harsh transitions.
13.cInitial Layer: 300 mm/s² — Gentle movement prevents lifting from the bed.
13.dOuter Wall: 1500 mm/s² — Improves outer surface clarity.
13.eInner Wall: 2000 mm/s² — Balanced for structural components.
13.fTop Surface: 1500 mm/s² — Ensures smooth detailing.14. Adhesion and Brims
14.aSkirt Loops: 2 — Helps prime nozzle and start cleanly.
14.bBrim Width: 6 mm — Helps hold soft materials down.
14.cBrim Gap: 0.15 mm — Allows for easy removal without tearing.15. Prime Tower and Flush Settings
15.aPrime Tower: ON — Purges moisture and early flow inconsistencies.
15.bTower Width: 40 mm — Prevents collapse due to heat.
15.cBrim Width (Tower): 4 mm — Adds stability to the purge base.
15.dFlush Into Support: ON — Discards unwanted early flow safely.16. G-Code Start Script
M900 K0.05 ; Pressure Advance M106 S0 ; Fan off G92 E0 G1 E15 F300 ; purge line G92 E0
17. Additional Notes
17.aDry filament at 155 F for 2 hours before use.
17.bStore with desiccant.
17.cKeep extruder door open to allow vapor to escape.
17.dAvoid long dwell times at high temperatures.If you need any other assistance, feel free to reach out to us anytime at timeplast@timeplast.com — we’ll be happy to help.
Free U.S. standard shipping on orders of 5+ spools!
Vanilla Soap
-
Vanilla Soap Gen 5 turns your 3D printer into a little bath-and-body workshop. Infused with real vanilla essence and built on our Gen 5 soap base, this filament produces beautifully scented, long-lasting soap pieces that clean effectively and dissolve cleanly in water. Instead of relying on big, showy bubbles, Gen 5 uses naturally derived surfactants and emulsifiers to do the real work, lifting dirt and oils gently, the way a high-quality artisan soap would. The result is a warm, soft, sweet-scented wash that lasts up to 10× longer than a typical bar.
Why It’s Special
Authentic Vanilla Aroma
A soothing, cozy fragrance released slowly with each use thanks to micro-encapsulation.Gentle, Effective Clean
Minimal foam by design, the formula cleans through natural surfactants, not bubbles, giving you a rich, creamy wash without wasting soap.Water-Structured Formula
With ~70% structured water, the vanilla stays protected during printing and releases softly during use.For Makers Who Love Comfort & Craft
Print custom vanilla soaps, gifts, decorative pieces, or personalized bars that smell like warm sugar and nostalgia. It’s a blend of science, creativity, and self-care — made entirely by you.
For external use only. Avoid sensitive areas.
-
Click here to access our new and improved TimeMass GPT Assistant. Just tell it your printer model and the TimeMass filament you're using—it will instantly recommend the exact parameters you need to start printing successfully.
1. Introduction
These parameters are designed to help avoid printing issues; however, temperatures and speed timings can be adjusted based on your specific goals. For example, if you prefer a less rigid result, we recommend using a lower temperature. This section outlines a complete slicing and printing profile for TimeMass, tailored for printers with a 0.8 mm nozzle. If the print is not being successful, please lower the nozzle temperature by 10°C and start over until an optimal print is achieved. Please check the manual for printing parameters.2. Temperature Settings
2.aNozzle Temperature: 230°C — Optimal for flowability while avoiding decomposition (which begins around 250°C).
2.bBed Temperature: 75°C — Ensures strong first-layer adhesion and prevents moisture bubbling.
2.cNozzle Temperature Range: 230–245°C — Timeplast melts around 165°C but prints best at 235°C for precise viscosity control.3. Cooling Settings
3.aNo Cooling for First Layers: 3 layers — Prevents shrinkage due to rapid cooling of moisture-rich filament.
3.bFan Minimum Speed: 0% for the first 100 seconds — Allows heat retention during early layers.
3.cFan Maximum Speed: 15% starting at 8 seconds — Avoids overcooling that can lead to warping.
3.dKeep Fan Always On: OFF — Allows vapor to escape and avoids internal fogging.
3.eSlow Down for Cooling: ON — Improves surface finish with controlled cooling.
3.fForce Cooling for Overhangs: OFF — Overcooling can deform bridges in Timeplast.
3.gFan for Overhangs: 15% — Only for essential cooling in complex areas.
3.hPre-Start Fan Time: 2 seconds — Minimizes pressure differential during the first layer.4. Volumetric Flow
4.aMax Volumetric Speed: 12 mm³/s — Based on a melt flow index of ~15 g/10min, allows high-speed printing.
4.bRamming Speed: 3 mm³/s — Prevents bubbles or popping from pressure spikes.5. Retraction and Flow
5.aRetraction Distance: 0.4 mm — Minimal retraction required for soft filaments to avoid stringing.
5.bRetraction Speed: 15 mm/s — Slow enough to avoid pulling molten plastic.
5.cPressure Advance: 0.05 — Compensates for nozzle lag at high flow rates.
5.dFlow Ratio: 92% — Slight under-extrusion avoids swelling and surface artifacts.6. Precision Settings
6.aGap Closing Radius: 0.1 mm — Tolerant of gaps in thicker walls.
6.bArc Fitting: ON — Reduces G-code size and smooths curve transitions.
6.cElephant Foot Compensation: 0.1 mm — Offsets squishing in the first layer caused by large bead sizes.7. Walls and Shells
7.aWall Loops: 2 — Minimum for strength when using a 0.8 mm nozzle.
7.bDetect Thin Walls: ON — Ensures tight geometries aren’t skipped.
7.cTop/Bottom Shell Layers: 3 — Provides good coverage; increase if watertightness is needed.
7.dTop/Bottom Thickness: 1.2 mm — Equals 1.5x the nozzle size for solid strength.
7.eTop/Bottom Pattern: Monotonic — Distributes tension evenly and improves surface finish.8. Geometry and Movement
8.aWall Order: Inner before Outer — Creates cleaner outer surfaces.
8.bInfill First: OFF — Maintains precise outer dimensions.
8.cSmooth Speed Transition: ON — Prevents ringing caused by abrupt speed changes.
8.dSmooth Coefficient: 80 — Ideal damping for soft materials.
8.eAvoid Crossing Wall: ON — Minimizes stringing across part walls.
8.fMax Detour for Crossing: 10 mm or 5% — Balances time with print cleanliness.9. Layer and Width Settings
9.aLayer Height: 0.3 mm — Optimal for strength and resolution using a 0.8 mm nozzle.
9.bInitial Layer Height: 0.35 mm — Slightly higher to improve adhesion.
9.cLine Widths (all): 0.8 mm — Matches nozzle diameter for consistent extrusion.10. Seam Settings
10.aSeam Position: Aligned or Back — Use aligned for mechanical consistency, back for visual appeal.
10.bSmart Scarf Seam: ON — Automatically adjusts seam location to reduce visual impact.
10.cSeam Angle: 155° — Standard seam angle for clean transitions.
10.dSeam Steps: 10 — Smooths seam path and improves visual finish.11. Infill Settings
11.aWall/Infill Overlap: 10% — Prevents infill from deforming soft exterior walls.
11.bInfill Combination: ON — Consolidates paths for efficiency.
11.cDetect Floating Shells: ON — Ensures unsupported vertical structures are printed reliably.
11.dSparse Infill Density: 20–25% — Balanced rigidity vs. material use.
11.eSparse Pattern: Grid — Stable and efficient for flexible geometries.12. Speed Settings
12.aTravel: 160 mm/s — Fast but safe against backlash.
12.bInitial Layer: 15 mm/s — Prevents nozzle from skimming and ensures bed adhesion.
12.cOuter Wall: 60 mm/s — Controlled speed for surface quality.
12.dInner Wall: 90 mm/s — Slightly faster without compromising control.
12.eSmall Perimeter: 35 mm/s — Reduced speed for detailed geometry.
12.fTop Surface: 40 mm/s — Improves finish on topmost layers.
12.gInfill: 100–120 mm/s — Takes advantage of high flowability.13. Acceleration Settings
13.aNormal Print: 2000 mm/s² — Prevents ringing in soft filaments.
13.bTravel: 4000 mm/s² — Enables fast movement without harsh transitions.
13.cInitial Layer: 300 mm/s² — Gentle movement prevents lifting from the bed.
13.dOuter Wall: 1500 mm/s² — Improves outer surface clarity.
13.eInner Wall: 2000 mm/s² — Balanced for structural components.
13.fTop Surface: 1500 mm/s² — Ensures smooth detailing.14. Adhesion and Brims
14.aSkirt Loops: 2 — Helps prime nozzle and start cleanly.
14.bBrim Width: 6 mm — Helps hold soft materials down.
14.cBrim Gap: 0.15 mm — Allows for easy removal without tearing.15. Prime Tower and Flush Settings
15.aPrime Tower: ON — Purges moisture and early flow inconsistencies.
15.bTower Width: 40 mm — Prevents collapse due to heat.
15.cBrim Width (Tower): 4 mm — Adds stability to the purge base.
15.dFlush Into Support: ON — Discards unwanted early flow safely.16. G-Code Start Script
M900 K0.05 ; Pressure Advance M106 S0 ; Fan off G92 E0 G1 E15 F300 ; purge line G92 E0
17. Additional Notes
17.aDry filament at 155 F for 2 hours before use.
17.bStore with desiccant.
17.cKeep extruder door open to allow vapor to escape.
17.dAvoid long dwell times at high temperatures.If you need any other assistance, feel free to reach out to us anytime at timeplast@timeplast.com — we’ll be happy to help.
Free U.S. standard shipping on orders of 5+ spools!
Ginger Soap
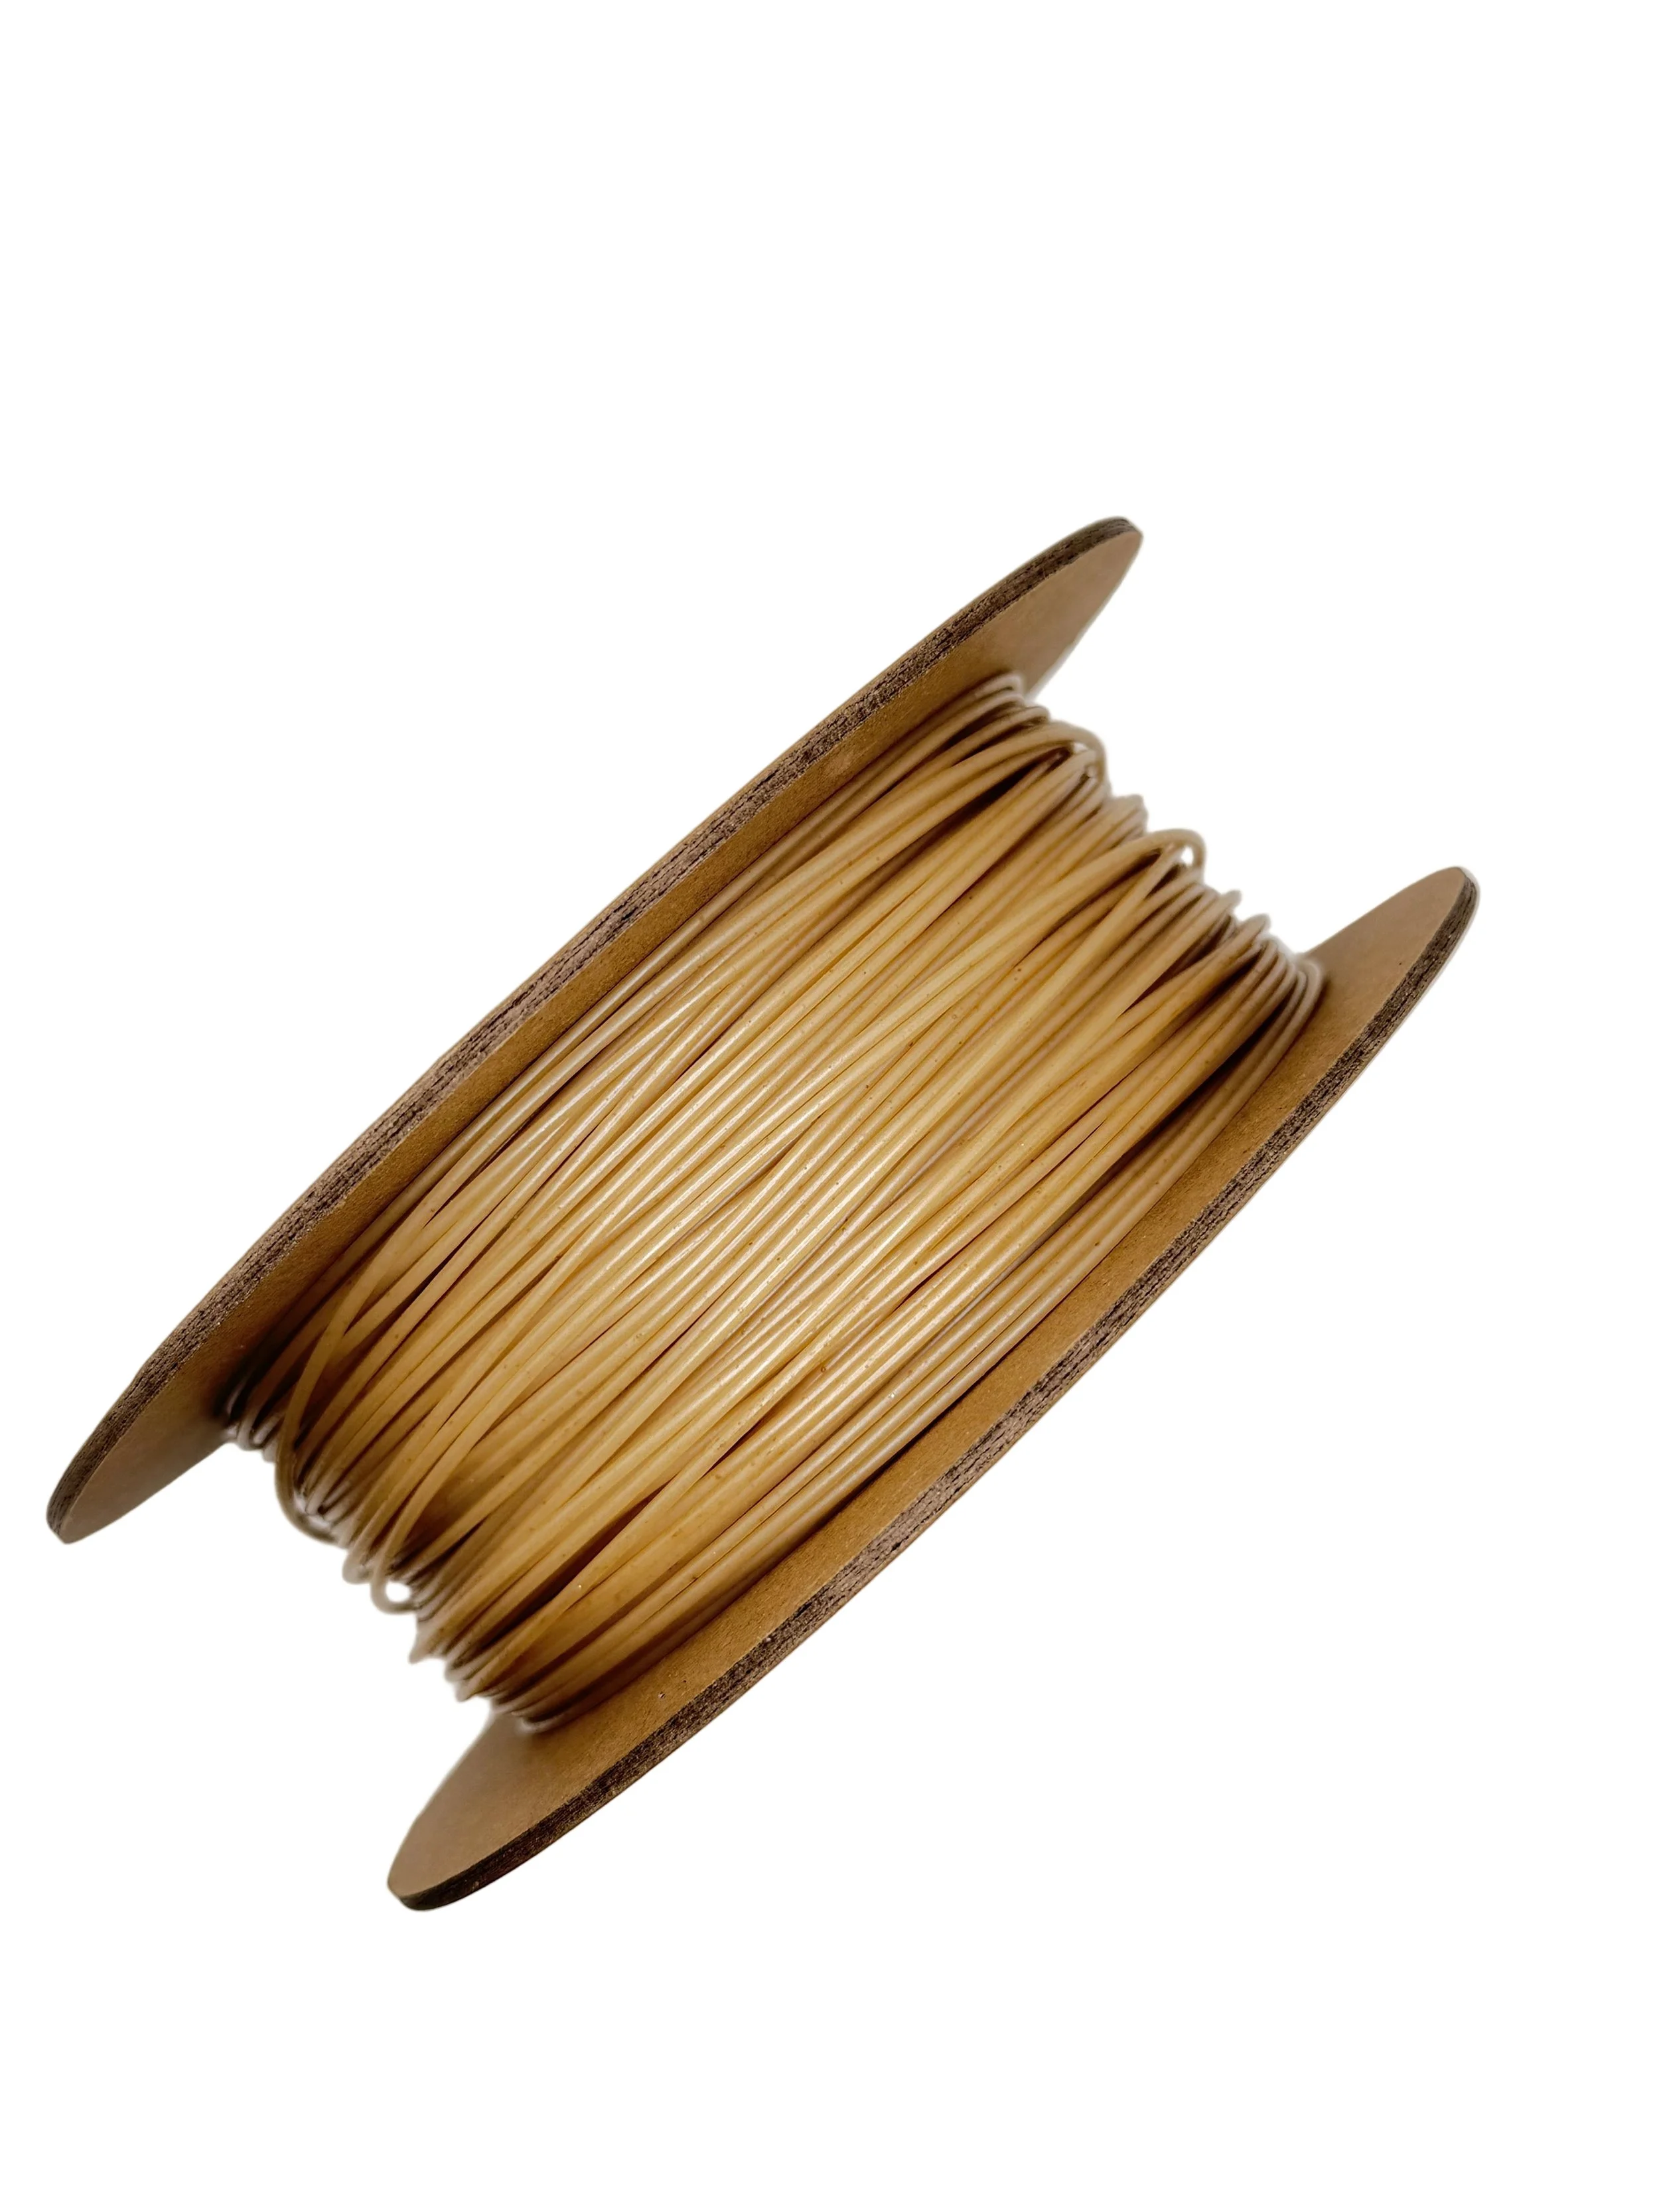
-
Ginger Soap Gen 5 brings a warm, uplifting twist to your 3D-printed soap collection. Made with real ginger extract, this filament lets you print soap bars that release a soft gingery aroma and a smooth, comforting cleanse not big bubbly lather, but the natural cleaning action of plant-derived surfactants. Ginger’s cozy, slightly spicy scent comes through beautifully in the finished bar, offering a small boost of energy each time you wash. Built on our Gen 5 formula, these soaps are designed to last far longer than commercial ones, all while gently carrying ginger’s natural antimicrobial touch. It’s a small, handmade moment of self-care you can print whenever you want.
How it works: The structured-water base helps buffer heat during printing so ginger’s aroma survives and then slowly releases with each use; the material dissolves cleanly and steadily when exposed to water.
Why Soap Gen 5? Perfect for a refreshing, pick-me-up feel in daily routines.
Print an instant mood boost.
For external use only. Avoid sensitive areas.
-
Click here to access our new and improved TimeMass GPT Assistant. Just tell it your printer model and the TimeMass filament you're using—it will instantly recommend the exact parameters you need to start printing successfully.
1. Introduction
These parameters are designed to help avoid printing issues; however, temperatures and speed timings can be adjusted based on your specific goals. For example, if you prefer a less rigid result, we recommend using a lower temperature. This section outlines a complete slicing and printing profile for TimeMass, tailored for printers with a 0.8 mm nozzle. If the print is not being successful, please lower the nozzle temperature by 10°C and start over until an optimal print is achieved. Please check the manual for printing parameters.2. Temperature Settings
2.aNozzle Temperature: 230°C — Optimal for flowability while avoiding decomposition (which begins around 250°C).
2.bBed Temperature: 75°C — Ensures strong first-layer adhesion and prevents moisture bubbling.
2.cNozzle Temperature Range: 230–245°C — Timeplast melts around 165°C but prints best at 235°C for precise viscosity control.3. Cooling Settings
3.aNo Cooling for First Layers: 3 layers — Prevents shrinkage due to rapid cooling of moisture-rich filament.
3.bFan Minimum Speed: 0% for the first 100 seconds — Allows heat retention during early layers.
3.cFan Maximum Speed: 15% starting at 8 seconds — Avoids overcooling that can lead to warping.
3.dKeep Fan Always On: OFF — Allows vapor to escape and avoids internal fogging.
3.eSlow Down for Cooling: ON — Improves surface finish with controlled cooling.
3.fForce Cooling for Overhangs: OFF — Overcooling can deform bridges in Timeplast.
3.gFan for Overhangs: 15% — Only for essential cooling in complex areas.
3.hPre-Start Fan Time: 2 seconds — Minimizes pressure differential during the first layer.4. Volumetric Flow
4.aMax Volumetric Speed: 12 mm³/s — Based on a melt flow index of ~15 g/10min, allows high-speed printing.
4.bRamming Speed: 3 mm³/s — Prevents bubbles or popping from pressure spikes.5. Retraction and Flow
5.aRetraction Distance: 0.4 mm — Minimal retraction required for soft filaments to avoid stringing.
5.bRetraction Speed: 15 mm/s — Slow enough to avoid pulling molten plastic.
5.cPressure Advance: 0.05 — Compensates for nozzle lag at high flow rates.
5.dFlow Ratio: 92% — Slight under-extrusion avoids swelling and surface artifacts.6. Precision Settings
6.aGap Closing Radius: 0.1 mm — Tolerant of gaps in thicker walls.
6.bArc Fitting: ON — Reduces G-code size and smooths curve transitions.
6.cElephant Foot Compensation: 0.1 mm — Offsets squishing in the first layer caused by large bead sizes.7. Walls and Shells
7.aWall Loops: 2 — Minimum for strength when using a 0.8 mm nozzle.
7.bDetect Thin Walls: ON — Ensures tight geometries aren’t skipped.
7.cTop/Bottom Shell Layers: 3 — Provides good coverage; increase if watertightness is needed.
7.dTop/Bottom Thickness: 1.2 mm — Equals 1.5x the nozzle size for solid strength.
7.eTop/Bottom Pattern: Monotonic — Distributes tension evenly and improves surface finish.8. Geometry and Movement
8.aWall Order: Inner before Outer — Creates cleaner outer surfaces.
8.bInfill First: OFF — Maintains precise outer dimensions.
8.cSmooth Speed Transition: ON — Prevents ringing caused by abrupt speed changes.
8.dSmooth Coefficient: 80 — Ideal damping for soft materials.
8.eAvoid Crossing Wall: ON — Minimizes stringing across part walls.
8.fMax Detour for Crossing: 10 mm or 5% — Balances time with print cleanliness.9. Layer and Width Settings
9.aLayer Height: 0.3 mm — Optimal for strength and resolution using a 0.8 mm nozzle.
9.bInitial Layer Height: 0.35 mm — Slightly higher to improve adhesion.
9.cLine Widths (all): 0.8 mm — Matches nozzle diameter for consistent extrusion.10. Seam Settings
10.aSeam Position: Aligned or Back — Use aligned for mechanical consistency, back for visual appeal.
10.bSmart Scarf Seam: ON — Automatically adjusts seam location to reduce visual impact.
10.cSeam Angle: 155° — Standard seam angle for clean transitions.
10.dSeam Steps: 10 — Smooths seam path and improves visual finish.11. Infill Settings
11.aWall/Infill Overlap: 10% — Prevents infill from deforming soft exterior walls.
11.bInfill Combination: ON — Consolidates paths for efficiency.
11.cDetect Floating Shells: ON — Ensures unsupported vertical structures are printed reliably.
11.dSparse Infill Density: 20–25% — Balanced rigidity vs. material use.
11.eSparse Pattern: Grid — Stable and efficient for flexible geometries.12. Speed Settings
12.aTravel: 160 mm/s — Fast but safe against backlash.
12.bInitial Layer: 15 mm/s — Prevents nozzle from skimming and ensures bed adhesion.
12.cOuter Wall: 60 mm/s — Controlled speed for surface quality.
12.dInner Wall: 90 mm/s — Slightly faster without compromising control.
12.eSmall Perimeter: 35 mm/s — Reduced speed for detailed geometry.
12.fTop Surface: 40 mm/s — Improves finish on topmost layers.
12.gInfill: 100–120 mm/s — Takes advantage of high flowability.13. Acceleration Settings
13.aNormal Print: 2000 mm/s² — Prevents ringing in soft filaments.
13.bTravel: 4000 mm/s² — Enables fast movement without harsh transitions.
13.cInitial Layer: 300 mm/s² — Gentle movement prevents lifting from the bed.
13.dOuter Wall: 1500 mm/s² — Improves outer surface clarity.
13.eInner Wall: 2000 mm/s² — Balanced for structural components.
13.fTop Surface: 1500 mm/s² — Ensures smooth detailing.14. Adhesion and Brims
14.aSkirt Loops: 2 — Helps prime nozzle and start cleanly.
14.bBrim Width: 6 mm — Helps hold soft materials down.
14.cBrim Gap: 0.15 mm — Allows for easy removal without tearing.15. Prime Tower and Flush Settings
15.aPrime Tower: ON — Purges moisture and early flow inconsistencies.
15.bTower Width: 40 mm — Prevents collapse due to heat.
15.cBrim Width (Tower): 4 mm — Adds stability to the purge base.
15.dFlush Into Support: ON — Discards unwanted early flow safely.16. G-Code Start Script
M900 K0.05 ; Pressure Advance M106 S0 ; Fan off G92 E0 G1 E15 F300 ; purge line G92 E0
17. Additional Notes
17.aDry filament at 155 F for 2 hours before use.
17.bStore with desiccant.
17.cKeep extruder door open to allow vapor to escape.
17.dAvoid long dwell times at high temperatures.If you need any other assistance, feel free to reach out to us anytime at timeplast@timeplast.com — we’ll be happy to help.
Free U.S. standard shipping on orders of 5+ spools!
Water Security
Water Desalination
-
Drink Fresh, Forget Salt
Introducing the groundbreaking Water Desalination filament. Formulated with advanced ionic exchange resins and activated carbon composites, this filament effectively removes marine salts and contaminants from seawater. Print portable desalination filters, survival kits, coastal emergency water systems, and maritime hydration devices, instantly turning seawater into fresh, drinkable water.
Experience unparalleled preparedness and security with TimeMass filaments—designed with cutting-edge materials and technology to ensure your survival, sustainability, and peace of mind.
-
Click here to access our new and improved TimeMass GPT Assistant. Just tell it your printer model and the TimeMass filament you're using—it will instantly recommend the exact parameters you need to start printing successfully.
1. Introduction
These parameters are designed to help avoid printing issues; however, temperatures and speed timings can be adjusted based on your specific goals. For example, if you prefer a less rigid result, we recommend using a lower temperature. This section outlines a complete slicing and printing profile for TimeMass Water Desalinization, tailored for printers with a 0.8 mm nozzle. If the print is not being successful, please lower the nozzle temperature by 10°C and start over until an optimal print is achieved. Please check the manual for printing parameters.2. Temperature Settings
2.aNozzle Temperature: 230°C — Optimal for flowability while avoiding decomposition (which begins around 250°C).
2.bBed Temperature: 75°C — Ensures strong first-layer adhesion and prevents moisture bubbling.
2.cNozzle Temperature Range: 230–245°C — Timeplast melts around 165°C but prints best at 240°C for precise viscosity control.3. Cooling Settings
3.aNo Cooling for First Layers: 3 layers — Prevents shrinkage due to rapid cooling of moisture-rich filament.
3.bFan Minimum Speed: 0% for the first 100 seconds — Allows heat retention during early layers.
3.cFan Maximum Speed: 15% starting at 8 seconds — Avoids overcooling that can lead to warping.
3.dKeep Fan Always On: OFF — Allows vapor to escape and avoids internal fogging.
3.eSlow Down for Cooling: ON — Improves surface finish with controlled cooling.
3.fForce Cooling for Overhangs: OFF — Overcooling can deform bridges in Timeplast.
3.gFan for Overhangs: 15% — Only for essential cooling in complex areas.
3.hPre-Start Fan Time: 2 seconds — Minimizes pressure differential during the first layer.4. Volumetric Flow
4.aMax Volumetric Speed: 12 mm³/s — Based on a melt flow index of ~15 g/10min, allows high-speed printing.
4.bRamming Speed: 3 mm³/s — Prevents bubbles or popping from pressure spikes.5. Retraction and Flow
5.aRetraction Distance: 0.4 mm — Minimal retraction required for soft filaments to avoid stringing.
5.bRetraction Speed: 15 mm/s — Slow enough to avoid pulling molten plastic.
5.cPressure Advance: 0.05 — Compensates for nozzle lag at high flow rates.
5.dFlow Ratio: 92% — Slight under-extrusion avoids swelling and surface artifacts.6. Precision Settings
6.aGap Closing Radius: 0.1 mm — Tolerant of gaps in thicker walls.
6.bArc Fitting: ON — Reduces G-code size and smooths curve transitions.
6.cElephant Foot Compensation: 0.1 mm — Offsets squishing in the first layer caused by large bead sizes.7. Walls and Shells
7.aWall Loops: 2 — Minimum for strength when using a 0.8 mm nozzle.
7.bDetect Thin Walls: ON — Ensures tight geometries aren’t skipped.
7.cTop/Bottom Shell Layers: 3 — Provides good coverage; increase if watertightness is needed.
7.dTop/Bottom Thickness: 1.2 mm — Equals 1.5x the nozzle size for solid strength.
7.eTop/Bottom Pattern: Monotonic — Distributes tension evenly and improves surface finish.8. Geometry and Movement
8.aWall Order: Inner before Outer — Creates cleaner outer surfaces.
8.bInfill First: OFF — Maintains precise outer dimensions.
8.cSmooth Speed Transition: ON — Prevents ringing caused by abrupt speed changes.
8.dSmooth Coefficient: 80 — Ideal damping for soft materials.
8.eAvoid Crossing Wall: ON — Minimizes stringing across part walls.
8.fMax Detour for Crossing: 10 mm or 5% — Balances time with print cleanliness.9. Layer and Width Settings
9.aLayer Height: 0.3 mm — Optimal for strength and resolution using a 0.8 mm nozzle.
9.bInitial Layer Height: 0.35 mm — Slightly higher to improve adhesion.
9.cLine Widths (all): 0.8 mm — Matches nozzle diameter for consistent extrusion.10. Seam Settings
10.aSeam Position: Aligned or Back — Use aligned for mechanical consistency, back for visual appeal.
10.bSmart Scarf Seam: ON — Automatically adjusts seam location to reduce visual impact.
10.cSeam Angle: 155° — Standard seam angle for clean transitions.
10.dSeam Steps: 10 — Smooths seam path and improves visual finish.11. Infill Settings
11.aWall/Infill Overlap: 10% — Prevents infill from deforming soft exterior walls.
11.bInfill Combination: ON — Consolidates paths for efficiency.
11.cDetect Floating Shells: ON — Ensures unsupported vertical structures are printed reliably.
11.dSparse Infill Density: 20–25% — Balanced rigidity vs. material use.
11.eSparse Pattern: Grid — Stable and efficient for flexible geometries.12. Speed Settings
12.aTravel: 160 mm/s — Fast but safe against backlash.
12.bInitial Layer: 15 mm/s — Prevents nozzle from skimming and ensures bed adhesion.
12.cOuter Wall: 60 mm/s — Controlled speed for surface quality.
12.dInner Wall: 90 mm/s — Slightly faster without compromising control.
12.eSmall Perimeter: 35 mm/s — Reduced speed for detailed geometry.
12.fTop Surface: 40 mm/s — Improves finish on topmost layers.
12.gInfill: 100–120 mm/s — Takes advantage of high flowability.13. Acceleration Settings
13.aNormal Print: 2000 mm/s² — Prevents ringing in soft filaments.
13.bTravel: 4000 mm/s² — Enables fast movement without harsh transitions.
13.cInitial Layer: 300 mm/s² — Gentle movement prevents lifting from the bed.
13.dOuter Wall: 1500 mm/s² — Improves outer surface clarity.
13.eInner Wall: 2000 mm/s² — Balanced for structural components.
13.fTop Surface: 1500 mm/s² — Ensures smooth detailing.14. Adhesion and Brims
14.aSkirt Loops: 2 — Helps prime nozzle and start cleanly.
14.bBrim Width: 6 mm — Helps hold soft materials down.
14.cBrim Gap: 0.15 mm — Allows for easy removal without tearing.15. Prime Tower and Flush Settings
15.aPrime Tower: ON — Purges moisture and early flow inconsistencies.
15.bTower Width: 40 mm — Prevents collapse due to heat.
15.cBrim Width (Tower): 4 mm — Adds stability to the purge base.
15.dFlush Into Support: ON — Discards unwanted early flow safely.16. G-Code Start Script
M900 K0.05 ; Pressure Advance M106 S0 ; Fan off G92 E0 G1 E15 F300 ; purge line G92 E0
17. Additional Notes
17.aDry filament at 155 F for 2 hours before use.
17.bStore with desiccant.
17.cKeep extruder door open to allow vapor to escape.
17.dAvoid long dwell times at high temperatures.If you need any other assistance, feel free to reach out to us anytime at timeplast@timeplast.com — we’ll be happy to help.
Water Retainer

-
Water-Holding Innovation
Harness water retention like never before with Water Retainer filament. Engineered with hydrogel-forming polymer composites, this filament absorbs, retains, and gradually releases water when needed. Prints swell upon water exposure, providing passive cooling, soil hydration, and prolonged moisture release. Applications include smart irrigation systems, plant hydration capsules, cooling garments, moisture-responsive insulation, and eco-friendly agriculture and landscaping aids.
-
Click here to access our new and improved TimeMass GPT Assistant. Just tell it your printer model and the TimeMass filament you're using—it will instantly recommend the exact parameters you need to start printing successfully.
1. Introduction
These parameters are designed to help avoid printing issues; however, temperatures and speed timings can be adjusted based on your specific goals. For example, if you prefer a less rigid result, we recommend using a lower temperature. This section outlines a complete slicing and printing profile for TimeMass Water Retainer, tailored for printers with a 0.8 mm nozzle. If the print is not being successful, please lower the nozzle temperature by 10°C and start over until an optimal print is achieved. Please check the manual for printing parameters.2. Temperature Settings
2.aNozzle Temperature: 230°C — Optimal for flowability while avoiding decomposition (which begins around 250°C).
2.bBed Temperature: 75°C — Ensures strong first-layer adhesion and prevents moisture bubbling.
2.cNozzle Temperature Range: 230–245°C — Timeplast melts around 165°C but prints best at 240°C for precise viscosity control.3. Cooling Settings
3.aNo Cooling for First Layers: 3 layers — Prevents shrinkage due to rapid cooling of moisture-rich filament.
3.bFan Minimum Speed: 0% for the first 100 seconds — Allows heat retention during early layers.
3.cFan Maximum Speed: 15% starting at 8 seconds — Avoids overcooling that can lead to warping.
3.dKeep Fan Always On: OFF — Allows vapor to escape and avoids internal fogging.
3.eSlow Down for Cooling: ON — Improves surface finish with controlled cooling.
3.fForce Cooling for Overhangs: OFF — Overcooling can deform bridges in Timeplast.
3.gFan for Overhangs: 15% — Only for essential cooling in complex areas.
3.hPre-Start Fan Time: 2 seconds — Minimizes pressure differential during the first layer.4. Volumetric Flow
4.aMax Volumetric Speed: 12 mm³/s — Based on a melt flow index of ~15 g/10min, allows high-speed printing.
4.bRamming Speed: 3 mm³/s — Prevents bubbles or popping from pressure spikes.5. Retraction and Flow
5.aRetraction Distance: 0.4 mm — Minimal retraction required for soft filaments to avoid stringing.
5.bRetraction Speed: 15 mm/s — Slow enough to avoid pulling molten plastic.
5.cPressure Advance: 0.05 — Compensates for nozzle lag at high flow rates.
5.dFlow Ratio: 92% — Slight under-extrusion avoids swelling and surface artifacts.6. Precision Settings
6.aGap Closing Radius: 0.1 mm — Tolerant of gaps in thicker walls.
6.bArc Fitting: ON — Reduces G-code size and smooths curve transitions.
6.cElephant Foot Compensation: 0.1 mm — Offsets squishing in the first layer caused by large bead sizes.7. Walls and Shells
7.aWall Loops: 2 — Minimum for strength when using a 0.8 mm nozzle.
7.bDetect Thin Walls: ON — Ensures tight geometries aren’t skipped.
7.cTop/Bottom Shell Layers: 3 — Provides good coverage; increase if watertightness is needed.
7.dTop/Bottom Thickness: 1.2 mm — Equals 1.5x the nozzle size for solid strength.
7.eTop/Bottom Pattern: Monotonic — Distributes tension evenly and improves surface finish.8. Geometry and Movement
8.aWall Order: Inner before Outer — Creates cleaner outer surfaces.
8.bInfill First: OFF — Maintains precise outer dimensions.
8.cSmooth Speed Transition: ON — Prevents ringing caused by abrupt speed changes.
8.dSmooth Coefficient: 80 — Ideal damping for soft materials.
8.eAvoid Crossing Wall: ON — Minimizes stringing across part walls.
8.fMax Detour for Crossing: 10 mm or 5% — Balances time with print cleanliness.9. Layer and Width Settings
9.aLayer Height: 0.3 mm — Optimal for strength and resolution using a 0.8 mm nozzle.
9.bInitial Layer Height: 0.35 mm — Slightly higher to improve adhesion.
9.cLine Widths (all): 0.8 mm — Matches nozzle diameter for consistent extrusion.10. Seam Settings
10.aSeam Position: Aligned or Back — Use aligned for mechanical consistency, back for visual appeal.
10.bSmart Scarf Seam: ON — Automatically adjusts seam location to reduce visual impact.
10.cSeam Angle: 155° — Standard seam angle for clean transitions.
10.dSeam Steps: 10 — Smooths seam path and improves visual finish.11. Infill Settings
11.aWall/Infill Overlap: 10% — Prevents infill from deforming soft exterior walls.
11.bInfill Combination: ON — Consolidates paths for efficiency.
11.cDetect Floating Shells: ON — Ensures unsupported vertical structures are printed reliably.
11.dSparse Infill Density: 20–25% — Balanced rigidity vs. material use.
11.eSparse Pattern: Grid — Stable and efficient for flexible geometries.12. Speed Settings
12.aTravel: 160 mm/s — Fast but safe against backlash.
12.bInitial Layer: 15 mm/s — Prevents nozzle from skimming and ensures bed adhesion.
12.cOuter Wall: 60 mm/s — Controlled speed for surface quality.
12.dInner Wall: 90 mm/s — Slightly faster without compromising control.
12.eSmall Perimeter: 35 mm/s — Reduced speed for detailed geometry.
12.fTop Surface: 40 mm/s — Improves finish on topmost layers.
12.gInfill: 100–120 mm/s — Takes advantage of high flowability.13. Acceleration Settings
13.aNormal Print: 2000 mm/s² — Prevents ringing in soft filaments.
13.bTravel: 4000 mm/s² — Enables fast movement without harsh transitions.
13.cInitial Layer: 300 mm/s² — Gentle movement prevents lifting from the bed.
13.dOuter Wall: 1500 mm/s² — Improves outer surface clarity.
13.eInner Wall: 2000 mm/s² — Balanced for structural components.
13.fTop Surface: 1500 mm/s² — Ensures smooth detailing.14. Adhesion and Brims
14.aSkirt Loops: 2 — Helps prime nozzle and start cleanly.
14.bBrim Width: 6 mm — Helps hold soft materials down.
14.cBrim Gap: 0.15 mm — Allows for easy removal without tearing.15. Prime Tower and Flush Settings
15.aPrime Tower: ON — Purges moisture and early flow inconsistencies.
15.bTower Width: 40 mm — Prevents collapse due to heat.
15.cBrim Width (Tower): 4 mm — Adds stability to the purge base.
15.dFlush Into Support: ON — Discards unwanted early flow safely.16. G-Code Start Script
M900 K0.05 ; Pressure Advance M106 S0 ; Fan off G92 E0 G1 E15 F300 ; purge line G92 E0
17. Additional Notes
17.aDry filament at 155 F for 2 hours before use.
17.bStore with desiccant.
17.cKeep extruder door open to allow vapor to escape.
17.dAvoid long dwell times at high temperatures.If you need any other assistance, feel free to reach out to us anytime at timeplast@timeplast.com — we’ll be happy to help.
Air Water Well
-
Infinite Air-to-Water Solution
Transform humidity into endless fresh drinking water with our Air Water Well filament. Utilizing embedded hygroscopic salts (such as calcium chloride and lithium chloride), this filament captures atmospheric moisture overnight. As temperatures rise at dawn, solar-activated additives release the stored water, which condenses into pure, potable water. Applications include printing atmospheric water collectors, portable hydration systems, and emergency water generation devices perfect for air water wells with infinite potential to collect water or for survival in arid climates.
-
Click here to access our new and improved TimeMass GPT Assistant. Just tell it your printer model and the TimeMass filament you're using—it will instantly recommend the exact parameters you need to start printing successfully.
Using a Bambu Lab printer?
Click here to download our updated Bambu Lab profile. All printing parameters are fully optimized and tested—just load the file and start printing.1. Introduction
These parameters are designed to help avoid printing issues; however, temperatures and speed timings can be adjusted based on your specific goals. For example, if you prefer a less rigid result, we recommend using a lower temperature. This section outlines a complete slicing and printing profile for TimeMass Air Water Well, tailored for printers with a 0.8 mm nozzle. If the print is not being successful, please lower the nozzle temperature by 10°C and start over until an optimal print is achieved. Please check the manual for printing parameters.2. Temperature Settings
2.aNozzle Temperature: 230°C — Optimal for flowability while avoiding decomposition (which begins around 250°C).
2.bBed Temperature: 75°C — Ensures strong first-layer adhesion and prevents moisture bubbling.
2.cNozzle Temperature Range: 230–245°C — Timeplast melts around 165°C but prints best at 240°C for precise viscosity control.3. Cooling Settings
3.aNo Cooling for First Layers: 3 layers — Prevents shrinkage due to rapid cooling of moisture-rich filament.
3.bFan Minimum Speed: 0% for the first 100 seconds — Allows heat retention during early layers.
3.cFan Maximum Speed: 15% starting at 8 seconds — Avoids overcooling that can lead to warping.
3.dKeep Fan Always On: OFF — Allows vapor to escape and avoids internal fogging.
3.eSlow Down for Cooling: ON — Improves surface finish with controlled cooling.
3.fForce Cooling for Overhangs: OFF — Overcooling can deform bridges in Timeplast.
3.gFan for Overhangs: 15% — Only for essential cooling in complex areas.
3.hPre-Start Fan Time: 2 seconds — Minimizes pressure differential during the first layer.4. Volumetric Flow
4.aMax Volumetric Speed: 12 mm³/s — Based on a melt flow index of ~15 g/10min, allows high-speed printing.
4.bRamming Speed: 3 mm³/s — Prevents bubbles or popping from pressure spikes.5. Retraction and Flow
5.aRetraction Distance: 0.4 mm — Minimal retraction required for soft filaments to avoid stringing.
5.bRetraction Speed: 15 mm/s — Slow enough to avoid pulling molten plastic.
5.cPressure Advance: 0.05 — Compensates for nozzle lag at high flow rates.
5.dFlow Ratio: 92% — Slight under-extrusion avoids swelling and surface artifacts.6. Precision Settings
6.aGap Closing Radius: 0.1 mm — Tolerant of gaps in thicker walls.
6.bArc Fitting: ON — Reduces G-code size and smooths curve transitions.
6.cElephant Foot Compensation: 0.1 mm — Offsets squishing in the first layer caused by large bead sizes.7. Walls and Shells
7.aWall Loops: 2 — Minimum for strength when using a 0.8 mm nozzle.
7.bDetect Thin Walls: ON — Ensures tight geometries aren’t skipped.
7.cTop/Bottom Shell Layers: 3 — Provides good coverage; increase if watertightness is needed.
7.dTop/Bottom Thickness: 1.2 mm — Equals 1.5x the nozzle size for solid strength.
7.eTop/Bottom Pattern: Monotonic — Distributes tension evenly and improves surface finish.8. Geometry and Movement
8.aWall Order: Inner before Outer — Creates cleaner outer surfaces.
8.bInfill First: OFF — Maintains precise outer dimensions.
8.cSmooth Speed Transition: ON — Prevents ringing caused by abrupt speed changes.
8.dSmooth Coefficient: 80 — Ideal damping for soft materials.
8.eAvoid Crossing Wall: ON — Minimizes stringing across part walls.
8.fMax Detour for Crossing: 10 mm or 5% — Balances time with print cleanliness.9. Layer and Width Settings
9.aLayer Height: 0.3 mm — Optimal for strength and resolution using a 0.8 mm nozzle.
9.bInitial Layer Height: 0.35 mm — Slightly higher to improve adhesion.
9.cLine Widths (all): 0.8 mm — Matches nozzle diameter for consistent extrusion.10. Seam Settings
10.aSeam Position: Aligned or Back — Use aligned for mechanical consistency, back for visual appeal.
10.bSmart Scarf Seam: ON — Automatically adjusts seam location to reduce visual impact.
10.cSeam Angle: 155° — Standard seam angle for clean transitions.
10.dSeam Steps: 10 — Smooths seam path and improves visual finish.11. Infill Settings
11.aWall/Infill Overlap: 10% — Prevents infill from deforming soft exterior walls.
11.bInfill Combination: ON — Consolidates paths for efficiency.
11.cDetect Floating Shells: ON — Ensures unsupported vertical structures are printed reliably.
11.dSparse Infill Density: 20–25% — Balanced rigidity vs. material use.
11.eSparse Pattern: Grid — Stable and efficient for flexible geometries.12. Speed Settings
12.aTravel: 160 mm/s — Fast but safe against backlash.
12.bInitial Layer: 15 mm/s — Prevents nozzle from skimming and ensures bed adhesion.
12.cOuter Wall: 60 mm/s — Controlled speed for surface quality.
12.dInner Wall: 90 mm/s — Slightly faster without compromising control.
12.eSmall Perimeter: 35 mm/s — Reduced speed for detailed geometry.
12.fTop Surface: 40 mm/s — Improves finish on topmost layers.
12.gInfill: 100–120 mm/s — Takes advantage of high flowability.13. Acceleration Settings
13.aNormal Print: 2000 mm/s² — Prevents ringing in soft filaments.
13.bTravel: 4000 mm/s² — Enables fast movement without harsh transitions.
13.cInitial Layer: 300 mm/s² — Gentle movement prevents lifting from the bed.
13.dOuter Wall: 1500 mm/s² — Improves outer surface clarity.
13.eInner Wall: 2000 mm/s² — Balanced for structural components.
13.fTop Surface: 1500 mm/s² — Ensures smooth detailing.14. Adhesion and Brims
14.aSkirt Loops: 2 — Helps prime nozzle and start cleanly.
14.bBrim Width: 6 mm — Helps hold soft materials down.
14.cBrim Gap: 0.15 mm — Allows for easy removal without tearing.15. Prime Tower and Flush Settings
15.aPrime Tower: ON — Purges moisture and early flow inconsistencies.
15.bTower Width: 40 mm — Prevents collapse due to heat.
15.cBrim Width (Tower): 4 mm — Adds stability to the purge base.
15.dFlush Into Support: ON — Discards unwanted early flow safely.16. G-Code Start Script
M900 K0.05 ; Pressure Advance M106 S0 ; Fan off G92 E0 G1 E15 F300 ; purge line G92 E0
17. Additional Notes
17.aDry filament at 155 F for 2 hours before use.
17.bStore with desiccant.
17.cKeep extruder door open to allow vapor to escape.
17.dAvoid long dwell times at high temperatures.If you need any other assistance, feel free to reach out to us anytime at timeplast@timeplast.com — we’ll be happy to help.
Water Purifier
-
Safe, Drinkable Water Anywhere
Purify water effortlessly with Water Purifier filament. Infused with antimicrobial silver ions, activated carbon, and iodine microcapsules, this filament creates prints that neutralize harmful bacteria, viruses, and pathogens in water. Applications include portable purification straws, inline filters, gravity-fed purification systems, and emergency water treatment devices, ensuring safe drinking water in minutes.
-
Click here to access our new and improved TimeMass GPT Assistant. Just tell it your printer model and the TimeMass filament you're using—it will instantly recommend the exact parameters you need to start printing successfully.
1. Introduction
These parameters are designed to help avoid printing issues; however, temperatures and speed timings can be adjusted based on your specific goals. For example, if you prefer a less rigid result, we recommend using a lower temperature. This section outlines a complete slicing and printing profile for TimeMass Water Purifier, tailored for printers with a 0.8 mm nozzle. If the print is not being successful, please lower the nozzle temperature by 10°C and start over until an optimal print is achieved. Please check the manual for printing parameters.2. Temperature Settings
2.aNozzle Temperature: 230°C — Optimal for flowability while avoiding decomposition (which begins around 250°C).
2.bBed Temperature: 75°C — Ensures strong first-layer adhesion and prevents moisture bubbling.
2.cNozzle Temperature Range: 230–245°C — Timeplast melts around 165°C but prints best at 240°C for precise viscosity control.3. Cooling Settings
3.aNo Cooling for First Layers: 3 layers — Prevents shrinkage due to rapid cooling of moisture-rich filament.
3.bFan Minimum Speed: 0% for the first 100 seconds — Allows heat retention during early layers.
3.cFan Maximum Speed: 15% starting at 8 seconds — Avoids overcooling that can lead to warping.
3.dKeep Fan Always On: OFF — Allows vapor to escape and avoids internal fogging.
3.eSlow Down for Cooling: ON — Improves surface finish with controlled cooling.
3.fForce Cooling for Overhangs: OFF — Overcooling can deform bridges in Timeplast.
3.gFan for Overhangs: 15% — Only for essential cooling in complex areas.
3.hPre-Start Fan Time: 2 seconds — Minimizes pressure differential during the first layer.4. Volumetric Flow
4.aMax Volumetric Speed: 12 mm³/s — Based on a melt flow index of ~15 g/10min, allows high-speed printing.
4.bRamming Speed: 3 mm³/s — Prevents bubbles or popping from pressure spikes.5. Retraction and Flow
5.aRetraction Distance: 0.4 mm — Minimal retraction required for soft filaments to avoid stringing.
5.bRetraction Speed: 15 mm/s — Slow enough to avoid pulling molten plastic.
5.cPressure Advance: 0.05 — Compensates for nozzle lag at high flow rates.
5.dFlow Ratio: 92% — Slight under-extrusion avoids swelling and surface artifacts.6. Precision Settings
6.aGap Closing Radius: 0.1 mm — Tolerant of gaps in thicker walls.
6.bArc Fitting: ON — Reduces G-code size and smooths curve transitions.
6.cElephant Foot Compensation: 0.1 mm — Offsets squishing in the first layer caused by large bead sizes.7. Walls and Shells
7.aWall Loops: 2 — Minimum for strength when using a 0.8 mm nozzle.
7.bDetect Thin Walls: ON — Ensures tight geometries aren’t skipped.
7.cTop/Bottom Shell Layers: 3 — Provides good coverage; increase if watertightness is needed.
7.dTop/Bottom Thickness: 1.2 mm — Equals 1.5x the nozzle size for solid strength.
7.eTop/Bottom Pattern: Monotonic — Distributes tension evenly and improves surface finish.8. Geometry and Movement
8.aWall Order: Inner before Outer — Creates cleaner outer surfaces.
8.bInfill First: OFF — Maintains precise outer dimensions.
8.cSmooth Speed Transition: ON — Prevents ringing caused by abrupt speed changes.
8.dSmooth Coefficient: 80 — Ideal damping for soft materials.
8.eAvoid Crossing Wall: ON — Minimizes stringing across part walls.
8.fMax Detour for Crossing: 10 mm or 5% — Balances time with print cleanliness.9. Layer and Width Settings
9.aLayer Height: 0.3 mm — Optimal for strength and resolution using a 0.8 mm nozzle.
9.bInitial Layer Height: 0.35 mm — Slightly higher to improve adhesion.
9.cLine Widths (all): 0.8 mm — Matches nozzle diameter for consistent extrusion.10. Seam Settings
10.aSeam Position: Aligned or Back — Use aligned for mechanical consistency, back for visual appeal.
10.bSmart Scarf Seam: ON — Automatically adjusts seam location to reduce visual impact.
10.cSeam Angle: 155° — Standard seam angle for clean transitions.
10.dSeam Steps: 10 — Smooths seam path and improves visual finish.11. Infill Settings
11.aWall/Infill Overlap: 10% — Prevents infill from deforming soft exterior walls.
11.bInfill Combination: ON — Consolidates paths for efficiency.
11.cDetect Floating Shells: ON — Ensures unsupported vertical structures are printed reliably.
11.dSparse Infill Density: 20–25% — Balanced rigidity vs. material use.
11.eSparse Pattern: Grid — Stable and efficient for flexible geometries.12. Speed Settings
12.aTravel: 160 mm/s — Fast but safe against backlash.
12.bInitial Layer: 15 mm/s — Prevents nozzle from skimming and ensures bed adhesion.
12.cOuter Wall: 60 mm/s — Controlled speed for surface quality.
12.dInner Wall: 90 mm/s — Slightly faster without compromising control.
12.eSmall Perimeter: 35 mm/s — Reduced speed for detailed geometry.
12.fTop Surface: 40 mm/s — Improves finish on topmost layers.
12.gInfill: 100–120 mm/s — Takes advantage of high flowability.13. Acceleration Settings
13.aNormal Print: 2000 mm/s² — Prevents ringing in soft filaments.
13.bTravel: 4000 mm/s² — Enables fast movement without harsh transitions.
13.cInitial Layer: 300 mm/s² — Gentle movement prevents lifting from the bed.
13.dOuter Wall: 1500 mm/s² — Improves outer surface clarity.
13.eInner Wall: 2000 mm/s² — Balanced for structural components.
13.fTop Surface: 1500 mm/s² — Ensures smooth detailing.14. Adhesion and Brims
14.aSkirt Loops: 2 — Helps prime nozzle and start cleanly.
14.bBrim Width: 6 mm — Helps hold soft materials down.
14.cBrim Gap: 0.15 mm — Allows for easy removal without tearing.15. Prime Tower and Flush Settings
15.aPrime Tower: ON — Purges moisture and early flow inconsistencies.
15.bTower Width: 40 mm — Prevents collapse due to heat.
15.cBrim Width (Tower): 4 mm — Adds stability to the purge base.
15.dFlush Into Support: ON — Discards unwanted early flow safely.16. G-Code Start Script
M900 K0.05 ; Pressure Advance M106 S0 ; Fan off G92 E0 G1 E15 F300 ; purge line G92 E0
17. Additional Notes
17.aDry filament at 155 F for 2 hours before use.
17.bStore with desiccant.
17.cKeep extruder door open to allow vapor to escape.
17.dAvoid long dwell times at high temperatures.If you need any other assistance, feel free to reach out to us anytime at timeplast@timeplast.com — we’ll be happy to help.
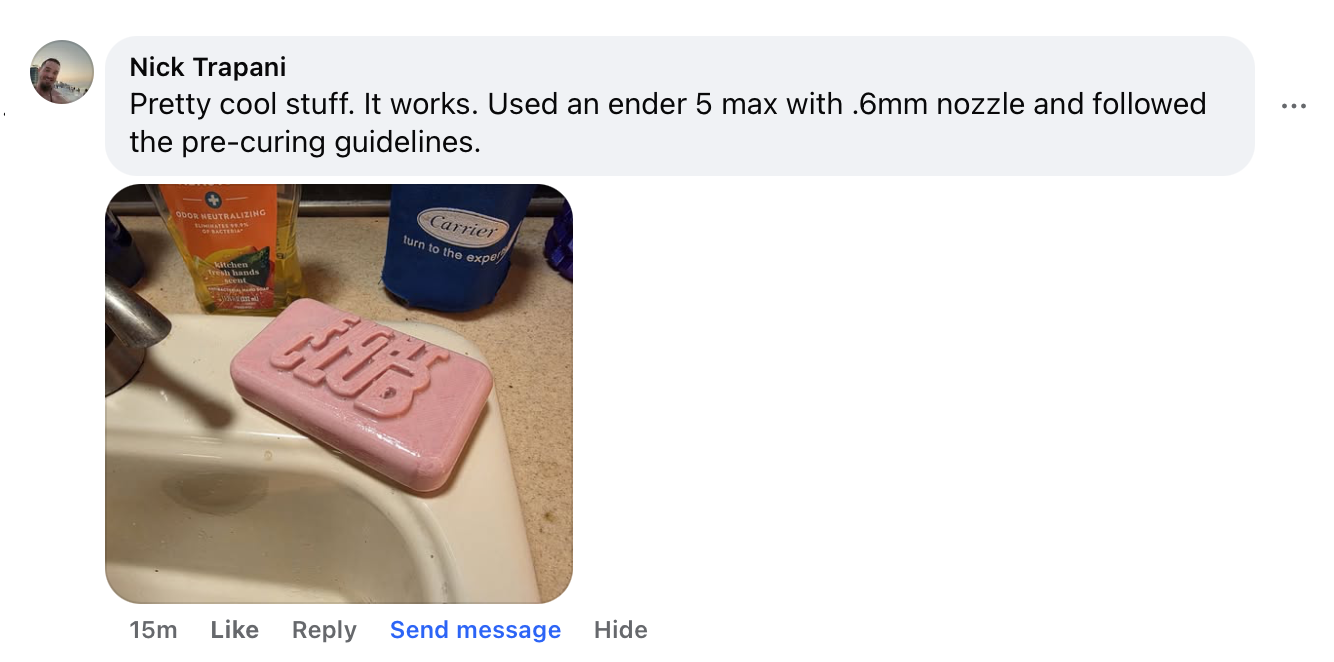

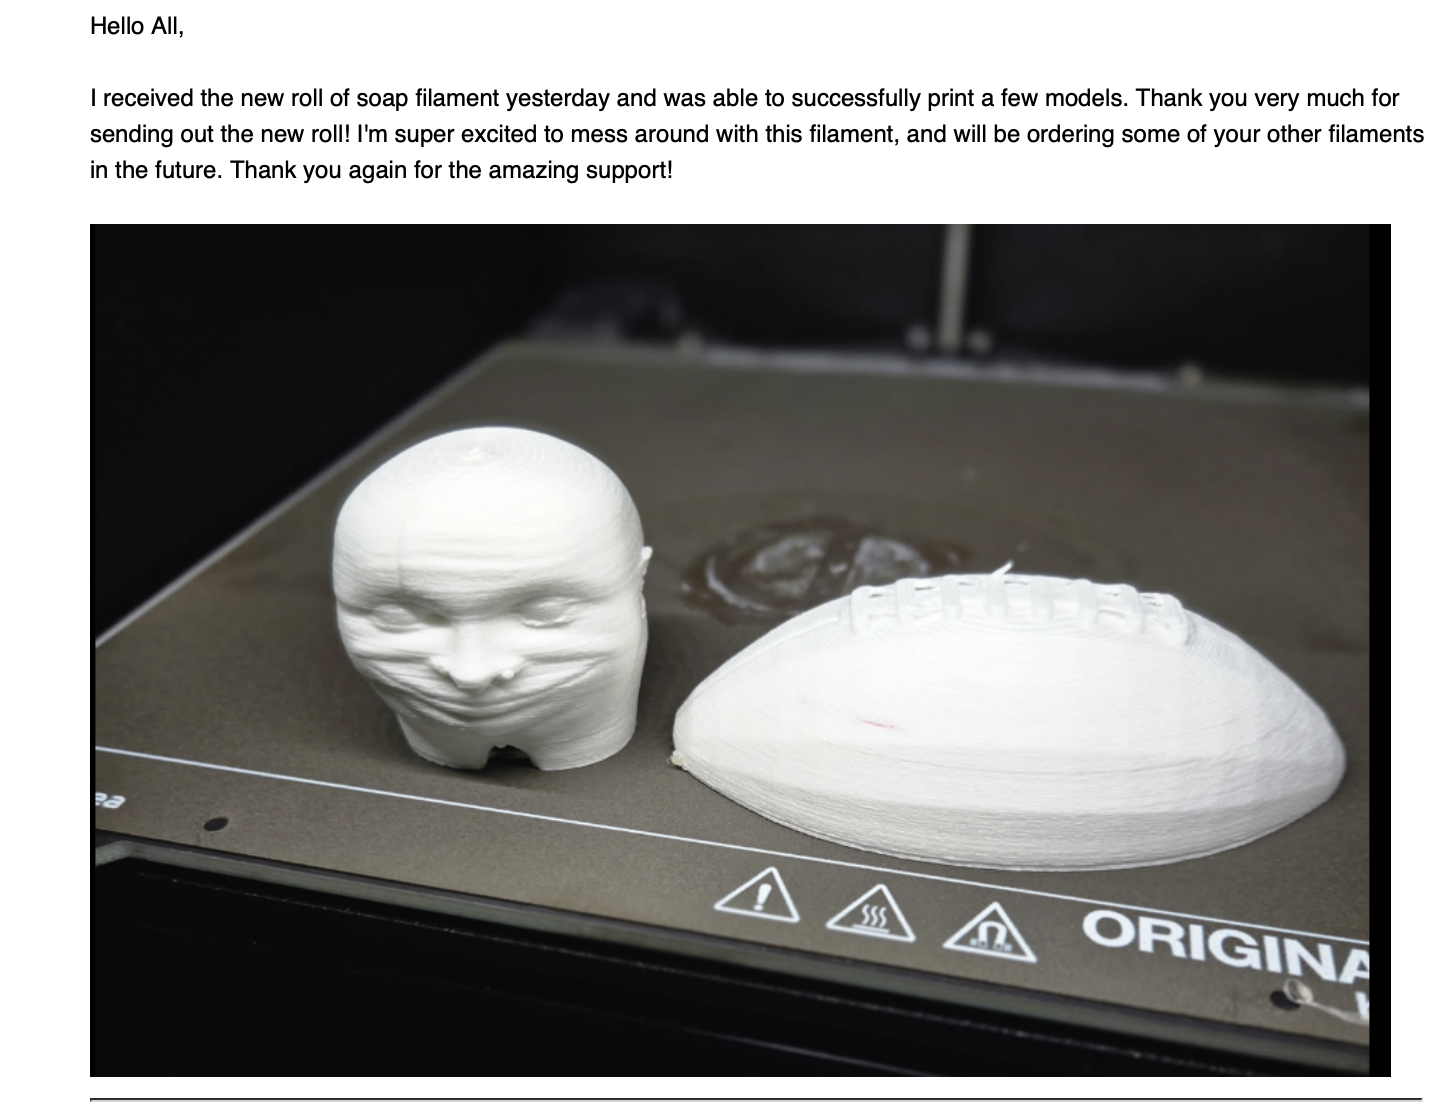


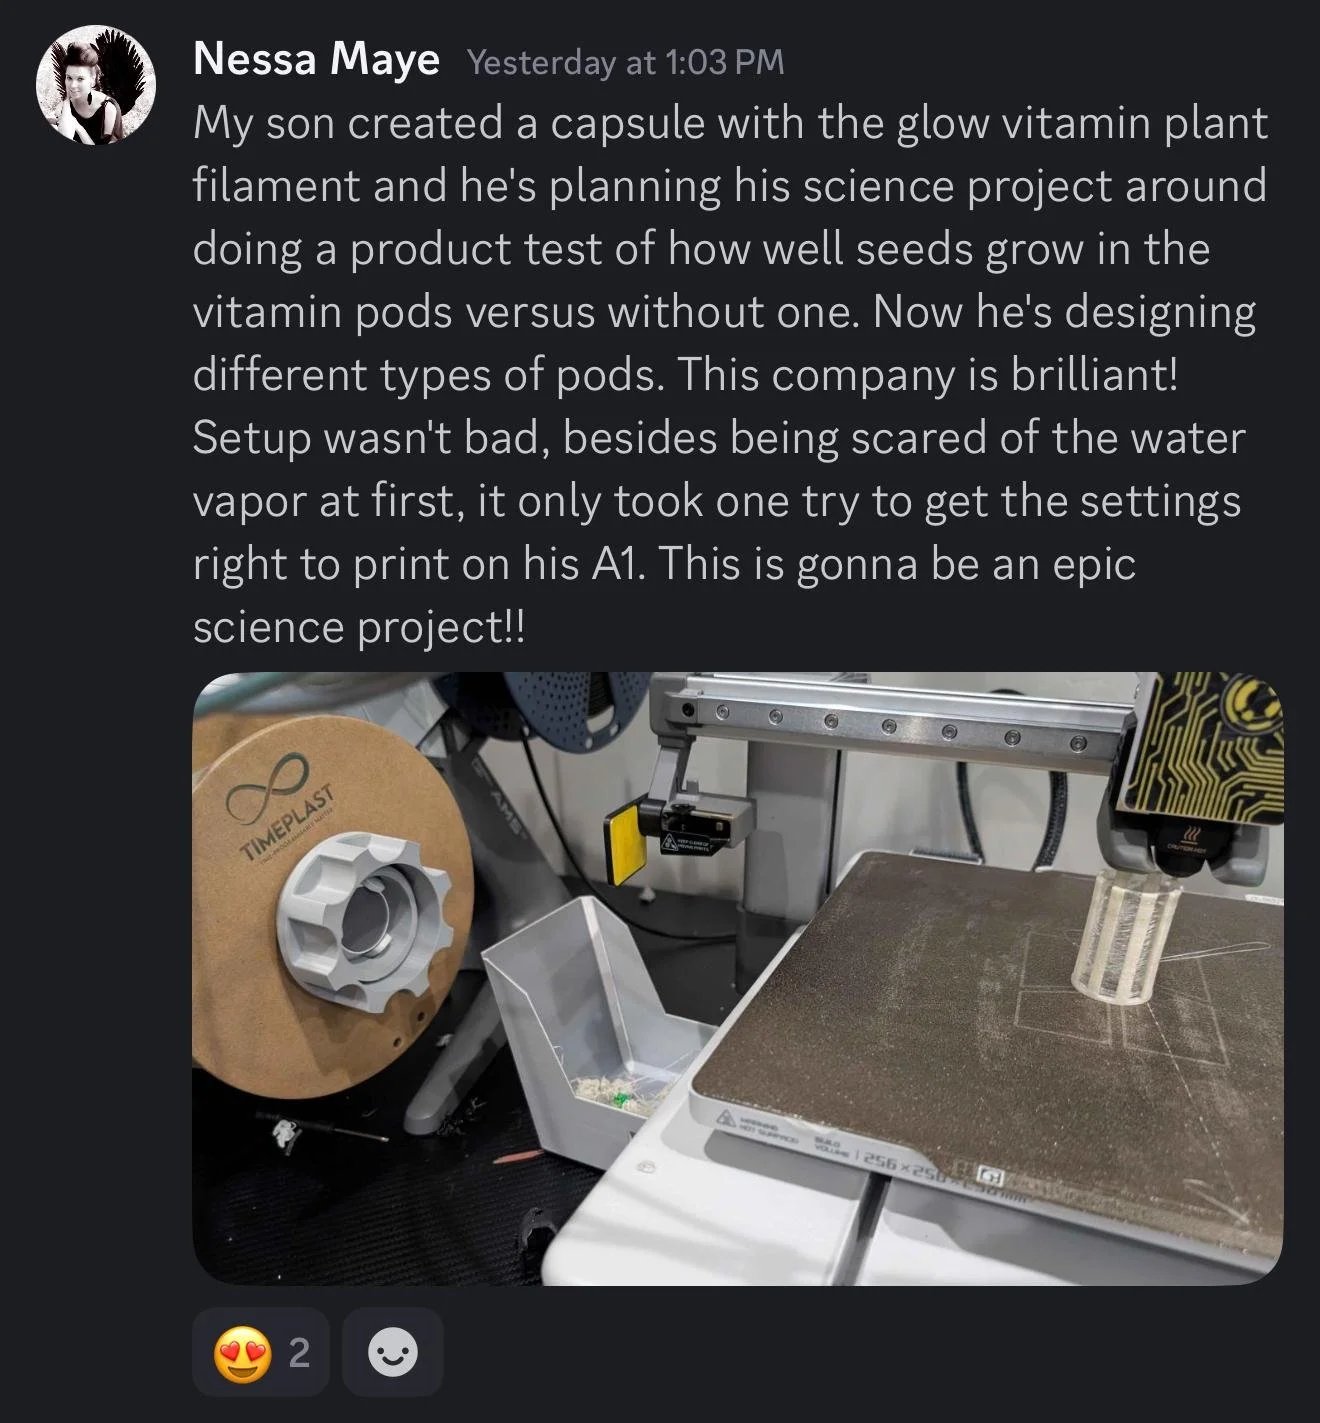


Big News! We’ve officially launched our Timeplast Discord & Reddit channels! This is your space to:
- Get direct support from the Timeplast team
- Learn tips & tricks from fellow makers
- Share your printing wins & creative projects
Together, we’re shaping the future of 3D (and 4D) printing. Join us here:
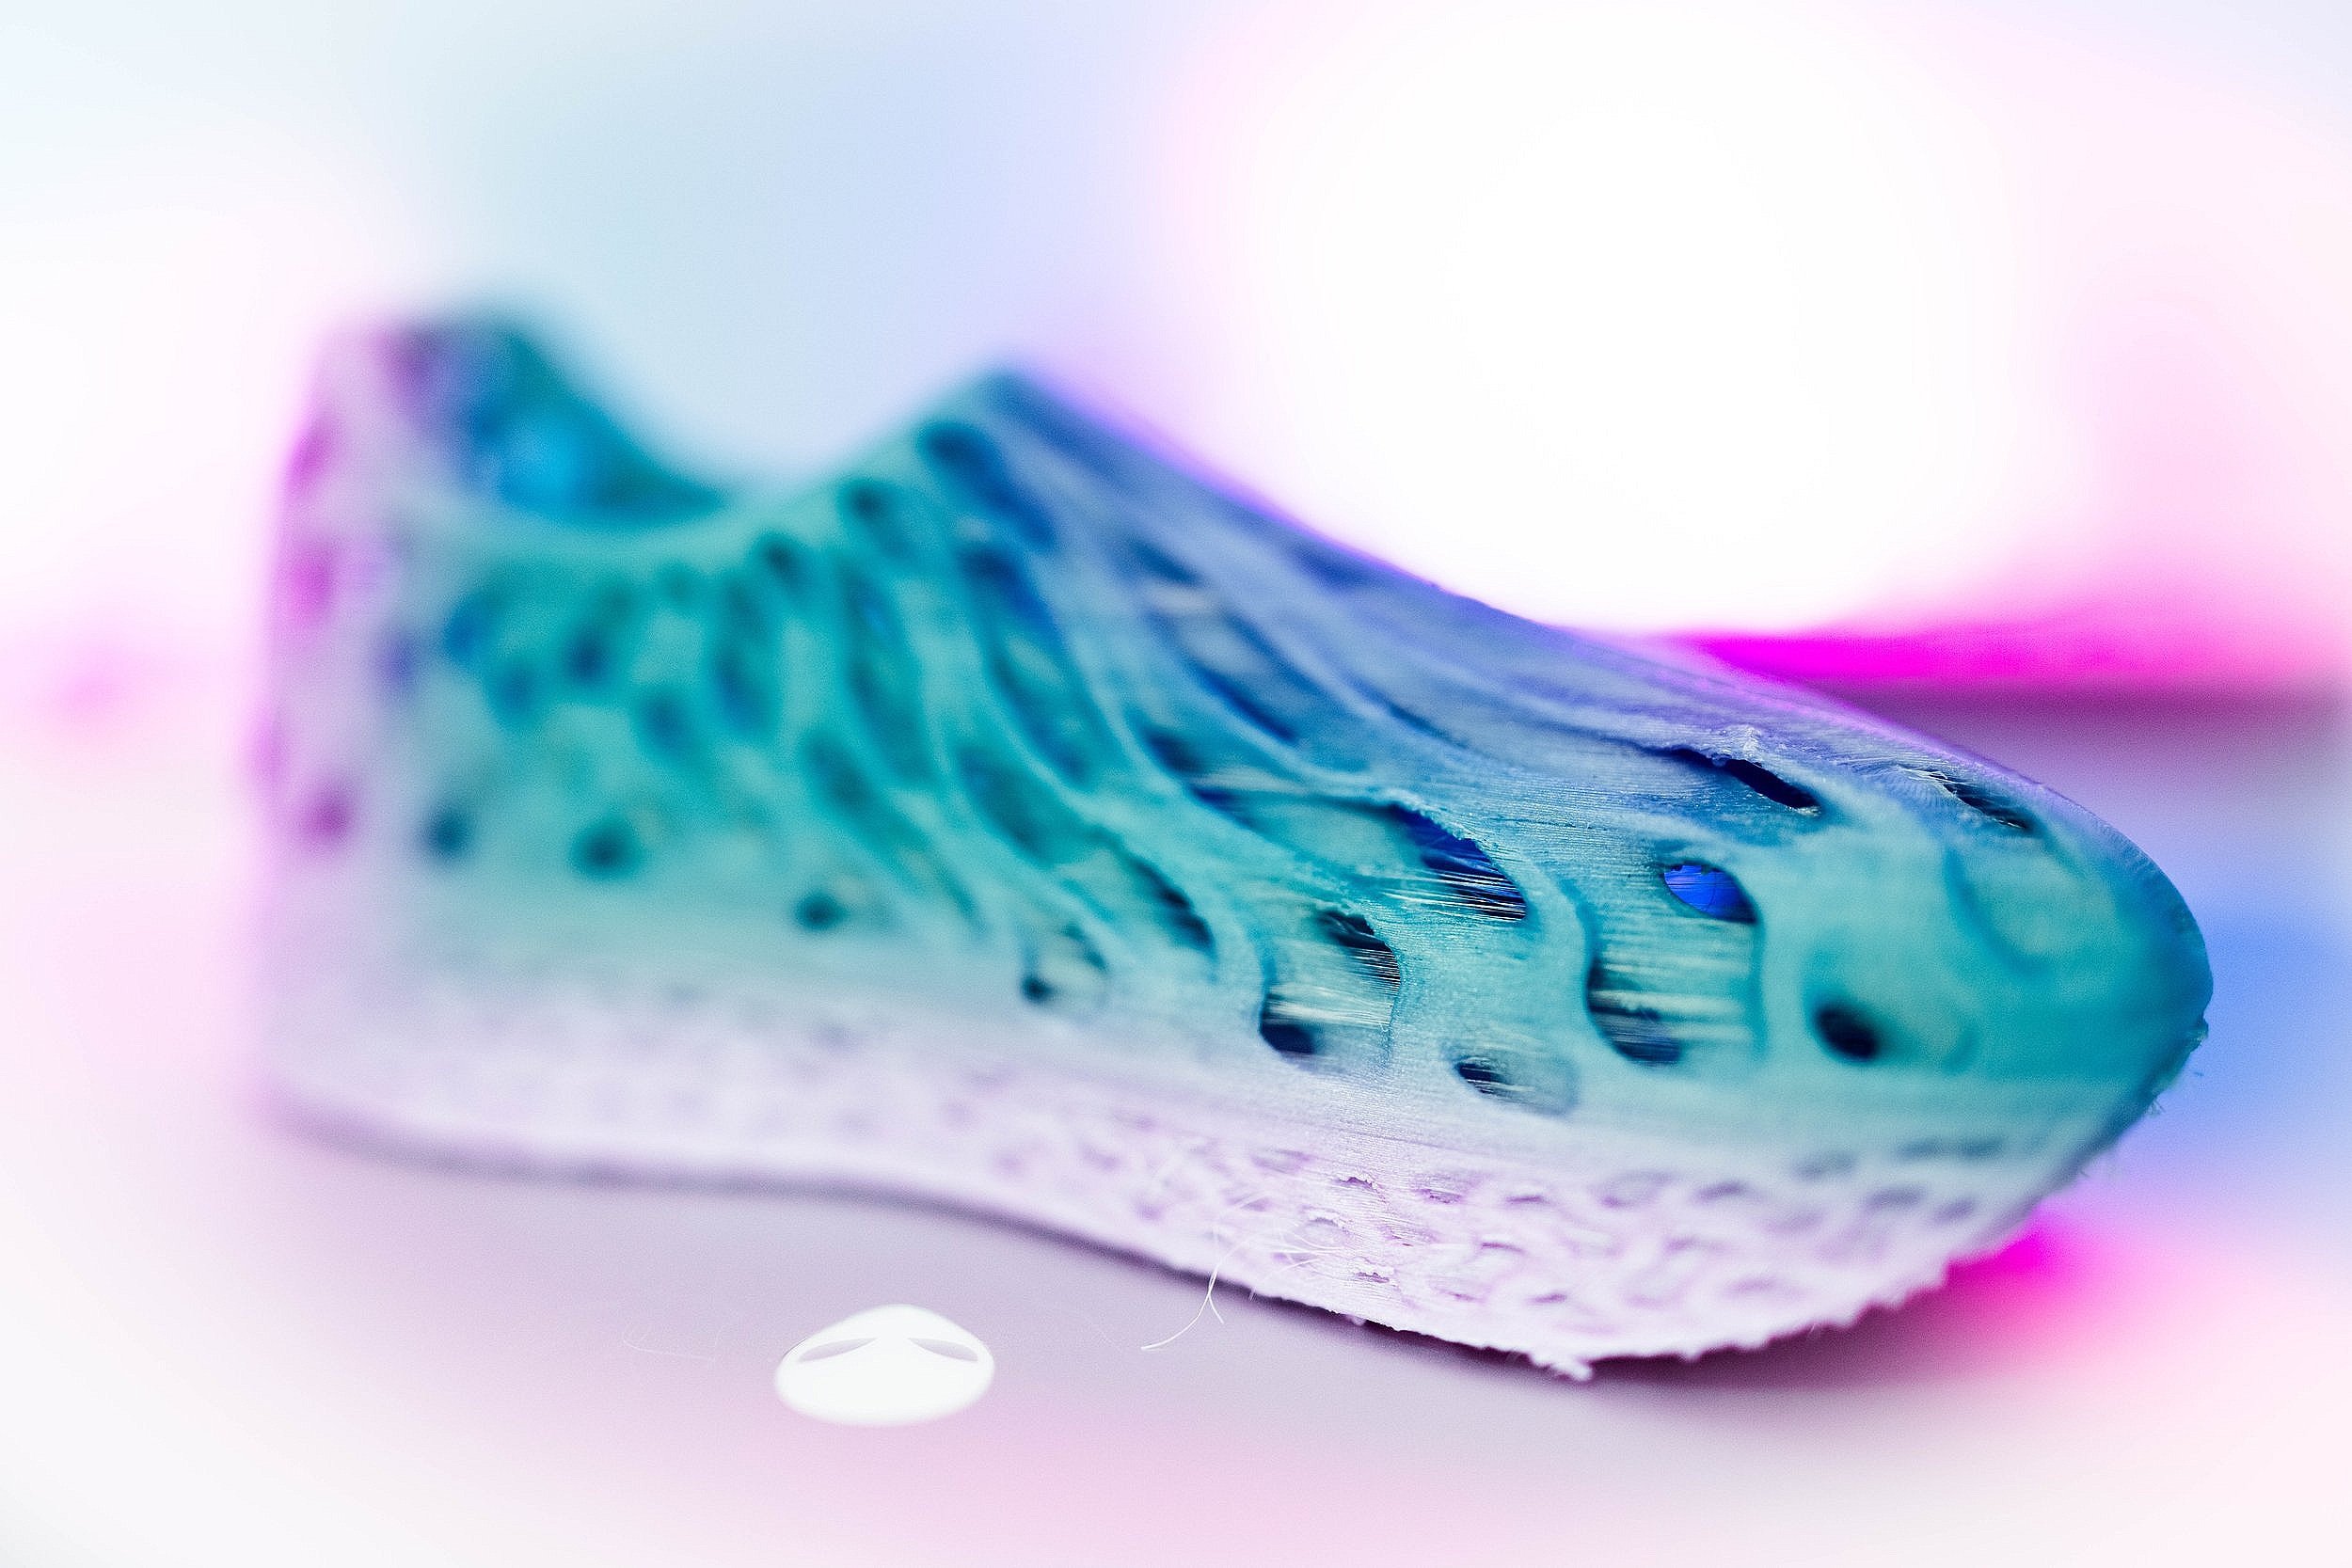
What is
TimeMass?
A must watch video made by our team.
Meet the Solution
-

Certified 100% Water Soluble
ASTM E 1148
-

Certified 100% PFAs-free
ASTM D7979-19
-

70% water, 30% sugar, vinegar, proprietary in-house Polyethenol and Calcium components
-

Patented Pabyss - The Plastic Abyss
A “Molecular Disintegrator” bottomless trashcan.

The possibilities are endless
Time-programmed wearables: Like artistic shoes, with incredible designs and at a very low cost of production.
Self-Eroding Marine Structures: Ocean-based supports that provide habitats for marine life and dissolve over time to release beneficial minerals, enriching marine ecosystems naturally.
Automated Farming Components: Timed-dissolving planters that release nutrients and water at key stages of plant growth, optimizing crop health and reducing artificial fertilizers.
Self-destructive Construction Scaffolding: Temporary, self-dissolving scaffolding for construction projects, removing the need for disassembly and minimizing post-construction waste.
Temporary Floating Platforms for Aquatic Events: Modular, dissolvable platforms for water-based events that disappear afterward, leaving the environment undisturbed.
Self-Deconstructing Medical Implants: Medical implants that dissolve once healing is complete, reducing the need for follow-up surgeries and minimizing infection risks.
Slow-Releasing Pesticide Capsules: Agricultural capsules that dissolve over time to release nutrients and pesticides sequentially, optimizing crop protection and reducing chemical waste.
Programmable Packaging Solutions: Water-soluble packaging for single-use items or perishables that disappears after disposal, reducing plastic waste effectively.
Zero-waste Temporary Art Installations: Timed art pieces designed to dissolve over time, creating ephemeral installations that leave no environmental impact, with increased art appreciation due to its ephemeral nature.
Ocean Buoys for Wildlife Monitoring: Timed-dissolving buoys that monitor marine life and disappear after their mission, preventing marine debris.
Personalized Fitness and Wellness Devices: Disposable fitness trackers that dissolve after use, releasing beneficial compounds, offering convenience with no waste.
Smart Infrastructure with Automated Deconstruction: Self-dissolving infrastructure for temporary construction needs, saving on cleanup costs and reducing waste when no longer needed.
Free U.S. standard shipping on orders of 5+ spools!